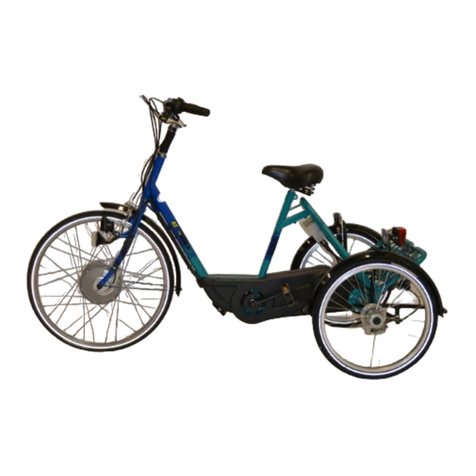
Hepha Trekking 7 User manual

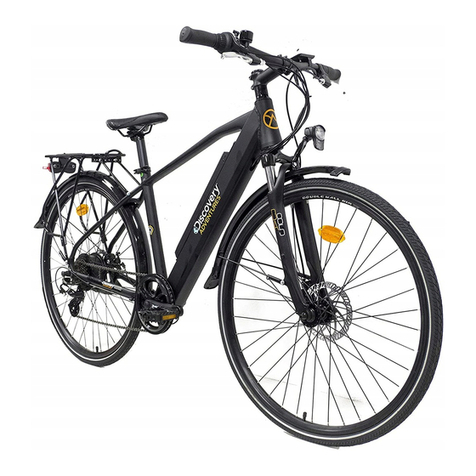
Hepha Trekking 7
User Manual
HEPHA GmbH
www.hepha.com [email protected]
Lise-Meitner-Str. 7a, 82216 Maisach, Germany
+49 (0) 8142 2844480

English version
German version
French version
Italian version
Spanish version
1
25
51
77
103

Package Contents
The toolbox
Trekking 7
Unboxing Guide
Take the bike out of the box
Adjust the stem
Attach the pedals
Install and fasten your display
Adjust your handlebar and saddle
Before First Ride
Adjust the handlebar
Adjust the saddle height
Check that everything is tight
Charge the battery
Turn on/off the power
Select assist mode
Removal of the battery
Riding safety
Storage
Disposal
Maintenance
Regular inspection
Cleaning
Screw connections
Warranty
1
2
3
5
6
7
8
9
10
11
11
12
13
14
17
19
19
20
21
21
22
Content
English Version

Package Contents
Package Contents Package Contents
1. The toolbox
1 2
Allen key #6 Allen key #5 Allen key #4 Allen key #3
Charger wall holder Holder screw*2
M3 screw
Expansion screws*2
T10 Star Allen Key
Torx Wrench
Charger
Battery key*2 Display User manual
2. Trekking 7
Display
Battery
Motor
Sensor ( inside the frame)
High step
Low step
Switch
Battery
Battery
lock
Display
Motor
Charging port

Unboxing Guide Unboxing Guide
3 4
Unboxing Guide
1.Take the bike out of the box
Gently open the packing box, take the bike out of the box.
When pulling out the bike, hold the bike steady so that it
does not fall over.
Remove (and recycle) all protective packaging. Squeeze the
tabs on the cable ties and remove them without cutting -
you can reuse them later.
Hold the bike steady to prevent it from falling over during pulling out !
tool box
pedals
Get the tools and pedals
from the box on the
carrier to assemble the
bike.
Pull the bike out
of the box.

2. Adjust the stem
Rotate the stem 90° clockwise to align with the front fender. Tighten the screws
with an Allen key #5 to ensure the stem stays in line with the front fork.
STEP 1
90°
Rotate
#5 Allen key
tighten
Unboxing Guide Unboxing Guide
5 6
Allen key #6
smooth
3. Attach the pedals
Take the pedals out of the box. The left side pedal has threads on the axle.
Screw onto the left crank by hand in an anticlockwise direction.
Tighten the pedal using Allen key #6.
Allen key #6
has threads on the axle
STEP 1
The axle of the right side pedal is smooth.
Screw onto the right crank by hand in a clockwise direction.
Tighten the pedal using Allen key #6.
STEP 2

STEP 1
4. Install and fasten your display
5. Adjust your handlebar and saddle
Unboxing Guide Unboxing Guide
7 8
Take the display from the toolbox. Position the lower end to the display holder
correctly, press the upper part onto the holder, and you'll hear a "click".
When parking the bike, remove the display by pressing the raised part of the
display holder. Take the display away.
STEP 2
Fasten the display if you don't want to carry the display with you.
Remove the display holder using Allen key #3. Press the display to your display
holder. Turn to the back of the display holder, take an M3 screw from the
toolbox, and fasten it using Allen key #3. Then install the display holder and the
display back to your handlebar.
See page 09-11 for how to adjust the handlebar and the saddle.
Note: Your bike has activated the Bike Lock Function by default set. That means
your display is the key to your bike. Remove the display and the motor will be
automatically deactivated. To unlock it, install the same display on the bike, and
the motor support will be reactivated. The display shows the Locked status
when motor it is activated or deactivated support through the Lock function.
① insert ② press after
insert the display
① press here
② remove
Install
Uninstall
① unscrew these two
screws and remove
the holder from the
bike
③fix the screw and
install the holder back
to the bike
② install the display to
the holder before fix
the screw
Install/remove the display
Fasten the display
M3 screw

Before First Ride Before First Ride
9 10
loosen these two
screws and rotate the
display
STEP 1
STEP 3
STEP 5
STEP 1
Before First Ride
1. Adjust the handlebar
2. Adjust the saddle height
Hold the front wheel between your knees
to see if the angle between the handle-
bar and the front wheel is 90°. If not,
adjust the screws as shown on page 05
(adjust the stem).
Rotate the handlebar up and
down, adjust the handlebar to
your suitable position. Tighten
the four screws using the Allen
key #4.
STEP 2 Loosen the 2 screws shown in the
picture with an Allen key#5. You
can adjust the handlebars' angle to
the appropriate position suitable
for you. Then you can tighten the
screws to fix the angle.
STEP 4
Loosen the two screws using Allen
key #3, rotate the display holder up
and down to your comfortable
position, then tighten the screws.
Adjust the display holder
When properly adjusted, the saddle
should be at hip height, or check if your
knees form a 90° angle at the top of the
pedal motion, straightening out when
your foot reaches the bottom.
Rotate the grips up and down,
adjust the grips to your suitable
position. Tighten the screw using
the Allen key #3.

3. Check that everything is tight
5. Turn on/off the power
Check that all the screws or other tightening features are sufficiently tight, such as the
brake calipers, seatclamp, stem, levers, headset, derailleur, wheels and so on.
Install the display into the holder. Press the power button to turn on the power. Press and
hold the button for 2 seconds to turn off the power. Fully charge the battery of the ebike
before turning it on for the first time.
4. Charge the battery
Open the rubber cover and gently insert the charging plug into the charging port. When
fully charged, the indicator light on the charger will change from yellow to green. It will
take about 4 hours to charge the battery fully.
Unplug the charger after complete charging and close the rubber cover.
Follow these simple tips to keep your battery running in perfect condition for longer
- Only use the official Hepha battery charger.
- Charge the bike indoors, in a well-ventilated dry location (moisture and extreme
temperature fluctuations can affect the charging process).
- The bike will charge best at temperature between 10-40°C (50-104°F).
- Place the charger on a hard surface and make sure it is never covered. Never place
it on carpet or textile surface.
- Always keep the plug and connector free of dirt and moisture.
- Do not charge your bike if the charger or plug is damaged. If in doubt, contact
Hepha immediately.
- If you don't plan to use your bike for a long period of time, make sure the battery
gets a full charge cycle every six months.
STEP 2 Open the seatclamp on the seat
post, adjust the saddle height to
your suitable position and then
close the seatclamp to the right
position.
STEP 3 Make sure you don't exceed the
maximum saddle height indicated
on the seat post.
Before First Ride Before First Ride
1211
Your bike has activated the Bike
Lock Function by default set. That
means you can only unlock your
bike with the same display.
power botton
Charging port
Fully charge the battery
before your first ride.

6. Select assist mode
Before First Ride Before First Ride
13 14
6.1 Select assist mode
If you turn the power on, the assist mode is reset to OFF irregardless of the assist mode
that you had selected before the last power OFF.
Press the UP and DOWN button on the switch to your preferred assist mode.
The walk assist function must only be used when pushing the bike. There is a
risk of injury if the wheels of the bike are not in contact with the ground while
using walk assistance.
The walk assist mode will exit if you pedal.
6.2 Walk assist
The walk assistance makes it easier to push your bike. The speed in this function depends
on the selected gear and can reach a maximum of 6 km/h.
To activate the walk assistance, press and hold the DOWN button on the switch for 3
seconds. The display shows WALK mode. Press and keep it held down when pushing the
bike.
To deactivate the walk assistance, press the UP button on the switch, and switch to your
preferred assist mode.
STEP 1
STEP 2
7. Removal of the battery
To remove the battery cover,
press and hold the steel tab
and push it up. Put the battery
cover on the floor.
Insert the battery key, rotate it,
press the metal shrapnel down and
remove the battery.
down button current assist mode
up button
hold the down botton on
insert the key
and rotate
push
metal shrapnel

Before First Ride
15 16
STEP 3
STEP 4
STEP 5
STEP 6
STEP 7
To charge the battery when not connected to the bike, you need the Hepha
EC-P100 Charger.
Connect the battery to the charger. A full charge of the battery takes approxi-
mately 4 hours. The indicator light on the charger is yellow while charging. Once
the battery is fully charged, the indicator light will turn green.
when the indicator light is red, it indicates a charging error, contact Hepha.
Put the battery back in the down
tube. Position the lower end first,
with the electrical contacts. Press
the upper part of the battery into
the holder until it locks with a
"click".
Turn keyhole right to vertical,
remove the battery key.
Put the battery cover back. Position the lower end first. Press the upper part to
cover the battery. Hold it with one hand. Push up the steel tab with the other
hand, press the battery cover to make it cover the battery correctly and then
push down the steel tab. Make sure the battery cover is fixed and stable.
Hepha EC-P100 Charger
indicator light
position the
lower end
Before First Ride

Riding safety Riding safety
17 18
Riding safety
WARNING Your bike must comply with your country's legal requirements when riding on
public roads in all conditions, including bad weather, night time, dusk or down. Many
countries require specific safety devices. It is your responsibility to familiarize yourself
with the laws of the country where you ride and to comply with all the applicable laws,
including properly equiping yourself and your bike as the low requires.
WARNING Your bike is trekking ebike. Respect the intended use your bike was designed
for. If you exceed these limits, you can damage your bike or break components and, as a
result, injure yourself.
WARNING Always wear a helmet when you ride your bike.
WARNING Do not touch the front/rear disc brake while it is rotating or directly after
braking. This could result in injury or burns.
WARNING Do not modify or tamper with the battery. Always contact Hepha regarding any
battery issues.
WARNING Always ride with care – turning and braking suddenly may cause accidents.
WARNING Do not modify or tamper with the bike’s motor or integrated computer
systems. Modifying the bike in any way will void your warranty and can lead to accidents
resulting in injury or death.
WARNING The left brake lever controls the front wheel brake. The right brake lever
controls the rear wheel brake.
WARNING Never ride with headphones or talk on the phone while riding.
WARNING Never ride in a situation where you are not able to fully control the bike.
WARNING Take care when riding in wet and slippery conditions. Ride slowly and gently
apply force to the brakes to accommodate a longer stopping distance.
WARNING Ride at an appropriate speed, in accordance with the terrain, your riding
capabilities and local government regulations.
WARNING Disc brakes can produce significant stopping power and may behave different-
ly to other bike brake systems. Please familiarize yourself with the brakes before your first
ride.
WARNING Always make sure your lights are working properly and not covered or
obscured. We recommend using lights in all conditions for maximum visibility.
WARNING Under wet and slippery conditions, adjust your way of riding. Ride slower and
gently apply force to the breaks earlier as your braking distance is longer.
WARNING Inspection and maintenance are important to the safety and longevity of your
bicycle. Regularly check the brakes, tires, steering, and wheel rims. Any part of a poorly
maintained bike can break or malfunction, leading to an accident resulting in serious
injury or death.
WARNING As with all mechanical components, bikes are subject to wear and tear, as well
as high stress. Different materials and components may fatigue in different ways. Make
sure you have replacement parts available for components which are easily worn or
damaged, e.g. tires and brake pads. If the design life of a component has been exceeded,
it can suddenly fail, possibly causing injuries to the rider. Any form of crack, scratches or
change of coloring can indicate that the life span of a component has been reached and
that it should be replaced.
WARNING Failure to confirm compatibility, properly install, operate and maintain any
component or accessory can result in serious injury or death. Do not modify your bike
frame or components in any way. Modifications can cause damage leading to an accident
that can result in severe injury or death. Incompatible accessories or improper mounting
of accessories can adversely affect the performance of your bike and may be unsafe.
WARNING Please note all product-specific demands for any third party products you add
to the bike. Child and baggage carriers add weight and raise the center of gravity, affecting
balance and bike handling. If you lose control, you and any child passengers can be
severely injured or killed.
WARNING If using a child seat with coiled spring, make sure it is fitted correctly and the
spring is covered to avoid potential injury.
WARNING CE mark and declaration of conformity for e-bike:
Hepha ebikes with a maximum support speed of 25 km/h meet the requirements of the
EU Machinery Directive 2006/42/EG.
The A-weighted emission sound pressure level at the driver ears is less than 70db(a).
These ebikes also comply with the following non-harmonised standards:
Bicycle standard: ISO 4210-2

If the bike is not used for a long period, the following points must be noted:
Dispose of excess lubricants, cleaning agents and paints. Dispose of these agents as
specified on their packaging and take local legislation into consideration. If you are
discarding a bike, return it to us or dispose of it in accordance with local laws.
Storage Maintenance
19 20
Storage
Disposal
Maintenance
Regular inspection
You'll be 15% more energy-efficient by keeping 3.0 Bar (42Psi) of air pressure in your tires.
Recommended tire inflation pressure: 2.0-3.5 Bar / 35-70 Psi.
Pump your tires
- Clean the bike.
- Store the bike in a dry, frost-free place where it is protected against major
fluctuations in temperature.
- Make sure the battery and display get a full charge every six months.
Electric bicycles: EN 15194
The declaration of conformity for your ebike model is enclosed with this user manual.
Note: If the display is out of power and cannot be turned on, charge the display via USB
Type-C cable.
Have your retailer check cycle at the following intervals:
If you use the cycle in difficult conditions or ride more than 2,000 km / 1,250 mi* per year,
shorten the inspection intervals and have an inspection carried out by your retailer every
6 months.
*whichever is the earliest
Inspection Distance travelled Hours of operation Duration of use
1st Inspection
2nd Inspection
Each subsequent
inspection
after 300 km /
190 mi* or
after 2,000 km /
1,250 mi* or
after a further
2,000 km /
1,250 mi* or
after 15 hours of
operation* or
after 100 hours of
operation* or
after a further 100 hours
of operation* or
after 3 months*
after one year*
after a further
year*

Maintenance
Warranty
21 22
Apply a little lube to your chain every now
and then to keep it running smoothly.
Lubricate your chain
Clean your bike frame using water and gentle detergent. We do not recommend using
pressure washers, as this can damage the internal electronics.
Cleaning
It's very important that all screwed connections are secured with the correct torque.
Check the tightening of the screws every 200km and tighten the screws.
Too much torque can damage the screw, nut or component. Always use the supplied
torque spanner to tighten screw joints.
1. 2-year warranty on the important components such as the motor, battery and charger,
speed sensor, front and rear hubs, cassette sprocket, fork, crank, chainwheel, handlebars,
stem, seat post, front and rear lights and other important non-consumable core parts, in
accordance with the statutory provisions. We will also cover the shipping and handling
charges for returning the repaired or replaced product covered by warranty policy.
2. Over and above the statutory warranty, Hepha also provides an extended manufacturer
guarantee for the cycle frame. The Guarantee periods are as follows for models onwards,
starting on the date of purchase by the original buyer:
— for aluminum frames: 5 years
3. This warranty is only valid if the following requirements are met:
You are the first owner of the bike and a valid proof of purchase is required when making
Screw connections
Warranty
Screw joint / Connected parts
Handlebar / Stem
Shift lever / Handlebar
Brake level / Handlebar
Switch / Handlebar
Stem, angle adjustment
Stem / Fork
Pedal / Crank
Front wheel axle / Front fork & rear
wheel axle / Frame
Type
–––
(Gripper clamp)
(Gripper clamp)
–––
–––
–––
(with quick release)
Torque
5-6 Nm
5 Nm
6-8 Nm
1.0-1.2Nm
9-10 Nm
9-10 Nm
35–55 Nm

Warranty
23
Warranty
24
a warranty claim.
If you are the 2nd user, the warranty term is calculated from the original date of delivery
from Hepha or authorised retailers. The 1st owner purchase proof must be attached.
Valid proof of purchase:
— Order number from online purchases made through Hepha
— Sales invoice
4. Warranty coverage
The warranty covers defects in workmanship and material and all original non-wear and
tear components.
5. Exclusion range of warranty
Wear parts like chain or belt, brake pad and brake disc, inner tubes and tyres, brake fluid,
rims, handles, saddle, front and rear fender sets, pedals, kickstand and carrier are not
part of the 2-year warranty, but we still guarantee the non-defects in workmanship and
material when you receive the products from Hepha or authorised retailers.
The warranty likewise excludes all damage resulting from insufficient care and mainte-
nance, excessive wear, accidents, cycle overloading, components fitted incorrectly, and
cycle alterations through the attachment and modification of additional components.
The warranty also does not apply if the cycle is used for improper sports activities, such as
performing jumps for which the cycle category was not intended, in the event of any other
type of overuse, and in cases where recommendations contained in our original operating
manual or made by our retailer are disregarded.
This warranty does not affect any further claims which you may be entitled to make
against the retailer under the statutory guarantee, such as your right to a discount, return
or compensation. The warranty and guarantee rights coexist. This guarantee will expire
and not restart in the event that a frame is replaced under warranty.
When purchasing your cycle, under this warranty or any other problems must be
addressed exclusively to the retailer from whom you purchased your cycle. To ensure
these are handled smoothly, full proof of purchase and cycle documents must always be
submitted. The retailer will then contact us for further action if necessary. Should you
authorize another retailer to submit a claim, further costs may be incurred as a result.
These costs are your own responsibility and will not be covered by us.
HEPHA GmbH reserves the right to charge a handling fee for unjustified complaints.
If your product turns out to have a defect during its warranty period, please contact us via

Lieferumfang
Der Werkzeugkasten
Trekking 7
Leitfaden zum Auspacken
Nehmen Sie das Fahrrad aus dem
Karton
Den Vorbau einstellen
Die Pedale befestigen
Display montieren und befestigen
Lenker und Sattel einstellen
Vor der ersten Fahrt
Einstellen des Lenkers
Die Sattelhöhe einstellen
Prüfen Sie, ob alles fest sitzt
Akku aufladen
Den Strom ein-/ausschalten
Unterstützungsmodus auswählen
Akku entfernen
Sicherheit beim Fahren
Lagerung
Entsorgung
Wartung
Regelmäßige Inspektion
Reinigung
Schraubverbindungen
Garantie
27
28
29
31
32
33
34
35
36
37
37
38
39
40
43
45
45
46
47
47
48
Inhalt
25 26
German Version

Lieferumfang
Lieferumfang Lieferumfang
1. Der Werkzeugkasten
27 28
Inbusschlüssel #6 Inbusschlüssel #5 Inbusschlüssel #4 Inbusschlüssel #3
Wandhalterung für
das Ladegerät
Halterungsschraube*2
M3 Schraube
Erweiterungss-
chrauben*2
T10 Torx-Schlüssel
Ladegerät
Akku-Schlüssel*2 Display Benutzerhandbuch
2. Trekking 7
Display
Akku
Motor
Sensor (im Rahmen)
High step
Low step
Schalter
Akku
Akkuschloss
Display
Motor
Ladebuchse

Leitfaden zum Auspacken Leitfaden zum Auspacken
29 30
Leitfaden zum Auspacken
1. Nehmen Sie das Fahrrad aus dem Karton
Bitte öffnen Sie den Karton vorsichtig und nehmen Sie das
Fahrrad aus dem Karton. Halten Sie das Fahrrad beim
Ziehen fest, damit es nicht umfallen kann.
Entfernen (und recyceln) Sie alle Schutzverpackungen.
Drücken Sie die Laschen an den Kabelbindern zusammen
und entfernen Sie sie, ohne sie abzuschneiden - Sie können
sie später wiederverwenden.
Halten Sie das Fahrrad fest, damit es beim Herausziehen nicht umfallen
kann!
Werkzeugkasten
Pedale
Holen Sie die Werkzeuge und
Pedale aus dem Karton auf
dem Gepäckträger, um das
Fahrrad zusammenzubauen.
Ziehen Sie das
Fahrrad aus dem
Karton

2. Den Vorbau einstellen
Drehen Sie den Vorbau um 90° im Uhrzeigersinn, um ihn mit dem Schutzblech
des Vorderrades auszurichten. Ziehen Sie die Schrauben mit einem #5
Inbusschlüssel an, um sicherzustellen, dass der Vorbau mit der Vorderradgabel
fluchtet.
SCHRITT 1
90°
Drehen
#5 Inbusschlüssel
Festziehen
Leitfaden zum Auspacken Leitfaden zum Auspacken
31 32
Inbusschlüssel #6
Glatt
3. Die Pedale befestigen
Nehmen Sie die Pedale aus dem Kasten. Das linke Pedal hat Gewinde
auf der Achse. Schrauben Sie es mit der Hand gegen den Uhrzeigersinn
auf die linke Kurbel.
Ziehen Sie das Pedal mit dem #6 Inbusschlüssel fest.
Inbusschlüssel #6
Hat Gewinde auf der Achse
SCHRITT 1
Die Achse des rechten Pedals ist glatt.
Schrauben Sie es mit der Hand im Uhrzeigersinn auf die rechte Kurbel.
Ziehen Sie das Pedal mit dem #6 Inbusschlüssel fest.
SCHRITT 2

4. Display montieren und befestigen
5. Lenker und Sattel einstellen
Leitfaden zum Auspacken Leitfaden zum Auspacken
33 34
Nehmen Sie das Display aus dem Werkzeugkasten. Setzen Sie das untere Ende
richtig auf den Display-Halter, drücken Sie den oberen Teil auf den Halter, bis Sie
ein "Klick" hören.
Wenn Sie das Fahrrad abstellen, entfernen Sie das Display, indem Sie auf den
erhöhten Teil des Displayhalters drücken. Nehmen Sie das Display ab.
Befestigen Sie das Display, wenn Sie es nicht mit sich tragen wollen.
Entfernen Sie den Displayhalter mit dem #3 Inbusschlüssel. Drücken Sie das
Display auf den Displayhalter. Drehen Sie die Rückseite des Displayhalters nach
oben, nehmen Sie eine M3-Schraube aus dem Werkzeugkasten und befestigen
Sie sie mit dem #3 Inbusschlüssel. Bringen Sie dann den Displayhalter und das
Display wieder an Ihrem Lenker an.
Lesen Sie auf Seite 35-37 wie Sie den Lenker und den Sattel einstellen.
Hinweis: Ihr Fahrrad hat standardmäßig die Fahrradschlossfunktion aktiviert.
Das heißt, Ihr Display ist der Schlüssel zu Ihrem Fahrrad. Entfernen Sie das
Display und der Motor wird automatisch deaktiviert. Um ihn wieder zu
entsperren, bringen Sie dasselbe Display wieder am Fahrrad an, und die
Motorunterstützung wird wieder aktiviert. Das Display zeigt den Status
"Gesperrt" an, wenn die Motorunterstützung durch die Sperrfunktion aktiviert
oder deaktiviert ist.
① Einsetzen ② Drücken Sie nach dem
Einsetzen des Displays
① Hier drücken
② Entfernen
Montieren
Entfernen
① Lösen Sie diese beiden
Schrauben und nehmen Sie
den Halter vom Fahrrad ab
③Befestigen Sie die
Schraube und bringen
Sie die Halterung wieder
am Fahrrad an
② Bringen Sie das Display
am Halter an, bevor Sie die
Schraube festziehen
Displays montieren/entfernen
Das Display befestigen
M3 Schraube
SCHRITT 1
SCHRITT 2
Other manuals for Trekking 7
1
Table of contents
Languages:
