Herman Miller Canvas Office Landscape Installation instructions

Z
1
© 2013 Herman Miller, Inc. Zeeland, Michigan. Printed in the U.S.A.
® Y, Zand Canvas Office Landscape are among the registered trademarks of Herman Miller, Inc.
Illustrations and specifications are based on the latest product information available at the time of publication.
The right is reserved to make changes in design and specifications at any time, without notice, and also to discontinue products.
Part no. 1b3cxn rev H.
YCanvas Office Landscape® 120° Connector Installation
and Disassembly for Recycling Instructions
ScissorsTorque Wrench9/16” Wrench9/16” SocketRatchet
Tools Required:
Parts Included:
Notice:
Notice:
Make certain that fasteners are Torqued to the
specied values.
Do not tighten screws until at least 2 frames are
completely connected.
Connector
Tube
FT131.X46(2)
FT131.X57(3)
Light Seal
FT131.2XX(1)
FT131.3XX(3)
Hardware Pack
FT131.246(4)
FT131.346(6)
FT131.257(6)
FT131.357(9)
3/8-16 Hex Head
Cap Screw Washer
A
E
C D
Safety Glass

Z
2
© 2013 Herman Miller, Inc. Zeeland, Michigan. Printed in the U.S.A.
® Y, Zand Canvas Office Landscape are among the registered trademarks of Herman Miller, Inc.
Illustrations and specifications are based on the latest product information available at the time of publication.
The right is reserved to make changes in design and specifications at any time, without notice, and also to discontinue products.
Part no. 1b3cxn rev H.
C
C
C
C
A
A
A
C
C
C
D
D
D
D
C
D
D
D
Frame
Frame
Hole
Hole
Slot
Do not
use
Frame
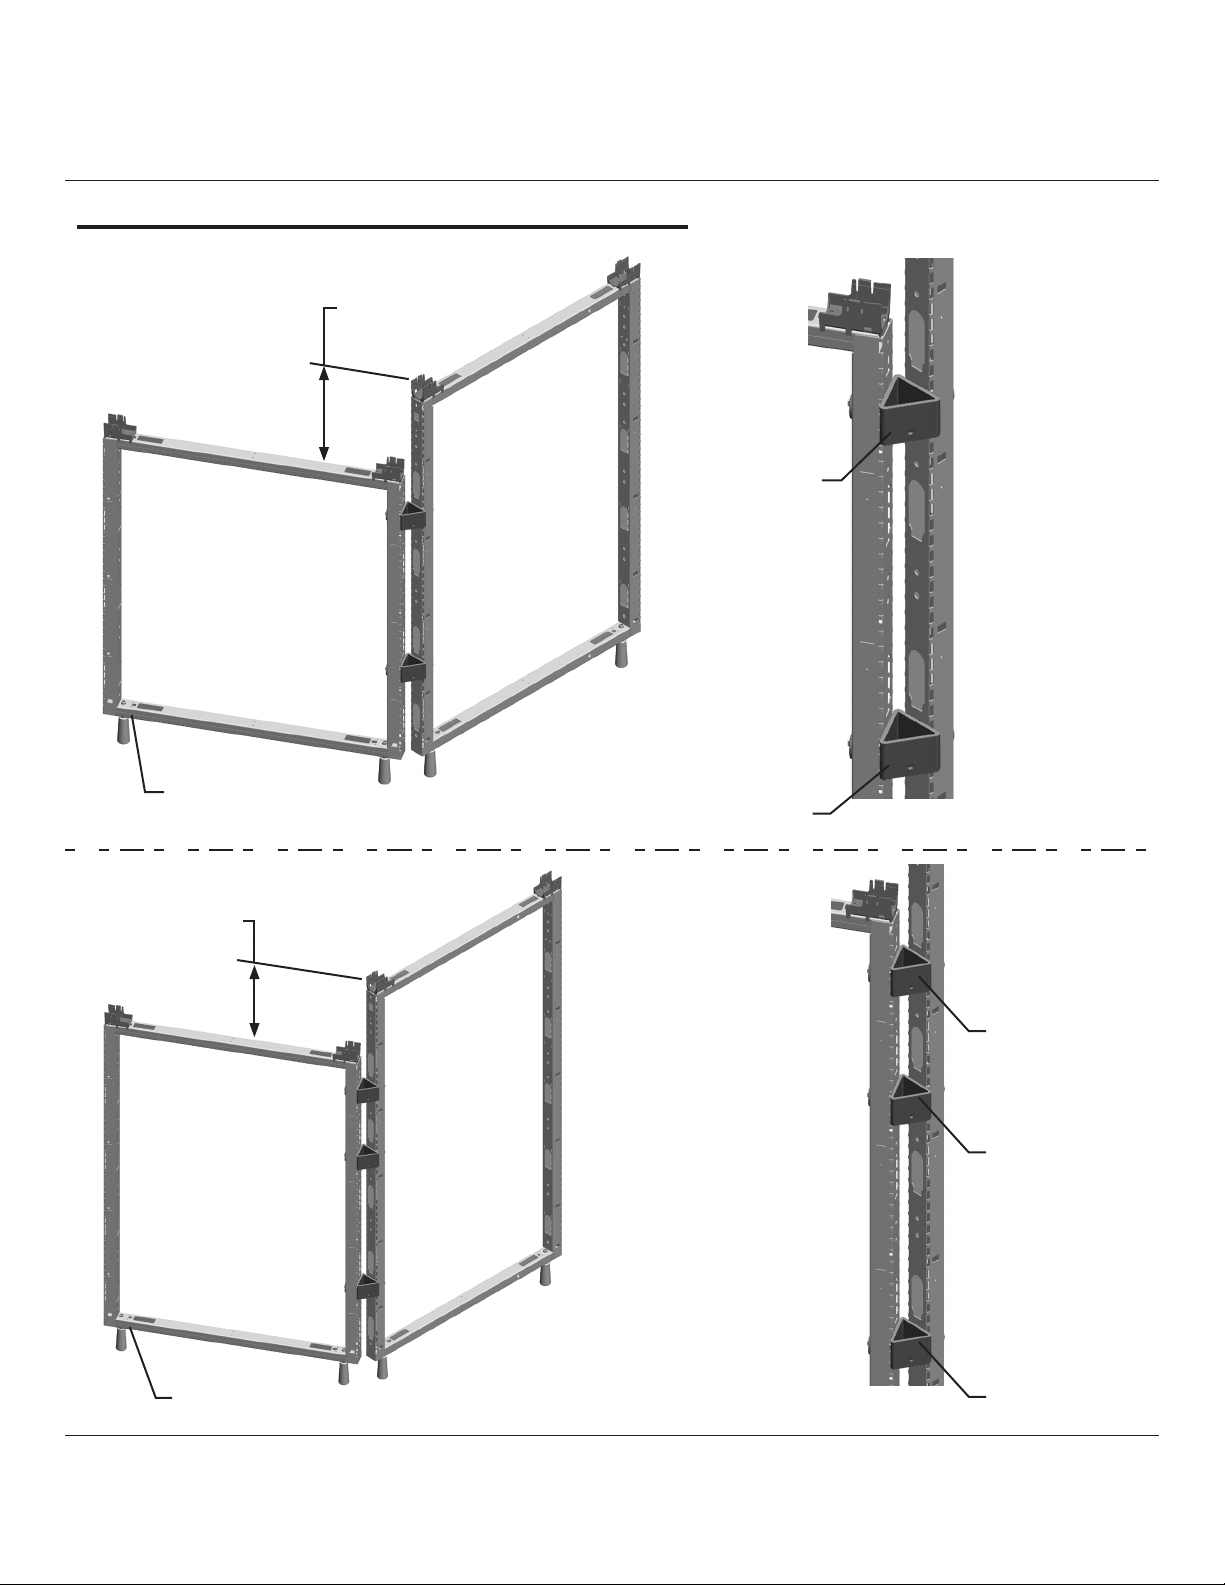
1. Align 3 Frames.
2. Connect Frames to Connector Tube (A) using Screws (C) and Washers (D) at Top
Hole location. Do not tighten Screws.
For change of Height Conguration, see next page.
3. Assemble Connector Tube (A) to Frames at Slot location second from bottom with
Screws (C) and Washers (D). Do not tighten Screws.
4. For Frames 57” and taller: install Connector (A), Screws and Washers in Middle
Hole.
5. Important: Torque Screws to 200 in-lbs. Start with Top Connector Tube, then
Bottom and Middle last.
Assembly Instructions:
Notice:
For proper trim alignment:
Threaded holes in connector Tube (A) to be oriented at the bottom of the parts as shown.

Z
3
© 2013 Herman Miller, Inc. Zeeland, Michigan. Printed in the U.S.A.
® Y, Zand Canvas Office Landscape are among the registered trademarks of Herman Miller, Inc.
Illustrations and specifications are based on the latest product information available at the time of publication.
The right is reserved to make changes in design and specifications at any time, without notice, and also to discontinue products.
Part no. 1b3cxn rev H.
Change of Height Conguration:
1 Cont. 57” or Taller Frame
11”
Hole
Location
Hole Location Top Hole
Location
Slot
Location
A
1. When walls of different height are connected, Connector
Tube (A) is installed at the top hole location of the
Smallest Frame.

Z
4
© 2013 Herman Miller, Inc. Zeeland, Michigan. Printed in the U.S.A.
® Y, Zand Canvas Office Landscape are among the registered trademarks of Herman Miller, Inc.
Illustrations and specifications are based on the latest product information available at the time of publication.
The right is reserved to make changes in design and specifications at any time, without notice, and also to discontinue products.
Part no. 1b3cxn rev H.
Change of Height Conguration Examples:
AA
A
AA
Hole
22”
Hole
Hole
46” Frame
11”
Slot
Slot
57” or Taller Frame
A
A
A
A
A
57” or Taller
Frame
Hole
Slot
22”
57” or Taller
Frame
Hole
11”
11”
Hole
Slot
Z
5
© 2013 Herman Miller, Inc. Zeeland, Michigan. Printed in the U.S.A.
® Y, Zand Canvas Office Landscape are among the registered trademarks of Herman Miller, Inc.
Illustrations and specifications are based on the latest product information available at the time of publication.
The right is reserved to make changes in design and specifications at any time, without notice, and also to discontinue products.
Part no. 1b3cxn rev H.
Change of Height Conguration Examples:
11” or 22”
46” or Shorter
Frame
A
A
A
A
A
Hole
Slot
11” or 22”
57” or Taller
Frame
Hole
Hole
Slot

Z
6
© 2013 Herman Miller, Inc. Zeeland, Michigan. Printed in the U.S.A.
® Y, Zand Canvas Office Landscape are among the registered trademarks of Herman Miller, Inc.
Illustrations and specifications are based on the latest product information available at the time of publication.
The right is reserved to make changes in design and specifications at any time, without notice, and also to discontinue products.
Part no. 1b3cxn rev H.
1. Align 2 to 3 Frames.
2. Assemble Frames to Connector Tube (A) with Screw (C) and Washer (D) at
top Hole location of shortest Stacking Frame. Install Screws (C) and Washers
(D) into remaining Frames.
3. Important: Torque All Screws to 200 in-lbs.
1
D
D
D
CC
C
A
A
Frame
Frame
Frame
Hole
Z
7
© 2013 Herman Miller, Inc. Zeeland, Michigan. Printed in the U.S.A.
® Y, Zand Canvas Office Landscape are among the registered trademarks of Herman Miller, Inc.
Illustrations and specifications are based on the latest product information available at the time of publication.
The right is reserved to make changes in design and specifications at any time, without notice, and also to discontinue products.
Part no. 1b3cxn rev H.
E
E
Fold-In Feature
Light Seal
Cut
Bottom of
Cladding
Indent
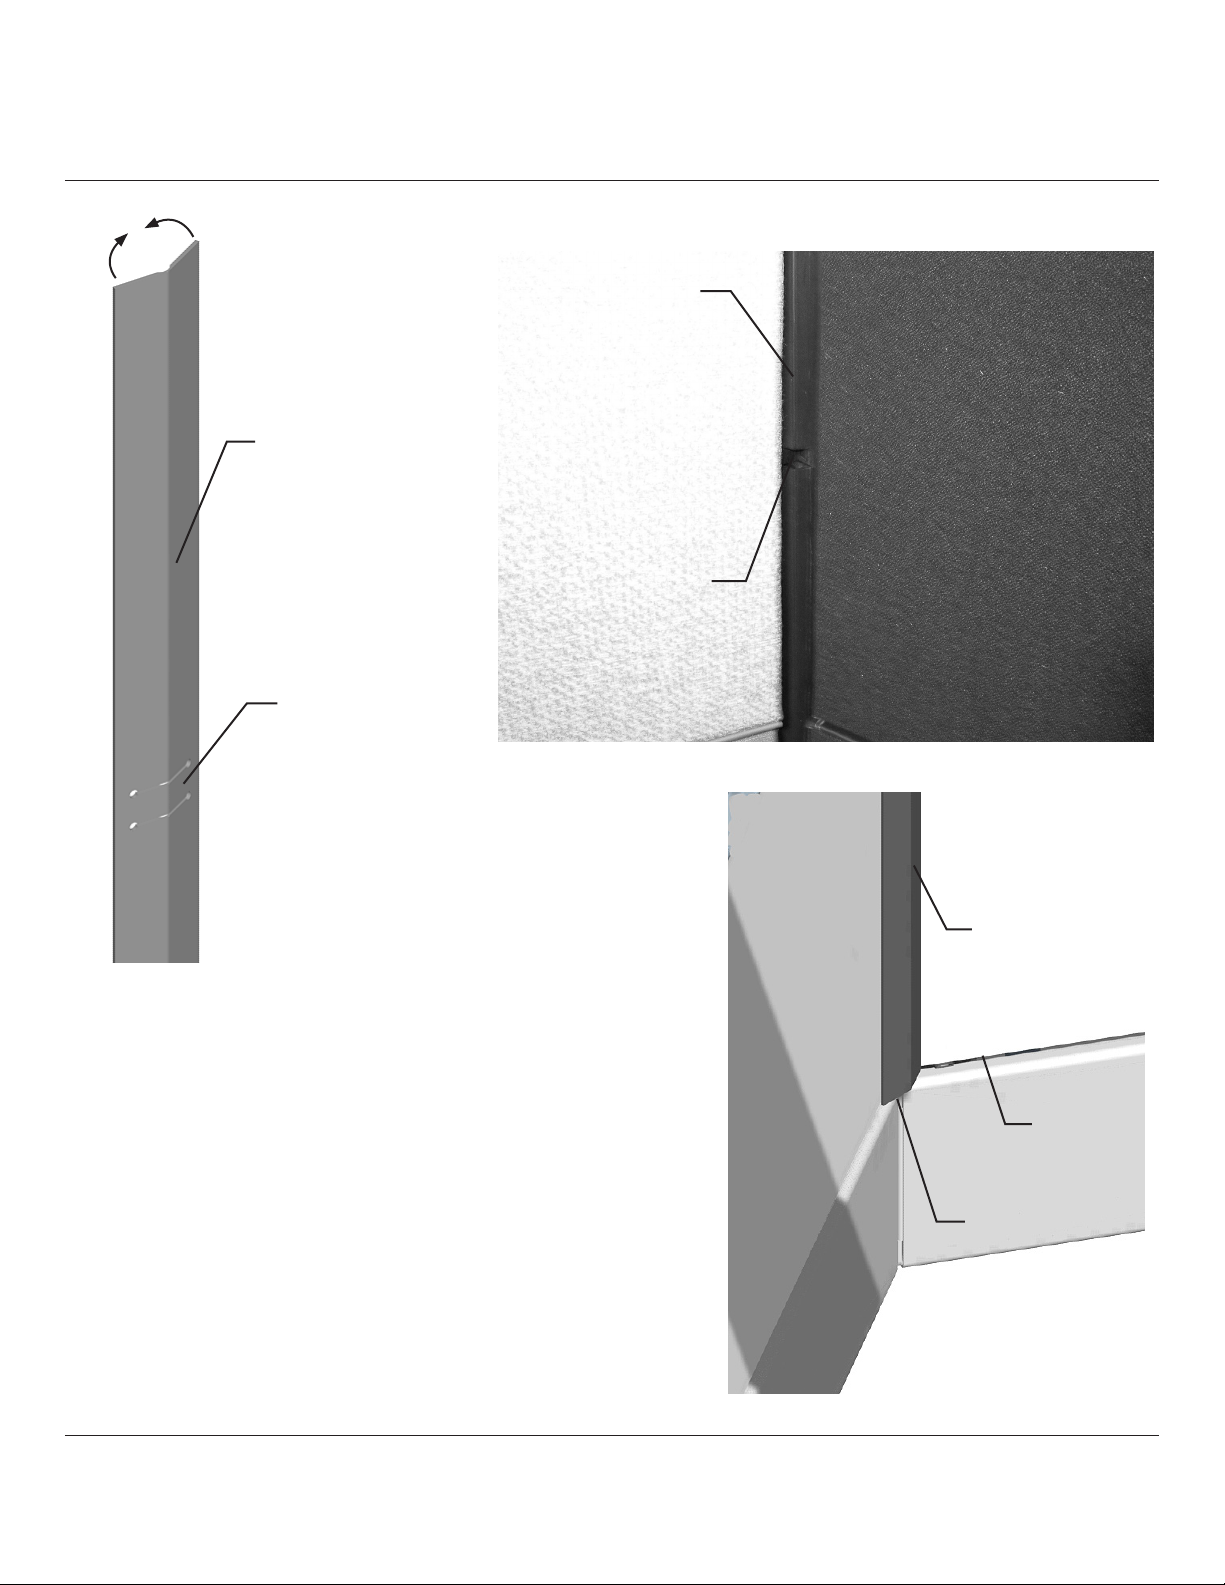
1. After Cladding has been installed, push in
Fold-in Feature in Light Seal (E).
2. Pinch sides together at top of Light Seal and
insert between Cladding starting at top of
Cladding. Let Indent rest on top of Connector
Tube.
3. Cut bottom of Light Seal, if needed, at bottom
edge of Cladding.
4. Continue to insert Light Seal between
Cladding.
2

Z
8
© 2013 Herman Miller, Inc. Zeeland, Michigan. Printed in the U.S.A.
® Y, Zand Canvas Office Landscape are among the registered trademarks of Herman Miller, Inc.
Illustrations and specifications are based on the latest product information available at the time of publication.
The right is reserved to make changes in design and specifications at any time, without notice, and also to discontinue products.
Part no. 1b3cxn rev H.
Disassembly for Recycling:
Materials Identication and Segregation:
Where possible, plastic components are marked with ASTM recycling codes.
Use these codes to identify material type for recycling. Non marked components
should be treated as mixed plastic. Ferrous metals can be identied using a
small magnet for recycling. Non-ferrous metals should be separated and recycled
separately.
To disassemble product, reverse the above installation steps.
Other manuals for Canvas Office Landscape
12


