Lestoil; methyl, isopropyl and isobutyl alcohols; hexane,
heptane and fully halogenated freon. Rinse thoroughly with
water afterwards.
3 Wash reel if necessary.The central electronic panel can be
removed and the reel washed down. Unthread the panel
securing knobs and carefully pull out the central panel.
Disconnect the panel from the tape. The reel may be cleaned
with the following: soap solution, naptha alcanox 10%,
Fantastic, Windex, Joy, Top Job, Mr. Clean, Formula 409;
hexane, heptane, white kerosene, mineral spirits; methyl,
isopropyl, isobutyl and 1 + 3 denatured alcohols; freons TF +
TE. Rinse well with water and let dry before putting the panel
back in. DO NOT use abrasives, partially halogenated
hydrocarbons or ketones to clean the reel.
TT
TT
Trouble Shootingrouble Shooting
rouble Shootingrouble Shooting
rouble Shooting
No Sound when the unit is tested
1 Check battery by pressing ON button. Replace battery if low
and make sure panel securing knobs are tight. If unit still does
not sound, remove central panel and check all connections.
2 Check probe conductor to make sure it is clean and not
crusted with mineral deposits. Check tape/probe connection
for any breaks.
Continuous Sound when the unit is turned on
or probe removed from water.
1 Make sure probe conductor tip is clean.
2 Check for excess moisture on the back of the electronic
panel.
3 Check probe/tape connection and tape for any breaks or
leaks where water might get in.
GeneralGeneral
GeneralGeneral
General
• Avoid sharp edged casing
• Avoid entanglement with other equipment
in boreholes and wells.
• Do not use as guide to backfilling with sand etc.,
Instrument may get locked in sand.
• Rewind tape onto reel after each use
Warranty is conditional upon adherence to these guide lines.
Equipment CheckEquipment Check
Equipment CheckEquipment Check
Equipment Check
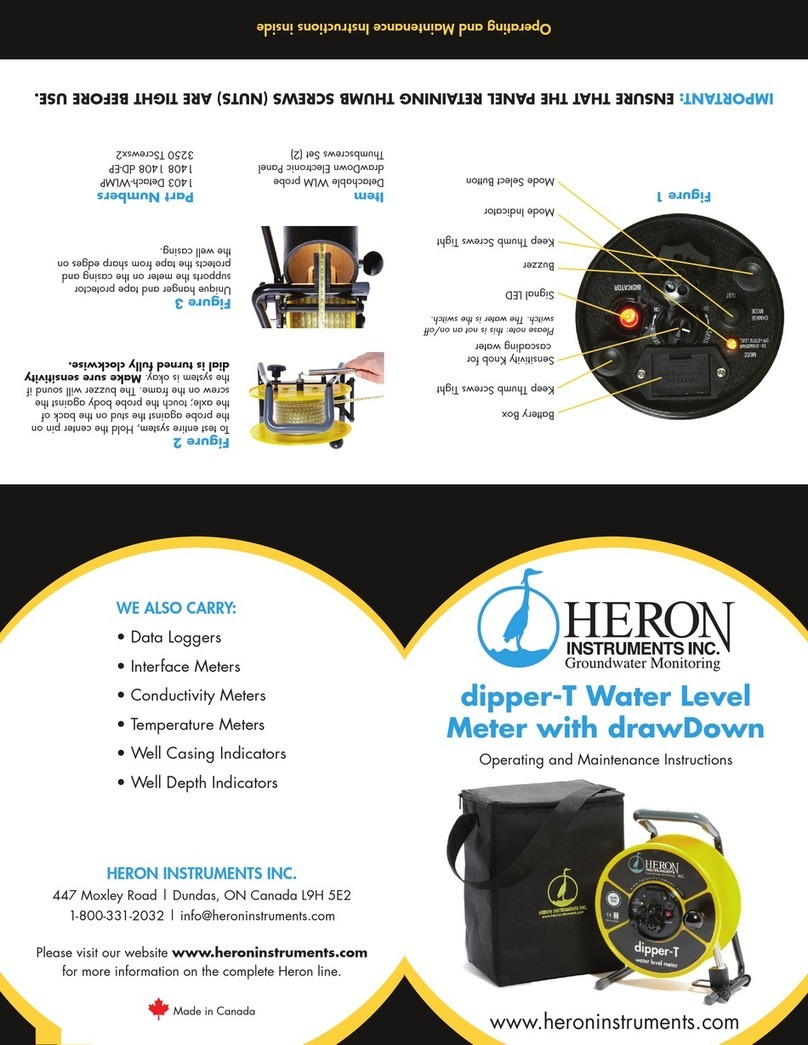
1 Test circuit and battery by pressing the ON button. Make sure
the panel securing knobs are tight (see diagram). If the unit
does not sound, replace the battery (one 9 volt) in the drawer
on the faceplate and repeat.
2 Test tape and probe by shorting out the centre conductor and
probe body on the stud on the back axle of the unit as shown.
The buzzer and light should activate; if not, adjust the sensi-
tivity and repeat. Make sure unit is on.
3 Test the unit in tap water before going out to the field. DO NOT
use distilled or deionized water.
Use in the Field - Important*Use in the Field - Important*
Use in the Field - Important*Use in the Field - Important*
Use in the Field - Important*
1 Reel the tape down the well carefully, avoiding the edge of
the casing. Hang the unit on the casing where possible and
run the tape over the frame leg to avoid cuts and nicks.
2 When the unit sounds, carefully measure the depth to water
from your reference point by slowly lowering and raising the
probe to the air/water interface. Raise the probe, shake off the
water and repeat the measurement. In wells with cascading
water, reduce the sensitivity by pressing the (-) button to avoid
false signals.
3 The probe is rated to full depth and can be used to measure
depth to bottom of well. Reel the tape until the probe touches
bottom and the tape becomes slack. DO NOT let the probe
fall under gravity or it will be damaged when it hits the bottom
of the well. DO NOT use the unit to measure sand backfill as
the tape and probe may get ”locked“ in the backfill.
4 Wind the tape back onto the reel, removing any excess
moisture and dirt.
Cleaning the MetersCleaning the Meters
Cleaning the MetersCleaning the Meters
Cleaning the Meters
1 Always the clean the meters after use in the field to maintain
optimal performance and extend the life of the unit.
2 Unwind the tape and probe and wash with a mild detergent.
Rinse well, wipe and rewind onto the reel. The tape and
probe can be cleaned and degreased with the following:
soap solution, naptha alcanox 10%, Joy detergent 10%,
Reel Lock
To unlock the reel turn the
plastic lock handle in the direction shown
until it touches the frame.
To Test Entire System
Hold the contre pin on the probe against
the stud on the back of the axle at the same
time touch the probe body aginst the screw
on the frame. The buzzer will sound if the
system is ok. Sensitivity knob should be
turned fully clockwise.
WW
WW
Water Level Meter Instructionsater Level Meter Instructions
ater Level Meter Instructionsater Level Meter Instructions
ater Level Meter Instructions
*Important:*Important:
*Important:*Important:
*Important:
Ensure that the Panel Securing Nuts are tight before use.
Note: Intermittemt beep indicates unit ONON
ONON
ON.Beeping shuts off automatically 5 minutes after last use.


