Hi-Tec S60 User manual


2 3
Contents
Precautions.......................................................................7
Preface...............................................................................8
Warranty ............................................................................9
Main Functions and Features........................................10
List of Accessories.........................................................13
Component Guideline ....................................................15
Front View .....................................................................................15
Rear View ......................................................................................16
Description of Indicators................................................................ 17
LCD Segment Display ...................................................................18
Preparations Before Use................................................19
Charging........................................................................................ 19
Installing the Battery...................................................................... 20
Install TFT Display......................................................................... 21
Insert and Remove The Memory Card .......................................... 22
Startup........................................................................................... 23
Language ......................................................................................24
Date/Time ...................................................................................... 24
Select Light Metering Mode........................................................... 25
Start Video Recording Via G-SENSOR Mode ............................... 26

4 5
Video Modes ...................................................................27
Basic Operations of Video Recording............................................ 27
Parameter Setting For Video Recording........................................ 28
• Execution Mode ........................................................................................29
• Video-Only Mode ......................................................................................29
• Time Lapse Mode .....................................................................................29
• Auto Video Mode.......................................................................................29
• PIV(Photo in video)...................................................................................30
• Video Resolution.......................................................................................30
• View Angle ................................................................................................31
• Bitrate .......................................................................................................31
• Video Content Loop .................................................................................. 32
• 180° Photo Rollover..................................................................................32
• Display Time .............................................................................................32
Audio Record................................................................................. 33
Photo Modes...................................................................34
Operating Procedure for Photo Shooting ...................................... 34
Parameter Settings for Photo Shooting......................................... 35
• Single Shot Mode .....................................................................................36
• Fast Shot Mode ........................................................................................36
• Continuous Shooting Mode ......................................................................36
• Timed Shooting Mode...............................................................................36
• Photo Resolution ......................................................................................36
• Display Time .............................................................................................36
Settings ...........................................................................37
• Warning Tone............................................................................................37
• Status Indicator.........................................................................................37
• On Screen Display....................................................................................38
• Auto To Standby ....................................................................................... 38
• TV Output Format .....................................................................................38
• Format.......................................................................................................38
• Recover Factory Setting ...........................................................................38
Playback..........................................................................39
Operating Procedure for Playback ............................................... 39
• Delete Files...............................................................................................41
• File Protection and Unlocking ...................................................................41
Upload Audio/Video/Photo Files to PC.......................................... 42
View Video/Photo On HDTV.......................................................... 43
Wi-Fi.................................................................................44
• Download a Wi-Fi APP .............................................................................44
• Wi-Fi Starting and Connection..................................................................45
Operating Instructions for Wi-Fi Control Interface ......................... 48
Download Files to Mobile Device .................................................. 53
Trim Videos....................................................................................55
Change Wi-Fi Connection Name and Password........................... 56
Wi-Fi Based Remote.......................................................58

6 7
Precautions
When using the S60 video camera, adhere to the following
precautions:
1. Do not drop, knock, or shake the video camera.
2. Do not place the video camera near an object that generates
strong magnetic elds, like a magnet or motor. Do not put the video
camera close to an object that emits powerful radio waves, like an
antenna. Strong magnetic elds may disrupt use of the video camera
or damage image / voice data.
3. Do not expose the video camera to high temperatures or direct
sunshine.
4. Do not put the memory card near an object that generates a strong
magnetic eld, like a television set, a speaker, or a magnet. Do not
put the memory card in a place where static electricity occurs.
5. Disconnect the power supply to immediately stop battery recharge
when overheating, smoking, or peculiar smells occur during
recharging.
6. Keep the video camera out of reach of children during recharging,
as the power cable may cause asphyxia or electrical shock.
7. Store the video camera in a cool, dry, and dust-free location.
Guide for Components .................................................................. 58
Startup........................................................................................... 60
Pairing ...........................................................................................60
Specications ................................................................................62
Precautions....................................................................................62
Accessory Application...................................................64
Water-proof Housing and Moisture-proof Foam ............................ 64
Mount Plug Bracket Components.................................................. 67
Use Curved Adhesive and Flat Adhesive ...................................... 68
Specications .................................................................69
Power Supply..................................................................71
Precautions for The Waterproof Housing ....................72
Tips ..................................................................................73
FCC Notices ....................................................................74

8 9
Preface
Thank you for purchasing the AEE S60 series compact high-denition
(HD) digital video camera, which features the following:
● Ultra-compact size and structure
● User-friendly interfaces
● Easy and intuitive operation
● Hands-free shooting that allows the user to capture real scenarios
at any time and in any place
● Superior recording performance from its dynamic HD shooting
technologies that provide the user with an exciting videographer
experience.
This manual describes how to install and use the S60 video camera.
It also provides information about the use, operation, installation
precautions, and technical specifications of the S60 video camera.
Before using the S60 video camera, read and understand this manual
in full and keep it handy for future use. Designed to professional
standards, the S60 video camera will meet the requirements of even
the most discerning user.
Dispose of properly. Recycle it for a greener earth!
Warranty
This product has been certified for compliance with related safety
regulations and specications issued by the Federal Communications
Commission (FCC) and Council of Europe (CE).
The S60 video camera is a compact, high-end HD digital camera
intended for professional applications. It provides the following
functions:
● Performs industry-leading HD digital shooting.
● Stores voice data.
● Displays images in real time.
● Performs video recording.
● Takes pictures.
● Displays time.
● Performs 4X digital zooming.
● Wi-Fi function and “App” application.
● Connects to an external special-purpose microphone.
● Performs USB 2.0 high-speed data transmission.
● Recharges the battery in USB mode.
● Accessories are available to facilitate your shooting experience at
any time in any place. The S60 holds multiple patents for invention
and technology.

10 11
Main Functions and Features
● Provides 140° wide-angle f/2.7 lens.
● Provides a special-purpose HD lens, which supports 1080P, 960P,
and 720P HD video recording.
● Takes 16M pixelated pictures in 4608×3456 resolution.
● Wi-Fi function and more "App" application.
● Performs 4X digital zooming.
● Contains a new generation image sensor Exmor R COMS that
doubles photosensitivity and sharpens image details even in a low-
light environment.
● Performs shooting in multiple modes such as single shot, fast shot,
and timed shooting.
● Provides a unique fast-shot feature that takes up to 8 photos per
second.
● Provides an independent voice recording function for longer voice
recording.
● Provides a 180° photo rollover function.
● Connects to an external TFT screen to view video recording and
playback.
● Provides HDMI and AV output interfaces for easy connection to an
HD monitor or TV set to view recorded les.
● Has a compact and stylish design.
● Provides better video effects in multiple video output modes (NTSC
system):
1080P(1920x1080) 60 frames / second
1080P(1920x1080) 48 frames / second
1080P(1920x1080) 30 frames / second
1080P(1920x1080) 24 frames / second
960P(1280×960) 60 frames / second
960P(1280×960) 48 frames / second
720P(1280×720) 120 frames / second
720P(1280×720) 60 frames / second
● Records video programs in MP4 format to facilitate playback on a
PC and uploads to video-sharing websites.
● Provides high color denition for clearer and more realistic video
feed.
● Supports playback, le deletion, and other operations.
● Supports fast forwarding and rewinding.
● Built-in microphone adopts dual-Mic design to achieve a high
quality stereo recording effect.
● All-around highlight status indicator.
● Built-in G-Sensor that functions as an automobile black box.

12 13
● Supports connection to an external microphone (special-purpose
microphone only).
● Provides a 1/4-inch general-purpose interface for accessory use.
● Accessories create a strengthened structure with improved
reliability and stability.
● A rechargeable, built-in, high capacity lithium-ion battery extends
video recording time.
● Provides shock-proof features to withstand minor bumps or falls.
● Provides IP68 waterproof housing to withstand a diving depth of
100 meters.
● Provides automatic standby to save power and can be set to auto-
save voice and video data.
List of Accessories
S60 Camera TFT Display Remote Control *
Waterproof Housing Waterproof Housing
Rear Case
Lithium-ion Battery
Back Clip *Power Supply Terminal *Plug Bracket Unit

14 15
Flat Adhesive Mount Curved Adhesive Mount Vertical-horizontal Joint
Extended Adjusting
Bolt Unit *
Moisture-proof Foam USB Data Cable
Waterproof Plug *User Manual Hand Strap *
Cloth Bag *CD-ROM *
The accessories you received may differ slightly from above. The
package is subject to change without further notice. You can order
optional accessories marked with " ".
Component Guideline
Front View
1
2
3
4
5
6
7
8
9
10
11
12
13
14
1. Wi-Fi key 8. Power on/off key
2. Wi-Fi status indicator 9. Battery lock
3. Light meter mode key 10. Lens
4. Recording status indicator 11. Cooling hole
5. Charging status indicator 12. Recording Status Indicator
6. G-Sensor key 13. Tripod mount
7. Video/audio recording button 14. Microphone

16 17
Rear View
15
16
17
18
19
20
21
22 23 24
25
26
27
28
29
30
31
32
34
33
15. Charging status indicator 25. LCD segment display
16. Recording status indicator 26. Microphone
17. Up button 27. Shutter button
18. Down button 28. Stop button
19. OK button 29. Mini HDMI interface
20. Left arrow button 30. USB interface
21. Right arrow button 31. TF card slot
22. Recording status indicator 32. Menu button
23. Charging status indicator 33. TFT display
24. Speaker 34. Playback button
Description of Indicators
Position
Status
Red indicator Green indicator Blue indicator
Front cover(1)
top cover(1)
TFT display(1)
Front cover(1)
top cover(1)
TFT display(1)
bottom side(2)
Front cover(1)
Startup Flash once and
then Stay on / /
Video
recording / Flash slowly /
Audio
recording / Flash slowly /
Photo
shooting Stay on Flash once /
Card full Stay on Stay on /
Charging
(switched off) Flash slowly / /
Fully charged
(switched off) Stay on / /
Low-battery
indicator
Flash fast for 5s and
then auto power off / /
Data
transmission Stay on / ash slowly
Wi-Fi on Stay on / ash slowly
When powering down the screen, the TFT display indicators will be lit. You
can long-press the Shutter button to turn on/off the screen.

18 19
LCD Segment Display
100-088
2H30
1080P- 25
1
56
2
3
4
7
1
2
3
4
100-0088
1888
8M
Icon Functions
1
Video mode
Photo mode
2
1080P-50 Video resolution
16M 12M 8M Photo resolution
3
100-0088 Number of recorded files
00:00:01 Recording timer
4
2H30 Remaining recordable time
1888 Remaining shots
5W M N S View angle
6Wi-Fi
7Battery level
Preparations Before Use
Charging
To check battery power, turn the unit on. If the battery level is low,
charge it.
Use the supplied power adapter or a USB port to charge the S60:
PC USB interface
Power adapter
Input: 100~240V 0.5A
Output: DC 5V 2000mA
USB interface
When the S60 is charged in a power-off state, the red indicator will
flash slowly. After the battery is fully charged, the red indicator will
stay on.

20 21
Installing the Battery
1. Before Installing the battery, ensure that the battery "lock key" at
the bottom of the S60 is unlocked.
2. Push the battery into the battery slot completely as below:
3. Battery lock:
Install TFT Display
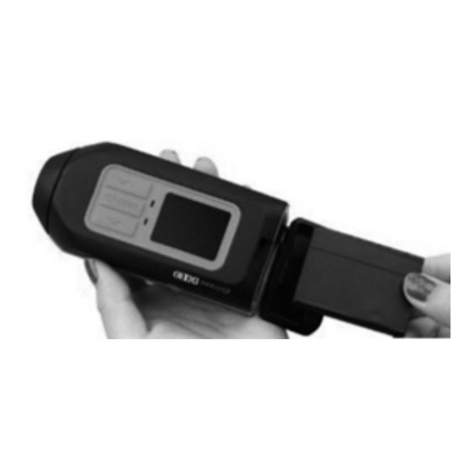
The S60 supports an external, dedicated 2″ TFT display which
performs CX setup, playback, file deletion, etc. on the camera to
preview or play the video back.
Install the display as shown below:

22 23
Insert and Remove The Memory Card
The S60 supports an external TF card up to 64G. Though all SD
cards above Class 10 can be used on the S60, a high-speed card
is recommended for high-denition shooting. When shooting during
dynamic motion, brand SDHC cards are recommended for use.
Insert the memory card
1. Ensure that the S60 is switched off.
2. Insert the SD card atly into the memory card slot, following the
direction of the arrow. A "click" can be heard to indicate the card
has been fully inserted.
• Remove the memory card
Press down on the center of the exposed
part of the SD card and the card will pop up
slightly. Slide the card out atly.
Before connecting the host to Wi-Fi or the remote control, please
rst insert the SD card.
Startup
Startup
Turn the power key to "ON" to turn on the S60:
Power key
When the host is in a power-on state, you can long-press the Shutter
button and Stop button simultaneously for 5s to turn off the host.
After closing the host, you can long-press the Shutter button and
Stop button simultaneously for 5s to turn it on.
• Two red indicators will be lit.
• The S60 enters recording standby mode. Now TFT display is
shown as below:
Visual angle
Battery level
Working mode
(video recording)
Time of video
recording
Resolution of video recording
Remaining video recording
time of memory card

24 25
Language
1. Press the "M" button to enter the camera setting menu.
2. Press the "-" / "+" button to select " ";
3. Press the "<"/">" button to select " " and press the "OK" button to
conrm.
4. Press the "<" / ">" button to move the cursor to the language type
to be modied. Then press "OK" to conrm.
5. Press the "M" button to exit the menu and return to recording
standby mode.
Date/Time
1. Press the "M" button to enter the camera setting menu.
2. Press "-" / "+" to select " ".
3. Press "<" / ">" to select " " and press "OK" to conrm.
4. Press "<" / ">" to move the cursor to the style to be modied. Then
press "OK" to conrm.
5. Press "<" / ">" to move the cursor to the time or date to be
modied. Then press "-" or "+" to modify the time and date . Press
"OK" to conrm.
6. Press the "M" button to exit the menu and return to recording
standby mode.
Use "<" / ">" to select the item to the left / right, and use "+" / "-"
to select the item above/below the selected item. After selection,
press "OK" to conrm the operation.
Please ensure that the date and time are correctly set. This unit
will add time to the photo/video based on this setting.
Select Light Metering Mode
To achieve the best exposure effect, use the central spot light
metering mode when the central spot is bright and the surrounding
environment is dark.
light meter mode key
" ": turn on central spot metering
" ": turn off central spot metering

26 27
Start Video Recording Via G-SENSOR Mode
G-Sensor key
Turn the G-Sensor key to "ON" so that the S60 will actively sense the
change of gravity. The system will automatically start video recording
in case of shock or tilting, etc. When this mode is applied in fixed
installation, mounted on a vehicle or helmet for example, it can start
video recording automatically without the need to start recording in
advance. Using this option frees you from manual operation while
conserving battery power.
If the camera does not sense a change in gravity after 3 minutes, it
will exit video recording.
During the camera’s startup process, do not activate the G-sensor
function simultaneously to prevent error.
Video Modes
Basic Operations of Video Recording
1. Turn on the S60 to enter recording standby mode.
2. Aim the lens on the subject and preview it in TFT display.
3. Press the "Video recording" button once to start video recording.
• The system will tick once to indicate the start of video recording.
The TFT display shown below is for video recording:
Working mode
(photo shooting)
Remaining number of
shots of memory card
Battery level
Resolution for photo shooting
4. During video recording, press the "Stop" button once to stop video
recording.
• The system generates a tick tone twice to indicate that video
recording stops. The time counter also stops.
• The display will return to recording standby mode.

28 29
Parameter Setting For Video Recording
Perform the following steps to set the parameters for video recording:
1. Press the "M" button to enter the setting menu.
2. Press "+" / "-" to select " ."
3. Press "<" / ">" to move the cursor to the sub-menu you want to
congure. Press "OK" to enter the sub-menu:
Icon Functions Icon Functions
Execution mode Video resolution
View angle Bitrate
Video content loop 180° photo rollover
Display time
4. Press "<" / ">" to select the parameters you want.
5. Press "OK" to conrm.
6. Press the "M" button again to exit the setting menu.
• Execution Mode
Select the execution mode you want. Press "OK" to conrm. Press
"M" again to exit the setting menu.
: Video recording
: Voice recording
: PIV
: Video-only
: Time Lapse
: Auto video
• Video-Only Mode
In this mode, you can record a video without voice.
• Time Lapse Mode
The time Lapse function records one picture as a frame of the
video according to the time interval you set. It doesn’t require post-
editing and can easily capture continuous frame evolution and
movement.
The available options are: 1s, 2s, 5s, 10s and 30s.
(The function is unavailable in 720P 100f/120f modes.)
• Auto Video Mode
If this function is enabled, the system auto-starts recording video
according to the countdown time you set.
The available options are: 5s, 10s and 20s.

30 31
• PIV(Photo in video)
In this mode, you can shoot photos in the video recording process.
(The function is unavailable in 720P 100f/120f modes.)
Manual photo shooting ( ): Press "Shutter" button during
video recording to take one photo.
Auto photo shooting: During video recording, the system
continuously performs photo shooting at the set time interval.
There are four options of time interval: 5s, 10s, 30s and 60s.
• Video Resolution
The optional resolutions for video recording are listed as below:
Resolutions PAL System NTSC System
1080P(16:9)
1920x1080 24fps, 25fps, 48fps, 50fps 24fps, 30fps, 48fps, 60fps
960P(4:3)
1280x960 48fps, 50fps 48fps, 60fps
720P(16:9)
1280×720 50fps, 100fps 60fps, 120fps
• View Angle
Optional view angle: Broad, Medium, Narrow, Small.
(The function is unavailable in 960P and 720P modes.)
Broad
Medium
Narrow Small
• Bitrate
This unit provides two bit rate options: high " " and normal
"". (If high bit rate is selected, you will get clearer picture
with increased le size).

32 33
• Video Content Loop
You can activate or deactivate the loop recording function. If ON,
your video le will be stored automatically in 10 minute segments.
If OFF, your video le will be stored in 15 minute segments.
• 180° Photo Rollover
When this function is activated, an upright video file can be
obtained when using the S60 to shoot video upside down.
(The function is unavailable in 720P 100f/120f modes.)
• Display Time
YYou can choose to display or not display the video recording time
at the bottom right corner of the photo.
(The function is unavailable in 720P 100f/120f modes.)
Audio Record
Operating procedures for audio recording:
1. Enter the audio recording mode and press "Video Recording" to
start audio recording.
• The system will tick once to indicate audio recording.
Recording time
Working mode
(Audio recording)
Remaining
audio recording
time of memory card Battery level
2. During audio recording, press the "Stop" button once to stop audio
recording.
• The system generates a tick tone twice to indicate that video
recording has stopped.
• The display will return to recording standby mode.
Exit audio record mode:
1. Press "M" button to enter the camera setting menu;
2. Press "<" / ">" to select " " and press "OK" to conrm;
3. Press "<" / ">" to select " " mode and press "OK" to
conrm. The S60 will return to recording standby mode.

34 35
Photo Modes
Operating Procedure for Photo Shooting
1. Turn on the S60 to enter recording standby mode.
2. Aim at the subject and preview it on the display.
3. Press the "Shutter" button once to switch the working mode to
"photo modes."
4. Press the "Shutter" button again to shoot one photo.
• The system will click to indicate a completed operation and then
returns to photo shooting standby mode.
• The TFT display in photo shooting mode is shown below:
Working mode
(photo shooting)
Remaining number of
shots of memory card
Battery level
Resolution for photo shooting
Parameter Settings for Photo Shooting
Perform the following steps to set the parameters for photography:
1. Press the "M" button to enter the setting menu.
2. Press "+" / "-" to select " ";
3. Press "<" / ">" to move the blue cursor to the sub-menu you want
to congure. Press "OK" to enter the sub-menu:
Icon Functions Icon Functions
Capture mode Photo resolution
Display time
4. Press "<" / ">" to select the parameters you require.
5. Press "OK" to conrm.
6. Press the "M" button again to exit the setting menu.
• Capture Mode
Select the capture mode you require and press "OK" to conrm.
Press the "M" button again to exit the setting menu.
: Single shot mode
: Fast shot mode
: Continuous Shooting Mode
: Timed shooting mode

36 37
• Single Shot Mode
Take one photo when the photo shooting button is pressed.
• Fast Shot Mode
The S60 takes several photos within one second.
The available options are: 3/1s, 6/1s, 8/1s (photos per second).
• Continuous Shooting Mode
In this mode, you can shoot photos continuously as per the preset
time interval until you press the "Stop" button.
The available options are: 0.5s, 1s, 2s, 3s, 5s, 10s, and 20s.
• Timed Shooting Mode
When the "Shutter" button is pressed once under the recording
standby mode, the S60 will start a countdown and take photos
when the set time has elapsed.
The available options are 3s, 5s, 10s.
• Photo Resolution
Three optional resolutions include: "8M", "12M" or "16M".
• Display Time
You can choose to display or not display the time at the bottom
right corner of the photo.
Settings
1. Press "M" button to enter the camera setting menu.
2. Press "-" / "+" to select " ".
3. Press "<" / ">" to move the blue cursor to the sub-menu you want
to congure. Press "OK" to conrm.
Icon Functions Icon Functions
Warning tone Status indicator
On screen display Auto to standby
TV output format Language
Date/time Format
Recover factory setting Ver
• Warning Tone
Adjust the sound level of the buzzer. Three modes are available:
Off, Medium(50%) and Standard(100%).
• Status Indicator
Activate or deactivate the status indicators.
Three modes are available: Off (All OFF), Two (Only front cover
and top cover) and On (All ON).

38 39
• On Screen Display
Display or hide the recording icons or information on the display
screen.
• Auto To Standby
The S60 is set to automatically enter standby mode if no operation
(photo shooting, video recording or button operation) is carried
out over a certain length of time. If an operation is completed in
the timing process, the timer will be reset. Under standby mode,
press the video recording button/shutter button/stop button to
awaken the S60. The available modes options are: Off, 2 minutes,
5 minutes and 10 minutes.
• TV Output Format
This setting is designed to ensure that the frame rate of video
recording matches the playback format on TV.
Please select NTSC in North America.
Please select PAL outside North America.
• Format
This option clears all the les in memory.
• Recover Factory Setting
This option allows all system settings to be restored to their
original factory settings.
Playback
Operating Procedure for Playback
1. Press the "playback" button to enter the playback interface.
2. Press the "Video recording" button to select file type and press
"OK" to conrm:
: View video les
: View photo les
: View all video/audio/photo les
3. Press "<" / ">" / "+" / "-" button to move the cursor to the thumbnail
of the le you want to play back;
4. Press "OK" to enter the playback interface and press "OK" to play
it.
• When playing video les, there are various functions available to
you. These and their corresponding button are listed below:
Button Functions Button Functions
-Decrease volume; +Increase volume;
<Fast rewind >Fast forward
Press it to return to the le
preview interface; OK Play/pause.
Table of contents
Other Hi-Tec Action Camera manuals
