Step 1 - Unpack Hideaway Bin
Remove all polystyrene.•
Remove the bucket/s.•
Please leave the Glad sample pack and instructions inside the bucket for the homeowner.•
(NZ only)
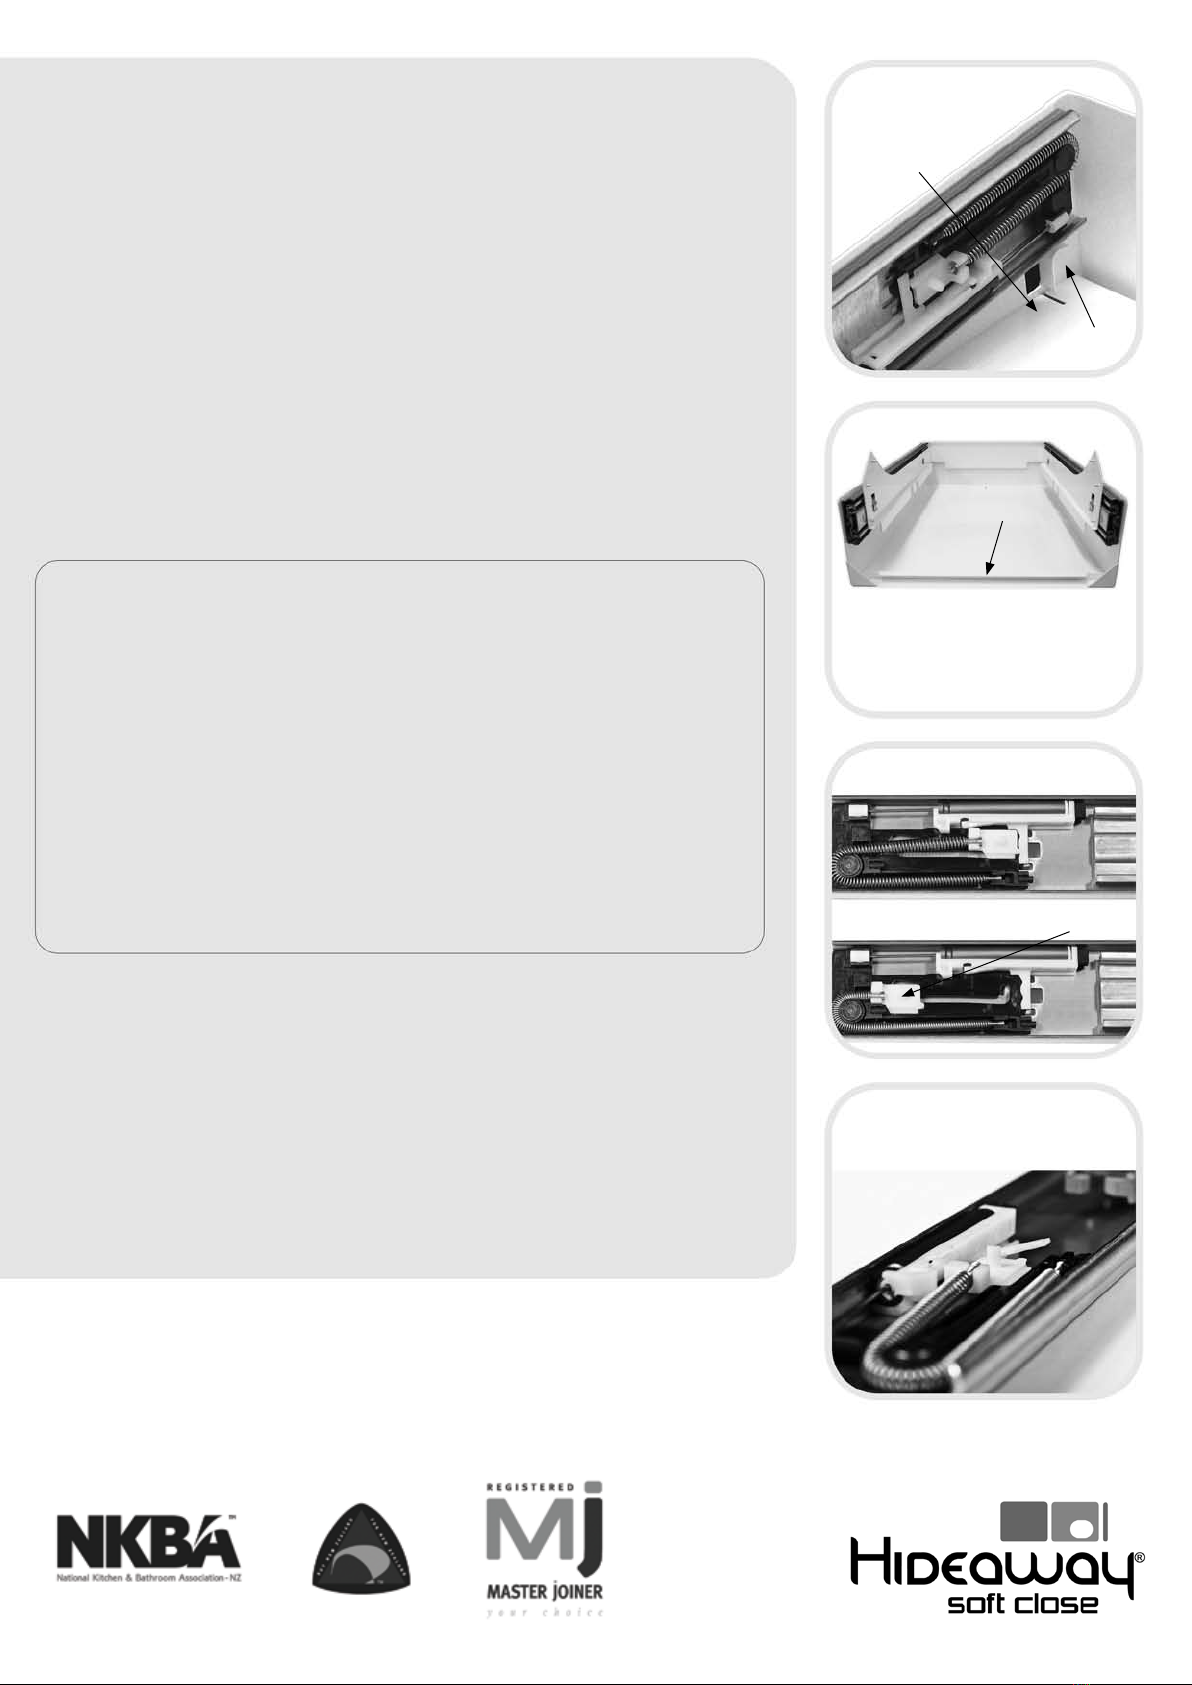
Step 2 - Remove the door bracket (g 2 & 3)
Placethemountingpanelupsidedownonaatsurfacewiththerunnersfacingupwards.•
Fully extend the runners• . It is critically important that you extend as far as they will open.
Undo the nut on either side of the door bracket (these nuts attach the door bracket to•
the collar).
Remove door bracket - set nuts aside in a safe place (see Fig 2).•
NOTE: VERY IMPORTANT - do not remove the collar from the runners or the runners from the•
mounting panel.
Step 3 - Remove the friction-tted lid from mounting panel
(g 4a, 4b & 4c)
Mountingpanelshouldstillbeupsidedownonaatsurfacewiththerunnersfacingupwards.•
Toremovethefriction-ttedlid-pushrmlydownonthelidatthebackoftheunit.•
Pushrmly,distributingpressuretobothsidesoflidtoensurethelidclearsthehookslocatedon•
the left and right hand sides of the mounting panel.
Simultaneously,pullthefriction-ttedlidforwardsuntilitpullsclearofthemountingpanel.•
Pullthefoampadclearofthemountingpanel.Setaside,leavingtheplasticcoveron.•
Step 4 - Top mounting bins only: Install your bins within your
cupboard/carcass
Positionthemountingpanel(nowclearofrunnerinnerandcollaraswellasfriction-ttedlidand•
foampad)inside,beneathyourcarcass/shelf.
Position within the centre of the carcass and ensure the front of the mounting panel is sitting•
ushwiththefrontofthecarcass.Mountingpointsarelocatedonthetopofthemountingpanel
forxing.Securethemountingpanelintoplacewiththe16mmSurexscrewsprovided.
Any additional mounting points added will null and void warranty.
Step 5 - Install your bin within your cupboard / carcass
YourunithassidemountingpointsasshowninFig1.Ifsidemounting,theinternalspaceofthe•
cabinet must be within the advertised width.
Thesidemountingpointsaretobesecuredwiththe16mmSurexscrewsandwashersprovided.•
Step 6 - Reinstall the friction-tted lid and foam into mounting panel
Restthefoamontopofthefriction-ttedlid-theatsideofthefriction-ttedlidshouldbetowards•
the ground with the folds facing upwards.
Slidethefriction-ttedlidandfoaminsidethemountingpanel,stoppingjustbeforetherear•
hooks.(Note:thelargefoldonthefriction-ttedlidsitsatthefrontoftheunit,andtherearofthe
lid has the slots which reconnect with the hooks located on the mounting panel at the rear).
Simultaneously,withonehand,pushrmlyuponthebackofthefriction-ttedlid,pushthelidabove•
thehooksanddropintolocation.Whilstthisishappening,withtheotherhandpushthefrontof
the lid upwards to ensure it rests on the metal support (located at the front of the mounting panel -
g4c).
Thelidshouldmoveupanddownslightlywithease,indicatingcorrectinstallation.•
Step 6 - Reattach the door bracket
Extend the runners once again.•
Align the door bracket to the collar and lightly tighten in place using the nuts provided.•
The Hideaway®Soft Close Installation Instructions
Fig 2
Door bracket and collar detached
Fig 1
Collar
Door
Bracket
Door Bracket
Friction-
ttedlid
Liner
holder
Runners
Fig 3
Door bracket and collar attached
Fig 4a
Pushrmlyonthebackoftheunit
to ensure the lid clears the hooks
located on the right and left hand
sides of mounting panel
Mounting
panel
Top and/or side
mounting points
Buckets