HIKOKI R 18DTB User manual

R18DB
R18DTB
R 18DB • R 18DTB
Cordless Cleaner
充电式吸尘器
充電式吸塵器
Keep for future reference
保留备用
保留備用
Handling instructions
使用说明书
使用說明書
English
中 文中國語
000BookR18DBChS.indb1000BookR18DBChS.indb1 2020/07/1010:08:102020/07/1010:08:10

English
2
GENERAL POWER TOOL SAFETY WARNINGS
WARNING
Read all safety warnings and all instructions.
Failure to follow the warnings and instructions may result in electric shock, fire and/or serious
injury.
Save all warnings and instructions for future reference.
The term “power tool” in the warnings refers to your mains-operated (corded) power tool or
battery-operated (cordless) power tool.
1) Work area safety
a) Keep work area clean and well lit.
Cluttered or dark areas invite accidents.
b) Do not operate power tools in explosive atmospheres, such as in the presence
of flammable liquids, gases or dust.
Power tools create sparks which may ignite the dust or fumes.
c) Keep children and bystanders away while operating a power tool.
Distractions can cause you to lose control.
CONTENTS
GENERAL POWER TOOL SAFETY WARNINGS ..........................................2
CAUTION ON LITHIUM-ION BATTERY .........................................................5
REGARDING LITHIUM-ION BATTERY TRANSPORTATION ........................6
PRECAUTIONS FOR CORDLESS CLEANER ...............................................7
SYMBOLS ......................................................................................................8
NAME OF PARTS...........................................................................................8
SPECIFICATIONS..........................................................................................9
STANDARD ACCESSORIES .......................................................................10
APPLICATIONS............................................................................................10
BATTERY REMOVAL / INSTALLATION ......................................................11
CHARGING ..................................................................................................11
PRIOR TO OPERATION...............................................................................14
THE SWITCH PANEL (R18DB)....................................................................15
HOW TO USE...............................................................................................16
EMPTYING THE DUST CASE......................................................................18
MAINTENANCE AND INSPECTION ............................................................19
TROUBLESHOOTING..................................................................................21
SELECTING ACCESSORIES.......................................................................22
000BookR18DBChS.indb2000BookR18DBChS.indb2 2020/07/1010:08:102020/07/1010:08:10

English
3
2) Electrical safety
a) Power tool plugs must match the outlet.
Never modify the plug in any way.
Do not use any adapter plugs with earthed (grounded) power tools.
Unmodified plugs and matching outlets will reduce risk of electric shock.
b) Avoid body contact with earthed or grounded surfaces, such as pipes,
radiators, ranges and refrigerators.
There is an increased risk of electric shock if your body is earthed or grounded.
c) Do not expose power tools to rain or wet conditions.
Water entering a power tool will increase the risk of electric shock.
d) Do not abuse the cord. Never use the cord for carrying, pulling or unplugging
the power tool.
Keep cord away from heat, oil, sharp edges or moving parts.
Damaged or entangled cords increase the risk of electric shock.
e) When operating a power tool outdoors, use an extension cord suitable for
outdoor use.
Use of a cord suitable for outdoor use reduces the risk of electric shock.
f) If operating a power tool in a damp location is unavoidable, use a residual
current device (RCD) protected supply.
Use of an RCD reduces the risk of electric shock.
3) Personal safety
a) Stay alert, watch what you are doing and use common sense when operating a
power tool.
Do not use a power tool while you are tired or under the influence of drugs,
alcohol or medication.
A moment of inattention while operating power tools may result in serious personal
injury.
b) Use personal protective equipment. Always wear eye protection.
Protective equipment such as dust mask, non-skid safety shoes, hard hat, or hearing
protection used for appropriate conditions will reduce personal injuries.
c) Prevent unintentional starting. Ensure the switch is in the offposition before
connecting to power source and/or battery pack, picking up or carrying the
tool.
Carrying power tools with your finger on the switch or energising power tools that have
the switch on invites accidents.
d) Remove any adjusting key or wrench before turning the power tool on.
A wrench or a key left attached to a rotating part of the power tool may result in
personal injury.
e) Do not overreach. Keep proper footing and balance at all times.
This enables better control of the power tool in unexpected situations.
f) Dress properly. Do not wear loose clothing or jewellery. Keep your hair,
clothing and gloves away from moving parts.
Loose clothes, jewellery or long hair can be caught in moving parts.
000BookR18DBChS.indb3000BookR18DBChS.indb3 2020/07/1010:08:102020/07/1010:08:10

English
4
g) If devices are provided for the connection of dust extraction and collection
facilities, ensure these are connected and properly used.
Use of dust collection can reduce dust-related hazards.
4) Power tool use and care
a) Do not force the power tool. Use the correct power tool for your application.
The correct power tool will do the job better and safer at the rate for which it was
designed.
b) Do not use the power tool if the switch does not turn it on and off.
Any power tool that cannot be controlled with the switch is dangerous and must be
repaired.
c) Disconnect the plug from the power source and/or the battery pack from the
power tool before making any adjustments, changing accessories, or storing
power tools.
Such preventive safety measures reduce the risk of starting the power tool
accidentally.
d) Store idle power tools out of the reach of children and do not allow persons
unfamiliar with the power tool or these instructions to operate the power tool.
Power tools are dangerous in the hands of untrained users.
e) Maintain power tools. Check for misalignment or binding of moving parts,
breakage of parts and any other condition that may affect the power toolʼs
operation.
If damaged, have the power tool repaired before use.
Many accidents are caused by poorly maintained power tools.
f) Keep cutting tools sharp and clean.
Properly maintained cutting tools with sharp cutting edges are less likely to bind and
are easier to control.
g) Use the power tool, accessories and tool bits etc. in accordance with these
instructions, taking into account the working conditions and the work to be
performed.
Use of the power tool for operations different from those intended could result in a
hazardous situation.
5) Battery tool use and care
a) Recharge only with the charger specified by the manufacturer.
A charger that is suitable for one type of battery pack may create a risk of fire when
used with another battery pack.
b) Use power tools only with specifically designated battery packs.
Use of any other battery packs may create a risk of injury and fire.
c) When battery pack is not in use, keep it away from other metal objects, like
paper clips, coins, keys, nails, screws or other small metal objects, that can
make a connection from one terminal to another.
Shorting the battery terminals together may cause burns or a fire.
d) Under abusive conditions, liquid may be ejected from the battery; avoid
contact. If contact accidentally occurs, flush with water. If liquid contacts eyes,
additionally seek medical help.
Liquid ejected from the battery may cause irritation or burns.
000BookR18DBChS.indb4000BookR18DBChS.indb4 2020/07/1010:08:102020/07/1010:08:10

English
5
6) Service
a) Have your power tool serviced by a qualified repair person using only identical
replacement parts.
This will ensure that the safety of the power tool is maintained.
CAUTION
Keep children and infirm persons away.
When not in use, tools should be stored out of reach of children and infirm persons.
CAUTION ON LITHIUM-ION BATTERY
To extend the lifetime, the lithium-ion battery equips with the protection function to stop
the output.
In the cases of 1 to 3 described below, when using this product, even if it is switched on,
the motor may stop. This is not the trouble but the result of protection function.
1. When the battery power remaining runs out, the motor stops.
In such case, charge it up immediately.
2. If the tool is overloaded, the motor may stop. In this case, switch the tool offand
eliminate causes of overloading. After that, you can use it again.
3. If the battery is overheated under overload work, the battery power may stop.
In this case, stop using the battery and let the battery cool. After that, you can use
it again.
Furthermore, please heed the following warning and caution.
WARNING
In order to prevent any battery leakage, heat generation, smoke emission, explosion and
ignition beforehand, please be sure to heed the following precautions.
1. Make sure that swarf and dust do not collect on the battery.
○
During work make sure that swarf and dust do not fall on the battery.
○
Make sure that any swarf and dust falling on the power tool during work do not
collect on the battery.
○
Do not store an unused battery in a location exposed to swarf and dust.
○
Before storing a battery, remove any swarf and dust that may adhere to it and do
not store it together with metal parts (screws, nails, etc.).
2. Do not pierce battery with a sharp object such as a nail, strike with a hammer, step
on, throw or subject the battery to severe physical shock.
3. Do not use an apparently damaged or deformed battery.
4. Do not use the battery in reverse polarity.
5. Do not connect directly to an electrical outlets or car cigarette lighter sockets.
6. Do not use the battery for a purpose other than those specified.
7. If the battery charging fails to complete even when a specified recharging time has
elapsed, immediately stop further recharging.
8. Do not put or subject the battery to high temperatures or high pressure such as
into a microwave oven, dryer, or high pressure container.
9. Keep away from fire immediately when leakage or foul odor are detected.
000BookR18DBChS.indb5000BookR18DBChS.indb5 2020/07/1010:08:102020/07/1010:08:10

English
6
10. Do not use in a location where strong static electricity generates.
11. If there is battery leakage, foul odor, heat generated, discolored or deformed, or in
any way appears abnormal during use, recharging or storage, immediately remove
it from the equipment or battery charger, and stop use.
12. Do not immerse the battery or allow any fluids to flow inside. Conductive liquid
ingress, such as water, can cause damage resulting in fire or explosion. Store your
battery in a cool, dry place, away from combustible and flammable items. Corrosive
gas atmospheres must be avoided.
CAUTION
1. If liquid leaking from the battery gets into your eyes, do not rub your eyes and
wash them well with fresh clean water such as tap water and contact a doctor
immediately.
If left untreated, the liquid may cause eye-problems.
2. If liquid leaks onto your skin or clothes, wash well with clean water such as tap
water immediately.
There is a possibility that this can cause skin irritation.
3. If you find rust, foul odor, overheating, discolor, deformation, and/or other
irregularities when using the battery for the first time, do not use and return it to
your supplier or vendor.
WARNING
If a conductive foreign matter enters in the terminal of
lithium ion battery, the battery may be shorted, causing
fire. When storing the lithium ion battery, obey surely the
rules of following contents.
○
Do not place conductive debris, nail and wires such
as iron wire and copper wire in the storage case.
○
Either install the battery in the power tool or store
by securely pressing into the battery cover until the
ventilation holes are concealed to prevent short-
circuits (See Fig. 1).
REGARDING LITHIUM-ION BATTERY TRANSPORTATION
When transporting a lithium-ion battery, please observe the following precautions.
WARNING
Notify the transporting company that a package contains a
lithium-ion battery, inform the company of its power output
and follow the instructions of the transportation company
when arranging transport.
●
Lithium-ion batteries that exceed a power output
of 100 Wh are considered to be in the freight
classification of Dangerous Goods and will require
special application procedures.
Ventilation holes
Terminals
Battery cover
Battery
Fig. 1
Latch
Wh
Power Output
2 to 3 digit number
Fig. 2
000BookR18DBChS.indb6000BookR18DBChS.indb6 2020/07/1010:08:102020/07/1010:08:10

English
7
●
For transportation abroad, you must comply with international law and the rules
and regulations of the destination country.
PRECAUTIONS FOR CORDLESS CLEANER
1. Always charge the battery at a temperature of 0°C – 40°C. A temperature of less
than 0°C will result in over charging which is dangerous. The battery cannot be
charged at a temperature higher than 40°C.
The most suitable temperature for charging is that of 20°C – 25°C.
2. Do not use the charger continuously.
When one charging is completed, leave the charger for about 15 minutes before
the next charging of battery.
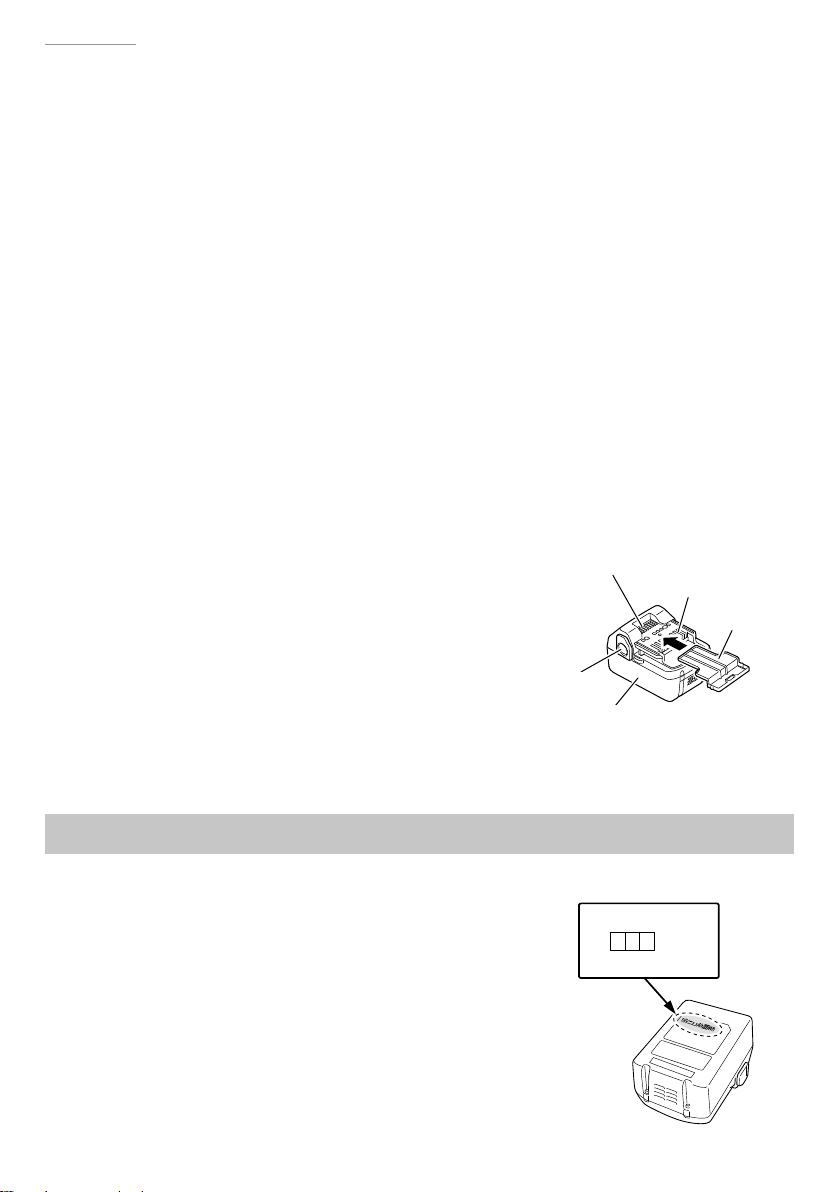
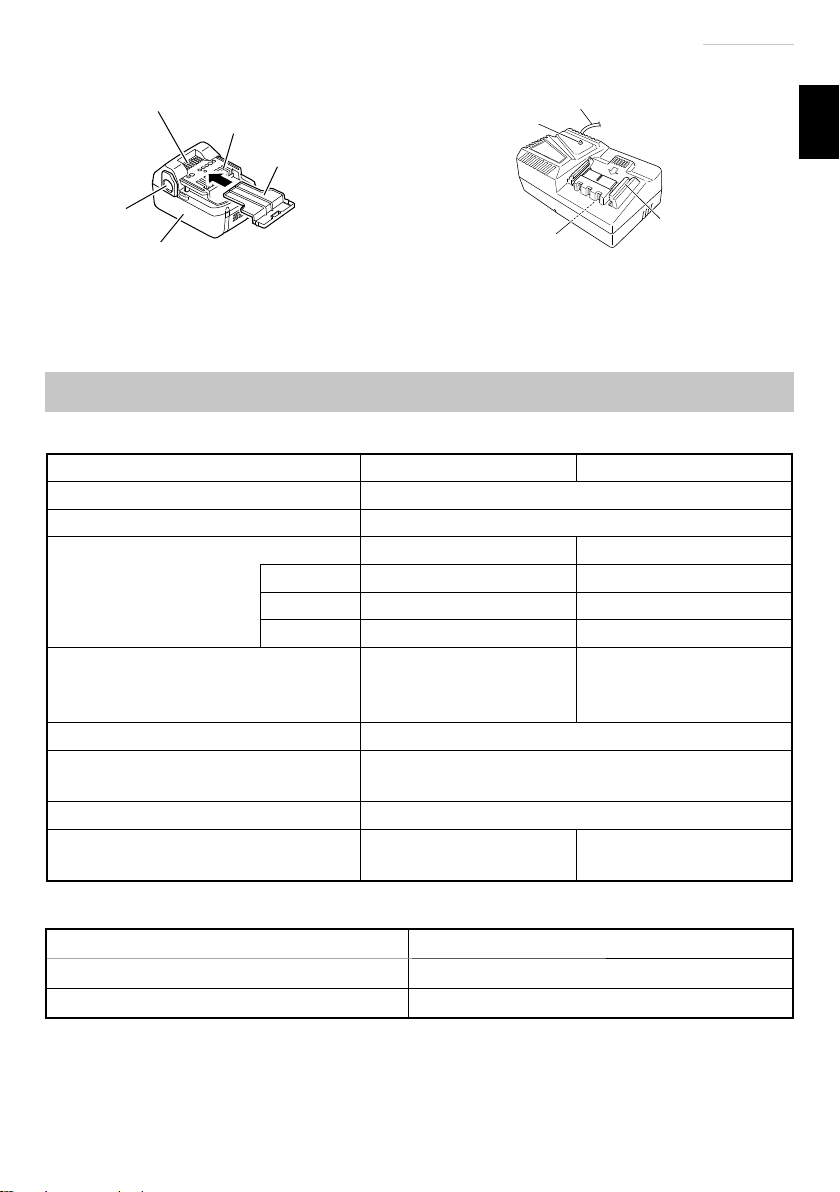
3. Do not allow foreign matter to enter the hole for connecting the rechargeable
battery.
4. Never disassemble the rechargeable battery and charger.
5. Never short-circuit the rechargeable battery. Short-circuiting the battery will cause
a great electric current and overheat. It results in burn or damage to the battery.
6. Do not dispose of the battery in fire.
If the battery is burnt, it may explode.
7. Bring the battery to the shop from which it was purchased as soon as the post-
charging battery life becomes too short for practical use. Do not dispose of the
exhausted battery.
8. Using an exhausted battery will damage the charger.
9. Do not insert object into the air ventilation slots of the charger.
Inserting metal objects or inflammables into the charger air ventilation slots will
result in electrical shock hazard or damaged charger.
10. Prevent the appliance from sucking in the following: Fire or injury may result.
○
Liquids (e.g., water, oil) or damp debris.
○
Generated spark during metal grinding or cutting.
○
High temperature things, such as lighted cigarette.
○
Inflammable substances (gasoline, thinner, benzene, kerosene, paint, etc.),
explosive substances (nitroglycerine, etc.), combustible substances (aluminum,
zinc, magnesium, titanium, red phosphorus, yellow phosphorus, celluloid, etc.)
○
Sharp things, such as nails, razors or glass.
○
Solidification materials, such as cement powder and toner, and conductive fine
dusts, such as metal powder and carbon powder.
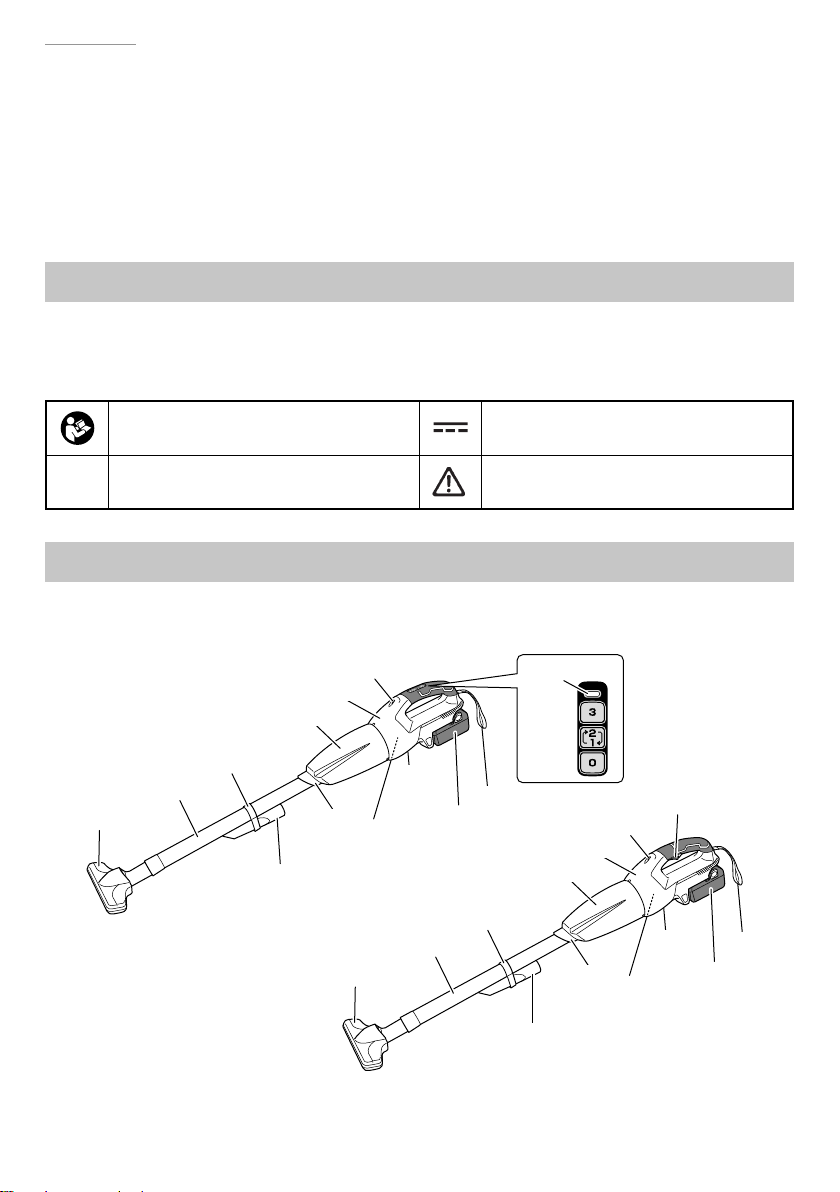
11. Set the filter correctly before use. Do not use the appliance without the filter or with
it set in a wrong position, or do not use a torn filter. May cause failures, such as
motor burnout.
12. This appliance is only used indoors. Never use it outdoors. Do not use in the rain.
Keep away from water or oil.
Malfunction may result as this appliance is not waterproof.
13. Do not use the appliance with its suction opening or exhaust opening obstructed.
The temperature of the motor may rise abnormally, causing troubles such as
deformation of parts or motor burnout.
000BookR18DBChS.indb7000BookR18DBChS.indb7 2020/07/1010:08:112020/07/1010:08:11

English
8
14. Do not operate the appliance when the suction opening is blocked.
The motor may overheat, causing deformation of parts or malfunction of the motor.
15. When you drop or bump the appliance accidentally, check for breakage, crack, or
deformation in the appliance. Breakage, crack or deformation may cause injuries.
16. When the appliance is out of condition or emits abnormal sound during use,
immediately turn offthe switch and request repair from your local retailer or
authorized servicing agent. If you continue to use the appliance as it is, it may lead
to injuries.
SYMBOLS
WARNING
The following show symbols used for the machine. Be sure that you understand their
meaning before use.
To reduce the risk of injury, user must
read instruction manual. Direct current
V Rated voltage Warning
NAME OF PARTS
1. POWER TOOL
LED light
LED light
Switch
Housing
Housing
Dust Case
Dust Case
Nozzle
Holder
Nozzle
Holder
Extension
Pipe
Extension
Pipe
Crevice
Nozzle R18DB
R18DTB
Crevice
Nozzle
Intake
port
Intake
port
Motor
Motor
Name
plate
Name
plate
Strap
Strap
Indicator Lamp
Switch panel
Battery
Battery
Flooring
Nozzle
Flooring
Nozzle
Fig. 3
000BookR18DBChS.indb8000BookR18DBChS.indb8 2020/07/1010:08:112020/07/1010:08:11

English
9
2. Battery 3. Battery Charger
Ventilation holes
Terminals
Battery cover
Battery
<BSL1830>
Latch
Nameplate
Pilot lamp
Guide
rail
Cord
<UC18YFSL>
Fig. 4 Fig. 5
SPECIFICATIONS
POWER TOOL
Model R18DB R18DTB
Voltage 18 V
Motor DC motor
Continuous operating
time
(Battery:
using BSL1830/BSL1850)
―Approx. 24 / 40 min.
3 (HIGH) Approx. 24 / 40 min. ―
2 (MID) Approx. 29 / 48 min. ―
1 (LOW) Approx. 40 / 66 min. ―
Suction Work Rate
3 (HIGH) : Approx. 40 W
2 (MID) : Approx. 30 W
1 (LOW) : Approx. 16 W
Approx. 40 W
Dust collecting capacity 560 mL
Battery BSL1830: Li-ion 18 V
(3.0 Ah 10cells)
Charger UC18YFSL
Weight 1.7 kg
(BSL1830 attached)
1.7 kg
(BSL1830 attached)
CHARGER
Model UC18YFSL
Charging voltage 14.4 V – 18 V
Weight 0.5 kg
000BookR18DBChS.indb9000BookR18DBChS.indb9 2020/07/1010:08:112020/07/1010:08:11

English
10
STANDARD ACCESSORIES
In addition to the main unit (1 unit), the package contains the accessories listed in the below.
Table 1
R18DB R18DTB
(XC) (NN) (NN)
Charger (UC18YFSL) 1— —
Battery (BSL1830) 1— —
Battery cover 1— —
Flooring Nozzle 11 1
Crevice Nozzle 11 1
Extension Pipe
(With Nozzle Holder) Nozzle Holder 11 1
Standard accessories are subject to change without notice.
APPLICATIONS
○
Light-duty vacuuming of dry surfaces
000BookR18DBChS.indb10000BookR18DBChS.indb10 2020/07/1010:08:112020/07/1010:08:11

English
11
BATTERY REMOVAL / INSTALLATION
1. Battery removal
Hold the handle tightly and push the battery latches to
remove the battery (see Fig. 6).
CAUTION
Never short-circuit the battery.
2. Battery installation
Match the battery with the unit's groove and firmly press
the battery in until you hear a click (see Fig. 6).
CHARGING
Before using the power tool, charge the battery as follows.
1. Connect the charger’s power cord to the receptacle.
When connecting the plug of the charger to a receptacle,
the pilot lamp will blink in red (At 1- second intervals).
2. Insert the battery into the charger.
Firmly insert the battery into the charger as shown in Fig. 7.
3. Charging
When inserting a battery in the charger, charging will
commence and the pilot lamp will light continuously in red.
When the battery becomes fully recharged, the pilot
lamp will blink in red. (At 1-second intervals) (See
Table 2 on page 12)
●
Pilot lamp indication
The indications of the pilot lamp will be as shown in Table 2, according to the condition of
the charger or the battery.
Latch
Battery
Handle
Pull out
Insert
Push
Fig. 6
Fig. 7
Battery
Pilot lamp
Charger
000BookR18DBChS.indb11000BookR18DBChS.indb11 2020/07/1010:08:122020/07/1010:08:12

English
12
Table 2
Indications of the pilot lamp
Pilot lamp
(red)
Before
charging Blinks
Lights for 0.5 seconds. Does not
light for 0.5 seconds. (offfor
0.5 seconds)
While
charging Lights Lights continuously
Charging
complete Blinks
Lights for 0.5 seconds. Does not
light for 0.5 seconds. (offfor
0.5 seconds)
Overheat
standby Blinks
Lights for 1 second. Does not
light for 0.5 seconds. (offfor
0.5 seconds)
Battery overheated.
Unable to charge.
(Charging will
commence when
battery cools)
Charging
impossible Flickers
Lights for 0.1 seconds. Does not
light for 0.1 seconds. (offfor
0.1 seconds)
Malfunction in
the battery or the
charger
●
Regarding the temperatures and charging time of the battery.
The temperatures and charging time will become as shown in Table 3.
Table 3
Charger
Battery UC18YFSL
Charging voltage V 14.4 –18
Weight kg 0.5
Temperatures at which the battery can be
recharged 0oC –50oC
Charging time for battery capacity, approx.
(At 20oC)
1.5 Ah
2.0 Ah
2.5 Ah
3.0 Ah
4.0 Ah
5.0 Ah
6.0 Ah
8.0 Ah
min.
min.
min.
min.
min.
min.
min.
min.
22
30
35
45
60
75
90
120
Number of battery cells 4 –10
000BookR18DBChS.indb12000BookR18DBChS.indb12 2020/07/1010:08:122020/07/1010:08:12

English
13
NOTE
The recharging time may vary according to the ambient temperature and power source
voltage.
4. Disconnect the charger’s power cord from the receptacle.
5. Hold the charger firmly and pull out the battery.
NOTE
Be sure to pull out the battery from the charger after use, and then keep it.
Regarding electric discharge in case of new batteries, etc.
As the internal chemical substance of new batteries and batteries that have not been used
for an extended period is not activated, the electric discharge might be low when using
them the first and second time. This is a temporary phenomenon, and normal time required
for recharging will be restored by recharging the batteries 2 – 3 times.
How to make the batteries perform longer.
(1) Recharge the batteries before they become completely exhausted.
When you feel that the power of the tool becomes weaker, stop using the tool and recharge
its battery. If you continue to use the tool and exhaust the electric current, the battery may
be damaged and its life will become shorter.
(2) Avoid recharging at high temperatures.
A rechargeable battery will be hot immediately after use. If such a battery is recharged
immediately after use, its internal chemical substance will deteriorate, and the battery life
will be shortened. Leave the battery and recharge it after it has cooled for a while.
CAUTION
○
If the battery is charged while it is heated because it has been left for a long time in
a location subject to direct sunlight or because the battery has just been used, the
pilot lamp of the charger lights for 1 second, does not light for 0.5 seconds (offfor
0.5 seconds). In such a case, first let the battery cool, then start charging.
○
When the pilot lamp flickers (at 0.2-second intervals), check for and take out any
foreign objects in the charger’s battery connector. If there are no foreign objects, it
is probable that the battery or charger is malfunctioning. Take it to your authorized
Service Center.
○
Since the built-in micro computer takes about 3 seconds to confirm that the battery
being charged with charger is taken out, wait for a minimum of 3 seconds before
reinserting it to continue charging. If the battery is reinserted within 3 seconds, the
battery may not be properly charged.
○
If the pilot lamp does not blink in red (every second) even though the charger cord
is connected to the power, it indicates that the protection circuit of the charger may
be activated.
000BookR18DBChS.indb13000BookR18DBChS.indb13 2020/07/1010:08:122020/07/1010:08:12

English
14
PRIOR TO OPERATION
1. Setting up and checking the work environment
Check if the work environment is suitable by following the precautions.
2. Mounting and dismounting the filter
Before using the appliance, check that the filter is securely mounted.
(1) Remove the dust case (Fig. 8)
Looking at the dust case from the intake port, turn it counterclockwise for
approximately 120 degrees to align the protruding marks on the dust case and the
housing, and then pull it off.
(2) Remove the filter. (Fig. 9)
Turn the filter clockwise to remove it from the housing.
(3) Check the filter (Fig. 10)
Check the filter for damage and contamination.
Fig. 10
Filter
free of
debris
and dust
Rubber not
deteriorated
Connector
free of
damage
Filter
Fig. 9
Turn clockwise
Remove
Housing
Filter holder
Filter
Hold here
Fig. 8
Tighten
Protruding marks
Dust
Case
Intake Port
Housing
Remove
(4) Install the filter (Fig. 11)
When installing the filter, press the housing on with the projections in a horizontal
position. Then, turn the filter until the projections are fixed in the grooves of the
housing.
Filter
Projections
Projection
Fig. 11
Push in
Turn to
secure
Housing
Grooves
Filter holder
Housing Grooves
000BookR18DBChS.indb14000BookR18DBChS.indb14 2020/07/1010:08:122020/07/1010:08:12

English
15
(5) Install the dust case (Fig. 12)
Place the dust case over the housing, making sure that the protruding marks on both
are aligned. Then, turn the dust case clockwise for approximately 120 degrees.
* The dust case can also
be installed with the
nozzle facing upwards.
Fig. 12
Protruding Marks
Align the
protruding
marks
Dust Case
Housing
Turn clockwise
for approximately
120 degrees
Dust Case
NOTE
If the filter is not properly fitted, dirt or grime can enter the fan unit and cause damage or
malfunction.
THE SWITCH PANEL (R18DB)
CAUTION
Do not subject the switch panel to shock or damage.
1. Switch operation (Fig. 13)
The vacuum of the appliance can be switched
between three stages of operation, depending on
your need.
When the power is off, pressing the 3 button or
the 2 / 1 button will switch the appliance on. At the
same time, the LED light will switch on. To switch
between MID mode and LOW mode, press the 2 / 1
button.
To suppress noise when using the appliance, switch
to 1 mode.
To shut offthe appliance, press the
Ø
button. This will also switch offthe LED light.
Mode Continuous operating time
BSL1830 BSL1850
3 (HIGH) Approx. 24 min. Approx. 40 min.
2 (MID) Approx. 29 min. Approx. 48 min.
1 (LOW) Approx. 40 min. Approx. 66 min.
∗
Continuous operating time will vary according to battery condition.
Please use the table as a guideline.
OFF Button
Fig. 13
Switch Panel
Indicator Lamp
HIGH Mode
MID/LOW Mode
LED light
000BookR18DBChS.indb15000BookR18DBChS.indb15 2020/07/1010:08:132020/07/1010:08:13

English
16
2. The Indicator Lamp (Fig. 14)
When the battery supply is low during operation of the appliance,
the indicator lamp will light up. When this occurs, please recharge
the appliance.
HOW TO USE
WARNING
To prevent accidents when installing or removing the rechargeable battery, make
sure that the appliance is switched off.
CAUTION
○
Make sure that the rechargeable battery is properly installed. If not properly
installed, the battery may fall out, causing injury.
○
Make sure the filter is installed when operating the appliance. Failure to do so may
result in injury or malfunction.
1. Verify the filter (Fig. 15)
Check to make sure the filter is installed.
At the same time, check to make sure the
filter is not damaged or dirty. (See "Check
the filter" on page 14.)
2. Attach the nozzle (See Fig. 16 on page 17)
Depending on the operation, insert the
nozzle to the intake port of the appliance.
The appliance can be used without a nozzle.
NOTE
When attaching the nozzle or extension pipe, insert as you twist in the direction indicated by
the arrow. (See Fig. 17 on page 17)
Twist in the direction indicated by the arrow when detaching as well.
Twisting in the opposite direction could result in detaching the dust case from the housing.
Indicator
Lamp
3
2
1
Ø
Fig. 14
Housing
Fig. 15
Filter
Filter holder
Dust Case
000BookR18DBChS.indb16000BookR18DBChS.indb16 2020/07/1010:08:132020/07/1010:08:13

English
17
Fig. 17
Housing
Nozzle and
Extension Pipe
Detach
Twist
Direction
Insert
Dust Case
Extension Pipe
Nozzle
Fig. 16
3. Install the battery (Fig. 18)
As shown in the diagram below, firmly insert until a click
is heard.
4. Switch on the appliance (Fig. 19)
<R18DB>
Press the button for the mode you wish to operate.
(See "THE SWITCH PANEL (R18DB)" on page 15.)
<R18DTB>
When the switch is pulled, the appliance and the LED
light are both activated. Release the switch and the
appliance and LED light are both shut off.
Switch Switch
LED light LED light
Fig. 19
<R18DB> <R18DTB>
CAUTION
○
Do not expose directly your eye to the light by looking into the light.
If your eye is continuously exposed to the light, your eye will be hurt.
Firmly insert Battery
Fig. 18
000BookR18DBChS.indb17000BookR18DBChS.indb17 2020/07/1010:08:132020/07/1010:08:13

English
18
EMPTYING THE DUST CASE
CAUTION
○
To prevent accidents, make sure the power is switched offand remove the
rechargeable battery from the appliance.
○
Do not subject the dust case to strong impacts
as this may cause deformation or damage.
○
Empty the dust case frequently and keep
the appliance, filter, etc. clean. Failure to
do so may reduce vacuuming efficiency or
cause malfunction of the motor or odor.
1. Turn the dust case and pull it from the housing.
(Fig. 20)
NOTE
Point the intake port downward as dust can spill
when removing the dust case.
2. Dispose the dust in the dust case.
3. If the suction does not recover after disposing
the dust, clean the filter.
4. Attach the filter and dust case to the housing.
Effectively removing dust (Fig. 21)
The appliance has a built-in mechanism for
scraping offdust attached to the filter when
removing the dust case.
To even more effectively scrape offthe dust,
repeatedly turn the dust case back and forth (2
to 3 times or more).
Holding the unit so that the dust case does not
detach from the housing, slightly and repeatedly
turn the dust case in the indicated directions.
Fig. 20
Point the intake port downward
Remove
Housing
Dust Case
Dust Case
Dust
Dust Removal Blades (3)
(Fixed to the inside of the
dust case)
Filter
Dust
Dust Case
Turn the dust case back and
forth for 2 or 3 times
Fig. 21
000BookR18DBChS.indb18000BookR18DBChS.indb18 2020/07/1010:08:142020/07/1010:08:14

English
19
MAINTENANCE AND INSPECTION
CAUTION
Be sure to turned offthe switch and remove the battery before maintenance and
inspection.
1. Cleaning the filter
CAUTION
○
Do not wash the filter in a washing machine.
○
Do not wash the filter in hot water or dry it by fire.
If the vacuuming efficiency is poor even when the dust case has been emptied, remove the
filter and wash it in cold or warm water. (The water should not be hot to the touch.)
After washing, dry out of direct sunlight.
If there is dust on the fan filter, hold the cleaner with the fan filter pointing downwards to keep
dust from entering the motor and lightly clean with a small brush such as a used toothbrush.
NOTE
○
Do not use gasoline, thinner, benzene or kerosene as they can melt plastic.
○
Do not use an air gun or similar tool to clean the filter, fan filter or the appliance itself.
(Fig. 22)
Doing so could push dirt into the appliance and cause malfunction.
Fig. 22
Filter
Filter
Air
No!
Dry offany moisture Clean with a toothbrush or similar tool
(Do not brush vigorously)
Point the fan filter
downwards
Do not detach the
filter holder and the
fan filter!
Filter holder
2. Inspecting the mounting screws
Regularly inspect all mounting screws and ensure that they are properly tightened. Should
any of the screws be loose, retighten them immediately. Failure to do so may result in
serious hazard.
3. Maintenance of the motor
The motor unit winding is the very “heart” of the power tool.
Exercise due care to ensure the winding does not become damaged and/or wet with oil or
water.
000BookR18DBChS.indb19000BookR18DBChS.indb19 2020/07/1010:08:142020/07/1010:08:14

English
20
NOTE
Regularly idle the motor to clean out dirt and dust.
Damage may result if dirt or dust collects in the motor.
4. Cleaning of the outside
When the tool is stained, wipe with a soft dry cloth or a cloth moistened with soapy water.
Do not use chloric solvents, gasoline or paint thinner, as they melt plastics.
5. Storage
Store the cordless cleaner in a place in which the temperature is less than 50°C and out of
reach of children.
When storing the appliance in a vertical position, hook the strap to a hanger.
NOTE
○
Do not store in a location where children can easily reach or take out the appliance.
○
Do not store in a damp location or in an area exposed to rainfall.
○
Do not store in direct sunlight or in a location where temperatures may suddenly change.
○
Do not store in a location with volatile materials that could ignite or explode.
○
Do not stand the appliance against a wall without using the strap to fix it in place. (Fig. 23)
Failure to do so may result in damage from a fall.
Fig. 23
Yes No!
Standing against the wall
Use the strap
for stability
NOTE
Storing Lithium-ion Batteries
Make sure the batteries have been fully charged before storing them.
Prolonged storage (3 months or more) of batteries with a low charge may result in
performance deterioration, significantly reducing battery usage time or rendering the
batteries incapable of holding a charge.
However, significantly reduced battery usage time may be recovered by repeatedly
charging and using the batteries two to five times.
If the battery usage time is extremely short despite repeated charging and use, consider
the batteries dead and purchase new batteries.
CAUTION
In the operation and maintenance of power tools, the safety regulations and
standards prescribed in each country must be observed.
000BookR18DBChS.indb20000BookR18DBChS.indb20 2020/07/1010:08:152020/07/1010:08:15
This manual suits for next models
1
Table of contents
Other HIKOKI Ultrasonic Jewelry Cleaner manuals