INFANT
MOVEMENT
MONITOR
Do not handle roughly, drop or throw.
Follow the installation instruction carefully to ensure the device is installed securely and correctly.
Babysense is not a toy. Do not allow children of any age to play with it.
Do not put any additional baby or pet in the bed.
Babysense Connect is intended for use with one infant and cannot be used for two infants in one bed.
Babysense Connect cannot be used with co-sleepers that are attached to the parent's/caregiver's bed.
Do not operate the unit in the presence of electromagnetic interference.
Portable and mobile RF communications equipment may eect operation of this device.
You must undertake the performance test daily and every time you move the monitor, change bedding
or relocate crib/bed position (Daily Performance Test Section).
Do not operate vaporizer or ventilator directly towards the bed.
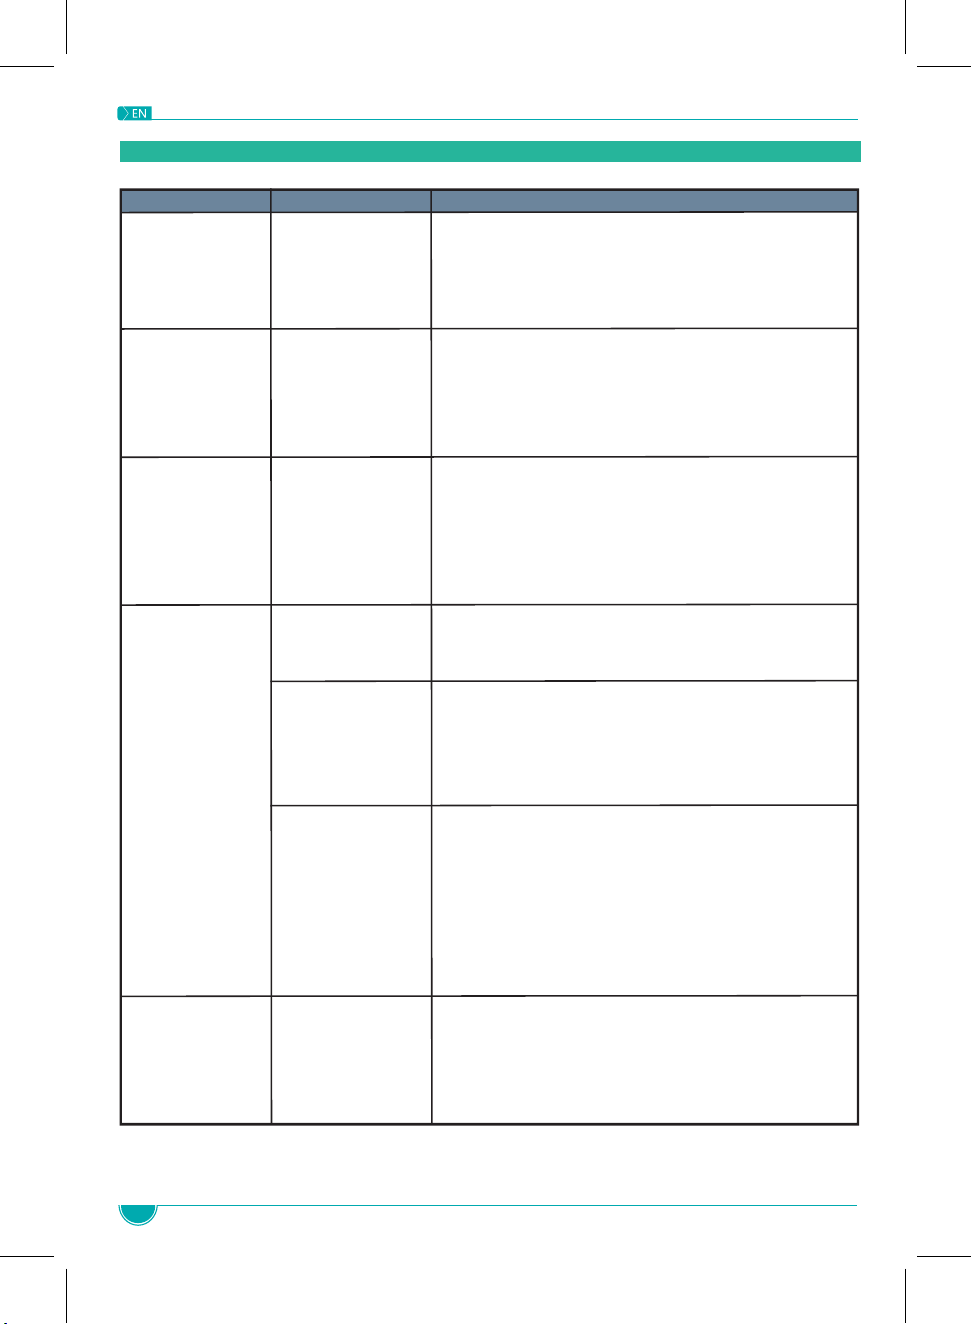
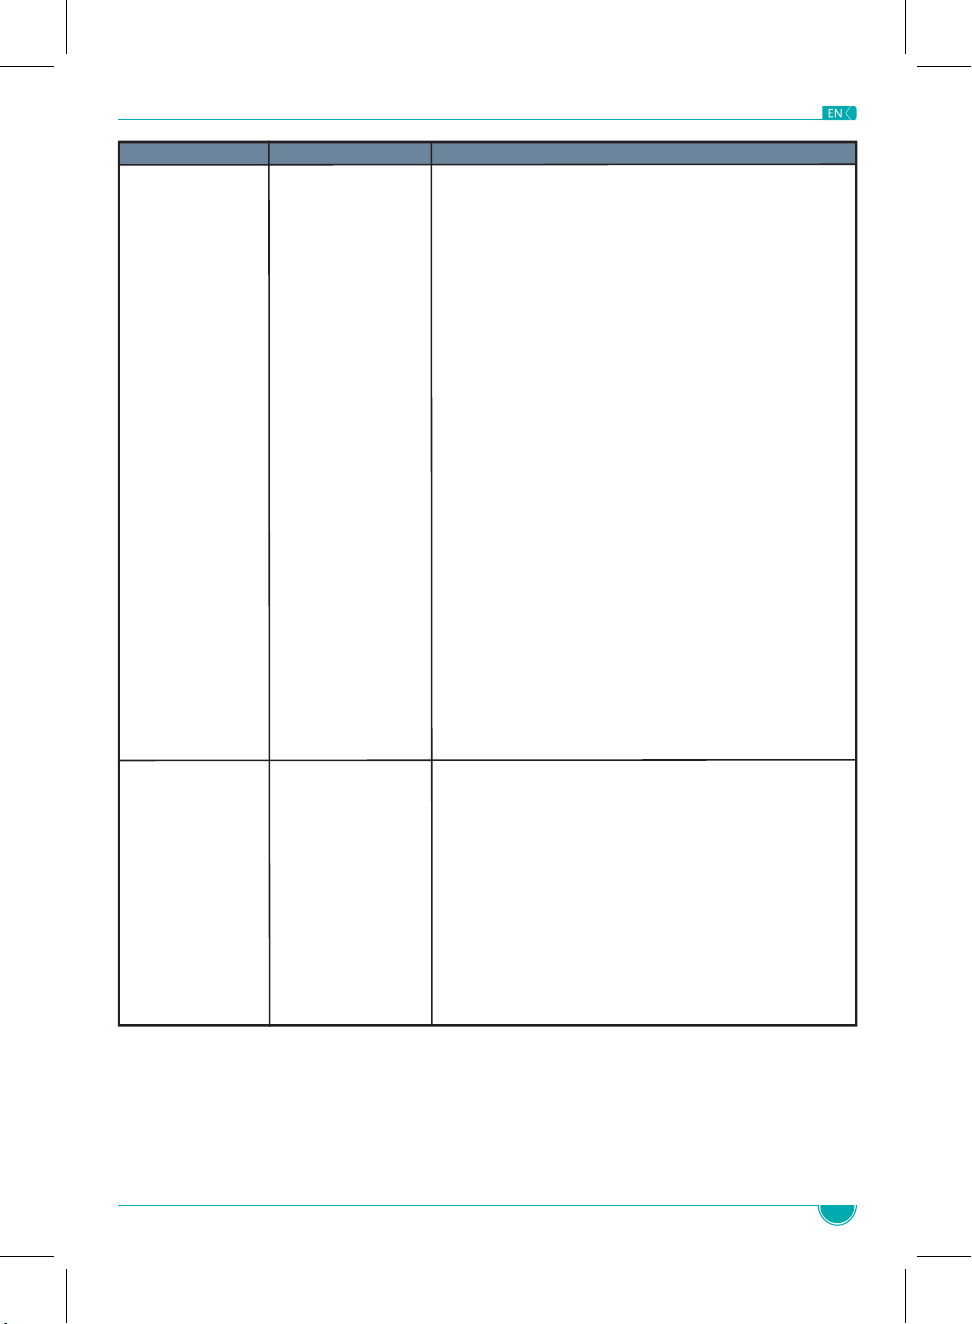
To avoid possible danger from sensor cords, ensure that excess cords are pulled back under the
mattress, secured with the included cable tie and are not visible or reachable.
Install 4 new and identical Alkaline size AA 1.5 volt batteries. DO NOT use rechargeable batteries.
IMPORTANT: It is strongly advised that parents and caregivers learn how to give first aid.
Please remove batteries if the device is not in use for an extended time (2 weeks or more).
If you have any problems with this device, such as setting up, maintaining or using, please
contact the manufacturer’s service personnel. Also, please report to the manufacturer if any unexpected
operation or events occur.
Do not use the equipment if you notice a change in the system's performance, if the system is
damaged, or if any of its components are worn or frayed.
The equipment should not be used adjacent to or stacked with other equipment. If adjacent or stacked
use is necessary, the equipment should be observed to verify normal operation in the configuration in
which it is used.
Ensure you read this user manual before installing and using the product.
Babysense is a high quality, high sensitivity electronic device, which must be handled with care:
Babysense monitors and alerts, but cannot prevent any type of distress. The responsibility for applying first
aid rests on caretakers. The Babysense senses movements and motion only, and cannot monitor other
occurrences. The purpose of the device is to alert when stopping or slowing of movement occurs.
Babysense is a unique safety and reassurance system which helps give parents peace of mind, alerting if
movements stop or become irregularly slow, giving critical time to intervene. There are a number of
cautionary steps, which are internationally recommended for SAFE SLEEPING:
Babysense Connect is an addition to these precautions. Babysense Connect is a home movement monitor
for infants up to one year of age, and is not to be used with high-risk infants requiring constant medical
supervision.
Medically trained staff such as nurses, or non-medically trained users such as parents or caregivers may
use the Babysense Connect. Babysense Connect is intended for home use.
Always lay baby to sleep on his or her back.
Refrain from smoking near or around baby.
Avoid over-heating of baby's surrounding.
Do not leave any objects near your baby that can cause suocation.
*
*
*
*
Warnings
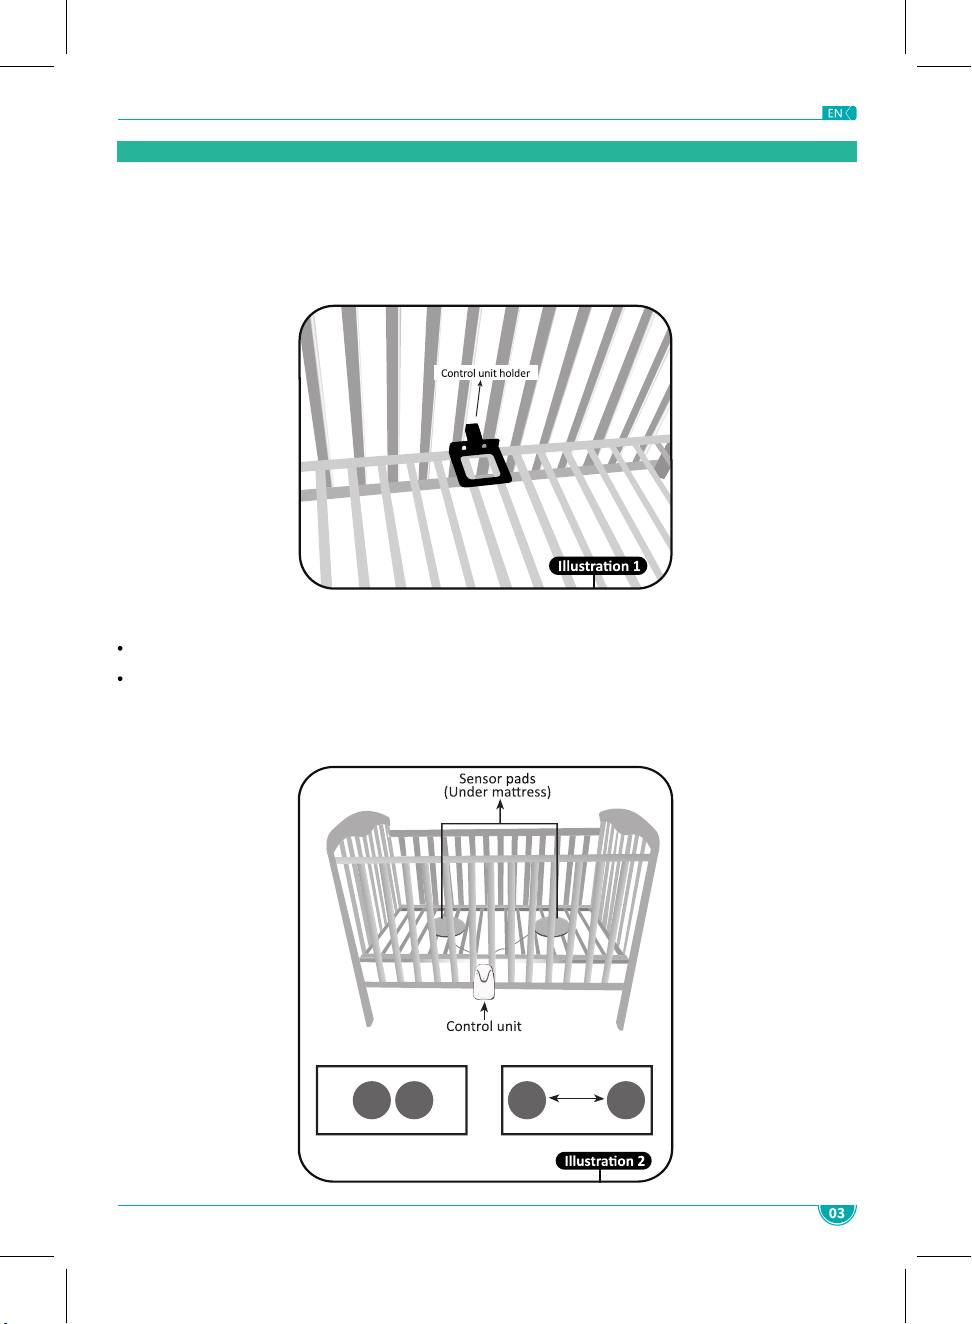
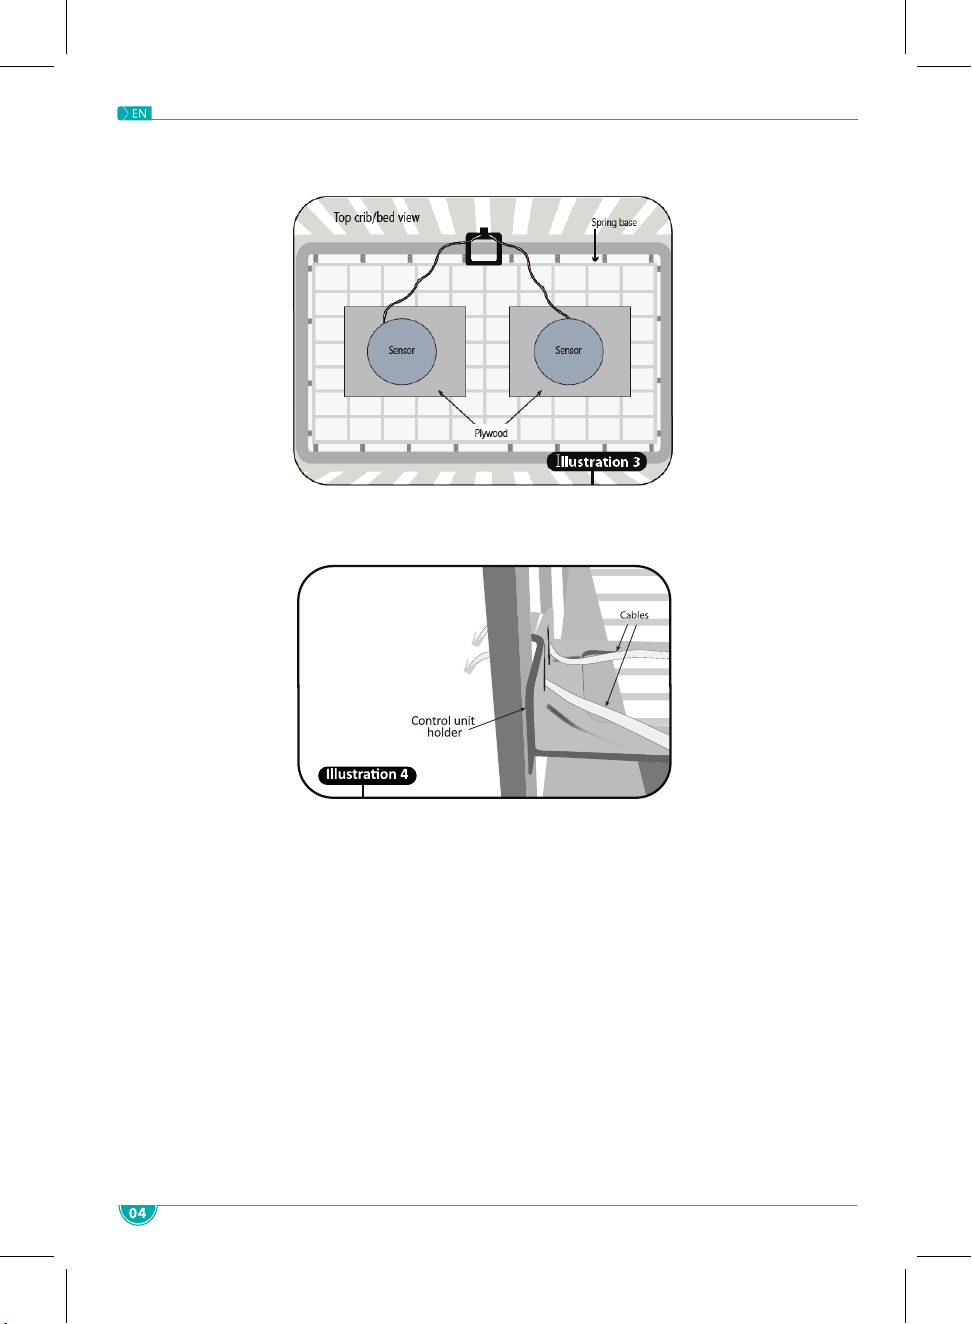
Babysense continually detects baby's movements and will set off a sound and visual alarm if movement
stops within 20 seconds or if the monitor detects less than 10 micro-movements per minute. The system's
non-touch, under the mattress sensor pads monitor baby's movement without restraining him.
Principle of Operation
Please note