manuals.online logo
Brands
  1. Home
  2. •
  3. Brands
  4. •
  5. Hisense
  6. •
  7. Refrigerator
  8. •
  9. Hisense HRCD586TBWB Mounting instructions

Hisense HRCD586TBWB Mounting instructions

HRCD585BW
HRCD585SW
HRCD585BWB
HRCD586TBWB
Thank you for choosing Hisense. We are sure you will find your new refrigerator a
pleasure to use. However, before you use the appliance, we recommend that you
carefully read the instructions, which provide details about installing and using the
product. Please keep this manual for future reference.
2
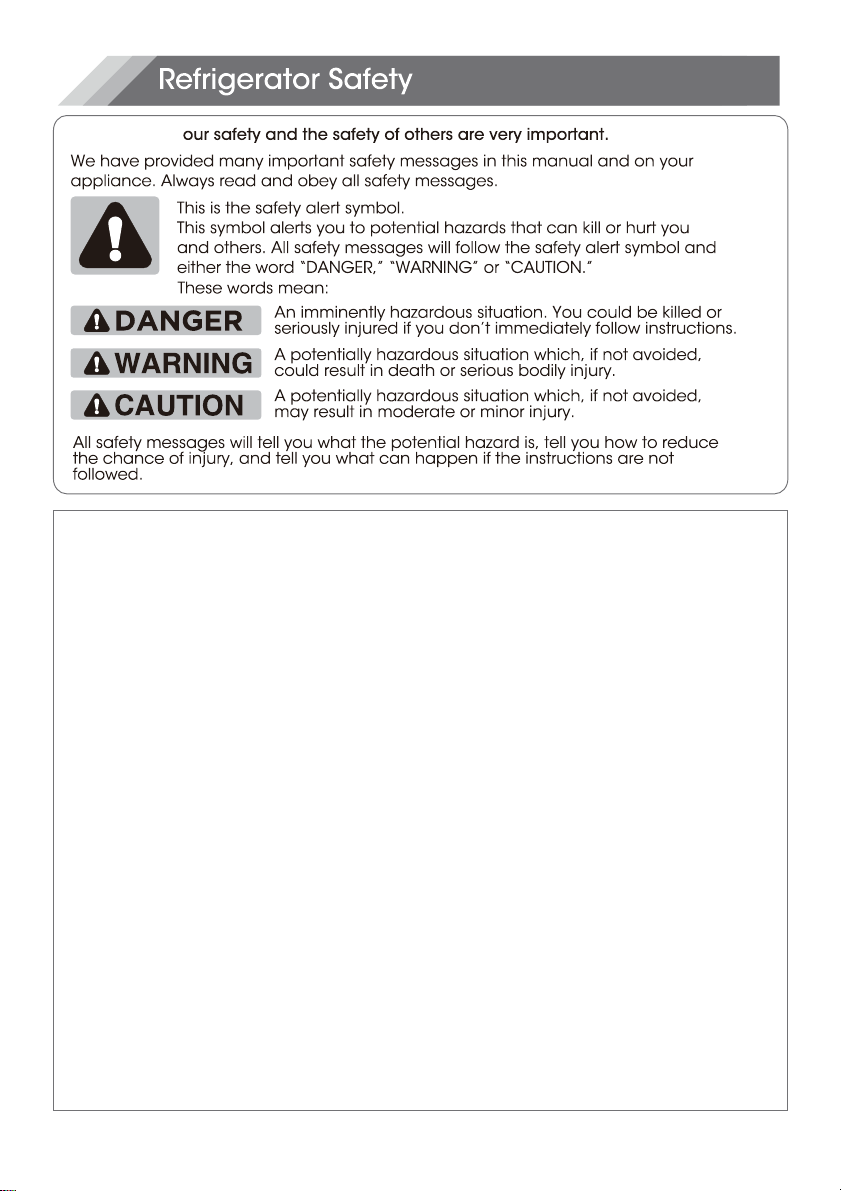
REFRIGERATOR SAFETY............................................................................................ 3
PARTS AND FEATURES............................................................................................. 5
INSTALLATION REQUIREMENTS................................................................................. 6
Location Requirements............................................................................................ 6
ElectricalRequirements........................................................................................... 6
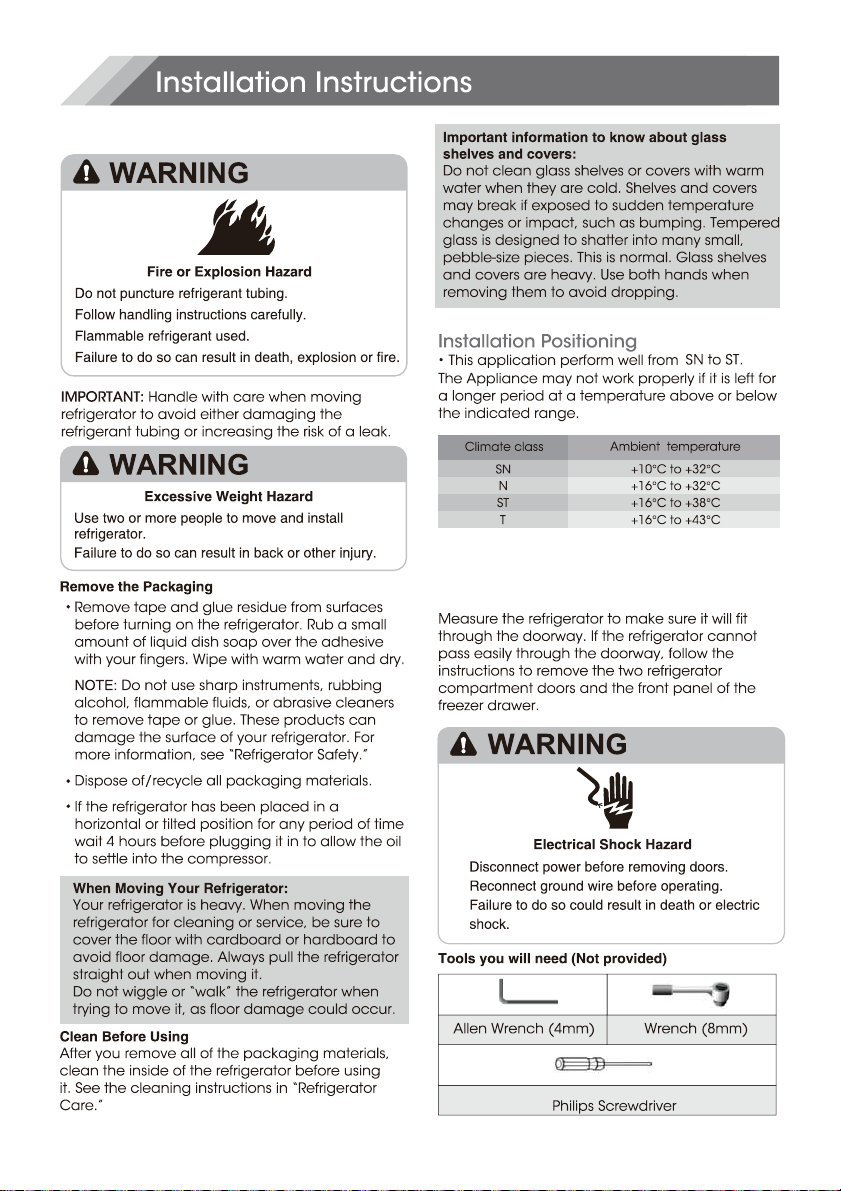
INSTALLATION INSTRUCTIONS.................................................................................. 7
Unpackthe Refrigerator...........................................................................................7
Installation Positioning............................................................................................. 7
Door Removal.......................................................................................................... 7
Move Near Water Supply.......................................................................................... 8
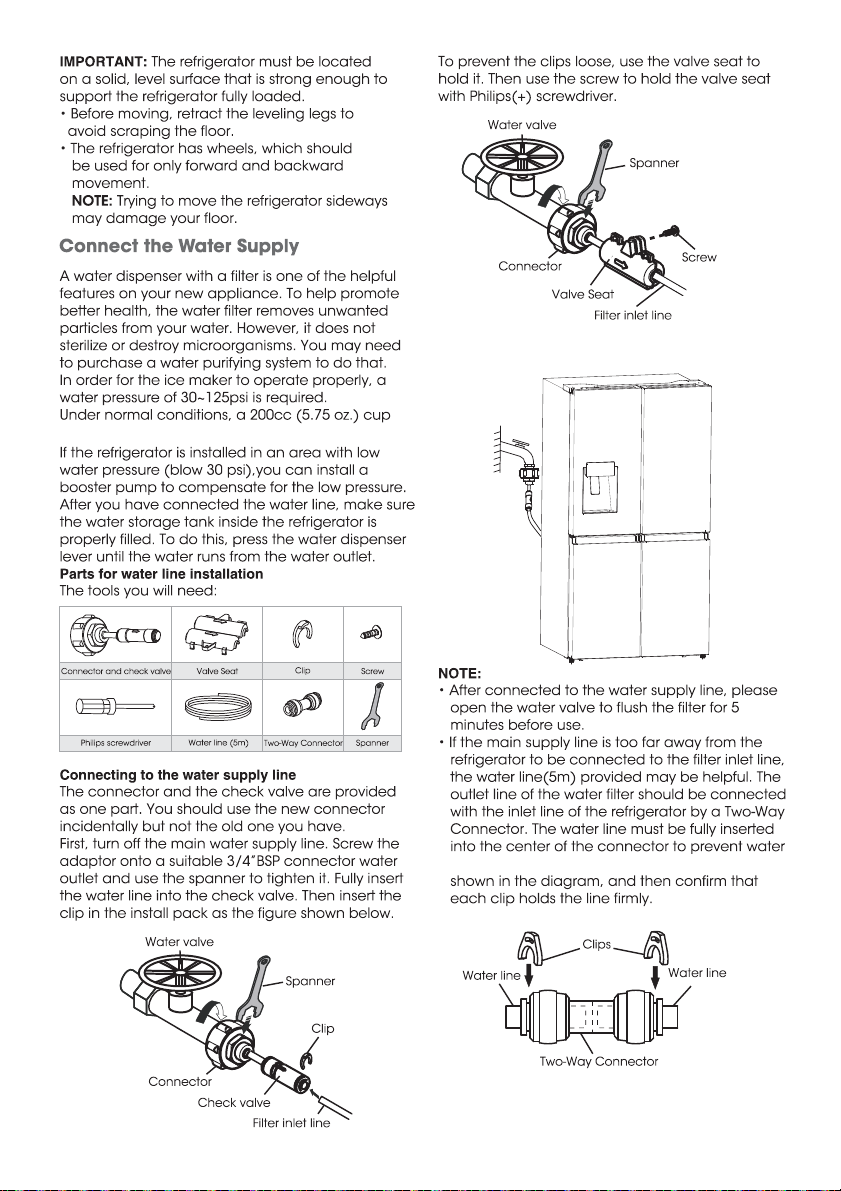
Connect the Water Supply....................................................................................... 9
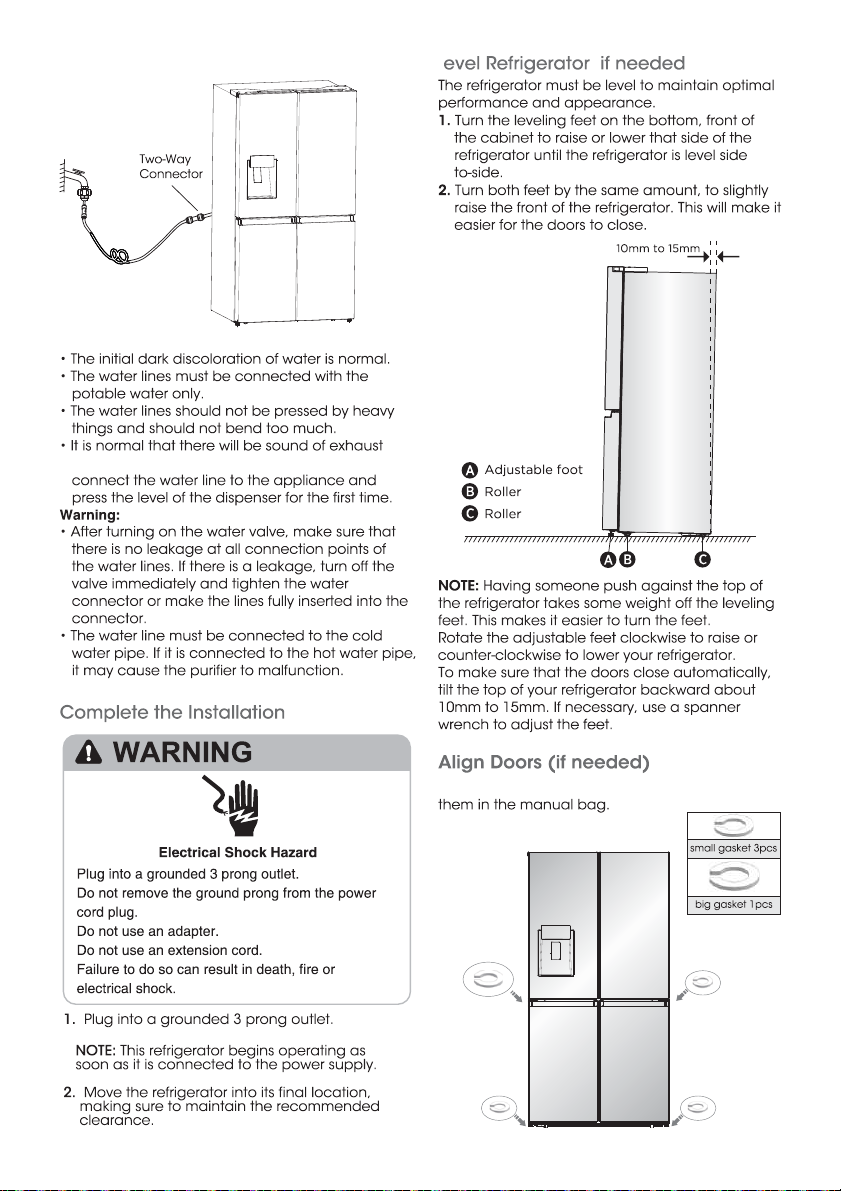
Complete the Installation........................................................................................ 10
Level Refrigerator..................................................................................................... 10
Align Doors.............................................................................................................. 10
REFRIGERATOR USE.................................................................................................11
Openingand Closing Doors.................................................................................... 11
Using the Controls....................................................................................................12
Features...................................................................................................................14
General Use Information..........................................................................................17
REFRIGERATOR CARE.............................................................................................. 19
Cleaning..................................................................................................................19
Lights....................................................................................................................... 19
Vacation and Moving Care..................................................................................... 20
Reinstalling/Using Refrigerator Again...................................................................... 20
TROUBLESHOOTING................................................................................................ 21
Y
3
Important SafetyInstrutions
WARNING:To reduce the risk of fire,electrical shock,
injury to persons,or damage when using the refrigerator,
follow basic precautions,including the following:
· Ensure everyone using this
appliance is familiar with
itsoperations and safety
features.
· This appliance is not
intended for use by persons
(including children) with
reduced physical,sensory
or mental capabilities,
unless supervised or
properly instructed.
·Children should be
supervised to ensure that
they do notplay with the
appliance.
·Plug into a grounded 3
prong outlet.
· Do not remove ground
prong.
· Do notuse an adapter.
· Do notuse an extension
cord.
·Do notdamage the
refrigerant circuit.
· When positioning the
appliance,ensure the
supply cord isnottrapped
or damaged.
· Do not locate multiple
portable socket-outlets or
portable power supplies at
the rear of the appliance.
· If the power supply cord is
4
damaged,it must be
replaced by the manufaturer,
its service agent or a
similarly qualified person
to avoid a hazard.
· Disconnectpower before
servicing.
· Do not use electrical
appliances inside the food
storage compartments of
the refrigerator,unless they
are of the type
recommended by the
manufacturer.
· Replace all parts and
panels before operating.
·CAUTION:Risk of fire
or flammable materials
· Flammable refrigerant
used.To be repaired only
by trained service
personnel.Do notpuncture
refrigerant tubing.
· Flammable refrigerant
used.Dispose of properly
in accordance with federal
or local regulations.
· Flammable refrigerantused.
Follow handling instructions
carefully.Risk of fire or
explosion due to puncture
of refrigerant tubing.
· It is hazardous for anyone
other than an Authorized
Service Person to service
this appliance.In Queensland
the Authorized Service
Persion MUST hold a Gas
Work Authorization for
hydrocarbon refrigerants
to carry out servicingor
repairs which involve
removal of covers.
· Use nonflammable cleaner.
· Do not use mechanical
devicesor other means to
accelerate the defrosting
process,other than those
recommended by the
manufacturer.
· Keep flammable materials
and vapors,such as gasoline,
away from refrigerator.
· CAUTION:Do not store
products which contain
flammable propellants(e.g.
spray cans) or explosive
substances in the refrigerator.
· Keep ventilation openings in
the appliance enclosure or in
the built-in structure clear of
obstruction.
· Connect to potable water
supplyonly.
· Use two or more people to
move and install refrigerator.
· To avoid the risk of children
becoming trapped and
suffocating,do not allow
them to play or hide inside
the refrigerator.
Read and Save These Instructions
5
Refrigerator LED Light
Ice-Maker
Refrigerator Door Bin
Rotary Separator
Cover
Storage Drawer
Freezer LED Light
Freezer Tray
Freezer Middle Drawer
Freezer Lower Drawer
Freezer Door Bin
Water Filter
Glass Shelf
Refrigerator side lights
Middle Storage Drawer
Convertible Compartment LED light
Convertible Compartment Tray
Convertible Compartment Middle Drawer
Convertible Compartment Lower Drawer
Leveling Leg
6
Risk of fire/ flammable materials
AC 220-240 volt, 50 Hz, AC only 15- or 20-amp fused,
grounded electrical supply is required. It is
recommended that a separate circuit serving only
your refrigerator is provided. Use an outlet that
cannot be turned off by a switch. Do not use an
extension cord.
NOTE: Befor performing any type of installation or
cleaning, disconnect the refrigerator from the
electrical source. When you have finished, reconnect
the refrigerator to the electrical source and reset
the temperature controls to the desired setting.
Unpack the Refrigerator
Door Removal
(only if needed)
7
,
8
9
can be filled in about 10 seconds.
leaking. Insert the 2 clips in the installion pack as
10
L
coming out from the appliance when you
The gaskets are used to align doors, you can find
11
your refrigerator to swing the doors open.
whole Control Panel including dispenser function.
12
turn
Leaving any door open for over 2 minutes will
activate door alarm.The “ ” icon will flicker, the
control panel will display “dr” , and you will hear a
buzzer sound.The buzzer will sound 3 times per
minute and will stop after 8 minutes. In case of
alarm, you can touch the Alarm button to cancel
door alarm, then the “ ” icon stops flickering and
keeps on, the buzzer sound will stop at the same
time.Also door alarm can be stopped by closing
all the doors.
To save energy, please avoid keeping doors open
for a long time when using refrigerator.
You can touch the “Freezer” button to activate the
mode to control the freezer temperature.When you
press the button continuously, the temperature will
be set in the following sequence.
Press and hold the button for 3 seconds, the icon
On the Super Cool Function, when you touch the
“Eco” button, Eco function will be activated, and
“Super Cool” mode will be off.
The control panel is shown in the diagram below.
Press and hold "Alarm" for 3 seconds to lock the
If Control panel is locked, the icon “ ” will be on,
and none of the buttons on the Control panel
work.To unlock the Control panel, please press
and hold “Alarm” for 3 seconds again.
You can touch “Ice Off” button to control the ice
maker. When the Child Lock is off, you can touch
the “Ice Off” icon to lock the ice maker, and the
icon “ ” will be illuminated. If you want to unlock
the ice maker, please touch the “Ice Off” icon
again, and the icon “ ” will be off.
be illuminated, the fridge temperature setting will
items in the Fridge, please touch and hold this
NOTE: When the “Ice Off” is on, it only locks the ice
maker not the dispenser.
Important
Please remove all ice from the icemaker bucket
before activating the “Ice off” function. This is
necessary to prevent formation of ice lumps
and flooding caused by melting ice
.
the food to complete pre-freezing.
To freeze fresh food,activate
13
In the unlocked state, press button to switch
between Celsius and Fahrenheit units. The default
state is Celsius display.
convertible
compartment
When the Child Lock is on,the dispenser will not
work.When the Child Lock is off,you can press the
“Cubed”or “Crushed” option to choose the type of
ice to be dispensed,and press the “Water” button
will activate the water mode.If you choose the
function of Cubed,the “ ” icon will be illuminated,
choose the fuction of Crushed the “ ” icon will be
illuminated,and the “ ” icon will be illuminated
when Water function is chosen.
You can touch this button to turn Energy Save
mode on and off. When you turn Energy Save on,
the Eco icon “ ” lights.
The temperature of the fridge is automatically
switched to 6°C and the freezer to -17°C.
If Energy Save is off, the icon“ ” will go off and the
temperature setting will revert back to the previous
setting.
On the Super Freezer Function, when you touch
the “Eco” button, Eco function will be activated,
and “Super Freezer” mode will be off.
Demo mode is for store display,and it prevents
the refrigerator from generating cool air. In this
Cooling off Mode, the refrigerator may seem
like it is working but it will not make cool air.
The indicators on the control panel will show
“OFF”.To cancel this mode, press and hold
“Alarm” and “°F/°C” keys at the same time for
3 seconds and the buzzer will make a long
sound.
The state of the water filter is calculated by the
main control board and transmitted to the
display panel.The first time the power is switched
on and the water enters the filter, the filter state
is calculated at 99%.When the water filter state
drops to 15%, the icon “ ” is lit. When the filter
state reaches 10%, the icon “ ” will flash,The
user needs to replace the filter and long press
the Energy Save Button for 3 seconds to reset
the water filter state.The filter state will then be
re-calculated to 99%.
“ ” will be illuminated, the freezer temperature
setting will display -24°C.
Super Freeze can quickly lower the temperature
and freeze your food faster than usual.This can
retain more of the vitamins and nutrition in fresh
food and keep your food longer.
Super Freeze automatically switches off after 52
hours, and the freezer temperature setting will
revert back to the previous setting.
When the Super Freeze function is on, you can
touch “Freezer” to switch off the Super Freeze
function.
The Super Freeze is used to perform pre-freezing
and fast freezing in sequence of Freezer
compartment.This function accelerates the
freezing of fresh food and,at the same time,
protects foodstuffs already stored from
undesirable warming.
the Super Freeze function at
least 24 hours before placing
14
3. Removing/Replacing freezer drawer
passes the rail support.
select what you want to dispense.
(1)
(2)
First, open the door at the maximum Angle.
125
15
The water dispenser is located in the fridge door.
To get water, push the water button.Then move
your glass down to the dispenser lever (A) in the
suggested position and press it.
as required.Then move your glass down to the
the water dispenser still installed even if the
dispenser is not in use.
filter part. And the dropped water in the cover should
When the user disconnects the refrigerator,
Please refer to this user’s manual for proper
16
the ice from the ice box needs to be removed.
Caution
maintenance and operation. If this device is not
maintained and operated as specified in the owner’s
manual, there is a risk of exposure to contaminants.
2. Pull the water filter down wards and turn it about 90°
counter-clockwise to take it out.When the filter is
disassembled, pay attention to keep the filter head
upward tilted to avoid water leaking from the front
be cleaned immediately.
3. Insert the new water filter into the hole, and at the
same time turn it about 90° clockwise until it stops.
4. Push the water filter up, and move the cover up to
horizontal and push it until it locks.
To drink the freshest and cleanest water from your
refrigerator, change the filter on time.
To change the water filter, follow these steps:
1. Shut off the water supply.Then pull the handle under
the cover outwards to open the cover.
sheelf shown in Page14 (1) and lift it up vertically
original location and push down until they stick.
the desired location and push down until they stop.
17
5 . Turn the water supply back on.
NOTE: After turning on the water supply, you should
check the leaks. If leaks occur, repeat the above
operation steps 1-5. If leaks persisit,please stop using
it and call your supporting dealers.
6 . Flush filter for 5 minutes before use.
2. Let the water flow through the dispenser until it
becomes clear (after approx.6 to 7 minutes).This
will clean the water supply system and remove
the air from the lines.
reduce the water pressure when used in
conjunction with a reverse osmosis system. Remove
the water filter.
To relocate the door baskets (A), slide them in above
To relocate the door baskets (B), slide them into the
To remove the glass shelves, tilt up the front of the
shown in Page14 (2).Then pull the shelf out.
18
Clean regularly the surfaces that can come in
Make sure the compliance is checked by regular
inspections.
19
When cleaning the shelf parts, remove the lower
shelf parts and place them horizontally. Either
front or back, to prevent the shelf support from
falling off.
If the shelf parts are placed at an angle,their
sides will touch the ground.When the force
applied for cleaning is not proper,the shelf
bracket will easily fall off.
20
Tape rubber or wooden blocks to the tops of
the two doors, and let them open a sufficient
distance to let air in.This stops odor and mold
from building up.
Seal the doors with tape and tape the power

This manual suits for next models

3

Other Hisense Refrigerator manuals

Hisense RD-60WC1STA/USE-002 User manual

Hisense

Hisense RD-60WC1STA/USE-002 User manual

Hisense RR33D6ABE Mounting instructions

Hisense

Hisense RR33D6ABE Mounting instructions

Hisense RC-76WS User manual

Hisense

Hisense RC-76WS User manual

Hisense FV105D4BW2 Mounting instructions

Hisense

Hisense FV105D4BW2 Mounting instructions

Hisense RS-77WC1SQD/UPE-001 User manual

Hisense

Hisense RS-77WC1SQD/UPE-001 User manual

Hisense HSC-192FLB User manual

Hisense

Hisense HSC-192FLB User manual

Hisense BCD-560 Mounting instructions

Hisense

Hisense BCD-560 Mounting instructions

Hisense RT600N4WC2 Mounting instructions

Hisense

Hisense RT600N4WC2 Mounting instructions

Hisense HR6AFF355SD Mounting instructions

Hisense

Hisense HR6AFF355SD Mounting instructions

Hisense RS669N4WC1 Mounting instructions

Hisense

Hisense RS669N4WC1 Mounting instructions

Hisense FV306N4BC1 Mounting instructions

Hisense

Hisense FV306N4BC1 Mounting instructions

Hisense RD-44WC series User manual

Hisense

Hisense RD-44WC series User manual

Hisense RS44G1 Mounting instructions

Hisense

Hisense RS44G1 Mounting instructions

Hisense RS-34WC4SIA Mounting instructions

Hisense

Hisense RS-34WC4SIA Mounting instructions

Hisense HRBF179B User manual

Hisense

Hisense HRBF179B User manual

Hisense HRF266N6CSE User manual

Hisense

Hisense HRF266N6CSE User manual

Hisense H415BSF-WD User manual

Hisense

Hisense H415BSF-WD User manual

Hisense RQ758N4SWFE Mounting instructions

Hisense

Hisense RQ758N4SWFE Mounting instructions

Hisense hr6af243 Mounting instructions

Hisense

Hisense hr6af243 Mounting instructions

Hisense RQ-52WC4S Mounting instructions

Hisense

Hisense RQ-52WC4S Mounting instructions

Hisense RF225C3CSEI Mounting instructions

Hisense

Hisense RF225C3CSEI Mounting instructions

Hisense RT267D4ABF Mounting instructions

Hisense

Hisense RT267D4ABF Mounting instructions

Hisense RIB312F4AW1 Mounting instructions

Hisense

Hisense RIB312F4AW1 Mounting instructions

Hisense RS694N4TIE User manual

Hisense

Hisense RS694N4TIE User manual

Popular Refrigerator manuals by other brands

Electrolux ERN23601 user manual

Electrolux

Electrolux ERN23601 user manual

Mitsubishi Electric MR-L650EH operating instructions

Mitsubishi Electric

Mitsubishi Electric MR-L650EH operating instructions

KitchenAid KSSC48QTS00 parts list

KitchenAid

KitchenAid KSSC48QTS00 parts list

Dometic CLASSIC RM 2620 Installation & operating instructions

Dometic

Dometic CLASSIC RM 2620 Installation & operating instructions

Thetford N304.3 Installation and owner's manual

Thetford

Thetford N304.3 Installation and owner's manual

Electrolux E23CS78HPS - Icon s Factory parts catalog

Electrolux

Electrolux E23CS78HPS - Icon s Factory parts catalog

IKEA FULLGORA manual

IKEA

IKEA FULLGORA manual

Vector VEC225 Owner's manual & warranty

Vector

Vector VEC225 Owner's manual & warranty

TCL RP505SXF0 operating instructions

TCL

TCL RP505SXF0 operating instructions

Whirlpool WRX38RWH6 Service manual

Whirlpool

Whirlpool WRX38RWH6 Service manual

U-Line HWD524 quick start guide

U-Line

U-Line HWD524 quick start guide

Hisense H220TTS H220TWH manual

Hisense H220TTS

Hisense H220TTS H220TWH manual

KitchenAid KBRC36MHS01 parts list

KitchenAid

KitchenAid KBRC36MHS01 parts list

Whirlpool WT4535D Use and care guide

Whirlpool

Whirlpool WT4535D Use and care guide

Kenmore 795.71312.311 Service manual

Kenmore

Kenmore 795.71312.311 Service manual

Zanussi Z 16/2 R Instructions for use and care

Zanussi

Zanussi Z 16/2 R Instructions for use and care

Whirlpool ET22PKXDN00 Use and care guide

Whirlpool

Whirlpool ET22PKXDN00 Use and care guide

Samsung RS66A8100B1/EF user manual

Samsung

Samsung RS66A8100B1/EF user manual

manuals.online logo
manuals.online logoBrands
  • About & Mission
  • Contact us
  • Privacy Policy
  • Terms and Conditions

Copyright 2025 Manuals.Online. All Rights Reserved.