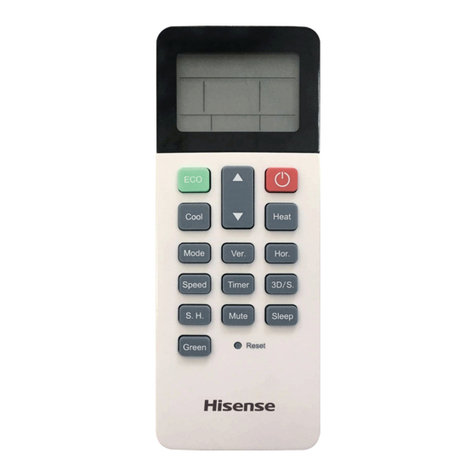
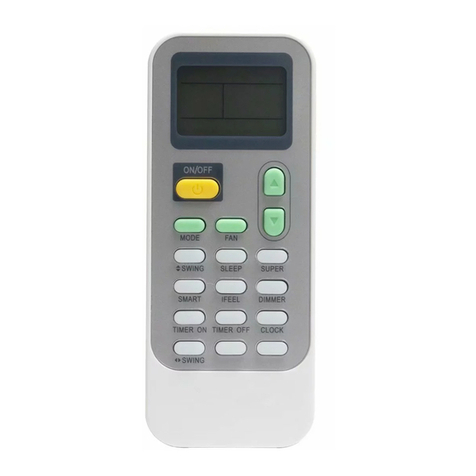
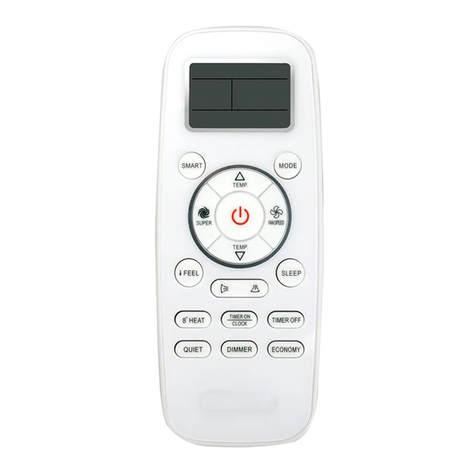
Hisense Y-H1 User manual

Instruction manual for Remote controller
Model: Y-H1
IMPORTANT:
READ AND UNDERSTAND THIS MANUAL BEFORE
USING THIS REMOTE CONTROLLER.
KEEP THIS MANUAL FOR FUTURE REFERENCE.
Remote Controller Packing List
No.
PART
QT'Y
1
Remote Controller
1
2
Batteries
2
3
Instruction Manual
1

The remote controller transmits signals to the system.
-H1
Remote controller
1
1
2
4
3
13
12
5
6
11
7
8
9
10
SUPER BUTTON
SWING BUTTON
FAN BUTTON
ROOM TEMPERATURE
SETTING BUTTONS
SLEEP BUTTON
DIMMER BUTTON
CLOCK BUTTON
ON/OFF BUTTON
SMART BUTTON
MODE BUTTON
TIMER ON/OFF BUTTON
Used to start or stop the fast cooling.
(Fast cooling operates at high fan speed with
18℃ set temp automatically)
Used to stop or start adjustment
louver swinging and set the desired up/down
airflow direction.
horizontal
SWING BUTTON
Used to stop or start adjustment
louver swinging and set the desired left/right
airflow direction.
vertical
Used to select fan speed in sequence
auto, high, medium or low.
Used to set or cancel Sleep Mode operation.
The screen brightness is decreased each time
that button is pressed and it goes blank after
pressing the button four times.
Used to set the current time.
Used to enter fuzzy logic operation directly,
regardless of the unit is on or off.
The appliance will be started when it is
energized or will be stopped when it is
in operation, if you press this button.
Press this button to select the operation mode.
Used to set or cancel the timer operation.
Remote controller
Indication symbols on LCD:
Used to adjust the room temperature and
the timer, also real time.
10 11
12
13
3
4
1
2
6
7
5
8
9
MODE
CLOCK TIMER ON TIMER OFF
DIMMER
SMART
SWING
SWING MUTE TEP SWITCH
SLEEP
I FEEL
SOFT
14
16
17
15
18*
14 MUTE BUTTON
Used to . set or cancel Mute mode operation
16
I FEEL BUTTON
Used to start or stop the I feel mode. Press this
button above 5 seconds , Turn off I FEEL mode.
(In I feel mode,the Air Conditioner operates basis
temperature sensor fitted in remote instead of machine,
Advice to use I FEEL mode and the remote put
where the indoor unit receive signal easily.)
15
TEP SWITCH BUTTON
Display set temperature flickeringly when the button is
pressed. Display indoor temperature when the button
is pressed again. And the flicker must be closed by
pressing the button or cutting off the electricity supply.
17
18*
SOFT BUTTON
Used to limit the maximum electric current,so that
you can use it with other electric instrument when
power is not enough.
(invalid for heating mode)
Note: Each mode and relevant function will be further specified in following pages.
①
②Heating and electric heating function are not available in single cooling only models.
③Pictures in the manual are for reference only, specifications are subject to the physical product.
Signal transmit.
Dry indicator
Fan only indicator
Heating indicator
Cooling indicator
High fan speed
Medium fan speed
Low fan speed Display set temperature
Display set timer
Display current time
Auto fan speed Smart indicator
Sleep indicator
Mute indicator
Super indicator
Soft indicator Cancel I feel indicator
(invalid for this model)
*Some remote controller models without this button.

How to Use
2
To operate the room air conditioner, aim
the remote controller to the signal receptor.
The remote controller will operate the air
conditioner at a distance of up to 8m when
pointing at signal receptor of indoor unit.
Remote controller
Remote controller
How to Insert the Batteries
Remove the battery cover according to the arrow direction.
Insert new batteries making sure that the (+) and (-) of
battery are matched correctly.
Reattach the cover by sliding it back into position.
Note:
Use 2 LR03 AAA(1.5volt) batteries. Do not use rechargeable batteries.
Replace batteries with new ones of the same type when the display
becomes dim.
If the batteries are not in use for a prolonged period of time, remove the batteries from the battery
compartment to avoid the trouble.
The battery can be used for about 6 months. If the Remote Control is not operated even when placing it
near the receiver, replace 2 batteries with the new ones.
Please do not use manganese battery because it may cause mal-function.
Avoid extremely hot or cold locations such as placing it near or over a radiator, or in direct sunlight.
Also avoid placing it fluorescent light.
Do not let children play with the Remote Control.
To avoid interference, the indoor unit and the Remote Control unit should be at least 1m away from a
TV set or a radio.
In case more than two air conditioners are installed in the same room, it may interrupt individual operation.
CAUTION

Each time MODE button is pressed, the operation mode
is changed in sequence:
Each time the "FAN" button is pressed, the fan speed is
changed in sequence:
18℃~32℃
Heating mode is NOT available for cooling only air conditioner.
HEATING
COOLING DRY FAN ONLY
Selecting mode
FAN mode
Auto High Medium Low
At "FAN ONLY" mode, only "High","Medium" and "Low" are available.
At "DRY" mode, Fan speed is set at "Low" automatically, "FAN" button
is ineffective in this case.
Setting temperature
Press once to temperature setting by 1lower ℃
Press once to temperature setting by 1raise ℃
Range of available set temperature
*HEATING, COOLING
SWING, SMART, TIMER ON, TIMER OFF, CLOCK, SLEEP and SUPER operation modes will be
specified in the following pages.
Changing modes during operation, sometimes the unit does not response at once. Wait 3 minutes.
Wait 3 minutes before restarting the appliance.
During heating operation, air flow is not discharged at the beginning. After 2-5 minutes, the air flow will be discharged
until temperature of indoor heat exchanger rises.
Operation instructions
3
Operation modes
Note: Heating mode is NOT available for cooling only models.
MODE
CLOCK TIMER ON TIMER OFF
DIMMER
SMART
MUTE TEP SWITCH
SLEEP
I FEEL
SOFT
1
3
2
SWING
SWING

Do not turn the vertical and horizontal adjustment louvers manually, otherwise malfunction may occur. If that happens,
turn off the unit first and cut off the power supply, then restore power supply again.
It is better not to let the vertical adjustment louver tilt downward for a long time at COOLING or DRY mode to prevent
condensed water from dripping.
Operation instructions
4
Airflow direction control
MODE
CLOCK TIMER ON TIMER OFF
DIMMER
SMART
MUTE TEP SWITCH
SLEEP
I FEEL
SOFT
4
4
SWING
SWING
4
Airflow direction control
Vertical and horizontal airflow is automatically adjusted to a certain
angle in accordance with the operation mode after turning on the unit.
The direction of airflow can be
also adjusted to your own
requirement by pressing the
" " and the " "
button of the remote controller.
Operation mode Direction of airflow
COOLING, DRY
*HEATING,
FAN ONLY
horizontal
downward
SWING SWING
Vertical airflow control (with the remote controller)
Using remote controller to set various angles of flow or specific angle
as you like.
Swinging airflow
Pressing " " button once, the adjustment
louver will swing up and down automatically.
horizontal
Desired direction airflow
Pressing the " " button again when the louvers swing
to a suitable angle as desired.
Horizontal airflow control (with the remote controller)
Using remote controller to set various angles of flow or specific angle
as you like.
Swinging airflow
Pressing " " button once, the adjustment
louver will swing left and right automatically.
vertical
Desired direction airflow
Pressing the " " button again when the louvers swing
to a suitable angle as desired.
SWING
SWING
SWING
SWING

SMART button is ineffective in SUPER mode.
Press the SMART button, the unit enters SMART mode(fuzzy logic operation) directly regardless of
the unit is on or off. In this mode, temperature and fan speed are automatically set based on the
actual room temperature.
Note: Temperature, airflow and direction are controlled automatically in SMART mode.
However, a decrease or rise of up to 7 ℃ can be set with the remote controller if you still
feel uncomfortable.
Operation instructions
5
SMART mode
Indoor temperature
Indoor temperature
Target temperature
Target temperature
Below T-3℃
Over T+3℃
T+3℃ or below
T
T
T
T
T
Over T+3℃
T-3℃T+3℃≦Tindoor≦
Operation mode
Operation mode
HEATING
FAN ONLY
FAN ONLY
COOLING
COOLING
Operation mode and temperature are determined by indoor temperature
Heat pump models
Cooling only models
CLOCK button
You can adjust the real time by pressing CLOCK button, then
using and buttons to get the correct time, press
CLOCK button again the real time is set.
MODE
CLOCK TIMER ON TIMER OFF
DIMMER
SMART
MUTE TEP SWITCH
SLEEP
I FEEL
SOFT
SWING
SWING
Your feeling
What you can do in SMART mode
button adjustment procedure
Uncomfortable
because of
unsuitable air
flow volume.
Uncomfortable
because of
unsuitable flow
direction.
Uncomfortable
because of
unsuitable flow
direction.
Indoor fan speed alternates among
High, Medium and Low each time this
button is pressed.
Press it once, the vertical adjustment
louver swings to change vertical airflow
direction. Press it again, swings stops.
Press it once, the horizontal adjustment
louver swings to change horizontal airflow
direction. Press it again, swings stops.
SWING
SWING

6
Timer mode
How to set TIMER ON
How to cancel TIMER ON
TIMER ON button can be used to set the timer programming as wished in order to
switch on the appliance at your desired time.
Press TIMER ON button, "12:00 ON" flashes on the LCD, then you
can press the or buttons to select your desired time for
appliance on.
Press the button once to increase or decrease the time setting by 1 minute.
Press the button 5 seconds to increase or decrease the time setting by
10 minute.
Press the button for a longer time to increase or decrease the time by 1 hour.
Press the TIMER ON button again, a "beep" can be heard and the indicator disappears,
the TIMER ON mode has been cancelled.
When your desired time displayed on LCD, press the TIMER ON button and confirm it.
A "beep" can be heard.
Note: If you don't set the time in 5 seconds after you press TIMER ON button, the remote controller
will exit the TIMER ON mode automatically.
Note: It is similar to set TIMER OFF, you can make the appliance switch off automatically at your
desired time.
The TIMER indicator on the indoor unit lights up.
"ON" stops flashing.
After the set timer displayed for 5 seconds the clock will be displayed on the LCD
of the remote controller instead of set timer.
It is convenient to set the timer on with TIMER ON buttons when you go out in the morning
To achieve a comfortable room temperature at the time you get home. You can also set
Timer off at night to enjoy a good sleep .with TIMER OFF
Operation instructions
Increase
or
or
or
Decrease
i)
ii)
iiI)
ON

7
Operation instructions
SLEEP mode
SUPER mode
SLEEP mode can be set in COOLING, HEATING or DRYING operation mode,
This function gives you a more comfortable environment for sleep.
The appliance will stop operation automatically after operating for 8 hours.
In SLEEP mode,
Note: Heating is NOT available for cooling only air conditioner.
SUPER mode is used to start or stop fast cooling.
SUPER mode can be set when the appliance is in operation or energized.
Fast cooling operates at high fan speed, changing the set temperature
automatically to 18 . ℃
In SUPER mode, you can set airflow direction or timer. If you want to
escape from SUPER mode, press any - SUPER , MODE, FAN, ON/OFF
or TEMPERATURE SETTING button.
Note:
The Appliance will continue working in SUPER mode with set temperature of 18℃, if
you don't escape from it by pressing any of the buttons mentioned above.
SLEEP and SMART buttons are not available in SUPER mode.
SUPER button is ineffective in HEATING mode.
SLEEP mode
SUPER mode
MODE
CLOCK TIMER ON TIMER OFF
DIMMER
SMART
MUTE TEP SWITCH
SLEEP
I FEEL
SOFT
MODE
CLOCK TIMER ON TIMER OFF
DIMMER
SMART
MUTE TEP SWITCH
SLEEP
I FEEL
SOFT
SWING
SWING
SWING
SWING
(invalid for heating mode)

Manuale di istruzioni per telecomando
: Y-H1Modello
IMPORTANT:
LEGGERE E COMPRENDERE QUESTO MANUALE
PRIMA DI USARE IL TELECOMANDO. CONSERVARE
IL MANUALE PER FUTURE CONSULTAZIONI.
LISTA DEI COMPONENTI
No.
PARTE
QUANTITÀ
1
Telecomando
1
2
Batteria
2
3
Manuale di Funzionamento
1

Il telecomando trasmette segnali al sistema.
-H1
Telecomando
1
1
2
4
3
13
12
5
6
11
7
8
9
10
TASTO SUPER
TASTO SWING
TASTO FAN
TASTI DI I
TEMPERATURA AMBIENTE
MPOSTAZIONE DELLE
TASTO SLEEP
TASTO DIMMER
TASTO CLOCK
TASTO ON/OFF
SMARTTASTO
TASTO MODE
TASTO TIMER ON/OFF
Utilizzato per attivare o disattivare il
riscaldamento / raffreddamento veloce.
(Il raffreddamento veloce si funziona all'alta
velocità della ventola con 18℃ la temperatura
impostata automaticamente)
Utilizzato per attivare o avviare lo rspostamento del
del deflettore di regolazione verticale e impostare
la direzione del flusso d'aria desiderata.
SWING TASTO
Utilizzato per arrestare o avviare la regolazione
verticale della feritoia oscillante e impostare il flusso
d'aria sinistra/destra nella direzione desiderata.
Pulsante utilizzato per regolare le velocità
della ventola tra Alta,Media, Bassa
Utilizzato per impostare o disattivare il
funzionamento in modalità sleep.
Premendo questo pulsante,tutte le visualizzazioni
relative all'unità interna saranno disattivate.
Utilizzato per impostare le ore correnti.
Utilizzato per attivare direttamente il funzionamento
a fuzzy logic, indipendentemente dal fatto che l'unità
sia accesa o spenta.
Premendo questo pulsante L’UNIT sarà avviata se
alimentata,oppure arrestata se in funzione.
À
è sarà
Premendo questo pulsante per selezionare le
modalità di funzionamento.
Utilizzato per impostare o cancellare il funzionamento
del timer.
Telecomando
Simboli delle indicazioni sul LCD:
Utilizzati per regolare la temperature ambiente,
il timer e l orologio. '
10 11
12
13
3
4
1
2
6
7
5
8
9
MODE
CLOCK TIMER ON TIMER OFF
DIMMER
SMART
SWING
SWING MUTE TEP SWITCH
SLEEP
I FEEL
SOFT
14
16
17
15
18*
14 Pulsante MUTE
Utilizzato per impostare o annullare il
funzionamento del temporizzatore
16
I FEEL TASTO
Utilizzato per avviare o arrestare il raffreddamento rapido.
Premere il suddetto pulsante 5 secondi, disattivare modalità
"SENSAZIONE". (In tale modalità, il condizionatore d'aria
funziona con un sensore di temperatura base montato in
remoto invece dell'apparecchio. Consigli per utilizzare la
modalità "SENSAZIONE" dove l'unità interna riceve il
segnale facilmente.)
15
TASTO TEP SWITCH
Mostra la temperatura impostata ad intermittenza quando
si preme il pulsante. Mostra la temperatura interna quando
il pulsante viene premuto di nuovo. La luce lampeggiante
deve essere chiusa premendo il tasto o tagliare
l'alimentazione elettrica.
17
18*
TASTO SOFT
Utilizzato per limitare la corrente massima elettrica,
in modo da poterla utilizzare con un altro strumento
elettrico quando l'alimentazione non è sufficiente.
(non valido per la modalità di
riscaldamento)
Nota: ①Ogni madalità a le sue funzioni relative saranno successivamente specificate nelle pagine seguenti.
②Le funzioni di riscaldamento e riscaldamento elettrico non sono disponibili per i modelli di solo raffreddamento.
③Le figure nel manuale sono soltanto semplici rappresentazioni dell'apparecchio, potrebbero non rappresentare fedelmente
l'aspetto del telecomando d'aria acquistato.
.
Trasmette il segnale
Indicatore di asciugamento
Indicatore solo per ventola
Indicatore del riscaldamento
Indicatore di reffraddamento
Velocità alta della ventola
Velocità media della ventola
Velocità bassa della ventola Display delle impostazioni delle
temperature
Display delle impostazioni del timer
Display delle ore correnti
Velocità della ventola Indicatore del Smart
Indicatore del riposo
Silenziatore
Indicatore del super
Indicatore Leggero Indicatore Annullamento
(non valido per questo modello)
(Invalido per modelli multisplit)
(Invalido per modelli canalizzabili )
(non valido per questo modello)
(Valido soltanto per modelli da pavimento e soffitto e console)
(non valido per questo modello)
( Valido soltanto per modelli con invertitore a CC )
*Alcuni modelli di controller remoti senza questo pulsante.

Come usarlo
2
Per usare il condizionatore ,mirare il ricevitore
del segnale del telecomando.
Il telecomando azioner
.
à il condizionatore ad
una distanza di massimo 8m quando si punta
il ricevitore del segnale dell'unià interna
Telecomando
Telecomando
Inserimento delle batterie
Rimuovere il coperchio delle batteria nella direzione
indicata della freccia.
Inserirci le nuove batterie assicurandosi che i poli (+)
e (-) siano orientati correttamente.
Rimontare il coperchio facendolo scorrere nuovamente
in posizione.
Nota
Usare 2 batterie LR03 AAA(1.5volt) . Non usare batterie ricaricabili.
Sostituire con batterie dello stesso tipo quando
I'illuminazione del display risulta attenuata.
Se le batterie non vengono usate per lungo tempo, toglierle dall’apposito vano per evitare problemi.
La batteria può essere usata per circa 6 mesi.
Se il telecomando non funziona neanche in prossimità del ricevitore, sostituire le 2 batterie con batterie nuove.
Non usare batterie al manganese che possono provocare anomalie di funzionamento.
Evitare luoghi eccessivamente caldi o freddi, come nel caso di un’installazione in prossimità di un termosifone
o sopra di esso, o nel caso di un’esposizione diretta al sole.
Evitare anche di mettere l’apparecchio vicino a una luce fluorescente.
Evitare che i bambini giochino con il telecomando.
Per evitare interferenze, la sezione interna e il telecomando devono essere ad almeno 1 metro da un impianto
TV o radio.
Se si installano più di due condizionatori nella stessa stanza, potrebbero verificarsi interruzioni di funzionamento.
ATTENZIONE

La modalità di unzionamento cambia in sequenza a
ogni pressione del tasto MODE:
La velocit sequenza a ogni
pressione del tasto “FAN”:
à del ventilatore cambia in
18℃~32℃
La è disponibile per I condizionatori con
funzione di solo raffredamento.
modalità riscaldamento non
RISCALDA
MENTO
RAFFRED
DAMENTO ASCIUGA
MENTO VENTOLA
SOLA
Modalità di selezione
Modalità VENTILATORE(FAN)
Automatica Alta Media Bassa
Nella modalità “SOLO VENTILATORE” (FAN ONLY ), sono disponibili solo
le “DEUMIDIFICAZIONE(DRY)”la velocità del ventilatore impostata
automaticamente a “Bassa”(Low),mentre il tasto“FAN” non attivo.
è
è
Impostazione della temperature
Premere una volta per diminuire di temperatura
impostata.
1°C la
Premere una volta per aumentare di 1℃ la
impostata
temperatura
Gamma di temperatura impostabile
*RISCALDAMENTO,
RAFFREDDAMENTO
Le modalità di funzionamento di SWING, SMART, TIMER ON, TIMER OFF, CLOCK, SLEEP e
SUPER vengono spiegate nel dettaglio nelle pagine successive.
Se si cambia la modalità durante il funzionamento, 3 minuti. l'unità potrebbe non rispondere immediatamente. Attende
Aspettare 3 minuti prima di riavviare l'unità.
Durante il funzionamento in riscaldamento, il flusso dell'aria non viene inizialmente fatto fuoriuscire. Il flusso
inizia a fuoriuscire dopo 2-5 minuti ,quando la temperatura dello scambiatore di calore interno sar
lo scambiatore calore interno comincia ad alzare la temperatura si inizia a dare il flusso d'aia.
modalità
à aumentata.
Istruzioni per l'uso
3
Modalità di selezione
*Nota: la modalità di riscaldamento NON
raffreddamento .
è disponibile per I modelli a solo
MODE
CLOCK TIMER ON TIMER OFF
DIMMER
SMART
MUTE TEP SWITCH
SLEEP
I FEEL
SOFT
1
3
2
SWING
SWING

Non agire mai il deflettore verticale a mano, altrimenti causa il malfunzionamento. Se per
caso questo succede, arrestare prima l'unità interna e disattivare l'alimentazione elettrica,
poi attivare di nuovo l'alimentazione elettrica.
È meglio che non lasciare il deflettore verticale inclinare verso basso a lungo tempo alle modalità di
Raffreddamento od Asciugamento per prevenire gocciolatura dell'acqua condensata dal drenaggio.
Istruzioni per l'uso
4
Controllo della direzione del flusso d'aria
MODE
CLOCK TIMER ON TIMER OFF
DIMMER
SMART
MUTE TEP SWITCH
SLEEP
I FEEL
SOFT
4
4
SWING
SWING
4
Controllo della direzione del flusso d'aria
Il flusso d verticale regolato automaticamente con una
determinata angolazione,a seconda della modalità di funzionamento
impostata all dell'unità.
'aria
'accensione
è
La direzione del flusso d'aria può
essere regolato anche il vostro
proprio requisito premendo il
pulsante " SWING"
del telecomando " SWING" e.
Modalità del
funzionamento Direzione del
flusso d'aria
RAFFREDDAMENTO,
ASCIUGAMENTO
*RISCALDAMENTO,
VENTOLA SOLA
Orizzontale
Verso basso
Controllo del flusso d'aria verticale( tramite telecomando)
Utilizzo di telecomando per impostare diversi angoli di flusso o un
angolo specifico come ti piace.
Flusso d'aria oscillante
Premuto una volta il pulsante “ SWING”, il deflettore verticale si agisce
automaticamente verso alto e verso basso.
Direzione desiderata del flusso d'aria
Premere di nuovo il pulsante “ SWING” quando il deflettore verticale viene
in un angolo corretto desiderato.
Controllo del flusso dell'aria orizzontale( manuale)
Utilizzo di telecomando per impostare diversi angoli di flusso o un
angolo specifico come ti piace.
Flusso d'aria oscillante
Premendo il pulsante “ ”, il deflettore di regolazione
verticale oscillerà a destra e a sinistra automaticamente.
SWING
Direzione desiderata del flusso d'aria
Premendo il pulsante “ ” quando i deflettori oscillano indirizza
il flusso d'aria nella direzione desiderata.
SWING

Il pulsante SMART non vien in efficienza alla modalità SUPER
Premendo il pulsante SMART, l'unità entra direttamente in modalità di SMART
(funzionamento di logica “fuzzy”),indipentemente dal fatto che l'unità sia accesa o spenta.
In questa modalità e la velocità del ventilatore vengono impostate automaticamente
sulla base della temperatura ambiente attuale.
Nota: La temperatura, il flusso d'aria e la direzione sono controllati automaticamente alla
modalità SMARTTuttavia, una diminuzione o un aumento fino a 7 ℃ possono essere
impostate con il telecomando se si avverte ancora disagio..
Istruzioni per l'uso
5
Modalità SMART
Temperatura interna
Temperatura interna
Temperature
desiderate
Temperature
desiderate
Sotto T-3 ℃
Superioe a T+3℃
T+3℃ o più bassa
T
T
T
T
T
Superioe a T+3℃
T-3 ℃ ≦ Interno ≦
T+3 ℃
Modalità di
funzionamento
Modalità di
funzionamento
RISCALDAMENTO
VENTOLA SOLA
VENTOLA SOLA
RAFFREDDAMENTO
RAFFREDDAMENTO
Modalità di funzionamento e temperatura sono determinate dalla temperatura della camera
Modelli con pompa calore
Modelli con solo raffreddamento
Tasto CLOCK
È possibile regolare corrente premendo il pulsante CLOCK, quindi i
pulsanti e per impostare l’ore correnti. Premendo di nuovo il
pulsante CLOCK l’ore corrente viene impostate.
MODE
CLOCK TIMER ON TIMER OFF
DIMMER
SMART
MUTE TEP SWITCH
SLEEP
I FEEL
SOFT
SWING
SWING
La tua feeling
Che cosa puoi fare con la modalità SMART
Pulsante Procedura della regolazione
Non confortevole
perchè il volume
del flusso d'aria
non corretto
Non confortevole
perchè la direzione
del flusso d'aria
non corretta
Non confortevole
perchè la direzione
del flusso d'aria
non corretta
Ogni volta premuto questo pulsante la
velocità della ventola si alterna tra
ALTA,MEDIA e BASSA.
Premuto la prima volta questo pulsante, il
deflettore agisce per cambiare la direzione del
flusso d'aria. Premuto la seconda volta questo
pulsante il deflettore si ferma.
Premerlo una volta, i deflettori orizzontali
oscillano per cambiare direzione del flusso
d'aria orizzontale. Premere di nuovo, le
oscillazioni terminano.
SWING
SWING

6
La modalità TIMER
Come impostare il TIMER ON
Come annullare l TIMER ON'impostazione
Il pulsante TEMPORIZZATORE ON può essere utilizzato per impostare la programmazione del
temporizzatore come desiderato per accendere l'apparecchio al vostro tempo desiderato.
Premere il tasto TEMPORIZZATORE ON, "12:00 ON" lampeggia sul display LCD, quindi è
possibile premere i pulsanti o per selezionare il tempo desiderato per l'apparecchio.
Tasto per aumentare o diminuire di 1 minuto il tempo impostato
Tasto per aumentare o diminuire di10 minuti il tempo impostato.
Tasto a lungo per aumentare o diminuire di 1 ora il tempo impostato.
Premere di nuovo il tasto , viene emesso un "bip" e l'indicatore spegne,
la modalità è ora disattivata.
TIMER ON
TIMER ON
Quando l displa, premere il tasto TIMER ON per dare la conferma.'ora desiderata viene visualizzata sul
Verr “bip” .à emesso un
Nota: Se non viene impostata l ora nei 10 seondi successivi all utilizzo del tasto TIMER ON , il telecomando
telecomando uscir TIMER ON.
''
à automaticamente dalla modalità
Nota: Analogamente
TIMER OFF .
è possibile far spegnere automaticamente il condiziontore all'ora desiderata
utilizzando la modalità
L'indicatore del TIMER sull'unità si illumina
L impostato viene visualizzata per 5 secondi, quindi sul display del telecomando viene
visualizzato l
'ora
'orologio invece del timer.
E' comodo impostare il temporizzatore col pulsante TIMER ON quando si esce al
mattino per ottenere una confortevole temperatura ambiente al momento di ritornare a casa.
È anche possibile impostare il temporizzatore su off di notte per godere di un buon sonno con
TIMER OFF.
Istruzioni per l'uso
Aumentare
o
o
o
Diminuire
i)
ii)
iiI)
ON
"ON" smette di si lampeggiare.

7
Istruzioni per l'uso
Modalità SLEEP
Modalità SUPER
La modalità SLEEP può essere impostata alle modalità di COOLING ,
HEATING o DRYING.
Questa funzione della modalità ti dà un ambiente più confortevole per
dormire.
Il condizionatore sarà arrestato automaticamente dopo aver
funzionato per 8 ore.
Alla modalità SLEEP
Nota: La modalità del RISCALDAMENT NON viene applicata sui condizionatori di
RAFFREDDAMENTO SOLO.
La modalità SUPER viene utilizzato per avviare o arrestare il
RAFFREDDAMENTO o RISCALDAMENTO veloce.
La modalità SUPER può essere selezionata quando il condizionatore
è messa in funzione o connesso elettricamente.
Se la modalità d raffreddamento veloce funziona alla velocità alta
dela ventola, la temperatura si imposta automaticamente ai 18℃
Alla modalità SUPER, premendo uno dei pulsanti SUPER , MODE,
FAN, ON/OFF,SLEEP o TEMPERATURE SETTING, il display si
richiama alla modalità orginale.
Nota:
L'apparecchio continuerà a funzionare in modalità SUPER con temperatura
impostata di 18 ℃, se non viene disabilitata premendo uno qualsiasi dei tasti
di cui sopra
SLEEP e tasti SMART non sono disponibili in modalità SUPER.
Il pulsante SMART non funziona alla modalità SUPER
Modalità SLEEP
Modalità SUPER
MODE
CLOCK TIMER ON TIMER OFF
DIMMER
SMART
MUTE TEP SWITCH
SLEEP
I FEEL
SOFT
MODE
CLOCK TIMER ON TIMER OFF
DIMMER
SMART
MUTE TEP SWITCH
SLEEP
I FEEL
SOFT
SWING
SWING
SWING
SWING
(non valida per la modalità di riscaldamento)

Manual de instrucciones para el control remoto
Modelo: Y-H1
IMPORTANTE:
ANTES DE UTILIZAR EL CONTROL REMOTO
LEA Y ASEGÚRESE DE ENTENDER ESTE MANUAL.
GUARDE ESTE MANUAL PARA CONSULTAS FUTURAS.
Contenido del paquete del control remoto
Núm.
PARTE
CANTIDAD
1
Control remoto
1
2
Pilas
2
3
Manual de instrucciones
1

El control remoto le transmite señales al sistema.
-H1
Control remoto
1
1
2
4
3
13
12
5
6
11
7
8
9
10
BOTÓN SÚPER
BOTÓN DE OSCILACIÓN
BOTÓN DE VENTILADOR
BOTONES DE AJUSTE DE
TEMPERATURA
BOTÓN DE REPOSO
BOTÓN DE REGULACIÓN DE INTENSIDAD
BOTÓN DE RELOJ
BOTÓN DE ENCENDIDO/APAGADO
BOTÓN SMART
BOTÓN DE MODO
BOTÓN DEL TEMPORIZADOR DE
ENCENDIDO/APAGADO
Se utiliza para iniciar o detener el enfriamiento rápido.
El enfriamiento rápido funciona a una velocidad de
ventilador alta, cambiando la temperatura establecida
automáticamente a 18℃.
Se usa para detener o iniciar la oscilación de la
rejilla de ajuste horizontal y para configurar la
dirección del flujo de aire hacia la arriba/abajo.
BOTÓN DE OSCILACIÓN
Se usa para detener o iniciar la oscilación de la rejilla de
ajuste vertical y para configurar la dirección deseada del
flujo de aire hacia la izquierda/derecha.
Se utiliza para seleccionar la velocidad del
ventilador en modo automático, alto, medio o bajo.
Se utiliza para establecer o cancelar el modo de reposo.
El brillo de la pantalla se reduce cada vez que se
pulsa el botón y se queda en blanco después de
pulsar el botón cuatro veces.
Se utiliza para ajustar la hora actual.
Se utiliza para activar la función de lógica difusa
directamente, independientemente de que la
unidad esté encendida o apagada.
Al pulsar este botón el aparato se encenderá, si
está conectado, o se detendrá si ya estaba en
funcionamiento.
Presione este botón para seleccionar el modo de
funcionamiento.
Se utiliza para establecer o cancelar la operación
del temporizador.
Control remoto
Símbolos de indicación en el LCD:
Se utilizan para ajustar la temperatura ambiente
y el temporizador, también el tiempo real.
10 11
12
13
3
4
1
2
6
7
5
8
9
MODE
CLOCK TIMER ON TIMER OFF
DIMMER
SMART
SWING
SWING MUTE TEP SWITCH
SLEEP
I FEEL
SOFT
14
16
17
15
18*
14 BOTÓN DE SILENCIAMIENTO
Se utiliza para establecer o cancelar el funcionamiento del
modo silencioso.
16
BOTÓN “I FEEL”
Se utiliza para iniciar o detener el modo I feel. Presione este
botón por más de 5 segundos para apagar el modo I FEEL
(en este modo el aire acondicionado funciona con un sensor
de temperatura instalado en el control remoto en lugar de en
la máquina; se aconseja usar el modo I FEEL con el control
remoto en un lugar en el que la unidad interior reciba la señal
fácilmente).
15
BOTÓN DE CAMBIO DE TEMPERATURA
Muestra el ajuste de la temperatura titilando cuando se pulsa
el botón. Muestra la temperatura interior cuando se pulsa el
botón nuevamente. El parpadeo se debe detener pulsando
el botón o cortando el suministro de electricidad.
17
18*
BOTÓN SOFT ( )Sólo válido para modelo DC
Se utiliza para limitar la corriente eléctrica máxima, de
modo que usted lo pueda utilizar con otro instrumento
eléctrico cuando la energía no es suficiente.
(no válido para el modo de calor)
(
)
Sólo válido para los del tipo de
techo & piso y los de pie
Nota: ①Cada modo y su función correspondiente se especificarán con más detalle en las páginas siguientes.
②
③
Las funciones de calor y de calefacción eléctrica no están disponibles para modelos de solo frío.
Esta imagen está basada en la vista externa de un modelo estándar.
En consecuencia, la forma puede ser diferente a la del aire acondicionado que usted ha seleccionado.
Transmisión de señal
Indicador de seco
Indicador de sólo ventilador
Indicador de calentamiento
Indicador de enfriamiento
Velocidad alta de ventilador
Velocidad mediana del ventilador
Velocidad baja del ventilador Mostrar la temperatura ajustada
Mostrar el temporizador ajustado
Mostrar el tiempo actual
Velocidad automática de ventilador Indicador inteligente
Indicador de sueño
indicador de mute
Indicador de súper
Indicador de suave Indicador de cancelación de I feel
(no disponible para este modelo)
*Algunos modelos de control remoto no tienen este botón.
(No válido para el tipo Multi-Split)
(No válido para el
tipo por conducto)

¿Cómo utilizarlo?
2
Para manejar el aire acondicionado de la habitación,
apunte el control remoto hacia el receptor de señal.
El control remoto hará funcionar el aire acondicionado
desde una distancia de hasta 8m cuando se apunte al
receptor de señal de la unidad interior.
Control remoto
Control remoto
Cómo insertar las pilas
Quite la tapa de las pilas siguiendo la dirección de la flecha.
Inserte las pilas nuevas asegurándose de que el (+) y el (-)
de las baterías coincidan correctamente.
Volver a colocar la tapa deslizándola nuevamente a su posición.
Nota:
Utilizar 2 pilas LR03 AAA (1,5 voltios). No utilizar pilas recargables.
Remplace las pilas por otras nuevas del mismo tipo cuando la pantalla
se oscurezca.
●Si las baterías no están en uso para un período prolongado, remueva las baterías desde el compartamiento
de baterías para evitar problemas.
●La batería puede ser usada por 8 meses aproximadamente. Si el Control de Remoto no se opera aun cuando
lo presione cerca del receptor,
reemplace 2 baterías con nuevas y asegúrese de presionar el botón de ACL.
●No use baterías de manganeso porque eso puede causar una mala función.
●Evite un lugar extremadamente caliente o frio tal como colocándolo cerca o sobre un radiador, o en alcance
de sol directo.También evite colocarlo cerca de una luz fluorescente.
●No deje a niños jugar con el Control Remoto.
●Para evitar la interferencia, la unidad interior y el Contro Remoto deben ser por lo meno 1 metro fuera de un
televisor o un radio.
●En caso de que más de 2 airea condicionados sean instalados en la misma habitación, eso puede interrumpir
la operación individual.
PRECAUTION

Cada vez que se presiona el botón MODO, el modo de
funcionamiento cambia en la secuencia:
Cada vez que se presiona el botón "VENTILADOR", la
velocidad del ventilador cambia en la secuencia:
18℃~32℃
El modo calor NO está disponible para los aires acondicionados de sólo frío.
CALOR
FRÍO SECO SOLO VENTILADOR
Selección de modo
Modo de VENTILADOR
Automática Alta Media Baja
En el modo de "SOLO VENTILADOR", solamente están disponibles las velocidades
"Alta", "Media" y "Baja". En el modo "SECO", la velocidad del ventilador está ajustada
automáticamente en "Baja". El botón "VENTILADOR no es válido en este caso.
Ajustes de temperatura
Presione una vez para bajar el ajuste de temperatura 1℃
Presione una vez para subir el ajuste de temperatura 1℃
Rangos disponibles de ajustes de temperatura
*CALOR, FRÍO
Los modos de funcionamiento de OSCILACION, SMART, TEMPORIZADOR DE ENCENDIDO, TEMPORIZADOR
DE APAGADO, RELOJ, REPOSO y SÚPER serán especificados en las siguientes páginas.
Al cambiar modos durante el funcionamiento, a veces la unidad no responde inmediatamente. Esperar 3 minutos.
Espere 3 minutos antes de reiniciar el aparato.
Durante el funcionamiento de calor, el flujo de aire no es descargado inicialmente. Luego de 2-5 minutos, el flujo de aire será descargado
hasta que la temperatura del intercambiador de calor interior se eleve.
Instrucciones de funcionamiento
3
Modos de funcionamiento
Nota: El modo de calor NO está disponible para los modelos de sólo frío.
MODE
CLOCK TIMER ON TIMER OFF
DIMMER
SMART
MUTE TEP SWITCH
SLEEP
I FEEL
SOFT
1
3
2
SWING
SWING
Table of contents
Languages:
Other Hisense Remote Control manuals

Hisense
Hisense ERF2A60 User manual

Hisense
Hisense YJE-C01T Technical manual

Hisense
Hisense W9HBRCB0005 User manual

Hisense
Hisense BR0013 User manual

Hisense
Hisense 32K26 Operating manual

Hisense
Hisense HYE-W01 User manual

Hisense
Hisense GoClick HT005E User manual

Hisense
Hisense J1-91 User manual

Hisense
Hisense YXE-C02U Technical manual

Hisense
Hisense BRCB0006 User manual