Hitachi AXM8410C User manual

Instruction Manual
AXM8410C
MICRO HI-FI SYSTEM with
docking for iPad/ iPhone/iPod
GB
iPhone not included
Downloaded from www.vandenborre.be

1
Contents
SOME DOS AND DON’TS ON THE SAFE USE OF EQUIPMENT............................................................ 3
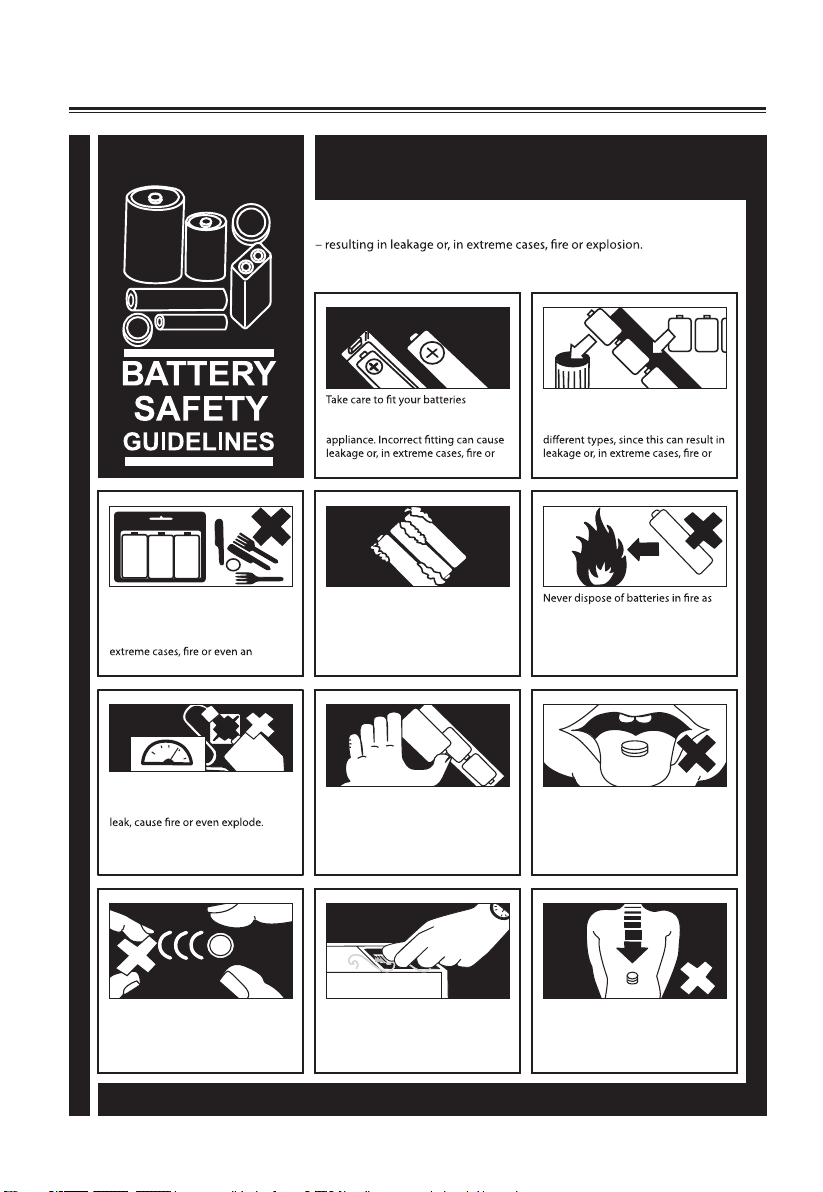
Battery Safety Guidelines ................................................................................................................... 4
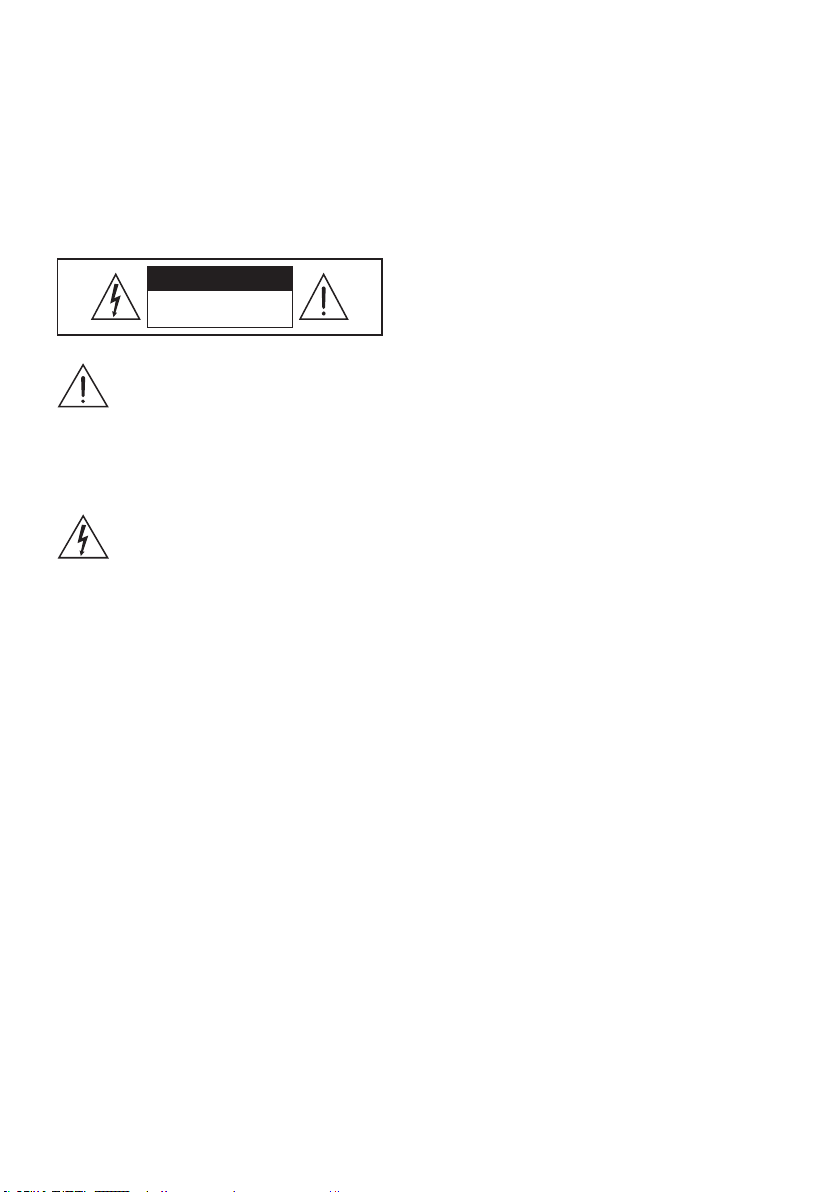
Safety Warnings................................................................................................................................... 5
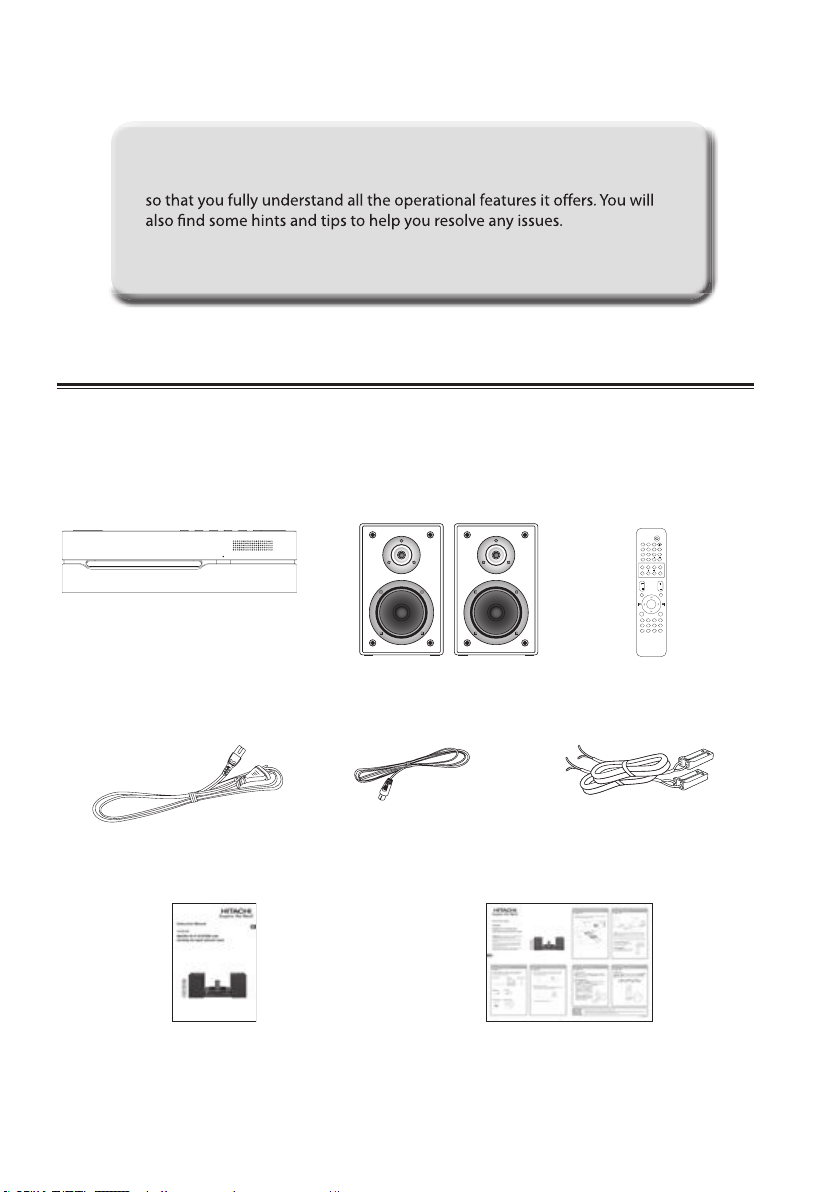
Unpacking............................................................................................................................................ 7
Product Overview................................................................................................................................ 8
Main Unit ........................................................................................................................................................................................................8
Back View........................................................................................................................................................................................................8
Remote Control ................................................................................................................................... 8
Operating Your Remote Control....................................................................................................... 10
Handling the Remote Control.............................................................................................................................................................. 10
Remote Control Operation Range.................................................................................................... 10
Connections ....................................................................................................................................... 11
Speaker Connections .............................................................................................................................................................................. 11
Using the AUX Connection ...................................................................................................................................................................11
Connecting the Aerial............................................................................................................................................................................. 11
Connecting to the Mains Supply ........................................................................................................................................................11
Playing MP3’s from a USB Device........................................................................................................................................................ 11
General Operation............................................................................................................................. 12
Powering On/O.......................................................................................................................................................................................12
Selecting Modes ....................................................................................................................................................................................... 12
Adjusting the Volume ............................................................................................................................................................................. 12
Adjusting the Sound Eect................................................................................................................................................................... 12
Adjusting the Bass.................................................................................................................................................................................... 12
Adjusting the Brightness ....................................................................................................................................................................... 12
Time Display............................................................................................................................................................................................... 12
Auto Setting the Clock............................................................................................................................................................................ 12
Manual Setting the Clock ......................................................................................................................................................................12
Setting the Daily Timer........................................................................................................................................................................... 12
Setting the Sleep Timer.......................................................................................................................................................................... 13
Radio Operation ................................................................................................................................ 13
Scanning for Radio Stations.................................................................................................................................................................. 13
Searching for a Station Automatically...............................................................................................................................................13
Searching for a Station Manually........................................................................................................................................................13
Programming Radio Stations Automatically .................................................................................................................................. 14
Programming Radio Stations Manually............................................................................................................................................14
Recalling a Preset Station ...................................................................................................................................................................... 14
RDS (Radio Data System) Reception ................................................................................................ 14
Compatible Disc Types ...................................................................................................................... 15
CD/MP3/WMA Operation.................................................................................................................. 15
Playback....................................................................................................................................................................................................... 15
To Pause Playback..................................................................................................................................................................................... 15
To Stop Playback.......................................................................................................................................................................................15
Skipping to Another Track.....................................................................................................................................................................15
Random Playback..................................................................................................................................................................................... 15
Repeat Playback........................................................................................................................................................................................15
Programme Setting..................................................................................................................................................................................15
Programme Cancel...................................................................................................................................................................................16
Intro Playback ............................................................................................................................................................................................ 16
iPod/iPhone/iPad Operation ............................................................................................................ 16
iPod/iPhone/iPad Operation ................................................................................................................................................................ 16
Inserting the iPhone/iPod and Selecting iPhone/iPod Mode .................................................................................................. 16
iPod/iPhone/iPad Playback...................................................................................................................................................................16
Downloaded from www.vandenborre.be

2
Control iPhone/iPod menu ...................................................................................................................................................................17
Charging your iPod/iPhone/iPad........................................................................................................................................................ 17
USB Operation ................................................................................................................................... 17
AUX Operation................................................................................................................................... 17
Maintenance ...................................................................................................................................... 18
Cleaning the Unit...................................................................................................................................................................................... 18
Handling Discs...........................................................................................................................................................................................18
Cleaning Discs............................................................................................................................................................................................18
Storing Discs............................................................................................................................................................................................... 18
Hints and Tips .................................................................................................................................... 19
Specications..................................................................................................................................... 20
Downloaded from www.vandenborre.be

3
SOME DOS AND DON’TS ON THE SAFE USE OF EQUIPMENT
This equipment has been designed and manufactured to meet international safety standards but, like
any electrical equipment, care must be taken if you are to obtain the best results and safety is to be
assured.
..............................................................
DO read the operating instructions before you attempt to use the equipment.
DO ensure that all electrical connections (including the mains plug, extension leads and
inter-connections between the pieces of equipment) are properly made and in
accordance with the manufacturer’s instructions. Switch o and withdraw the mains
plug before making or changing connections.
DO consult your dealer if you are ever in doubt about the installation, operation or safety of
your equipment.
DO be careful with glass panels or doors on the equipment.
DO route the mains lead so that it is not likely to be walked on, crushed, chafed, or subjected
to excessive wear and tear or heat.
..............................................................
DON’T remove any xed cover as this may expose dangerous voltages.
DON’T obstruct the ventilation openings of the equipment with items such as newspapers,
tablecloths, curtains, etc. Overheating will cause damage and shorten the life of the
equipment.
DON’T allow electrical equipment to be exposed to dripping or splashing, or objects lled with
liquids, such as vases.
DON’T place hot objects or naked ame sources such as lighted candles or nightlights on, or
close, to equipment. High temperatures can melt plastic and lead to res.
DON’T use makeshift stands and NEVER x legs with wooden screws. To ensure complete safety
always t the manufacturer’s approved stand or legs with the xings provided and
according to the instructions.
DON’T use equipment such as personal stereos or radios that will distract you from the
requirements of trac safety.
DON’T listen to headphones at high volume, as such use can permanently damage your
hearing.
DON’T leave equipment switched on when it is unattended unless it is specically stated that
is designed for unattended operation or has a stand-by mode. Switch o using the ON/
OFF switch on the equipment or at the mains socket, and make sure that your family
knows how to do this. Special arrangements may need to be made for inrm or
handicapped people.
DON’T continue to operate the equipment if you are in any doubt about it working normally, or
if it is damaged in any way – switch o, remove the mains plug from the mains socket
and consult your dealer.
..............................................................
ABOVE ALL
– NEVER let anyone especially children push anything into holes, slots or any other
opening in the equipment – this could result in a fatal electric shock.
– NEVER guess or take chances with electrical equipment of any kind. It is better to be safe
than sorry!
Downloaded from www.vandenborre.be

4
5
Battery Safety Guidelines
Used correctly, domestic batteries are a safe and dependable source
of portable power. Problems can occur if they are misused or abused
Here are some simple guidelines to safe battery use designed to
eliminate any such problems.
correctly, observing the plus and
minus marks on the battery and
even an explosion.
Replace the whole set of batteries at
one time, taking care not to mix old
and new batteries or batteries of
even an explosion.
Remove dead batteries from
equipment and all batteries from
equipment you know you are not
going to use for a long time.
Otherwise the batteries may leak and
cause damage.
Store unused batteries in their
packaging and away from metal
objects which may cause a
short-circuit resulting in leakage or, in
explosion.
this can cause them to explode.
Please recycle dead batteries; do not
put with the normal household
waste.
Supervise children if they are
replacing batteries themselves in
order to ensure these guidelines are
followed.
Never attempt to recharge ordinary
batteries, either in a charger or by
applying heat to them. They may
There are special rechargeable
batteries which are clearly marked as
such.
Remember that small button cell
batteries such as used in some
hearing aids, toys, games and other
appliances, are easily swallowed by
young children and this can be
dangerous.
Make sure battery compartments are
secure.
Keep loose button cells away from
young children.
Seek medical advice if you believe a
cell has been swallowed.
Battery Safety Guidelines
Downloaded from www.vandenborre.be

5
Ventilation
• Topreventtheriskofelectricshockor
re hazard due to overheating, ensure that
curtains and other materials do not obstruct
the ventilation vents.
• Donotinstallorplacethisunitinabookcase,
built-in cabinet or in another conned space.
Ensure the unit is well ventilated.
Safety
• Alwaysdisconnecttheunitfromthemains
supply before connecting/ disconnecting
other devices or moving the unit.
• Unplugtheunitfromthemainssocketbefore
a lightning storm.
• Intheinterestsofsafetyandtoavoid
unnecessary energy consumption, never
leave the unit switched on while unattended
for long periods of time, e.g. overnight, while
on holiday or while out of the house. Switch
it o and disconnect the mains plug from the
mains socket.
Mains Cable
• Makesuretheunitortheunitstandisnot
resting on top of the mains cable, as the
weight of the unit may damage the cable and
create a safety hazard.
interference
• Donotplacetheunitonornearappliances
which may cause electromagnetic
interference. If you do, it may adversely aect
the operating performance of the unit, and
cause a distorted picture or sound.
Batteries
• Batteriesusedintheremotecontrolforthis
unit are easily swallowed by young children
and this is dangerous.
• Keeploosebatteriesawayfromyoung
children and make sure that the battery
holder tray is secure in the remote control.
Seek medical advice if you believe a cell has
been swallowed.
• Pleasedisposeofbatteriescorrectlyby
following the guidance in this manual.
• Donotexposethebatterytodirectsunlight
or sources of excessive heat.
Safety Warnings
• Readalltheinstructionscarefullybefore
using the unit and keep them for future
reference.
• Retainthemanual.Ifyoupasstheunitontoa
third party make sure to include this manual.
• Checkthatthevoltagemarkedontherating
label matches your mains voltage.
Damage
• Pleaseinspecttheunitfordamageafter
unpacking.
• Donotcontinuetooperatetheunitifyouare
in any doubt about it working normally, or if
it is damaged in any way - switch o, withdraw
the mains plug and consult your dealer.
Location of Unit
• Theunitmustbeplacedonaatstable
surface and should not be subjected to
vibrations.
• Donotplacetheunitonslopedorunstable
surfaces as the unit may fall o or tip over.
• Themainssocketmustbelocatednearthe
unit and should be easily accessible.
• Thisunitisdesignedforindooruseonly.
Temperature
• Avoidextremedegreesoftemperature,either
hot or cold. Place the unit well away from
heat sources such as radiators or gas/electric
res.
• Avoidexposuretodirectsunlightandother
sources of heat.
Naked Flames
• Neverplaceanytypeofcandleornaked
ame on the top of or near the unit.
Moisture
• Toreducetheriskofre,electricshockor
product damage, do not expose this unit to
rain, moisture, dripping or splashing. No
objects lled with liquids, such as vases,
should be placed on the unit.
• Ifyouspillanyliquidintotheunit,itcan
cause serious damage. Switch it o at the
mains immediately. Withdraw the mains plug
and consult your dealer.
Downloaded from www.vandenborre.be

6
Supervision
• Childrenshouldbesupervisedtoensurethat
they do not play with the unit and the remote
control.
• Neverletanyoneespeciallychildrenpush
anything into the holes, slots or any other
openings in the case - this could result in a
fatal electric shock.
The lightning ash with arrowhead
symbol, within an equilateral triangle,
is intended to alert the user to the
presence of uninsulated“dangerous
voltage”within the unit’s enclosure
that may be of sucient magnitude to
constitute a risk of electric shock.
The exclamation point within an
equilateral triangle is intended to alert
the user to the presence of important
operating and maintenance
(servicing) instructions in the manual
accompanying the unit.
Service
• Toreducetheriskofelectricshock,do
not remove screws. The unit does not contain
any user-serviceable parts. Please leave all
maintenance work to qualied personnel.
• Donotopenanyxedcoversasthismay
expose dangerous voltages.
Maintenance
• Ensuretheunitisfullyunpluggedfromthe
power supply before cleaning.
• Donotuseanytypeofabrasivepador
abrasive cleaning solutions as these may
damage the unit’s surface.
• Donotuseliquidstocleantheunit.
CAUTION
RISK OF ELECTRIC SHOCK
DO NOT OPEN
Downloaded from www.vandenborre.be

7
Thank you for purchasing your new HITACHI Micro HI-FI System.
We recommend that you spend some time reading this instruction manual
Read all the safety instructions carefully before use and keep this
instruction manual for future reference.
Unpacking
Remove all packaging from the unit. Retain the packaging. If you dispose of it please do so according
to local regulations.
The following items are included:
MENU REPEAT
DISPLAY SHUFFLE
VOL
DISC USB DOCK TUNER
AUX CLOCK TIMER SLEEP
INTRO RDS DIM – DIM +
POP JAZZ ROCK
CLASSIC
FLAT – + MUTE
BASS
TU– TU+ – +
7 8 9 PROG
4 5 6 0
1 2 3
PRESET
ENTER
The Main Unit
Speakers x 2
Mains Cable
Instruction Manual
FM Aerial Speaker cable
Quick Start Guide
Remote Control
Downloaded from www.vandenborre.be

8
Product Overview
Main Unit
Panel View
1 CD Tray
2 Button
Switches the unit between the ON and
STANDBY modes.
3 Icon
Switches between USB, TUNER, DOCK, AUX
and DISC modes.
4 KIcon
Ejects a disc from CD compartment.
5 BF Icon
Plays/pauses/resumes playback.
6 Remote Sensor
Receives signals from the remote control.
7 LED Display
8
VOL - / + Buttons
Decreases or increases the volume.
9
USB Socket
10
iPod/iPhone/iPad Docking
11
Docking Cover
Flips open the docking cover
Back View
1 SPEAKER OUT Socketst
2 FM Aerial Socket
3 AUX in Sockets
4 AC~ Socket
5 ON/OFF
Remote Control
MENU REPEAT
DISPLAY SHUFFLE
VOL
DISC USB DOCK TUNER
AUX CLOCK TIMER SLEEP
INTRO RDS DIM – DIM +
POP JAZZ ROCK
CLASSIC
FLAT – + MUTE
BASS
TU– TU+ – +
7 8 9
PROG
4 5 6 0
1 2 3
PRESET
ENTER
/
2
4
7
8
:
<
>
@
B
C
F
G
J
K
A
D
E
H
I
L
-
0
1
3
6
5
9
;
=
?
Downloaded from www.vandenborre.be

9
1Button
Switches the unit between the ON
and STANDBY modes.
2
0-9 Buttons
Selects a soundtrack.
3KButton
Ejects a disc from CD compartment.
4PROG Button
• Programmesoundtracks.
• Presetsradiostations.
5
TU + / – Buttons
Searches for a radio station going
forwards/backwards through accessible
radio frequencies.
6
PRESET + / – Buttons
Selects a preset station.
7POP / JAZZ / ROCK / CLASSIC / fLAT
Buttons
Selects sound eect.
8
MUTE Button
Mutes the sound during playback.
9
BASS + / – Buttons
Selects bass level.
10 BFButton
Plays/pauses/resumes playback.
11
LButton
Stops playback.
12
VOLUME + / – Buttons
Increases or decreases the volume.
13
MENU Button
Displays menu screen.
14 REPEAT Button
Repeats a CD track or a music le.
15 <>Buttons
Navigate to select an item on a menu screen.
16 ENTER Button
Conrms the selection on a menu screen.
17 H,Buttons
• Skipsbackwardstothebeginningofthe
track or to the previous track.
• Allowsfastreversingofthecurrenttrack.
18 ,GButtons
• Skipsforwardstothenexttrack.
• Allowsfastforwardingofthecurrent
track.
19 DISPLAY Button
Displays playback information.
20
SHUFFLE Button
Random playback of CD tracks or music les.
21 DISC Button
Selects CD mode.
22 USB Button
Selects USB mode.
23 DOCK Button
Selects DOCK mode.
24 TUNER Button
Selects TUNER mode.
25 AUX Button
Selects AUX mode.
26
CLOCK Button
Display the time.
27 TIMER Button
Setup an alarm timer.
28
SLEEP Button
Selects a sleep timer.
29 INTRO Button
Plays soundtrack for 10sec.
30 RDS Button
Displays RDS information.
31 DIM + / – Buttons
Adjusts display brightness level.
Downloaded from www.vandenborre.be

10
Operating Your Remote Control
1. Press and slide the back cover to open the
battery compartment of the remote control.
OPEN
2. Insert two AAA size batteries (not included).
Make sure the (+) and (–) ends of the
batteries match the (+) and (–) ends indicated
in the battery compartment.
3. Close the battery compartment cover.
Handling the Remote Control
• Beawareofyourngernailswhenremoving
the battery cover and the battery.
• Donotdroptheremotecontrol.
• Donotallowanythingtoimpacttheremote
control.
• Donotspillwateroranyliquidontheremote
control.
• Donotplacetheremotecontrolonawet
object.
• Donotplacetheremotecontrolunderdirect
sunlight or near sources of excessive heat.
• Removethebatteryfromtheremotecontrol
when not in use for a long period of time,
as corrosion or battery leakage may occur
and result in physical injury, and/or property
damage, and/or re.
Remote Control Operation Range
• Theremotecontrolsensoronthefrontunit
is sensitive to the remote control’s commands
up to a maximum of 5 metres away and
within a maximum of a 60° arc.
• Pleasenotethattheoperatingdistancemay
vary depending on the brightness of the
room.
iR
MENU REPEAT
DISPLAY SHUFFLE
VOL
DISC USB DOCK TUNER
AUX CLOCK TIMER SL EEP
INTRO RDS DIM – DIM +
POP JAZZ ROCK
CLASSIC
FLAT – + MUTE
BASS
TU– TU+ – +
7 8 9 PROG
4 5 6 0
1 2 3
PRESET
ENTER
30° 30°
Max. 5 m
Downloaded from www.vandenborre.be

11
Connections
Connecting to the Mains Supply
• ThisunitisdesignedtooperatewithanAC
230V ~50Hz power supply.
• Connectingtheunittoanyotherpower
source may cause damage to the unit.
Unwind the mains cable to its full length.
Connect the mains plug to a mains socket.
Make sure the mains plug is fully inserted
into the mains socket. The unit is now
connected and ready to use.
• Toswitchtheunitocompletely,removethe
mains plug from the mains socket.
Ensure all connections are connected before
connecting to the mains power socket.
Playing MP3’s from a USB Device
When a USB device is connected to the unit, tap
the icon repeatedly on the unit or the USB
button on the remote control to select the USB
mode.
• TheunitcanonlyplayMP3andWMAle
formats in USB operation.
• IfyourUSBdeviceisloadedwithMP3’sbut
the display keeps showing‘NO DATA”on the
display, the format of your USB device might
not be compatible with the unit.
• Theunitmaynotbecompatiblewithall
USB devices, this is not an indication of a
problem with the unit.
Speaker Connections
Connect the speaker cables at the back of the
speakerstotheSPEAKEROUT(L/R)Socketsatthe
rear of the unit.
Using the AUX Connection
Use a RCA stereo audio cable to connect an
auxiliary equipment to the main unit’s AUX in
sockets.
Auxiliary Equipment
RCA stereo audio cables
(Not included)
Connecting the Aerial
Connect one end of the aerial cable (included)
to the FM socket at the rear of the unit. Then
position the aerial to obtain optimum reception.
Downloaded from www.vandenborre.be

12
Time Display
Press the CLOCK button to show the current time
on the display for few seconds.
Auto Setting the Clock
In FM mode, press RDS button repeatedly until RDS
CLOCKS shows on the display. Once RDS CLOCKS
has selected, clock will automatically update.
Manual Setting the Clock
Manual Setting the clock can only be done in
STANDBY mode.
1. In STANDBY mode, press and hold the CLOCK
button on the remote control until the hour
digits are ashing.
2. Press the buttons on the remote control to
adjust the hour digits while ashing, then press
the ENTER or CLOCK buttons on the remote
control to conrm, then the minute digits will
ash.
3. Press the buttons to adjust the minute digits
while ashing, then press the ENTER or CLOCK
buttons on the remote control to conrm.
4. Each activated state will be cleared if any
buttons are not pressed within 15 seconds.
Setting the Daily Timer
1. In STANDBY mode, press and hold the TIMER
button on the remote control until the display
shows“TIMER SET”.
2. Press the buttons on the remote control to
select USB, TUNER, DOCK or DISC mode, and
then press the ENTER or TIMER buttons on the
remote control to conrm.
3. The display will show volume level and ash.
Press the buttons on the remote control to
adjust the volume no less than Vol 8, and then
press the ENTER or TIMER buttons on the
remote control to conrm.
4. The hour digits will ash on the display. Press
the buttons on the remote control to adjust
the hour digits, and then press the ENTER or
TIMER buttons on the remote control to conrm.
5. The minute digits will ash on the display. Press
the buttons on the remote control to adjust
the minute digits, and then press the ENTER or
TIMER buttons on the remote control to conrm.
General Operation
Powering On/O
When you first connect the unit to the mains
socket. The unit will be in STANDBY mode and
the LED Display will be white.
• PresstheSTANDBY button on the unit or
the remote control to switch the unit on.
"HELLO" is displayed.
• PresstheSTANDBY button on the unit or
the remote control to switch the unit back to
standby mode. "ECO POWER" is displayed.
• Disconnectthemainsplugfromthemains
socket if you want to switch the unit o
completely.
Selecting Modes
Tap the icon repeatedly on the unit to switch
between USB, TUNER, DOCK, AUX and DISC
modes. The selected mode will show on the
display. Alternatively press the USB, TUNER,
DOCK, AUX or DISC button on the remote
control to select desired mode.
• IfthereisnosignalundertheUSB,TUNER,
DOCK, AUX and DISC mode or no iPhone/
iPod docked during iPod mode, the unit will
automatically switch o within 15 minutes.
• Pleaseturntheunitocompletelytosave
energy when not in use.
Adjusting the Volume
• TurntheVOL+ / VOL– dial on the unit or press
the VOL+ / VOL– buttons on the remote
control to adjust the volume.
• Ifyouwishtoturnthesoundo,pressthe
MUTE button on the remote control. Press the
MUTE button again or press the VOL + button
on the remote control or turn theVOL + dial on
the unit to resume normal listening.
Adjusting the Sound Eect
Press the POP, JAZZ, ROCK, CLASSIC or FLAT
buttons to select a desired music mode.
Adjusting the Bass
Press the BASS + / – buttons to select bass level.
Adjusting the Brightness
Press the DIM + / – buttons to select brightness
level.
Downloaded from www.vandenborre.be

13
6. The display will show the selected timer and
“ON”will ash on the display. Press the
buttons on the remote control to select“ON”to
enable the timer, otherwise select“OFF”to
disable the timer. Press the ENTER or TIMER
buttons on the remote control to conrm.
• Eachenabledstatewillbeclearedifabutton
is not pressed within 10 seconds.
• TheFMtunertimerwillgotothelaststation
you tuned into.
Setting the Sleep Timer
Use the sleep timer to turn the system o after
a certain number of minutes in play mode. By
setting the sleep timer, you can fall asleep to
music and know that your system will turn o by
itself rather than play all night.
1. To set the sleep timer press the SLEEP button
on the remote control repeatedly to view the
dierent timer settings. The number of
minutes shown will display in this sequence:
SP 120 SP 90
SP 00 SP 10 SP 15
SP 60 SP 30
2. The system is now set to turn o after the
number of minutes you have set. The display
will show “SP #”, e.g. “SP 10” means the unit
will switch itself o after 10 minutes, “SP 15”
means the unit will switch itself o after 15
minutes, and so on.
3. Press the SLEEP button to show the
reminding time till the unit switches o
minutes and return back to previous screen.
4. To cancel the sleep timer press the SLEEP
button repeatedly until “SP 00” shows on
the display.
Radio Operation
Scanning for Radio Stations
The unit will automatically select a FM radio
station with a good signal.
1. Select the TUNER mode by tapping the
icon repeatedly on the unit or pressing
the TUNER button on the remote control
until the display reads “TUNER”.
2. To activate automatic scanning, press and
hold the PROG button on the remote
control. The LED display will read “AUTO”
before scanning.
3. All stations found will be automatically
stored.
4. To select and listen to a saved radio station ,
press the PRESET + / – buttons on the remote
control.
Searching for a Station Automatically
In TUNER mode, press and hold the TU + / –
buttons on the remote control until the tuner
starts searching for a station. The tuner will stop
searching after tuning into a radio station.
The search may not stop at a station with a very
weak signal.
Searching for a Station Manually
In TUNER mode, repeatedly press the TU + / –
buttons on the remote control until the desired
frequency reception quality is found.
With FM radio it may be necessary to fine tune
each station by pressing the TU + / – buttons on
the remote control repeatedly. Each press will
adjust the frequency by 0.05MHz. If reception is
still poor adjust the position of the aerial or try
moving the radio to another location.
For Better Reception
Fully unwind the FM aerial. Extend the FM aerial
and place it in the position that oers the best
sound reception.
The unit will automatically switch between
stereo and mono mode. This is helpful when
receiving poor signal reception.
Downloaded from www.vandenborre.be

14
Programming Radio Stations
Automatically
Press and hold the PROG button for 2 seconds
to activate automatic programming. All
available stations are programmed in according
to waveband signal reception strength (from
strongest to weakest).
• Therstprogrammedradiostationis
broadcast automatically.
• Pressthe0-9 buttons in pairs (e.g., 01, 02, 03,
etc.) to select the desired preset station.
Programming Radio Stations Manually
1. Tune into the desired radio station, then
press the PROG button.
2. Press the 0-9 buttons in pairs (e.g., 01, 02,
03, etc.) or PRESET + / – buttons to select the
desired preset number location for the
selected radio station’s frequency.
3. Press the PROG button to set and store the
station.
4. Repeat steps 1 to 3 above for each radio
station you want to store in the unit’s
memory with a preset number location.
Recalling a Preset Station
Once you have saved a station to one of the
preset buttons, you can recall it by pressing
the 0-9 or PRESET + / – buttons on the remote
control.
• Thestoredstationswillbesavedintothe
memory and power o will not erase it.
Storing a new station in a preset location
will erase the previously stored station in that
location.
• WhiletheunitisinTUNER mode, press and
hold the Lbutton on the remote control to
erase the selected preset memory.
RDS (Radio Data System) Reception
Every time you press the RDS button, the display
will cycle through the following display modes:
the Station name, PTY, frequency, RDS CLOCK
or TEXT.
The information is displayed on the lower
segment of the display.
Station Name
Programme Type
Frequency
RDS CLOCK
TEXT
Station Name
When an RDS station is received, the “RDS” and
the name of that station will be displayed.
PTY (Programme Type)
Programme type identication signal. (Example:
News, Rock, Classical music.)
Frequency
This shows the frequency of the current station.
RDS CLOCK
Th e RDS CLOCK system may n ot pro perly
operateinareaswhereRDSCLOCKserviceisnot
available.OnceRDSCLOCK serviceisreceived,
theRDSCLOCKsystemkeepsoperating.“RDS
CLOCK” is displayedin areaswhere no RDS
CLOCKservicesareavailable.
TEXT
This displays a station description.
Downloaded from www.vandenborre.be

15
Compatible DiscTypes
Disc Types Disc Logo RecordedContent
CD-R (CD Recordable) AUDIO
CD-RW (CD-Rewritable) AUDIO
AUDIO-CD (Compact
Disc Digital Audio) AUDIO
CD/MP3/WMA Operation
Tap the icon repeatedly on the unit or press
the DISC button on the remote control to select
DISC mode.
Playback
1. Tap the Kicon on the unit or press the K
button on the remote control and the disc
tray will open automatically.
2. Place the CD/MP3/WMA disc with the label
side up into the CD compartment, and then
tap the Kicon on the unit or press the K
button on the remote control to close the door.
3. The total number of tracks will be shown on
the display, tap the BF icon on the unit
or press the BF button on the remote
control to play the rst track on the CD/MP3/
WMA disc automatically.
• ThisunitcanplayCD,CD-R,CD-RW,MP3,
WMA disc, 8cm and Multi sectioned of
MP3 DISCS.
• Ifthereisnodiscorthedisccan’tberead,
“NO CD” will show on the display.
To Pause Playback
1. Tap the BF icon on the unit or press the BF
button on the remote control to pause the
playback, the time elapsed indicator will ash.
2. To resume playback, tap the BF icon on the
unit or press the BF button on the remote
control again.
To Stop Playback
Tap the Licon on the unit or press the Lbutton
on the remote control to stop playback.
Skipping to Another Track
Tap the H/Gicons on the unit or press the
H/Gbuttons on the remote control to skip
backwards to the previous track or skip forwards
to the next track.
Random Playback
All the tracks on the disc can be played in a
random order.
• Duringplayback,presstheSHUFFLE button
on the remote control. “SHUF will show on
the display.
• TaptheH/Gicons on the unit or press the
H/Gbuttons on the remote control to play
the next random track.
• Afterallthetrackshavebeenplayedonce,
the playback will stop automatically.
• Tocanceltherandomplayback,pressthe
SHUFFLE button on the remote control
during SHUFFLE playback. Normal playback
will resume.
Repeat Playback
1. Press the REPEAT button once on the remote
control, “RP ONE” will show on the display.
The unit will play the current track repeatedly.
2. Press the REPEAT button twice, “RP ALL“
will show on the display. The unit will play all
tracks repeatedly.
3. Press the REPEAT button once more again,
“RP OFF“ will show on the display. The
REPEAT function will turn o.
Programme Setting
The user can program up to 32 tracks in CD
mode in any desired order. Programme mode
is activated while in STOP mode (programming
only available on Audio CD).
1. Tap the PROG icon on the unit or press the
PROG button on the remote control to enter
MEMORY mode.
2. Tap the H/Gicons on the unit or press the
H/Gbuttons on the remote control to
select the track that you want to preset.
3. Repeat steps 1-2 to programme more tracks.
Downloaded from www.vandenborre.be

16
4. Tap the BF icon on the unit or press the
BF button on the remote control to playback
programme tracks. Tap the BF icon on the
unit or press the BF button on the remote
control. The unit will play the rst track of the
programme.
Programme Cancel
Tap and hold the Licon on the unit or press
and hold the Lbutton on the remote control, or
open the CD tray and close it again to erase the
memory.
Intro Playback
• Pressthe INTRO button on the remote
control. The unit will play the rst 10 seconds
of each track.
• PresstheINTRO button on the remote
control again to resume normal playback.
iPod/iPhone/iPad Operation
Using the iPod/iPhone/iPad dock you can use
the unit to play music les stored on your iPod/
iPhone/iPad.
This unit can support the following iPod/
iPhone/iPad models.
Type Support Model
iPhone • iPhone
• iPhone 3G/3GS
• iPhone 4/4S
iPod
(with 30-
pin dock
connectors)
• iPod touch 1
st
/2
nd
/3
rd
/4
th
Generation
• iPod Classic
• iPod nano 1
st
/2
nd
/3
rd
/4
th
/5
th
/6
th
Generation
• iPod 4
th
Generation (with and
without colour display)
• iPod
5
th
Generation (video)
• iPod
mini
iPad • iPad
• iPad 2
Inserting the iPhone/iPod and Selecting
iPhone/iPod Mode
Tap the icon repeatedly on the unit or press
the DOCK button on the remote control to select
DOCK mode.
1. Press down on the PUSH logo on the docking
cover of the unit to ip the docking cover up.
2. Insert your iPod/iPhone/iPad into the iPod/
iPhone/iPad dock.
3. If the iPod/iPhone/iPad is connected, the
“IPOD” indicator will show on the display,
it will take around 10 seconds for the unit to
identify the iPod/iPhone/iPad.
4. Tap the BF icon on the unit or press the
BF button on the remote control to
playback the current track.
5. Select your desired music, or videos, etc., and
play the connected iPod/iPhone/iPad as usual.
iPod/iPhone/iPad Playback
You can use either the iPod/iPhone/iPad or the
remote control.
• TaptheBF icon on the unit or press the
BF button on the remote control to start /
pause / resume playback.
• PresstheMENU button then press the
ENTER button, and then press the /
buttons to select the desired folder.
• TaptheH/Gicons on the unit or press the
H/Gbuttons on the remote control to
select the previous or next music le.
• TapandholdtheH/Gicons on the unit
or press and hold the H/Gbuttons on the
remote control to perform fast forward/
reverse playback. Release the button to
resume normal playback.
• TurntheVOL + / VOL – dial on the unit or
press the VOL + / VOL – buttons on the
remote control to adjust the volume.
• TaptheLicon on the unit or press the
Lbutton on the remote control to go to the
previous iPhone/iPod menu.
• YouriPod/iPhone/iPadwillautomaticallystart
charging once it is docked.
• SwitchoyouriPod/iPhone/iPadwhile
listening to the radio to prevent signal
interference.
• WhileyouriPod/iPhone/iPadisdocked,you
can control it from the main unit, the remote
control or from the iPod/iPhone/iPad directly.
• UseyouriPod/iPhone/iPadcontrolsto
manually select your iPod/iPhone/iPad’s
music menu, then proceed to the next
operation.
Downloaded from www.vandenborre.be

17
Control iPhone/iPod menu
1. During the DOCK mode, tap the MENU icon
on the unit or press the MENU button on the
remote control to enter the iPod/iPhone/iPad
MENU mode.
2. Press the /buttons on the remote control
to navigate in the iPod/iPhone/iPad menu.
3. Press the ENTER button on the remote
control to conrm selection.
4. Press the MENU button on the remote
control to return to the previous iPod/
iPhone/iPad menu.
Charging your iPod/iPhone/iPad
1. Your iPod/iPhone/iPad has an internal non-
removable battery. The battery may need to
be charged if it has not been used for a while.
2. During the STANDBY or ON mode, you can
automatically charge the iPod/iPhone/iPad
through the unit when it is docked.
The iPod/iPhone/iPad battery is fully charged in
about a few hours. If you charge it while playing
music, it may take longer.
• YoucancontroltheiPod/iPhone/iPadplayer
with the remote control or iPod/iPhone/iPad
playeritselfwhiletheunitisinDOCKiPod
mode.
• Theunitcansupportmostgenerationsof
the iPod. Check your particular model for the
iPod generation supported.
USB Operation
1. Press down on the PUSH logo on the docking
cover of the unit to ip up the docking cover.
2. While in the ON mode, tap the icon
repeatedly on the unit or press the USB
button on the remote control to select USB
mode.
3. Connect a USB device to USB port
directly or with a USB cable (not included).
4. The unit automatically starts playback.
5. Tap the BF icon on the unit or press the
BF button on the remote control to start /
pause / resume playback.
6. Tap the H/Gicons on the unit or press the
H/Gbuttons on the remote control to
select a MP3/WMA le number.
7. Press the /buttons on the remote control
to select the desired folder (if the USB
memory device has more than one folder).
8. Tap the Licon on the unit or press the
button on the remote control to stop playback.
• TheunitcanonlyplayMP3andWMAle
formats in USB operation.
• TheunitcannotplayWMAlesprotectedby
“DRM FILE”.
• TheunitmaynotcompatiblewithallUSB
devices, this is not an indication of a problem
with the unit.
AUX Operation
There are AUX IN (L/R) sockets located at the
rear of the unit. Analogue audio sound signals
from other sources can be connected to the unit
through these sockets.
1. Connect to another audio device using the
AUX IN (L/R) sockets via a RCA stereo audio
cable (not included).
2. While in the ON mode, tap the icon
repeatedly on the unit or press the AUX
button on the remote control to select AUX
mode.
3. Turn the VOL + / VOL – dial on the unit or
press the VOL + / VOL – buttons to adjust the
volume to your desired level.
4. In AUX mode, operate your audio device
directly for playback features.
Downloaded from www.vandenborre.be

18
Maintenance
Cleaning the Unit
Ensure the unit is fully unplugged from the mains socket before cleaning.
• Tocleantheunit,wipethecasewithaslightlymoist,lint-freecloth.
• Donotuseanycleaninguidscontainingalcohol,ammoniaorabrasives.
• Donotsprayanaerosolatorneartheunit.
Handling Discs
• Donottouchtheplaybacksideofthedisc.
• Donotattachpaperortapetothedisc.
Playback side
Cleaning Discs
• Fingerprintsanddustonthedisccausepictureandsounddeterioration.Wipethediscfromthe
centre outwards with a cloth. Always keep the disc clean.
• Ifyoucannotwipeothedustwithasoftcloth,wipethedisclightlywithaslightlymoistenedcloth
and nish with a dry cloth.
• Donotuseanytypeofsolventsuchasthinner,benzine,commerciallyavailablecleanersorantistatic
spray. They may damage the disc.
Storing Discs
• Donotstorediscsinplacessubjectedtodirectsunlightornearheatsources.
• Donotstorediscsinplacessubjectedtomoistureanddustsuchasabathroomornearahumidier.
• Storingdiscsverticallyinacase,stackingdiscsorplacingobjectsondiscsoutsideoftheircasesmay
cause warping.
Downloaded from www.vandenborre.be

19
Hints and Tips
If a problem occurs, it may often be due to something very minor. The following table contains various
tips:
Menu Description
No power • Ensurethemainscableisconnectedsecurelyatbothends.
• MakesurethattheON mode is selected.
The remote control does
not function
• Usetheremotecontrolneartheunit.
• Pointtheremotecontrolattheremotesensorontheunit.
• Replacethebatteryintheremotecontrolwithanewone.
• Removeanyobstaclesbetweentheremotecontrolandtheunit.
The unit does not respond
when pressing any buttons
• Theunitmayfreezeupduringuse.Switchtheunito and then on
again at the mains socket to reset the unit.
CD
The disc does not play
• Thereisnodiscinsidetheunit(“NODISC”appearsonthedisplay).
• Insertthedisccorrectlywiththelabelsidefacingup.
• Cleanthedisc.
• PAUSE mode may be activated, deactivate it.
• Anon-validdischasbeeninserted.
• Condensationmayhaveformedinsidetheunitduetoasuddenchange
in temperature. Wait about an hour for it to clear and try again.
Disc skips • Makesuretheunitisonasecurespot.Vibrationsorjarringcancause
the disc to skip.
le from Media storage
device does not play
• Checkthele format.
• ThisproductonlysupportsMP3/WMAFileformats.
Radio
Desired station not found • Weaksignal.UsetheManualTunefunction.
iPod/iPhone/iPad
iPod/ iPhone/iPad does
not respond to the speaker
system
• iPod/iPhone/iPadmaynotbedockedproperlyorinstalledproperly.
Remove your iPhone/iPod from the dock and check for obstructions on
the connectors in the dock and on your iPod/iPhone/iPad.
• MakesurethatyouriPod/iPhone/iPadisworkingproperlybefore
docking. Please refer to your iPod/iPhone/iPad manual for details.
The unit doesn’t play
iPhone/iPod les or doesn’t
function as expected
• MakesuretheiPod/iPhone/iPadisconnectedproperly.
• Standbymodemaybeactivated;presstheSTANDBY button again.
• MakesuretheiPod/iPhone/iPadisswitchedon.
• VibrationsmayhavecausedtheiPod/iPhone/iPadtocomeloosefrom
the docking station.
• CheckDOCK mode is selected.
• ReinsertiPhone/iPod.
USB
Unable to insert USB device • InserttheUSBdevicetheotherwayround.
Cannot play some les
from USB device
• SomeUSBdevicesmaynotbecompatiblewiththeunit.
• OnlyMP3/WMAe formats are supported.
If any functional abnormality is encountered, unplug the unit from the mains socket and reconnect it again.
Downloaded from www.vandenborre.be
Table of contents
Languages:
Other Hitachi Stereo System manuals

Hitachi
Hitachi AX-67 s User manual

Hitachi
Hitachi AXM846E User manual

Hitachi
Hitachi AX-M910 User manual

Hitachi
Hitachi AXC12EBS User manual

Hitachi
Hitachi AX-M83 User manual

Hitachi
Hitachi AXM649BT User manual

Hitachi
Hitachi AXM525E User manual

Hitachi
Hitachi TRK-W545W.HW User manual

Hitachi
Hitachi AXM949E User manual

Hitachi
Hitachi AX-M82D s Manual

Hitachi
Hitachi AX-M133 s Manual

Hitachi
Hitachi AX-M76E User manual

Hitachi
Hitachi AX-M140 User manual

Hitachi
Hitachi AX-M7E User manual

Hitachi
Hitachi AXF100E User manual

Hitachi
Hitachi FX-10 User manual

Hitachi
Hitachi axm525dbe User manual

Hitachi
Hitachi AX-M70MP3 User manual

Hitachi
Hitachi AXM75DAB User manual

Hitachi
Hitachi AXF300E User manual