Hitachi DT-P300GX User manual

Thank you for choosing to use the HITACHI pump and supporting the various products of the company.
ขอขอบคุณที่ทานไดกรุณาไววางใจเลือกใชผลิตภัณฑปมนํ้าฮิตาชิ และใหการสนับสนุนผลิตภัณฑตางๆ ของบริษัท ดวยดีเสมอมา
•Please read and understand the manual before using the pump.
กรุณาอานทําความเขาใจคูมือการใชงานฉบับนี้ใหเขาใจกอนการใชงาน
•Please keep this manual after reading it along with the warranty card as reference.
หลังจากอานทําความเขาใจดีแลวกรุณาเก็บคูมือใชงานนี้ไวพรอมกับใบรับประกันเปนสําคัญตอไป
•Precautions on safe use
ขอควรระวังในการใชงานอยางปลอดภัย.......................2
•Part names and structure
ชื่อชิ้นสวนและโครงสราง..............................................5
•Specifications
ขอมูลจําเพาะ..............................................................6
•Precautions before installation
ขอควรระวังกอนการติดตั้ง...........................................6
•How to install the single jet
วิธีการติดตั้งเจ็ตเดี่ยว ..................................................7
•How to install the parallel jet
วิธีการติดตั้งเจ็ตคู........................................................8
•Installation routing the harness
การติดตั้งเดินสายไฟ ...................................................9
•Problems and repairs
ปญหาและการแกไข ..................................................10
•Wiring diagram
วงจรไฟฟา................................................................10
•In the installation of the pump it is necessary to implement it suitably, so the buyer should ask the seller to install it.
ในการติดตั้งปมนํ้าจําเปนตองดําเนินการใหเหมาะสม ดังนั้นใหรองขอการติดตั้งจากรานคาจําหนาย/ดําเนินการติดตั้งตอไป
•Should you want to know the name of the pump model, please read it from the nameplate on the body or the case.
ในการตรวจสอบชื่อรุนของปมนํ้าที่ทานเลือกซื้อไปนั้น โปรดเช็คจากแผนปายบริเวณตัวถัง หรือฝาครอบปม
DT-P TYPE. MODEL : DT-P300GX (PJ) (SJ)
Operation Manual
คูมือในการใชงาน
HITACHI PUMP
เครื่องปมนํ้าฮิตาชิ
CONTENTS
สารบัญ
Operations
การใชงาน Installation
(For installation by the shops/distributors)
การติดตั้ง (สําหรับรานคา/ตัวแทนจําหนาย)
3PPL063166-A.indd 13PPL063166-A.indd 1 07/21/11 9:06 AM07/21/11 9:06 AM

2
Earth rod แทงสายดิน
Earth wire สายดิน
Do not take
it apart
หามแยกชิ้นสวน
For the person not a serviceman, do not
dismantle the pump. ผูที่ไมใชชางซอม หามถอด
แยกชิ้นสวนซอมดัดแปลงโดยเด็ดขาด
•It may cause combustion or decrepancy and
cause injury. อาจทําใหเกิดการลุกไหม การทํางาน
ผิดปกติและกอใหเกิดการเสียหายและการบาดเจ็บ
ขึ้นได
Do not use
a wet hand
หามมือเปยก
While repairing you must take off the plug or cut
off the electricity, and do not use wet hands to
plug or remove the plug. ขณะทําการซอมบํารุง
ตองถอดปลั๊กหรือตัดไฟฟา และหามใชมือที่เปยก
ถอด/เสียบปลั๊กไฟฟา
Grounding
ตอสายดิน
You must always ground the appliance, and install
a circuit breaker specifically for it. ตองตอสายดิน
เสมอ, และติดตั้ง Leak Breaker เฉพาะ
Prohibition
หาม
Do not use the pump while its cover is removed.
ไมใชงานในสภาพที่ถอดฝาครอบออก
•It may cause a short circuit or fire from dust
or degenerated insulation. อาจกอใหเกิดไฟฟา
ชอตหรืออัคคีภัยจากฝุนผง หรือการเสื่อมสภาพของ
ฉนวนได
Before using, please try to understand [the precautions on the safe use] carefully and use the pump correctly.
กอนใชงานกรุณาอานทําความเขาใจ [ขอควรระวังในการใชอยางปลอดภัย] ใหละเอียดกอน และกรุณาใชอยางถูกวิธี
The precautions are shown as follows:
หัวขอควรระวังที่แสดงไวตอไปนี้
The level of damage and wear that may occur from abuse or ignorance of the warnings is shown in the table as follows.
ระดับความเสียหายและอันตรายที่อาจจะเกิดขึ้นจากการใชงานอยางผิดๆ หรือละเลยตอเนื้อหาคําเตือนนั้น ดังที่แสดงไวในตารางตอไปนี้
The content shows [warning or precaution]
เปนเนื้อหาที่แสดงเกี่ยวกับ [คําเตือน หรือขอควรระวัง]
The content shows prohibitions [Do not do it]
เปนเนื้อหาที่แสดงถึงสิ่งที่ตองไมทํา [ขอหาม]
The content shows a necessity that must always be done [Explanation]
เปนเนื้อหาที่แสดงถึงสิ่งจําเปนตองทําเสมอ [คําชี้แจง]
•If there is a defect or power leak, it may cause a short circuit. For
installation of an earth wire, please consult the distributor. เมื่อเกิด
การชํารุดหรือไฟฟารั่วอาจทําใหไฟฟาชอตได การติดตั้งสายดิน กรุณา
ปรึกษาตัวแทนจําหนาย
•It may cause a short circuit. อาจกอใหเกิดไฟฟาชอตหรือบาดเจ็บขึ้นได
PRECAUTIONS ON SAFE USE
ขอควรระวังในการใชงานอยางปลอดภัย
Warning Content in the symbol means [The danger may result in severe injury or death]
คําเตือน เนื้อหาขอความในชองสัญลักษณนี้คือ [เปนอันตรายที่อาจกอใหเกิดการบาดเจ็บสาหัส หรือถึงแกชีวิตได]
Precaution Content in the symbol means [The danger may cause damage to assets or injury]
ขอควรระวัง เนื้อหาขอความในชองสัญลักษณนี้คือ [เปนอันตรายอาจกอใหเกิดความเสียหายตอทรัพยสินหรือบาดเจ็บได]
Examples of the symbols
ตัวอยางของการแสดงรูปภาพสัญลักษณ
WARNING
คําเตือน
3PPL063166-A.indd 23PPL063166-A.indd 2 07/21/11 9:06 AM07/21/11 9:06 AM

3
Cleaning
ทําความสะอาด
In case there is dust on the plug blades or
surface, please clean it. กรณีที่มีฝุนจับที่ขาปลั๊กไฟ
และที่ผิวของขาปลั๊กไฟ ใหทําการเช็ดใหสะอาด
Wiring
งานเดินสายไฟ
Wiring should be made with correctness and
safety according to the internal requirements
on technical standards for electrical appliances.
ในงานเดินสายไฟควรดําเนินการดวยความ
ถูกตอง
ปลอดภัย ตามขอกําหนดเกี่ยวกับการเดินสาย
ภายในและมาตรฐานเทคนิคงานเครื่องใชไฟฟา
Repairing
การปฏิบัติ
ขณะซอม
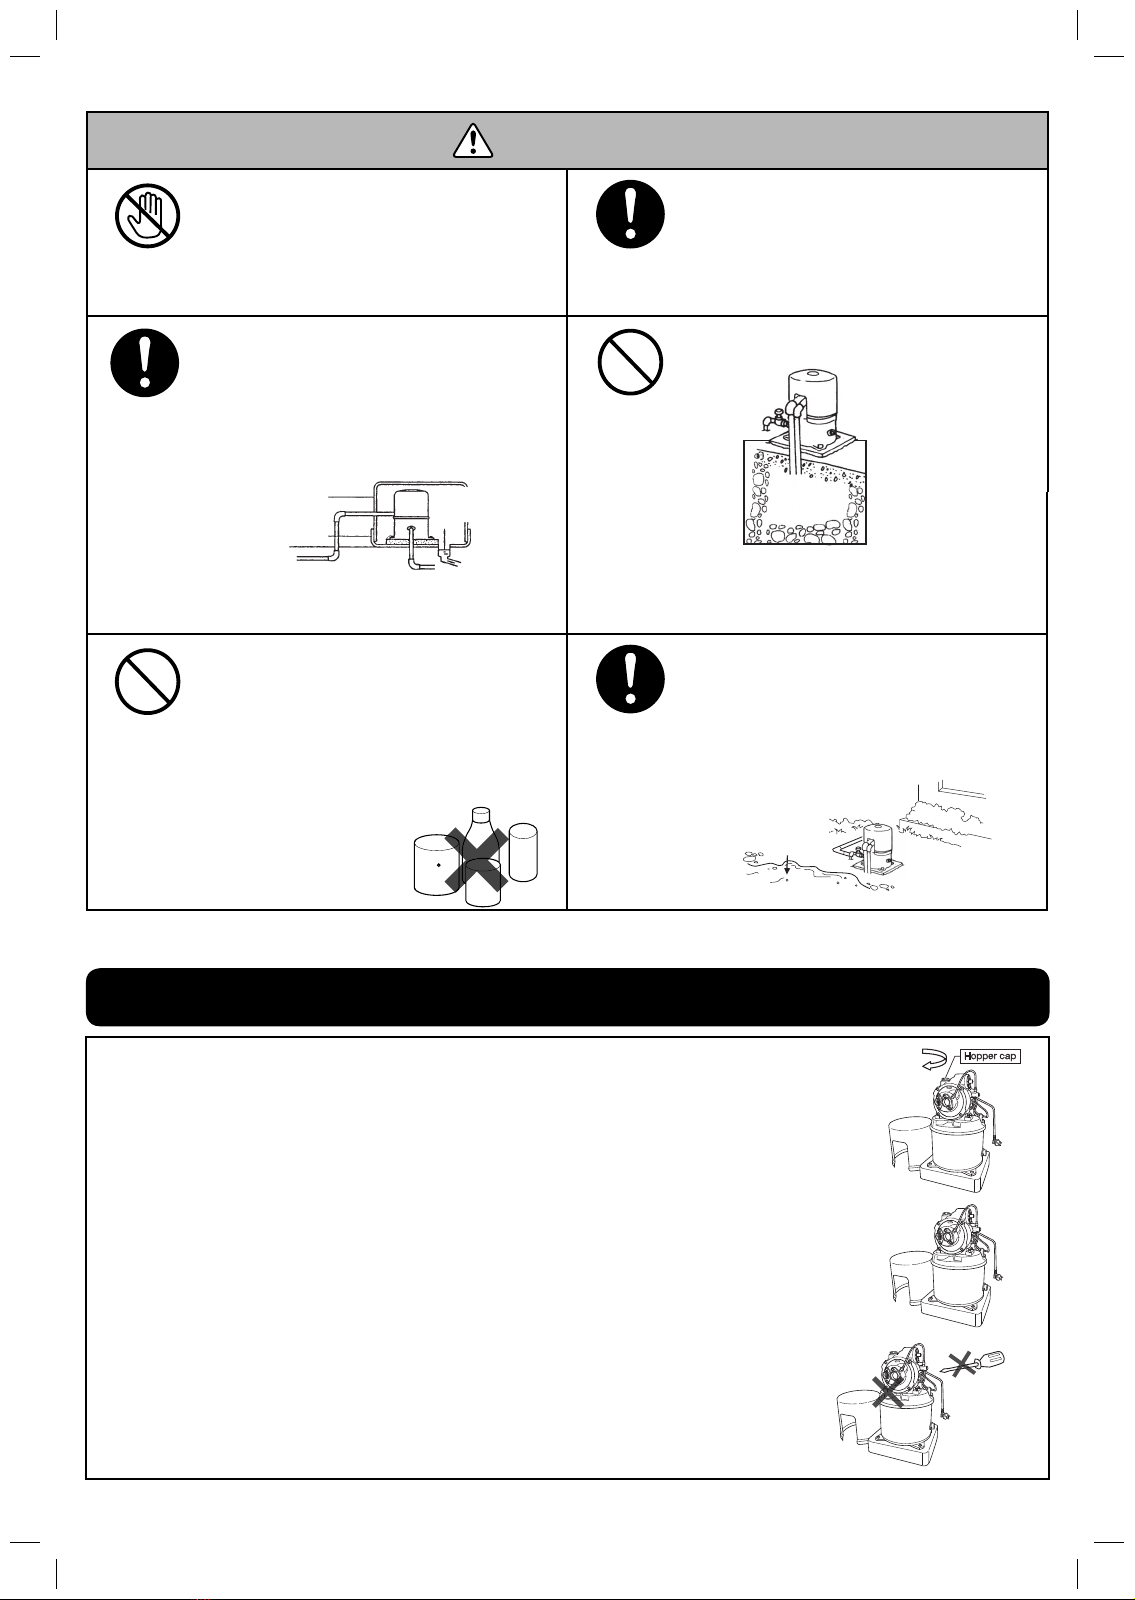
One should pull the plug or turn off the switch
immediately to prevent an accident. In case the
pump works abnormally or does not work, call
the distributor for inspection and repair. ควรดึง
ปลั๊กออก หรือปดสวิตช (Power) ทันที เพื่อปองกัน
อุบัติเหตุ กรณีเครื่องผิดปกติหรือปมนํ้าไมทํางานให
แจงตัวแทนจําหนายใหมาตรวจสอบ - ซอม ทันที
Prohibition
หาม
Do not roll, close, pull, bend, or modify the power
cord or cause a mark or damage on it. Do not put
heavy things on it, clip, or modify the cord.
หาม
มวน, บิด, ดึง, ฝนงอ, ดัดแปลงสายไฟ
(
Power cord)
หรือทําใหเกิดรอย, ความเสียหาย
หามนําของหนัก
วางทับ, หามหนีบ, หามแปรรูปสายไฟฟา
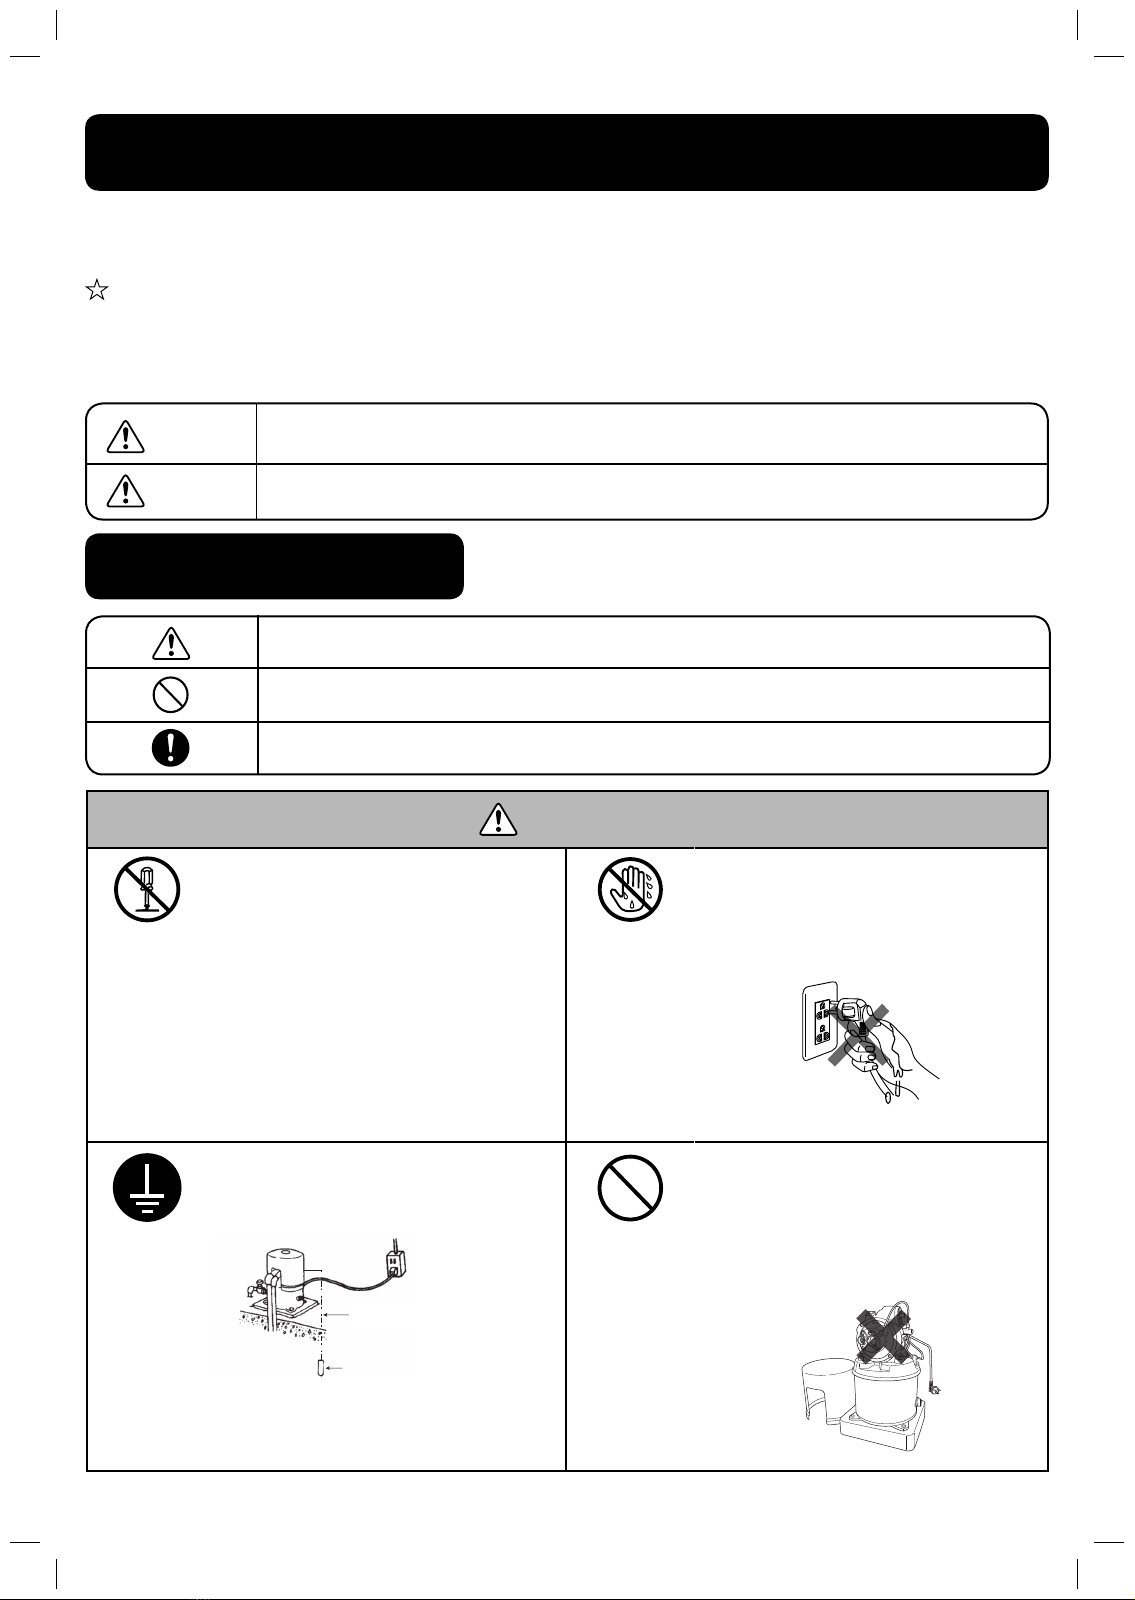
Power Supply
แหลงจายไฟ
In the event of not using it for a long time, remove
the plug out of the outlet or turn off the switch.
กรณีที่ไมใชงานเปนเวลานานๆ ควรดึงปลั๊กออกจาก
เตาเสียบหรือปดสวิตชไฟฟา
•If not, it may cause a fire from a power leak
or short circuit due to degenerated insulation.
เนื่องจากอาจเกิดอัคคีภัยจากไฟรั่วหรือไฟชอต
เนื่องจากฉนวนเสื่อมได
Prohibition
หาม
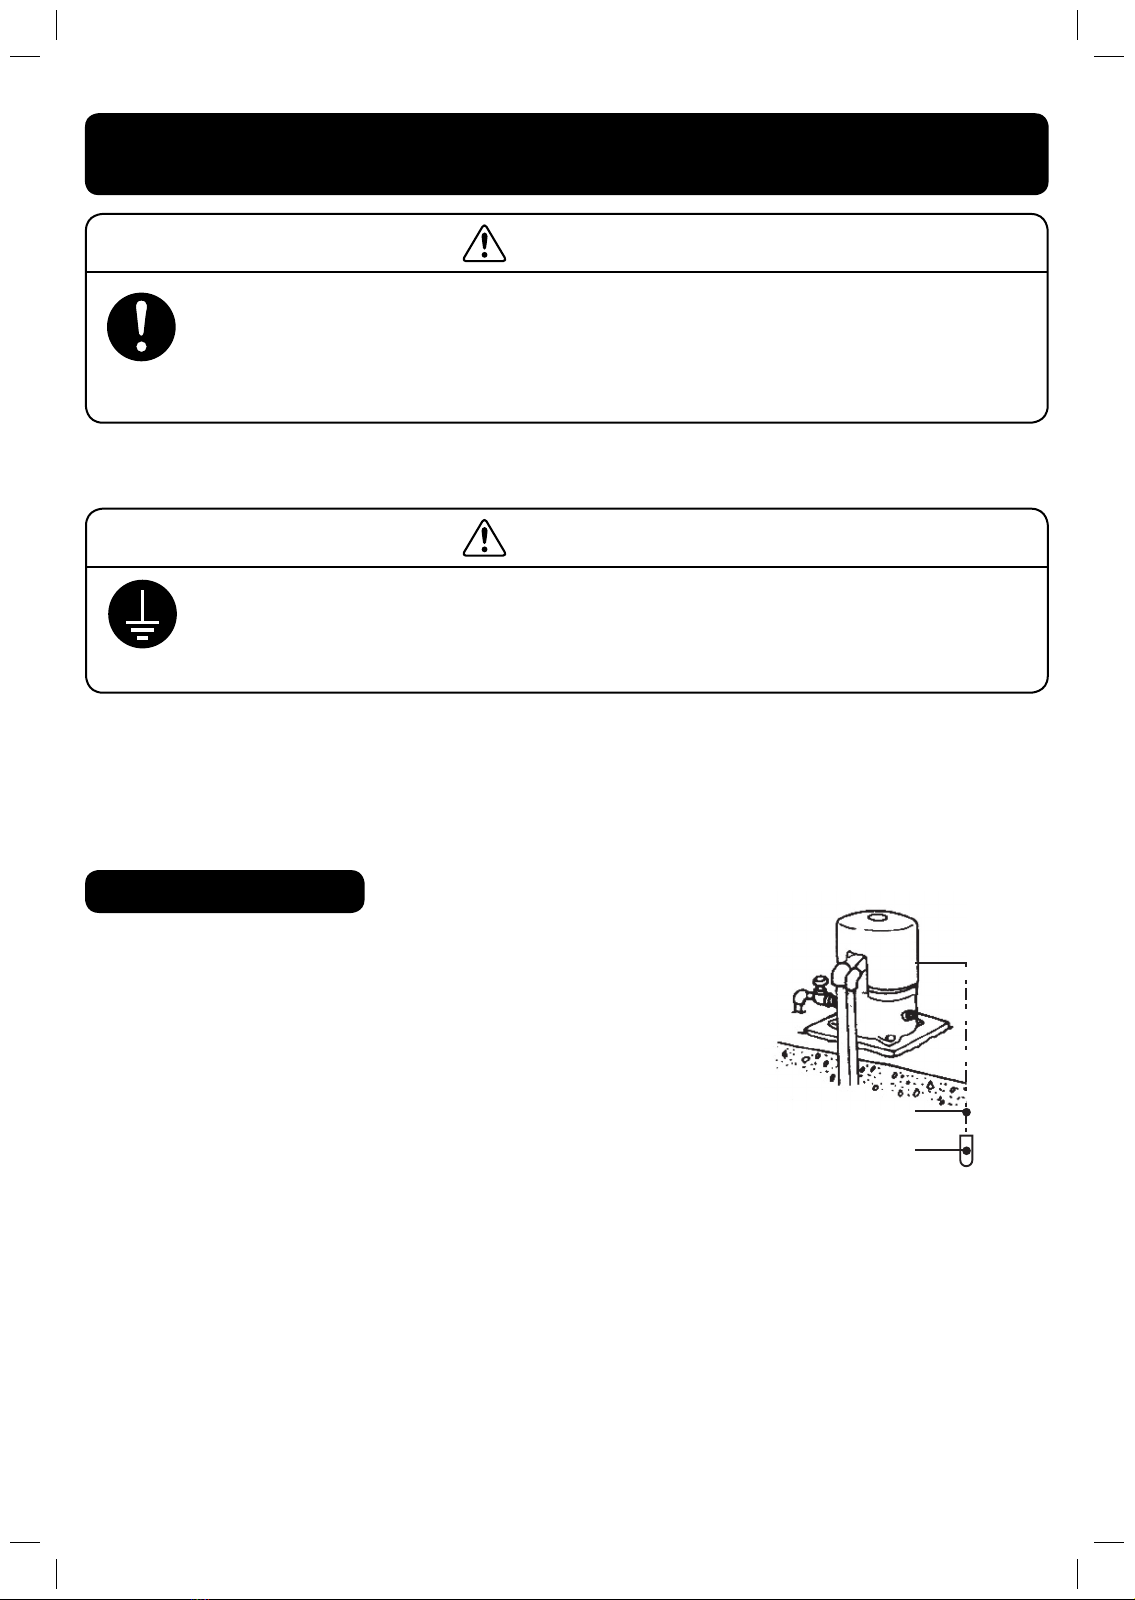
Do not place objects on the pump. หามนําวัตถุ
วางบนปม
•It may cause an injury from a cave-in of the pump.
อาจเกิดการบาดเจ็บ จากการยุบเสียทรงของปมนํ้าได
Warning
ระวัง
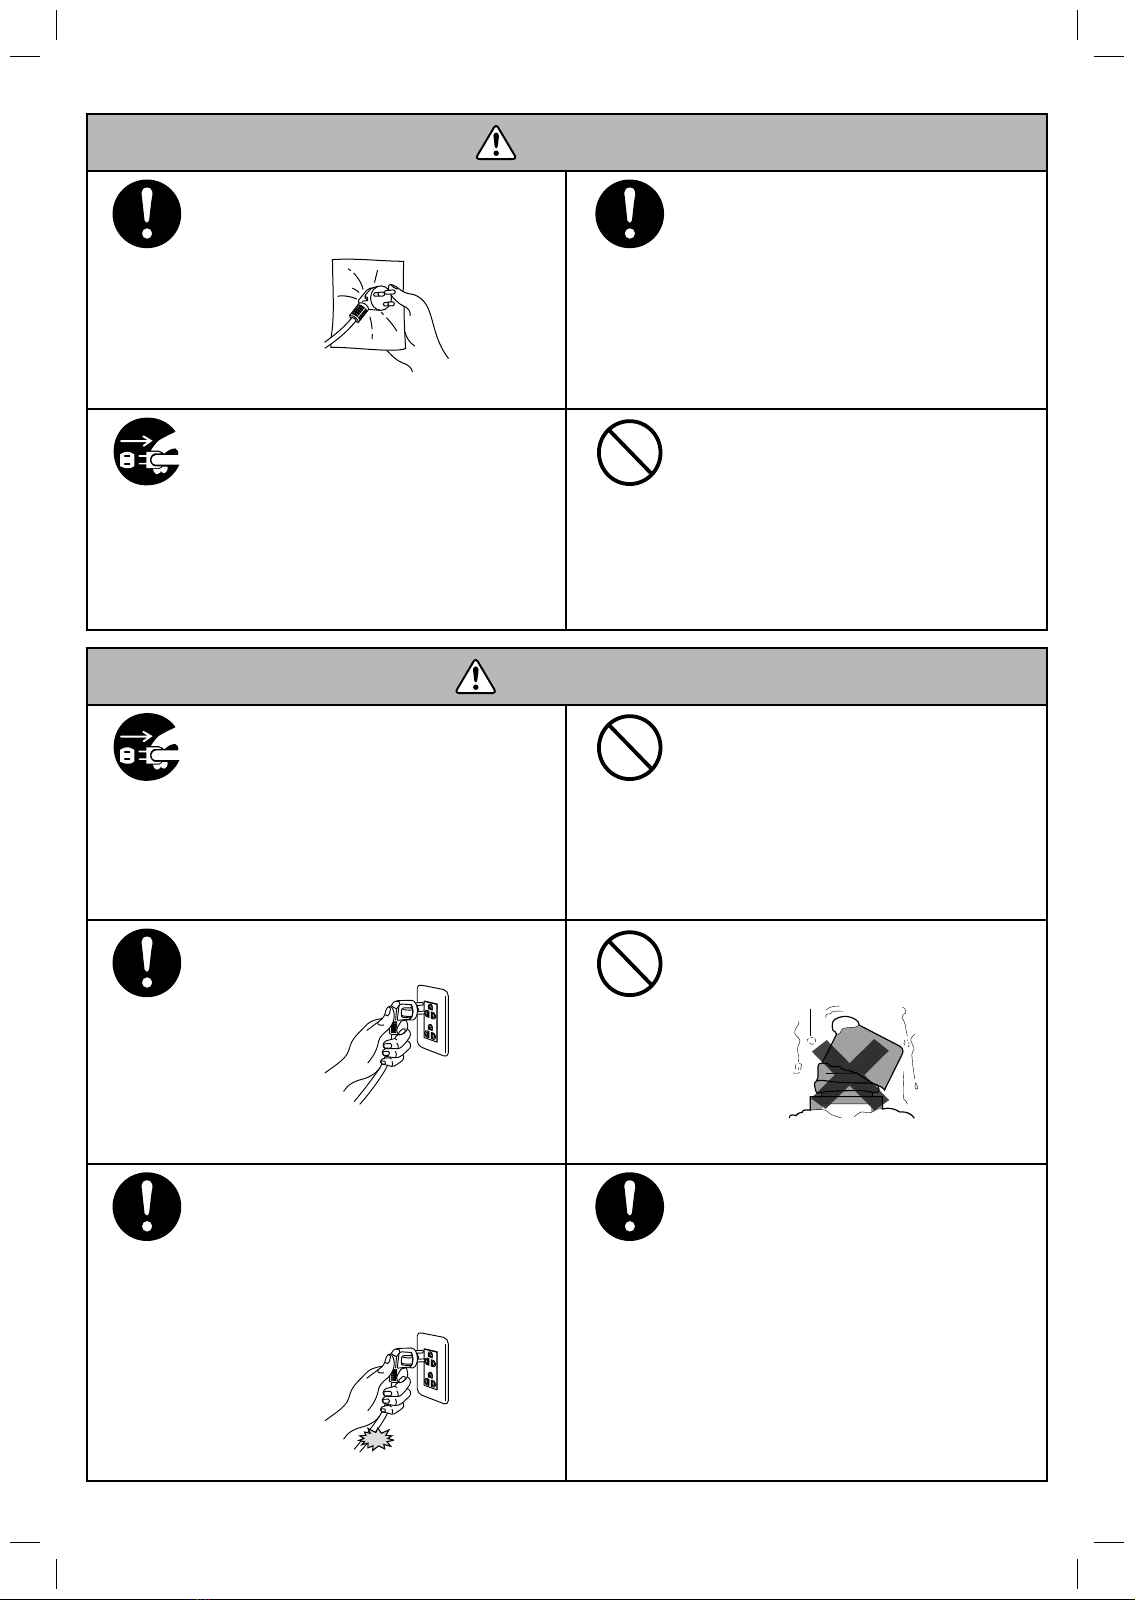
While removing the plug, pull the plug body.
ขณะถอดปลั๊กออก ควรจับที่ตัวปลั๊ก
Prohibition
หาม
Do not put an inflammable object inside the
pump cover. Do not cover the pump. หามใสวัตถุ
ที่ติดไฟงายไวในฝาครอบ หามนําผาคลุมตัวปม
Warning
ระวัง
•If the supply cord is damaged, it must be
replaced by the manufacturer, its service agent
or similarly qualified persons in order to avoid a
hazard. หากสายออนปอนกําลังไฟฟาชํารุดตองให
ผูทําหรือตัวแทนฝายบริการหรือบุคคลที่มีคุณสมบัติ
เหมือนกันเปนผูเปลี่ยน เพื่อหลีกเลี่ยงอันตราย
Warning
ระวัง
The appliance is not intended for use by persons
(including children) with reduced physical, sensory or
mental capabilities, or lack of experience and knowledge,
unless they have been given supervision or instruction
concerning use of the appliance by a person responsible
for their safety. ผลิตภัณฑนี้ไมไดถูกออกแบบมาใหบุคคล
(รวมทั้งเด็กเล็ก) ซึ่งมีรางกายทุพพลภาพ หรือบกพรองทาง
ปญญา หรือผูที่ขาดประสบการณและความรูความชํานาญ
ใชงาน นอกเสียจากวาบุคคลเหลานี้จะไดรับการดูแล
หรือแนะนําเกี่ยวกับการใชงานเครื่องที่ถูกวิธีโดยผูที่มี
หนาที่รับผิดชอบตอความปลอดภัยของบุคคลดังกลาว
•Faulty wiring may cause a short circuit or fire. งานเดินสายไฟที่
บกพรองผิดพลาด อาจกอใหเกิดไฟฟาชอตหรืออัคคีภัยได
•If not, it may cause a fire. อาจเปนสาเหตุของการเกิดอัคคีภัย
•There is a risk of fire, short-circuit, power leak, and electric shock.
มีความเสี่ยงที่จะเกิดการลุกไหมจากการชอต, ไฟฟารั่ว, ไฟฟาดูดได
•The power cord may be damaged and cause a short circuit. สายไฟ
(Power cord) อาจเกิดความเสียหายทําใหเกิดอัคคีภัย - ไฟฟาชอตได
•If not, it may cause a short circuit and a fire. อาจทําใหเกิดไฟฟา
ชอตและเกิดไฟฟาลัดวงจรได
•Children should be supervised to ensure that they do not play with
the appliance. เมื่อเด็ก คนชรา คนปวย และบุคคลรางกายไมสมประกอบ
ใชเครื่องปมนํ้าควรเอาใจใสเปนพิเศษ และตรวจสอบกอนการใชงาน
•If not, the pump may heat and catch fire. ปมจะรอนทําใหเกิดการติดไฟได
WARNING
คําเตือน
PRECAUTIONS
ขอควรระวัง
3PPL063166-A.indd 33PPL063166-A.indd 3 07/21/11 9:06 AM07/21/11 9:06 AM

4
Prohibition
หาม
Do not touch the pump motor while the pump is
running. หามสัมผัส Motor ปมนํ้าในขณะเดินเครื่อง
•Due to the high temperature, it may cause a scald.
เนื่องจากอุณหภูมิสูงอาจทําใหเกิดการพุพองได
Caution
ระวัง
While maintaining this product you should wear
gloves. การบํารุงรักษาผลิตภัณฑนี้ ควรสวมถุงมือ
ในขณะปฏิบัติงาน
•To prevent possible injury. เพื่อปองกันการ
บาดเจ็บที่อาจเกิดขึ้นได
Caution
ระวัง
Check the ground whether it has good water
drainage. ตรวจสอบดูวาที่พื้นมีการปองกันนํ้าหรือ
การระบายนํ้าดีหรือไม
•Otherwise, in the case of a water leak, it may
cause damage to the pump. กรณีเกิดนํ้ารั่ว
อาจสงผลใหเกิดความเสียหายได
Prohibition
หาม
Do not dry run it. หามเดินเครื่องโดยไมมีนํ้า (Dry Run)
Prohibition
หาม
Do not use the pump with other liquids except clean
water such as oil, thinner or hot water at 40°C or more.
หามนําปมนี้ไปใชกับของเหลวอื่น นอกจาก นํ้าสะอาด
เชน นํ้ามัน, ทินเนอรหรือนํ้ารอนที่อุณหภูมิมากกวา 40°C
Caution
ระวัง
Check the site of installation. ตรวจสอบพื้นที่
การติดตั้งปมนํ้า
•Avoid sites that are easily flooded, as it may
cause damage to the pump. หลีกเลี่ยงบริเวณ
พื้นที่มีนํ้าทวมขังไดงาย เพราะอาจทําใหเกิดความ
เสียหายกับปม
COVER
WATER-PROTECTING
TRAY ถาดกั้นนํ้า
DRAIN PIPE
ทอระบายนํ้า
1Be careful after filling water, tighten the hopper cap to prevent leaking water.
ระมัดระวัง หลังจากเติมนํ้าลอเสร็จแลว ควรขันฝาจุกปด ( Hopper cap ) ใหแนน
ไมใหเกิดนํ้ารั่วออกมา
2Check the possibility of leaking in step of installing pump (by turning on pump)
with certainty before closing the cover. ควรทําการเช็ครอยรั่วที่อาจเกิดขึ้นจากการ
ติดตั้งของปมนํ้า ( โดยเดินเครื่องปมนํ้า ) ใหแนใจกอนทําการปดฝาครอบปมนํ้า
3Do not open the cover while using. ไมควรเปดฝาครอบปมนํ้าออกขณะใชงาน
•Please read the operational manual with understanding before installing and using Pump. โปรดอานคูมือใหเขาใจ กอนทําการติดตั้งปมนํ้าและ
กอนการใชงาน
•The water left in the pump may overheat and cause damage.
นํ้าที่คางอยูภายในตัวปมจะรอนทําใหเปนสาเหตุของความเสียหายไดเชน
ชิ้นสวนพลาสติก
PRECAUTIONS
ขอควรระวัง
CAUTION
ขอควรระวัง
•Otherwise, it may cause injury or a short circuit.
อาจเกิดการบาดเจ็บ
หรือไฟฟาชอตจากการเสียหายได
•
Components of the pump, such as plastic, rubber
parts, can be damaged.
อาจทําใหชิ้นสวนไดรับ
ความเสียหายได เชน
พลาสติก, ยาง
The area where there
is stagnant water
บริเวณนํ้าขัง
40 C
OIL
∗When installation of the pump is made, please check for leaking water.
เมื่อทําการติดตั้งกรุณาตรวจสอบวาไมมีนํ้ารั่วเกิดขึ้น
3PPL063166-A.indd 43PPL063166-A.indd 4 07/21/11 9:06 AM07/21/11 9:06 AM

5
Pipe holder assembly
Jet body
assembly
Check valve
Strainer
Pipe band (5 pcs)
Socket(B)
Socket(C)
Hex nut M8 (3 pcs)
Hexbolt M8 x 30 (2 pcs)
Bolt M8 x 50 (1 pc)
Washer M8 D16 (5 pcs) Pipeholder (2 pcs)
Pressure
flange
Packing
Venturi
Jet assembly
Screen
Sealing
Spring dock
Check valve
Strainer
Free flang
Packing
Adapter
Socket(2")
Suction pipe(1")
Sub-flang
O-ring
How to prime it วิธีการลอนํ้า
•After installation on the first run, open the hopper cap and pour in some water. หลังจากทําการติดตั้ง
ในการเดินเครื่องครั้งแรกใหเปด HOPPER CAP แลวใสนํ้า
•Do not expose the electric components such as motor, electronic parts, etc. to water. กรุณาระวังไม
ใหนํ้าไปถูกชิ้นสวนอุปกรณไฟฟา เชน มอเตอร เปนตน
•For new pump, water must be filled into the suction pipe, compression pipe, and
pump head and securely close the hopper cap. ปมใหมตองเติมนํ้าในทอดูด, ทออัดและ
หัวปมใหเต็มปดฝาจุกใหแนน
•Open the water tap at the supply side. เปดกอกนํ้าดานจายออก
•
Install the pressure gauge at the hopper cap. ติดเกจวัดแรงดันที่ฝาอุด
•Close the control valve fully by turning it clockwise, and connect the power cord to
turn on the pump. ปดคอนโทรลวาลวจนสนิทโดยหมุนตามเข็มนาฬกาเสียบปลั๊กใหปมทํางาน
•After the water flows into the pump, adjust the control valve by releasing the adjusting
screw. หลังจากนํ้าไหลเขาไปในปม ปรับคอนโทรลวาลวโดยคลายตัว Adjusting screw
•After closing the water tap, check all conditions by opening or closing other water taps.
If there is a noise, adjust the adjusting screw by turning it 1-2 times. หลังจากปดกอกนํ้า,
เช็คสภาพใหพอเหมาะโดยเปดหรือปดกอกอื่นๆ ถามีเสียงดังใหปรับตัว Adjusting screw 1-2 รอบ
MODEL : DT-P300GX
Single Jet
เจ็ตเดี่ยว
Parallel Jet
เจ็ตคู
Hopper cap
•Remove the paper inside the cover after finishing installaiton. ถอดกระดาษขางในฝาครอบออกหลังจากติดตั้งเสร็จแลว
Adjusting screw
สกรูปรับ
Adjustment of Control Valve การปรับคอนโทรลวาลว
Pressure gauge
เกจวัดความดัน
Adjusting Pressure
100kPa (1.0kgf / cm2)
Hopper cap
ฝาจุกเติมนํ้า
Pressure port
ทอความดัน
Pressure tank
ถัง Inlet (Suction)
ทอดูด (นํ้าเขา)
Outlet
ทอจายนํ้าออก
Power cord
ปลั๊กไฟ
Air charger
ตัวอัดอากาศอัตโนมัติ
Control valve
วาลวควบคุม
Pump head
หัวปม
•Modification pressure switch may cause
malfunction of machine and pump parts
damage. The warranty will be terminated
instantly if you modify pressure switch.
การปรับแตงสวิตชความดัน อาจทําใหปมนํ้า
ทํางานผิดปกติเปนสาเหตุทําใหชิ้นสวนเสียหาย
หรือชํารุด การรับประกันสินคาจะสิ้นสุดลงทันที
หากมีการปรับสวิตชความดัน
How to Prime it
วิธีการลอนํ้า
PART NAMES AND STRUCTURE
ชื่อชิ้นสวนและโครงสราง
3PPL063166-A.indd 53PPL063166-A.indd 5 07/21/11 9:06 AM07/21/11 9:06 AM

6
PRECAUTIONS BEFORE INSTALLATION
ขอควรระวังกอนการติดตั้ง
MODEL รุน DT-P300GX (SJ) DT-P300GX (PJ)
MOTOR
(มอเตอร)
Type (ชนิด) SINGLE PHASE CONDENSER-RUN ( 2 poles )
Output (กําลังของมอเตอร)W (วัตต) 300 W
Rate Voltage (แรงดันไฟฟา)V(โวลท) 220 V
Frequency (ความถี่) Hz (เฮิรต) 50 Hz
PUMP
(ปม)
Pressure switch
(สวิตชความดัน)
ON (เปด) 140 kPa ( 1.4 kgf / cm2)
OFF (ปด) 180 kPa ( 1.8 kgf / cm2)
Jet type (เจ็ตรุน) J25-18SH (Single jet) (เจ็ตเดี่ยว) J25-30H (Parallel jet) (เจ็ตคู)
Suction lift (ระยะดูด)m(เมตร) 1218182430
Discharge head (ระยะสง)m(เมตร) 1212121212
Discharge capacity (ปริมาณนํ้า)
l/min (ลิตร/นาที) 20.5 l/min 11 l/min 20 l/min 16 l/min 9 l/min
Suction pipe (ทอดูด) mm (in) (มม. (นิ้ว)) 35 mm (1 1 /4 in) 35 mm (1 1/4 in)
Pressuce pipe (ทอความดัน) mm (in) (มม. (นิ้ว)) 25 mm (1 in) 25 mm (1 in)
Discharge pipe (ทอจาย) mm (in) (มม. (นิ้ว)) 25 mm (1 in) 25 mm (1 in)
Well diameter (ขนาดผนังบอ) mm (in) (มม. (นิ้ว)) 50 mm (2 in) More than 100 mm (4 in)
DT-P
Check the installation site to make sure that it
has good drainage. ตรวจเช็คดูวาพื้นที่การติดตั้ง
มีการดําเนินการปองกันนํ้า มีการระบายนํ้าไว
หรือไม
•If leakage occurs, it can result in serious damage.
กรณีเกิดนํ้ารั่ว อาจสงผลใหไดรับความเสียหายรุนแรงได
•It can be stalled outdoors, but the site must not be exposed to wind,
rain, or direct sunlight. ควรติดตั้งในสถานที่ที่ไมถูกลม, ฝน หรือแสงแดด
สองโดยตรง
*Build the shed securely. ควรทําที่ครอบปองกันใหแนนหนา
1Check the install site. ตรวจเช็คสถานที่ ที่จะทําการติดตั้ง
•Choose the place that can easily be accessed for maintenance.
เลือกติดตั้งในสถานที่ ที่สามารถทําการตรวจเช็คซอมไดงาย
•It should be installed near the well as much as possible. ควรติดตั้งใกลกับ
บอนํ้ามากที่สุด
A small area is not suitable. สถานที่แคบๆ ไมเหมาะสม
30 cm
or more
30 cm
ขึ้นไป
30 cm
or more
30 cm
ขึ้นไป
Please make an air permeable lid to allow ventilation. ทําฝาครอบ
ที่สามารถใหลมผานเขาออกไดงาย
Please make it a habit to regularly check the pump for water leaks.
กรุณาตรวจสอบวามีนํ้ารั่วออกมาจากปมหรือไมเปนประจํา
*
*
SPECIFICATIONS
ขอมูลจําเพาะ
Case cover ฝาครอบ
Water-preventing tray
ถาดรอง
Drainage channel
รองระบายนํ้า
The height is sufficient for
removing the cover.
ความสูงที่จะถอดฝาครอบได
3PPL063166-A.indd 63PPL063166-A.indd 6 07/21/11 9:06 AM07/21/11 9:06 AM

7
Suction lift (ระยะดูด) 12-18 m (12~18 เมตร)
Well diameter (ขนาดผนังบอ)
2 inches (50 mm) (2 นิ้ว (50 มิลลิเมตร))
Suction pipe’s size (ขนาดทอดูด) 1 1/4 inches (35 mm) (1 1/4 นิ้ว (35 มิลลิเมตร))
Pressure pipe’s size (ขนาดทอความดัน)
1 inch (25 mm) (
1 นิ้ว (25 มิลลิเมตร))
Discharge pipe’s size (ขนาดทอจาย)
1 inch (25 mm) (
1 นิ้ว (25 มิลลิเมตร))
How to install วิธีการติดตั้ง
1. Prepare all parts to install such as 1-inch PVC pipes, and joints (refer to the specified depth in the manual). เตรียมอุปกรณในการติดตั้ง
ทอพีวีซีขนาด 1 นิ้ว และขอตอตางๆใหครบ (ระดับความลึกที่ระบุไวตามคูมือ)
2. Expand the end of the provided 1-inch PVC pipe (suction pipe) about 50 mm by holding it over the fire as shown in the figure of step 1.
นําทอพีวีซีขนาด 1 นิ้ว (Suction pipe) นําไปลนไฟดานปลายทอใหขยายตัว ความยาวโดยประมาณ 50 มิลลิเมตร ภาพขั้นตอนที่ 1
3.
Install the expanded end of the PVC pipe to the venturi of the single jet. Install the end of PVC pipe so that it is over the venturi about 10 mm
as shown in the figure of step 2. Then, cover the connection point with a damp cloth and bend the pipe’s end onto the venturi as shown in the
figure of step 3. นําปลายทอพีวีซีที่ลนไฟ สวมเขากับตัวสง (Venturi) ของชุดหัวเจ็ตทันทีใหสวมปลายทอพีวีซียาวเกินออกมาประมาณ 10 มิลลิเมตร ของ
ตัวสงนํ้า (Venturi) ภาพขั้นตอนที่ 2 หลังจากนั้นใชผาชุบนํ้าเย็น ซับจุดที่สวมแลวบีบใหกระชับใหปลายทอพีวีซีงอเขารัดกับตัวสง (Venturi) ภาพขั้นตอนที่ 3
4. Apply the silicone to protect the water leakage. Then, check for leakage at the silicone-applied point by pouring the water into the
pipe. ใหอัดซิลิโคลนปองกันนํ้ารั่วอีกครั้งและทําการตรวจสอบรอยรั่ว โดยการเติมนํ้าลงในทอ เช็คดูวามีนํ้ารั่วซึมในบริเวณที่อัดซิลิโคลนหรือไม
5.
Connect the 1-inch PVC pipe to the single jet as shown in the figure of step 3. Securely attach them with adhesive to avoid leakage. Then,
insert the completed single jet into the well in depth steps as specified in the manual. นําทอพีวีซีขนาด 1 นิ้วตอเขากับชุดเจ็ตของ ภาพขั้นตอน
ที่ 3 (ทากาวใหแนน) อยาใหรั่วซึม หลังจากนั้นนําปลายหัวเจ็ตที่ประกอบสมบูรณแลวปลอยลงผนังบอ, ทีละชวงตามความลึกที่ระบุไวตามคูมือ
6.
Turn the pipe’s end of the single jet (clockwise) until the sealing is against with the wall of the 2-inche well as shown in the figure of step 4.
ใหทําการหมุนปลายทอชุดเจ็ต (ตามเข็มนาิกา) ใหซีลยาง (Sealing) กระชับติดกับผนังบอทอพีวีซีขนาด 2 นิ้ว ภาพขั้นตอนที่ 4 จนแนนพอประมาณ
7.
Connect the 1 1/4-inch PVC pipe to the adapter. นําทอพีวีซีขนาด 1 1/4 นิ้วสวมผานชุด หัวยึด (Adapter)
8. Connect the 1 1/4-inch reducer to the pipe’s end of the single jet as shown in the figure of step 5. นําขอลดขนาด 1 1/4 นิ้วตอเขากับ
ปลายทอของชุดหัวเจ็ต ภาพขั้นตอนที่ 5
9. Install the flange set to the pump and connect them to the adapter (indicated in the circle) as shown in the figure of step 6. ติดตั้งชุด
หนาแปลนเขากับตัวปมพรอมกับสวมเขากับชุด Adapter (ตามที่วงกลมไว) ภาพขั้นตอนที่ 6
10. After finishing installation, refer to How to Prime it (page 5). เมื่อจบขั้นตอนการติดตั้งเรียบรอยแลว ใหดูคูมือวิธีการลอนํ้าที่ระบุไว (หนาที่ 5)
** If you cannot install it yourself, please consult the authorized personnel or your dealer. หากไมสามารถดําเนินการไดเอง
ใหปรึกษาชางผูชํานาญงานโดยเฉพาะหรือตัวแทนจําหนาย
** All joints must be glued to avoid water leakage; otherwise, the pump is unable to suck up the water. ขอตอแตละจุดควรทากาว
ใหแนนอยาใหมีรอยรั่วซึมจะทําใหปมดูดนํ้าไมขึ้น
การติดตั้ง
เจ็ดเดี่ยว
How to
install the single jet
วิธีการติดตั้งเจ็ตเดี่ยว
**
For the single jet installation, install it to the well with diameter of 2 inches
(50 mm). Perform the installation as follows: สําหรับการติดตั้งเจ็ตเดี่ยว ( Single jet )
ใชกับผนังบอภายในขนาด 2 นิ้ว หรือ 50 มิลลิเมตร ใหดําเนินการติดตั้งตามรายละเอียดดังนี้
PVC pipe at the
pressure side: 1 inch
(ทอพีวีซีดานความดัน
1 นิ้ว)
PVC pipe at the
suction side: 1 1/4
inches (ทอพีวีซี
ดานดูด 1 1/4 นิ้ว)
Adapter (หัวยึด)
2-inch socket
(ทอตอ 2 นิ้ว)
1 1/4-inch reducer
(ขอลด 1 1/4 - 1 นิ้ว)
1-inch PVC pipe
(ทอพีวีซี 1 นิ้ว)
Well diameter: 2 inches
(ผนังบอขนาด 2 นิ้ว)
Hopper cap (ฝาจุกเติมนํ้า)
1-inch PVC pipe
(ทอพีวีซี 1นิ้ว)
Expanded point 50 mm.
(จุดลนไฟ 50 มม.)
Venturi (ตัวสงนํ้า)
Single Jet (ชุดเจ็ต)
Well diameter (2-inch PVC pipe)
(ผนังบอ (ทอพีวีซีขนาด 2 นิ้ว))
Below the water level
about 2-3 m.
(ลึกจากระดับผิวนํ้าลง
มาประมาณ 2-3 เมตร)
Water level
(ระดับผิวนํ้า)
1-inch joint
(ขอตอ 1 นิ้ว)
1-inch PVC
pipe (ทอพีวีซี
ขนาด 1 นิ้ว)
1-inch PVC pipe
(ทอพีวีซี 1 นิ้ว)
Turn clockwise
(หมุนตามเข็มนาิกา)
Apply silicone
(อัดซิลิโคลนซํ้า)
10 mm. (10 มม.)
~
~
Sealing (ซีลยาง)2-inch well
(ผนังบอขนาด 2 นิ้ว)
Figure of step 1
(ภาพขั้นตอนที่ 1)
Figure of step 2
(ภาพขั้นตอนที่ 2)
Figure of step 4
(ภาพขั้นตอนที่ 4) Figure of step 5
(ภาพขั้นตอนที่ 5)
Figure of step 6
(ภาพขั้นตอนที่ 6)
Figure of step 3
(ภาพขั้นตอนที่ 3)
Flange of the 1-inch pressure
pipe (หนาแปลนดานทอ
ความดัน 1 นิ้ว)
Adjusting screw
(สกรูปรับคอนโทรลวาลว)
Flange of the 1 1/4-inch suction
pipe (หนาแปลนทอดานดูด
1 1/4 นิ้ว)
How to install the single jet
วิธีการติดตั้งเจ็ตเดี่ยว (SJ)
3PPL063166-A.indd 73PPL063166-A.indd 7 07/21/11 9:06 AM07/21/11 9:06 AM

8
Hopper cap (ฝาจุกเติมนํ้า)Control valve’s adjusting screw
(สกรูปรับคอนโทรลวาลว)
Flange at the 1-inch pressure pipe
(หนาแปลนดานทอความดัน 1 นิ้ว)
Flange at the 1 1/4 inch suction pipe
(หนาแปลนดานทอดูด 1 1/4 นิ้ว)
Pipe holder (ตัวจับยึดทอ)
Pipe band (สายรัด)
PVC pipe at the
pressure side: 1 inch
(ทอพีวีซีดานความดัน 1 นิ้ว)
Depth of water level:
18-30 m (ระยะลึก
ดูดผิวนํ้า 18 ~ 30 เมตร)
Strainer (ตัวกรองทราย)
Well diameter: 4 inches (100 mm)
or more (ผนังบอขนาด 4 นิ้ว (100
มม.) ขึ้นไป)
Secure the band at every 5 m.
(รัดสายชวงละ 5 เมตร)
Depth from the water
level: 1.5-2.0 m, Parallel jet
(ระยะลึกผิวนํ้า 1.5 ~2.0 เมตร หัวเจ็ต
(Parallel Jet))
pipe at the suction side: 1 1/4 inches
(ทอพีวีซีดานดูด 1 1/4 นิ้ว)
How to install วิธีการติดตั้ง
1. Prepare all parts to install such as 1-inch PVC pipes, 1 1/4-inch PVC pipes, and joints (refer to the specified depth in the manual). เตรียมอุปกรณ
ในการติดตั้ง ทอพีวีซีขนาด 1 นิ้ว, 1 1/4 นิ้ว และขอตอตางๆใหครบ (ระดับความลึกที่ระบุไวตามคูมือ)
2. Connect the provided parallel jet to the 1-inch PVC pipe and the 1 1/4-inch PVC pipe at the suction side and pressure side of the jet respectively
as shown in the figure of step 1.
นําชุดหัวเจ็ตคู (Parallel Jet) ที่ใหมากับเครื่องตอเขากับทอพีวีซีขนาด 1 นิ้ว ,1 1/4 นิ้ว ทางดานดูดและดานความดันของ
ชุดหัวเจ็ต ภาพขั้นตอนที่ 1
3. Connect the PVC pipes at the suction side and pressure side at the depth specified in the manual. ทําการตอทอพีวีซีทางดานดูดและทางดานความดัน
ใหไดความลึกที่ระบุไวตามคูมือ
4. Secure the PVC pipes at the suction side and pressure side together with the pipe band at every 5 m as shown in the figure of step 2. ใหใชสาย
รัดทอ (Pipe band) ทําการรัดทอพีวีซีทางดานดูดและดานความดันเปนชวงๆ ชวงละ 5 เมตร ทั้งสองทอเขาดวยกัน ภาพขั้นตอนที่ 2
5. Secure the PVC pipes at the suction side and pressure side with the pipe holder at the well’s edge as shown in the figure of step 2. ใชตัวจับยึด
ทอ (Pipe holder) ทําการจับยึดทอทางดานดูดและทอทางดานความดันทั้งสองทอไวใหแนน วางไวบนปากผนังบอ ภาพขั้นตอนที่ 2
6. Place the pump to locate the position for installing the flange at the suction side and pressure side as shown in the figure of step 2. นําปมนํ้ามา
วางเทียบเพื่อหาระดับจุดตอชุดหนาแปลนของปมนํ้าทางดานทอดูดและทางดานทอความดัน ภาพขั้นตอนที่ 2
7. After finishing installation, refer to How to Prime it (page 5).เมื่อจบขั้นตอนการติดตั้งเรียบรอยแลว ใหดูคูมือวิธีการลอนํ้าที่ระบุไว (หนาที่ 5)
** All joints must be glued to avoid water leakage; otherwise, the pump is unable to suck up the water. ขอตอแตละจุดควรทากาวใหแนนอยา
ใหมีรอยรั่วซึมจะทําใหปมดูดนํ้าไมขึ้น
** If you cannot install it yourself, please consult the authorized personnel or your dealer. หากไมสามารถดําเนินการไดเอง ใหปรึกษาชาง
ผูชํานาญงานโดยเฉพาะหรือตัวแทนจําหนาย
Pipe size at pressure side:
1 inch (ขนาดทอดานความ
ดัน 1 นิ้ว)Pipe size at suction
side: 1 1/4 inches (ขนาด
ทอดานดูด 1 1/4 นิ้ว)
Parallel Jet
(ชุดหัวเจ็ต)
Figure of step 1
(ภาพขั้นตอนที่ 1)
Figure of step 2
(ภาพขั้นตอนที่ 2)
** For the parallel jet installation, install it to the well with diameter of 4
inches (100 mm) or more. Perform the installation as follows: สําหรับการ
ติดตั้งเจ็ตคู (Parallel Jet) ใชกับผนังบอภายในขนาด 4 นิ้ว หรือ 100 มิลลิเมตร
ขึ้นไป ใหดําเนินการติดตั้งตามรายละเอียดดังนี้
How to install the parallel jet
วิธีการติดตั้งเจ็ตคู (PJ)
การติดตั้ง
เจ็ดเดี่ยว
How to
install the parallel jet
วิธีการติดตั้งเจ็ตคู
Suction lift (ระยะดูด) 18-30 m (18~30 เมตร)
Well diameter (ขนาดผนังบอ)
4 inches (100 mm) (4 นิ้ว (100 มิลลิเมตร))
Suction pipe’s size (ขนาดทอดูด) 1 1/4 inches (35 mm) (1 1/4 นิ้ว (35 มิลลิเมตร))
Pressure pipe’s size (ขนาดทอความดัน)
1 inch (25 mm) (
1 นิ้ว (25 มิลลิเมตร))
Discharge pipe’s size (ขนาดทอจาย)
1 inch (25 mm) (
1 นิ้ว (25 มิลลิเมตร))
3PPL063166-A.indd 83PPL063166-A.indd 8 07/21/11 9:06 AM07/21/11 9:06 AM

9
Earth wire
สายดิน
Earth rod
แทงสายดิน
It is installed to prevent an accident from an electric shock when there is an electrical leak. The earth wire and the leakage
circuit breaker require a licensed electrical to do it, start by removing the plug of the outlet before making the connections.
ใหทําการติดตั้งไวเพื่อปองกันอุบัติเหตุจากกระแสไฟฟาดูด เมื่อเกิดกระแสไฟฟารั่ว การติดตั้งที่เกี่ยวกับสายดินและ Leakage Circuit
Breaker จําเปนตองใหผูเชี่ยวชาญเฉพาะในทางไฟฟา เปนผูดําเนินการใหทําการติดตั้ง โดยใหถอดปลั๊กไฟออกจากเตาเสียบเสียกอน
แลวจึงใหทําการติดตั้ง
It is prohibited from grounding in the following places (forbidden by law).
หามตอสายดินในสถานที่ที่จะกลาวตอไปนี้ (เปนขอหามโดยกฎหมาย)
•Where there is a gas pipe, telephone line, lightning rod and plumbing.
ที่ที่มีทอ Gas, สายโทรศัพท, สายลอฟา, ทอประปา
•Connecting the leakage circuit breaker. เกี่ยวกับ Leakage Curcuit Breaker
1) Please install a circuit breaker with the working current less than 15 mA.
กรุณาติดตั้งเครื่องปองกันกระแสไฟฟารั่ว (Leakage Circuit Breaker) โดยกระแสไฟฟา
ทํางานอยูที่นอยกวา 15 mA ลงมา
2)
In the case where there is an existing circuit breaker, check as specified above.
กรณีที่มี Circuit Breaker ติดตั้งอยูแลวใหตรวจเช็คตามที่กําหนดไวขางตน
You must make a ground wire and install a leakage circuit breaker specifically for this job. ตองทําการตอ
สายดิน และติดตั้ง Leakage Circuit Breaker สําหรับใชงานโดยเฉพาะ
•You may have an electrical shock when the pump is defective or leaking. อาจจะถูกกระแสไฟฟาดูด
เมื่อปมนํ้าชํารุดหรือกระแสไฟฟารั่ว
1Please make the ground wire and install a leakage circuit breaker. กรุณาตอสายดินและติดตั้ง Leakage
Circuit Breaker
Precautions ขอควรระวัง
INSTALLATION ROUTING THE HARNESS
การติดตั้งเดินสายไฟ
WARNING
คําเตือน
WARNING
คําเตือน
Wiring should be considered a safety priority and comply with the technical standard of the electrical
appliance or internal wiring to the house. การเดินสายไฟใหคํานึงถึงความปลอดภัย และปฏิบัติตามมาตรฐานดาน
เทคนิคอุปกรณเครื่องใชไฟฟา หรือขอกําหนดการเดินสายไฟภายใน
•Faulty wiring may cause a fire or short circuit. การกอสรางเพื่อเดินสายไฟแบบผิดๆ อาจกอใหเกิดอัคคีภัยหรือ
ถูกไฟฟาดูดได
3PPL063166-A.indd 93PPL063166-A.indd 9 07/21/11 9:06 AM07/21/11 9:06 AM

10
When there is a problem during usage, you should stop the pump, remove the plug, and check to find the cause or consult your distributor. เมื่อเกิดความ
ผิดปกติระหวางการใชงาน ควรหยุดการใชงานและถอดปลั๊กไฟออก ตรวจสอบและหาสาเหตุ หรือปรึกษาตัวแทนจําหนาย
DT-P300GX
Trouble อาการที่เสีย Cause สาเหตุ Correction การแกไข
The pump cannot pump water
(Motor cannot run and
makes no noise)
ปมนํ้าสูบนํ้าไมขึ้น
(มอเตอรไมหมุนและไมมีเสียงดัง)
The plug is loose or the main switch is broken.
ปลั๊กไฟหลวมหรือเมนสวิตชขาด
- Keep the plug tight and check the main switch.
เสียบปลั๊กใหแนนและเช็คเมนสวิตช
The coil in the motor or pressure switch is out of order.
ขดลวดในมอเตอรหรือสวิตชความดันเสีย
- Repair or replace the pressure or the motor switch.
ซอมสวิตชความดันหรือมอเตอรหรือเปลี่ยนใหม
The impeller is locked may be due to the scale.
ใบพัดล็อค อาจเกิดจากทรายหรือตะกรันนํ้า
- Remove the cover for cleaning.
คลายฝาครอบออก ทําความสะอาด
The capacitor has leaked or melted.
ตัวเก็บประจุรั่วหรือหลอมละลาย
- Replace.
เปลี่ยนใหม
The pump cannot pump up
(Motor ratates normally)
ปมนํ้าสูบนํ้าไมขึ้น
(มอเตอรหมุนปกติ)
Water supply is dried, or the suction pipe has leaked.
นํ้าในแหลงสูบนํ้าแหงหรือ ทอทางดานดูดรั่ว
- Check the water supply and make sure the connections are tight.
เช็คแหลงนํ้าและเช็คทอตามขอตอแนนหรือไม
The check valve cannot be closed tightly.
การปดตัวของเช็ควาลวไมสนิท
- Remove for cleaning and check the rubber seal.
ถอดทําความสะอาดและตรวจเช็คซีลยาง
Insufficient water in the pump for priming.
นํ้าในตัวเรือนปมที่ใชลอมีไมเพียงพอ
- Refill the priming water.
เติมนํ้าลอใหมอีกครั้ง
The pump can pump up
(the pump works all the time)
ปมนํ้าสูบนํ้าขึ้น
(ปมนํ้าทํางานตลอดเวลา)
The suction pipe is clogged up.
ทอทางดานดูดตัน
- Check and clean the pipe.
เช็คและทําความสะอาดทอใหม
Water level is lower than the suction pipe end.
ระดับนํ้าตํ่ากวาปลายทอดานดูด
- Adjust the level of the suction pipe to be lower than the water level.
ปรับระดับของทอดูดใหมใหตํ่ากวาระดับนํ้า
The pressure switch is broken.
สวิตชความดันเสีย
- Repair or replace.
ซอมหรือเปลี่ยนใหม
The pump can pump up
(The pump cuts off too often)
ปมนํ้าสูบนํ้าขึ้น
(ปมนํ้าตัด - ตอบอยเกินไป)
Air volume in the pressure tank is reduced.
ปริมาณอากาศในถังความดันลดลง
- Remove water out of the tank and clean the aerator.
ถายนํ้าออกจากถังและทําความสะอาดตัวปอนอากาศ
Water volume use is too low.
ปริมาณการใชนํ้านอย
- Turn on the faucet for the suitable volume.
เปดกอกนํ้าใชในปริมาณที่เหมาะสม
The delivery pipe is leaked or other equipment is broken down.
ทอทางดานจายรั่ว หรืออุปกรณอื่นๆ เสีย
- Repair the pipe or check the electrical equipment in the house.
ซอมแซมทอใหมหรือตรวจเช็คอุปกรณภายในบาน
PROBLEMS AND REPAIRS
ปญหาและการแกไข
WIRING DIAGRAM
วงจรไฟฟา
Power source
(แหลงจายไฟ)
Terminal box
(กลองชุดครอบสายไฟ)
(ค็อนเดนเซอร)
Condenser
(มอเตอร)
MOTOR
(ขาว)
WHITE (แดง)
RED
Pressure switch
(สวิตชปรับความดัน)
(ขาว)
WHITE
(เทา)
GRAY
(ดํา)
BLACK
(ฟา)
BLUE
(เทา)
GRAY
GREEN/YELLOW (EARTH)
เขียว/เหลือง (สายดิน)
(นํ้าตาล)
BROWN
3PPL063166-A.indd 103PPL063166-A.indd 10 07/21/11 9:06 AM07/21/11 9:06 AM

11
3PPL063166-A.indd 113PPL063166-A.indd 11 07/21/11 9:06 AM07/21/11 9:06 AM

12 3PPL063166-A
จัดจําหนายโดย : บริษัท ฮิตาชิเซลส (ประเทศไทย) จํากัด
ที่อยู : เลขที่ 994, 996 ซอยทองหลอ ถนนสุขุมวิท 55 แขวงคลองตันเหนือ เขตวัฒนา กรุงเทพฯ 10110
โทรศัพท : 0-2381-8381-98 โทรสาร : 0-2391-0210, 0-2391-0021
ราคาขายปลีกรุน : DT-P300GX (SJ) 9,500 บาท
DT-P300GX (PJ) 9,900 บาท
DISTRIBUTED BY : Hitachi Sales (Thailand), Ltd.
ADDRESS : 994, 996 Soi Thonglor, Sukhumvit 55 Rd., Klongtonnua, Vadhana, Bangkok 10110
Tel. 0-2381-8381-98 Fax. : 0-2391-0210, 0-2391-0021
SELLING PRICE : DT-P300GX (SJ) 9,500 -
DT-P300GX (PJ) 9,900 -
3PPL063166-A.indd 123PPL063166-A.indd 12 07/21/11 9:43 AM07/21/11 9:43 AM
This manual suits for next models
2
Table of contents
Other Hitachi Water Pump manuals