manuals.online logo
Brands
  1. Home
  2. •
  3. Brands
  4. •
  5. Hitron
  6. •
  7. Security Camera
  8. •
  9. Hitron HDG-N11NNV2WO User manual

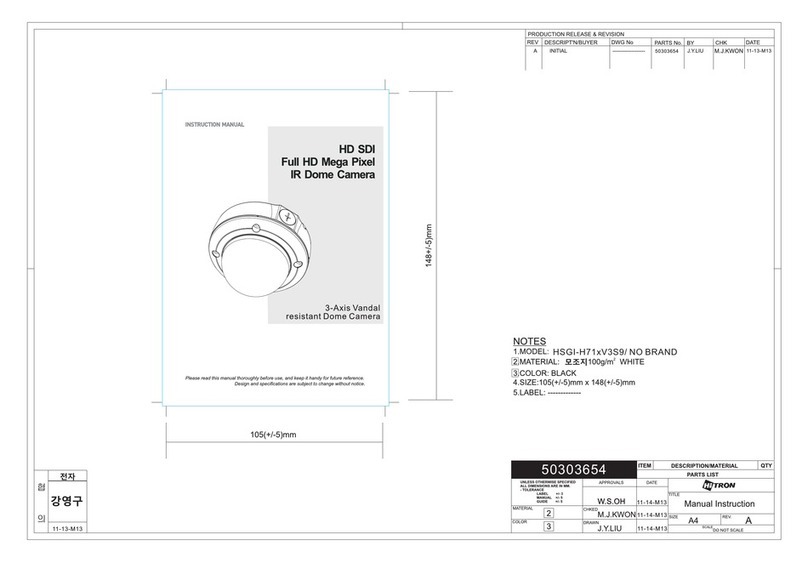
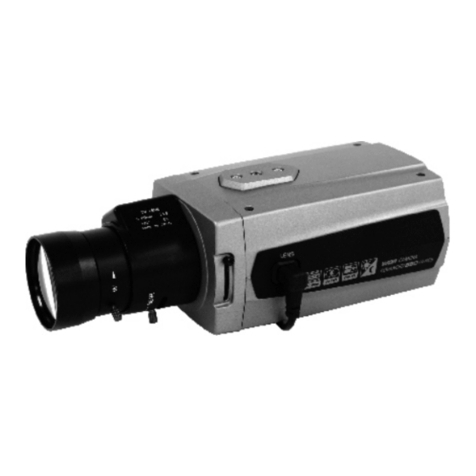
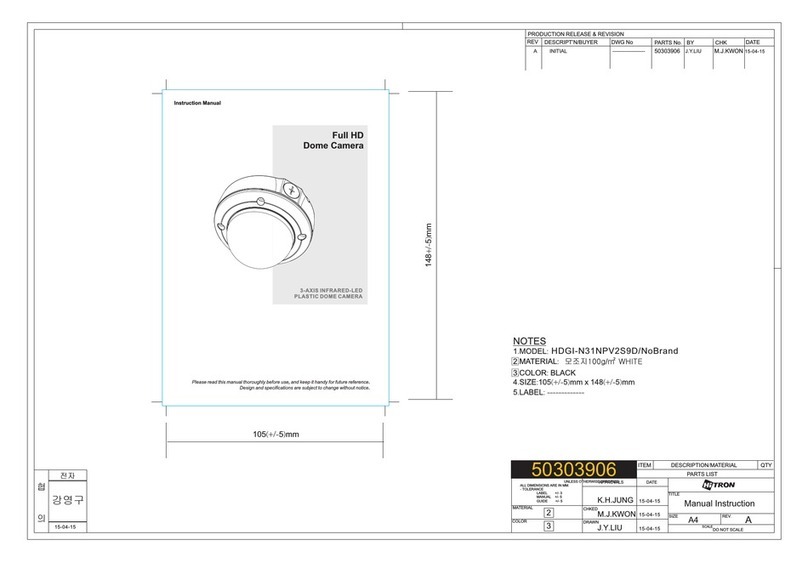
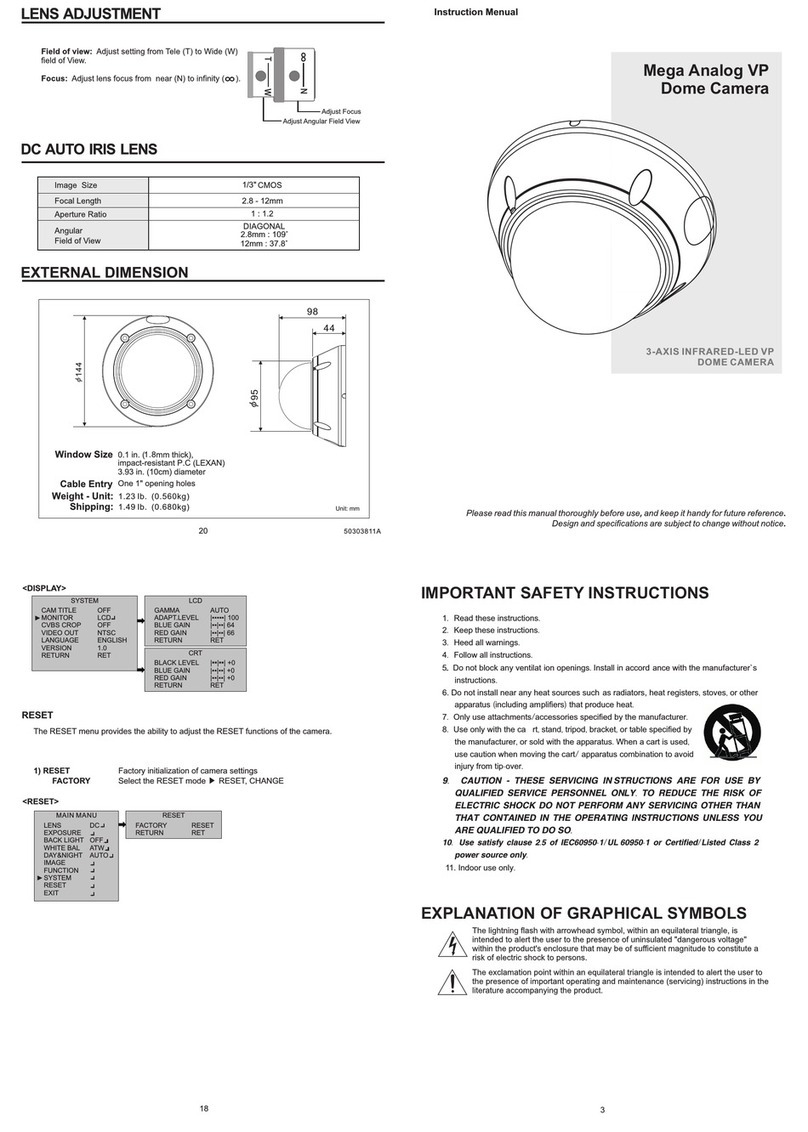
Hitron HDG-N11NNV2WO User manual

PRODUCTION RELEASE & REVISION
REV DESCRIPT'N/BUYER DWG No PARTS No.BY CHK DATE
TITLE
SIZE REV.
SCALE
MATERIAL
UNLESS OTHERWISE SPECIFIED
ALL DIMENSIONS ARE IN MM.
- TOLERANCE
LABEL +/- 3
MANUAL +/- 5
GUIDE +/- 5
COLOR
DATE
DRAWN
CHKED
APPROVALS
PARTS LIST
DESCRIPTION/MATERIAL
ITEM QTY
A4
DO NOT SCALE
2
2.MATERIAL: 2
3.COLOR: BLACK
3
전자
105(+/-5)mm
148+/-5)mm
50304037
HDG-N11NNV2WO / NoBrand
M.J.KWON
50304037
A
강영구
M.J.KWON
05-25-M1 6
15-02-12 05-25-M16
Mega Analog Vandal
Dome Camera
Instruction Manual
2
FCC COMPLIANCE STATEMENT
CE COMPLIANCE STATEMENT
CAUTION : Changes or modifications not expressly approved by the party responsible for
compliance could void the user’s authority to operate the equipment.
This device complies with Part 15 of the FCC Rules. Operation is subject to the following two
conditions: (1) this device may not cause harmful interference, and (2) this device must
accept any interference received, including interference that may cause undesired operation.
WARNING : This is a Class A poduct. In a domestic environment this product may cause
radio interference in which case the user may be required to take adequate measures.
FCC INFORMATION : This equipment has been tested and found to comply with the limits
for a Class A digital device, pursuant to Part 15 of the FCC Rules. These limits are designed
to provide reasonable protection against harmful interference when the equipment is
operated in a commercial environment. This equipment generates, uses, and can radiate
radio frequency energy and, if not installed and used in accordance with the instruction
manual, may cause harmful interference to radio communications. Operation of this
equipment in a residential area is likely to cause harmful interference in which case the user
will be required to correct the interference at his own expense.
1. Read these instructions.
2. Keep these instructions.
3. Heed all warnings.
4. Follow all instructions.
5.. Do not block any ventilat ion openings. Install in accord ance with the manufacturer`s
instructions.
6. Do not install near any heat sources such as radiators, heat registers, stoves, or other
apparatus (including amplifiers) that produce heat.
7. Only use attachments/accessories specified by the manufacturer.
8. Use only with the ca rt, stand, tripod, bracket, or table specified by
the manufacturer, or sold with the apparatus. When a cart is used,
use caution when moving the cart/apparatus combination to avoid
injury from tip-over.
9. CAUTION - THESE SERVICING IN STRUCTIONS ARE FOR USE BY
QUALIFIED SERVICE PERSONNEL ONLY. TO REDUCE THE RISK OF
ELECTRIC SHOCK DO NOT PERFORM ANY SERVICING OTHER THAN
THAT CONTAINED IN THE OPERATING INSTRUCTIONS UNLESS YOU
ARE QUALIFIED TO DO SO.
10. Use satisfy clause 2.5 of IEC60950-1/UL 60950-1 or Certified/Listed Class 2
power source only.
11. Indoor use only.
EXPLANATION OF GRAPHICAL SYMBOLS
IMPORTANT SAFETY INSTRUCTIONS
3
4
5
6
7
8
19
19
18
19
BASE INSTALLATION
5
1/3"
The 1/3" HD CMOS camera, especially for closed circuit television CCTV and
security surveillance application.
Auto and manual white balance modes (ATW/AWC/Manual/AWB)
1.0 lux(COLOR), 0.1 lux(B/W)
6
2.8-12
12V DC In put
DC 12V ± 10%
Desiccant pack
Top Case
Desiccant Pack
Accessories:
Poly Bag
Desiccant Pack
Double-Sided Tape
Recommended
location
Wedge Camera, Ceiling Mount
Rubber
washers (4x)
Ceiling
Plastic
anchors (4x)
Wedge Camera,
Ceiling Mount using a 4s Electrical Box
8-32 x 0.75 Flat head
screws (2x)
Rubber
washers (4x)
M4 x 8 Pan head
screws (4x)
7
8
RESET
WHITE BAL
BACKLIGHT
SENS-UP
D-WDR
<WHITE BAL>
OFF
WDR
BLC
HSBLC
<BACKLIGHT>
ATW
AWC->SET
INDOOR
OUTDOOR
MANUAL
AWB
<DAY&NIGHT>
SHARPNESS
LSC
D-EFFECT
DIS
D-ZOOM
SMART D-ZOOM
RETURN
CAM TITLE
MONITOR
CVBS CROP
VIDEO OUT
LANGUAGE
VERSION
RETURN
<RESET>
FACTORY
RETURN
9
MAIN MANU
LENS
EXPOSURE
BACK LIGHT
WHITE BAL
DAY&NIGHT
IMAGE
FUNCTION
SYSTEM
RESET
EXIT
DC
OFF
ATW
AUTO
MAIN MANU
LENS
EXPOSURE
BACK LIGHT
WHITE BAL
DAY&NIGHT
IMAGE
FUNCTION
SYSTEM
RESET
EXIT
MANUAL
OFF
ATW
AUTO
1)
2)
MAIN MANU
LENS
EXPOSURE
BACK LIGHT
WHITE BAL
DAY&NIGHT
IMAGE
FUNCTION
SYSTEM
RESET
EXIT
DC
OFF
ATW
AUTO
SHUTTER
AGC
SENS-UP
BRIGHTNESS
D-WDR
DEFOG
RETURN
AUTO
|▪l▪▪▪▪| 15
OFF
|▪l▪▪▪▪| 30
OFF
OFF
RET
< EXPOSURE > MODE
AGC, SENS-UP, BRIGHTNESS,
D-WDR and DEFOG function of the camera.
It
1/50000, x2 ~ x30
Adjust the Auto Gain Control level. ▶ 0 - 15
AGC
3) SENS-UP Select the Digital Slow Shutter level. ▶ OFF, AUTO (x2 ~ x30)
BRIGHTNESS Adjust the BRIGHTNESS level. ▶ 0 - 100
D-WDR
DEFOG
Select the Digital WDR.▶ ON, OFF
ON, OFF
POS/SIZE
GRADATION
DEFAULT
Adjust the window position & size
Off, Low, Middle, High
Initialize the setting values
10
BACKLIGHT
The BACKLIGHT menu is used to the ability to expand the dynamic range and to prevent back
lighting from the image.
1)WDR Select the Dynamic Range level.
* When WDR is ON, D-WDR, D-ZOOM, SMART D-ZOOM
and DIS function can not turn on.
2)BLC Prevents such a back light effect to secure a clear image under All illumination
environments.
Adjust the size of Back Light Compensation area.
3)HLMASK Mask the high light zone with specific color & level.
Adjust the window position & sizeAREA
Initialize the setting valuesDEFAULT
Select the HLMASK area ▶ AREA1 - AREA4SELECT
Adjust the HLMASK area window position & sizeDISPLAY
Select the HLMASK level ▶ 0 ~ 100LEVEL
All Day, NightMODE
Initialize the setting values.DEFAULT
MAIN MANU
LENS
EXPOSURE
BACK LIGHT
WHITE BAL
DAY&NIGHT
IMAGE
FUNCTION
SYSTEM
RESET
EXIT
DC
OFF
ATW
AUTO
WDR
GAIN
WDR OFFSET
RETURN
LOW
|▪▪▪▪▪| 0
RET
BLC
GAIN
AREA
DEFAULT
RETURN
MIDDLE
RET
HLBLC
SELECT
DISPLAY
LEVEL
MODE
BLACK MASK
DEFAULT
RETURN
AREA
ON
|▪▪l▪▪| 30
ALL DAY
ON
RET
< BACKLIGHT >
Select the BLC gain ▶ Low, Middle, HighGAIN
11
WHITE BALANCE
The screen color can be adjusted by using the Auto White Balance function.
It compensates for deviations in the white color caused by changes in the color temperature of
the light source so that the colors are reproduced correctly.
1)ATW
2)AWC->SET
3)INDOOR
4)OUTDOOR
5)MANUAL
Automatically adjust color temperature.
Automatically readjust only by pressing AWC→SET.
Set the color temperature to 3200°K
Set the color temperature to 6300°K
Manual mode.
User can change Red and Blue gain value manually.
BLUE
RED
0 ~ 100
0 ~ 100
6)AWB Automatically extended range of color temperature adjustment.
MAIN MANU
LENS
EXPOSURE
BACK LIGHT
WHITE BAL
DAY&NIGHT
IMAGE
FUNCTION
SYSTEM
RESET
EXIT
DC
OFF
ATW
AUTO
MANUAL
BLUE
RED
RETURN
|▪▪I▪▪| 50
|▪▪I▪▪| 50
RET
< WHITE BALANCE > MODE
12
.
CDS
BURST ON, OFF
IR SMART LEVEL 1~15
AREA Adjust the window position & size.
DAY&NIGHT mode are changed according to the brightness of the image.
Use only when the camera is installed in a dark place but the camera is viewing a bright place.
When used in a normal installation, hunting may occur.
< DAY&NIGHT > MODE
MAIN MANU
LENS
EXPOSURE
BACK LIGHT
WHITE BAL
DAY&NIGHT
IMAGE
FUNCTION
SYSTEM
RESET
EXIT
DC
OFF
ATW
AUTO
D&N AUTO
DELAY
D N (CDS)
N D (CDS)
RETURN
|▪▪I▪▪| 5
|▪▪I▪▪| 70
|▪▪I▪▪| 40
RET
D&N B&W
BURST
IR SMART
RETURN
ON
ON
RET
13
The IMAGE menu provides the ability to adjust the SHARPNESS, LSC, D-EFFECT, DIS, D-ZOOM
and SMART D-ZOOM functions of the camera.
1) SHARPNESS Adjust the SHARPNESS level. ▶ 0 - 15
2) LSC Select the lens Lens Shading Compensation. ▶ ON, OFF
3) D-EFFECT FREEZE Select real or still mode ▶ ON, OFF
MIRROR Select OFF, MIRROR, V-FLIP, ROTATE
NEG. IMAGE Select Negative image mode ▶ ON, OFF
4) DIS Select the Digital Image Stability ▶ ON, OFF
5) D-ZOOM Adjust the Digital Zoom level. ▶ x1.0 - x62.0
* When D-ZOOM is ON, SMART D-ZOOM and DIS function can not turn on.
6) SMART D-ZOOM Adjust the Smart Digital Zoom area, level, sensitivity and time.
* When D-ZOOM is ON, D-ZOOM and DIS function can not turn on.
SELECT Select the Smart D-zoom Area ▶ AREA1, AREA2
DISPLAY Select the Smart D-zoom Area display ▶ ON, OFF
SENSITIVITY Adjust the Smart D-zoom Sensitivity ▶ 0 - 60
D-ZOOM Adjust the Digital Zoom level ▶ x1.0 - x62.0
TIME Adjust time level ▶ 0 - 15 (sec)
MAIN MANU
LENS
EXPOSURE
BACK LIGHT
WHITE BAL
DAY&NIGHT
IMAGE
FUNCTION
SYSTEM
RESET
EXIT
DC
OFF
ATW
AUTO
IMAGE
SHARPNESS
LSC
D-EFFECT
DIS
D-ZOOM
SMART D-ZOOM
RETURN
|▪▪I▪▪| 8
OFF
OFF
OFF
OFF
OFF
RET
<SMART D-ZOOM>
SMART D-ZOOM
SELECT
DISPALY
SENSITIVITY
D-ZOOM
TIME
DEFAULT
RETURN
AREA1
ON
|▪▪▪I▪| 60
x2.8
|▪I▪▪▪| 3
RET
IMAGE
SHARPNESS
LSC
D-EFFECT
DIS
D-ZOOM
SMART D-ZOOM
RETURN
|▪▪I▪▪| 8
OFF
OFF
OFF
OFF
OFF
RET
14
1) DNR
2D
3D
SMART NR
Select Digital Noise Reduction.
LEVEL
▶ ON, OFF
▶ ON, OFF
▶ ON, OFF (Sensitivity 0 - 100)
Adjust the 3DNR level ▶ 0 - 100
2) MOTION
SELECT
DISPLAY
SENSITIVITY
Detects the Motioned Object in the image. ▶ ON, OFF
MOTION VIEW
DEFAULT
Select the Motion area ▶ AREA1 - AREA4
Adjust the Motion area window position & size
Adjust the Motion sensitivity level ▶ 0 - 60
Select the Motion view ▶ ON, OFF
Initialize the setting values
3) PRIVACY
SELECT
DISPLAY
COLOR
Hide an area you want to hide on the screen.
TRANS
DEFAULT
Select the privacy zone ▶ AREA1 - AREA8
Adjust the Privacy window type, position & size
▶ OFF, INV., MOSAIC, COLOR
Select the privacy zone color ▶ 0 - 15
Select the privacy zone transparency ▶ 0 - 3
Initialize the setting values
4) DEFECT DET
LIVE DPC
STATIC DPC
START
Compensates for bad pixels.
LEVEL
SENS-UP
Select the Live DPC mode ▶OFF, ON, AUTO
▶ ON, OFF
Start the bad pixels correction
Select the Static DPC level ▶ 0 - 60
Select the Sens-up level ▶ x2 - x30
AGC Select the AGC level ▶ 0 - 8
MAIN MANU
LENS
EXPOSURE
BACK LIGHT
WHITE BAL
DAY&NIGHT
IMAGE
FUNCTION
SYSTEM
RESET
EXIT
DC
OFF
ATW
AUTO
FUNCTION
DNR
MOTION
PRIVACY
DEFECT DET
RETURN
OFF
OFF
<FUNCTION>
15
MAIN MANU
LENS
EXPOSURE
BACK LIGHT
WHITE BAL
DAY&NIGHT
IMAGE
FUNCTION
SYSTEM
RESET
EXIT
DC
OFF
ATW
AUTO
FUNCTION
DNR
MOTION
PRIVACY
DEFECT DET
RETURN
OFF
OFF
RET
<DNR>
<MOTION>
DNR
2D
3D
RETURN
ON
ON
OFF
FUNCT NIO
RDN
MION
OT
PRIVACY
FECT DET
DE
RET RN
U
OFF
FF
O
RET
MOTION
SELECT
DISPLAY
SENSITIVITY
MOTION VIEW
DEFAULT
RETURN
AREA1
ON
|▪▪▪▪▪| 60
ON
RET
FUNCTION
DNR
MOTION
PRIVACY
DEFECT DET
RETURN
OFF
OFF
RET
<PRIVACY>
PRIVACY
SELECT
DISPLAY
COLOR
TRANS.
DEFAULT
RETURN
AREA1
COLOR
2
3
RET
UNCTF ION
RDN
MN
OTIO
PRIVACY
ECT DET
DEF
RET NUR
OFF
F
OF
RET
<DEFECT DET>
DEFECT DET
LIVE DPC
STATIC DPC
RETURN
AUTO
ON
RET
CTFUN ION
DNR
MOTION
PRIVACY
DEFECT DET
ETR URN
F
OF
OFF
RET
STATIC DPC
START
LEVEL
SENS-UP
AGC
RETURN
|▪I▪▪▪| 4
x8
|▪▪▪▪▪| 0
RET
DEFECT DET
CLOSE THE IRIS
THEN
PRESS SET KEY
DEFECT DET
WAITING...
<FUNCTION>
16
SYSTEM
The IMAGE menu provides the ability to adjust the CAM TITLE, RS485, MONITOR, CVBS CROP,
VIDEO OUT, LANGUAGE and, VERSION functions of the camera.
1) CAM TITLE Maximum of 15 characters are allowed.
2) MONITOR
LCD
GAMMA
ADAPT. LEVEL
Select the Monitor type ▶ LCD, CRT
BLUE GAIN
RED GAIN
Select the Gamma level ▶ AUTO, USER. USER+Y, 0.45 -1.0
Adjust the Adaptive level ▶ 0 - 100
Adjust the Blue gain level ▶ 0 - 100
Adjust the Red gain level ▶ 0 - 100
3) CVBS CROP ▶ ON, OFF
CRT
BLACK LEVEL
BLUE GAIN
RED GAIN
Select the Black level ▶ -30 ~ +30
Adjust the Blue gain level ▶ -50 ~ +50
Adjust the Red gain level ▶ -50 ~ +50
4) VIDEO OUT Select the video out type ▶ NTSC, PAL
5) LANGUAGE OSD menu LANGUAGE (16ea) ▶ ENGLISH etc.
6) VERSION Firmware VERSION
<SYSTEM>
MAIN MANU
LENS
EXPOSURE
BACK LIGHT
WHITE BAL
DAY&NIGHT
IMAGE
FUNCTION
SYSTEM
RESET
EXIT
DC
OFF
ATW
AUTO
<CAM TITLE>
CAM TITLE
0 1 2 3 4 5 6 7 8 9
A B C D E F G H I J K
L M N O P Q R S T U V
WXYZ▶→ ← ↑ ↓ ()
¯ - _■ /=& : ~ , .
← → CLR POS END
________________
SYSTEM
CAM TITLE
MONITOR
CVBS CROP
VIDEO OUT
LANGUAGE
VERSION
RETURN
OFF
LCD
OFF
NTSC
ENGLISH
1.0
RET
SYSTEM
CAM TITLE
MONITOR
CVBS CROP
VIDEO OUT
LANGUAGE
VERSION
RETURN
OFF
LCD
OFF
NTSC
ENGLISH
1.0
RET
If you see a part color scene out of the white is Blue, Red gain to
adjust the color alignment.
Note
17
<MONITER>
LCD
GAMMA
ADAPT.LEVEL
BLUE GAIN
RED GAIN
RETURN
AUTO
|▪▪▪▪▪| 100
|▪▪|▪▪| 64
|▪▪|▪▪| 66
RET
CRT
BLACK LEVEL
BLUE GAIN
RED GAIN
RETURN
|▪▪|▪▪| +0
|▪▪|▪▪| +0
|▪▪|▪▪| +0
RET
RESET
The RESET menu provides the ability to adjust the RESET functions of the camera.
1) RESET
FACTORY
Factory initialization of camera settings
Select the RESET mode ▶ RESET, CHANGE
<RESET>
RESET
FACTORY
RETURN
RESET
RET
MAIN MANU
LENS
EXPOSURE
BACK LIGHT
WHITE BAL
DAY&NIGHT
IMAGE
FUNCTION
SYSTEM
RESET
EXIT
DC
OFF
ATW
AUTO
SYSTEM
CAM TITLE
MONITOR
CVBS CROP
VIDEO OUT
LANGUAGE
VERSION
RETURN
OFF
LCD
OFF
NTSC
ENGLISH
1.0
RET
103x 172mm(H)
18
f=2.8~12mm F1.2~360 Varifocal, ICR (D&N)
Fixed mount
BNC Connector
Reset
ENG / JPN / CHN1 / CHN2 / KOR / GER / FRA / ITA
SPA / POL / RUS / POR / NED / TUR / HEB / ARB
OFF / ON
OFF / ON
LCD / CRT
NTSC (60Hz) / PAL (50Hz)
Video out
AUTO / USER / USER+Y / 0.45 ~ 1.0
Monitor
0 ~ 15
Freeze OFF / ON
DIS OFF / ON
Smart D-Zoom OFF / ON (x1.0 ~ x62 / 2 zone)
D-Zoom OFF /x1.0 ~ x62
D-Effect OFF / MIRROR / V-FILP / ROTATE
OFF / ON (SMART NR)
3DNR
Privacy Masking OFF / ON (8 Polygone)
Motion Detection OFF / ON (4 zone)
LSC (Shading) OFF / ON
Smart IR Level 1 ~ 15
0 ~ 100
0 ~ 100
DWDR OFF / ON
ATW / PUSH / INDOOR / OUTDOOR / MANUAL / AWB
SENS-UP
0 ~ 15
0 ~ 100
Max 2.7 Watts (220mA)
1/3" 1.3M Sony CMOS
1312(H) x 1069(V)
1296(H) x 1041(V)
1000 TVL
NTSC / PAL Changed by OSD
OFF / WDR / BLC / HSBLC
AUTO, 1/60(1/50), FLK ~ 1/50,000sec
OFF / x2 / x4 / x6 / x8 / x10 / x15 / x20 / x25 / x30
DC 12V ± 10%
DC Jack
MEGA ANALOG CAMERA
OSD (Coaxial communication)
1.0 Lux(Color), 0.1 Lux(B/W)
570g
19

Other Hitron Security Camera manuals

Hitron HSG-H7DxF3A3 User manual

Hitron

Hitron HSG-H7DxF3A3 User manual

Hitron HCG-P7xDxA32 User manual

Hitron

Hitron HCG-P7xDxA32 User manual

Hitron Mega Analog VP User manual

Hitron

Hitron Mega Analog VP User manual

Hitron FASTRAX II E User manual

Hitron

Hitron FASTRAX II E User manual
Hitron HCB-J5FD User manual

Hitron

Hitron HCB-J5FD User manual

Hitron HSUI-H75DxZ2U8 User manual

Hitron

Hitron HSUI-H75DxZ2U8 User manual

Hitron HCB-F9 User manual

Hitron

Hitron HCB-F9 User manual

Hitron 50201270 User manual

Hitron

Hitron 50201270 User manual

Hitron HDG-3x0 series User manual

Hitron

Hitron HDG-3x0 series User manual
Hitron HSGI-H71xV3S9 User manual

Hitron

Hitron HSGI-H71xV3S9 User manual

Hitron HDG-N15DPV2A7U User manual

Hitron

Hitron HDG-N15DPV2A7U User manual

Hitron HPCB-E(F)5WN9H User manual

Hitron

Hitron HPCB-E(F)5WN9H User manual
Hitron Minitrax HCV-851PZ0S4 User manual

Hitron

Hitron Minitrax HCV-851PZ0S4 User manual

Hitron HCGI-E1NKF0W2A User manual

Hitron

Hitron HCGI-E1NKF0W2A User manual

Hitron HCB-F90N User manual

Hitron

Hitron HCB-F90N User manual

Hitron HCUI-N4 K V Series User manual

Hitron

Hitron HCUI-N4 K V Series User manual

Hitron HCGI-P61DNFxW2 User manual

Hitron

Hitron HCGI-P61DNFxW2 User manual

Hitron HDGI-N31NPV2S9D User manual

Hitron

Hitron HDGI-N31NPV2S9D User manual

Hitron HCG-N41K*F*W2 series User manual
Hitron

Hitron HCG-N41K*F*W2 series User manual

Popular Security Camera manuals by other brands

Samsung iPolis SNB-5000 user manual

Samsung

Samsung iPolis SNB-5000 user manual

Amcrest IP4M-1026EW user manual

Amcrest

Amcrest IP4M-1026EW user manual

Iget HGNVK-48302 quick start guide

Iget

Iget HGNVK-48302 quick start guide

Sentry360 IS-IP200-IRB user manual

Sentry360

Sentry360 IS-IP200-IRB user manual

Novus NVIP-4VE-4202M user manual

Novus

Novus NVIP-4VE-4202M user manual

Honeywell NEXPTZ4520HD-NET Operation manual

Honeywell

Honeywell NEXPTZ4520HD-NET Operation manual

LG LVC-SX701OC instruction manual

LG

LG LVC-SX701OC instruction manual

TBK vision TBK-MD5707IR36 user manual

TBK vision

TBK vision TBK-MD5707IR36 user manual

Vista powerdome pro series installation manual

Vista

Vista powerdome pro series installation manual

BARTEC PIXAVI Orbit X EX user manual

BARTEC PIXAVI

BARTEC PIXAVI Orbit X EX user manual

Vicon IX 4000 L Installation & operation manual

Vicon

Vicon IX 4000 L Installation & operation manual

Dahua IPC-HFW5849T1-ASE-LED-0360B quick start guide

Dahua

Dahua IPC-HFW5849T1-ASE-LED-0360B quick start guide

Samsung SDZ-330 instruction manual

Samsung

Samsung SDZ-330 instruction manual

ESP GuardCamDeco product manual

ESP

ESP GuardCamDeco product manual

Ganz ZC-BT SERIES instruction manual

Ganz

Ganz ZC-BT SERIES instruction manual

Vivotek FD8182-T Quick installation guide

Vivotek

Vivotek FD8182-T Quick installation guide

Vitek VTC-TNT5RMS quick start guide

Vitek

Vitek VTC-TNT5RMS quick start guide

Wisenet PNM-8082VT quick guide

Wisenet

Wisenet PNM-8082VT quick guide

manuals.online logo
manuals.online logoBrands
  • About & Mission
  • Contact us
  • Privacy Policy
  • Terms and Conditions

Copyright 2025 Manuals.Online. All Rights Reserved.