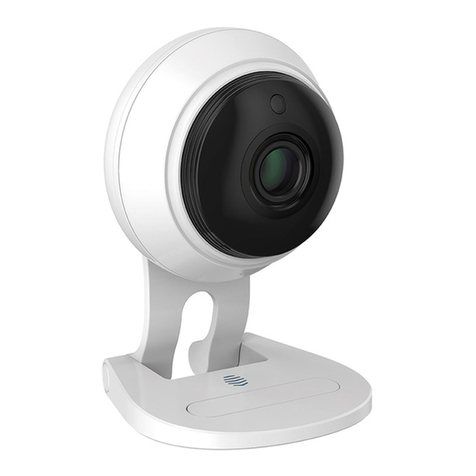
Hive Siren User manual

Welcome to Hive. This guide tells you everything
you need to know to set up your Hive Siren.
Siren user guide

01
Siren
8m cable 4x Wall plugs
Wall mount
4x Screws 2x Wall finisher
Power adapter
What’s in the box
Please check the contents of your Hive Siren’s packagingbefore proceedingto
install your Hive Siren. If you’re missingany parts please get in touch with our
customer care team by vistingwww.hivehome.com/contact-us

02
If you need to arrange for a professional installer to set-up your Hive Siren
please contact our customer care team by visitingwww.hivehome.com/install
Important: If you are installingthe Siren yourself you should be competent usingpower
tools and workingat heights. If you need to drill into brick or stone, you'll need an SDS power
drill and masonry bits.
Phillips screwdriver #1
Pencil/marker Spirit level
Drill bits 6mm, 12mm
Ladder
Power drill
Tools you may need

03
The siren is best placed between the first and second floors of your home.
You will need to place the Siren within 8m (26ft) of an internal power socket.
Where to place

04
Positioning
STEP 1
Assess where best to position the Siren in your
chosen location. It should be at a height between
2.5m to 3.5m. Ensure that there is an internal power
supply within 8m of this location.
Drill hole
STEP 2
Position the ladder safely and ensure you have
appropriate safety equipment before drilling. Drill a
6mm pilot hole from the outside to the inside.
Use a 12mm drill bit to increase the diameter of the
pilot hole.
To install your Siren follow the steps below:
Important: Make sure that you comply with all local buildingregulations, install in accordance
with buildingand installation codes where you live, and that you know where all in-wall pipes
and electrical wires are before drilling. If you don’t feel comfortable drillingthrough an exterior
wall, contact Hive by visitingwww.hivehome.com/install to arrange a professional installation.
Always use safety and protective gear appropriate for the type of work and tools beingused.
How to fit the siren

05
Fit the mountingplate
STEP 4
Slide the Siren up oof the mountingplate and use
a pencil or marker and a sprit level to mark out the
four holes, for drilling, on the wall.
Drill the holes you've marked, insert the wall plugs,
then screw the four screws into the wall. Make sure
that at least 12mm of the screw protrudes from the
surface of the wall.
Thread the power cable though the middle of the
mountingplate. Now place the mountingplate onto
the screws, slidingdown to lock into place.
Lightly tighten the four mountingscrews to secure
the backplate.
Prepare the Siren for fitting
STEP 5
While at ground level, unscrew the battery
compartment on the Siren and remove the battery
tab. The Siren will beep and the security light will
flash. You can now replace the battery compartment
and tighten the securingscrew. This will protect the
Siren from water ingress.
Important: You must unscrew the battery compartment before removingthe battery tab.
Thread the cable
STEP 3
Cover the end of the power cable with tape to
prevent the ingress of dust or debris. Thread the
cable from the inside of the property to the outside.
Now connect the cable to the power supply and plug
it into the internal socket and switch on.
Important: Remember to place a wall finisher over the cable before threadingthrough the wall. Then place the
second wall finisher over the cable from the outside.

05
Fit the Siren
STEP 6
1
Takingthe Siren up the ladder safely, insert the
power cable into the Siren. Wrap the cable around
the cable management guide and push any excess
cable back through the hole, leavingenough slack to
fit the Siren onto the mountingplate. Now slide the
Siren onto the mountingplate.
Tidy up
STEP 7
1
Head back inside, pull though any excess cable
gently, placingin a safe location, out of the way, so
that it is not a trip hazard. Before finishing
installation, make sure that the power supply is
connected and switched on.

06
How to use the Siren
Triggeringthe Siren
Go to HomeShieldSettings >Modes.
Make sure that Siren is added to Then within
your chosen Mode, so that it sounds when the
Alarm is raised.
Tip: Also consider turningonaHivelight toact
as an additional deterrent.
To ensure your Siren will sound in the event of an
alarm, it must be added to a Mode. Your siren will be
included as an output in Away mode as a default.
1
2
Siren Light
The Siren light will also automatically flash when the
Siren sounds.
The Siren light can also be used as a Hive Light. You
can turn the Siren light on duringan Alarm event by
addingit to Then within your chosen Mode.
Siren chirp
The Siren can ‘chirp’ to remind you to deactivate
HomeShield when you return home. You can enable
or disable Siren chirp in Settings.

07
How to turn oTamper alarm
Go to Siren Settings >Tamper detection
alarm.
Then switch the toggle to oto disable the
tamper detection alarm for 30 minutes.
Tamper detect will be automatically be
switched back on after 30 minutes.
You may want to switch othe tamper detection alarm
in the event that you want to move the siren, or change
batteries – to do this youcandisable tamper detect for
30 minutes.
1
2
3
Reset Siren
To reset your Siren, find the connector joiningthe
power cable to the power supply (as shown to the
right). Quickly disconnect and reconnect 5 times.
The Siren should longbeep once, and will go back into
pairingmode. Use your Hive app to install your Siren
again.
Troubleshooting

© 2017 Centrica Connected Home Limited.
Registered in England (No. 5782908). Registered oce:
Millstream, Maidenhead Road, Windsor, Berkshire SL4 5GD. All rights reserved.
Table of contents
Other Hive Security System manuals
