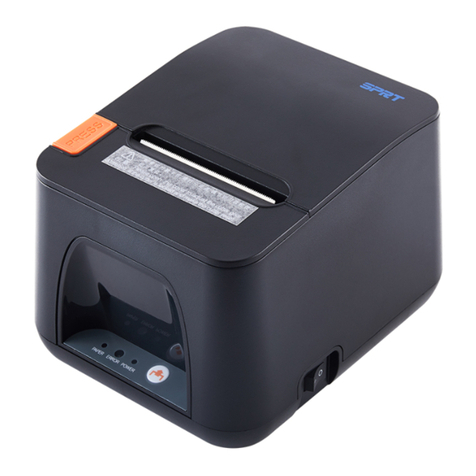
HiWeigh PT2 User manual

SPECIALPRINTER
PT2

ValueEachGram

2
Content
Precautions ................................................................................................................................................ 3
Chapter 1 Product introduce ..................................................................................................................... 7
1.1 Printer exterior .................................................................................................................................... 7
1.2 Accessory ........................................................................................................................................... 7
1.2.1 Standard accessories ................................................................................................................... 7
1.2.2 Options accessories ..................................................................................................................... 8
Chapter2 Function characters ................................................................................................................... 8
2.1 Specifications ..................................................................................................................................... 8
2.2 Other specifications ............................................................................................................................ 9
Chapter 3 Using method ...........................................................................................................................10
3.1 Prepare before using .........................................................................................................................10
3.1.1 Li-ion battery installation .............................................................................................................10
3.1.2 Paper loading .............................................................................................................................10
3.2 Basic function using........................................................................................................................... 11
3.2.1 Turn on ....................................................................................................................................... 11
3.2.2 Turn off ....................................................................................................................................... 11
3.2.3 Inspect itself ................................................................................................................................ 11
3.2.4 Paper feeding .............................................................................................................................12
3.2.5 Charging .....................................................................................................................................12
3.3 Print connection and printing .............................................................................................................12
3.3.1 Serial connection ........................................................................................................................12
3.3.2 RAW-IR and IrDA connection ......................................................................................................12
3.3.3 Bluetooth ....................................................................................................................................13
3.3.4 Matched pair ...............................................................................................................................14
3.4 LED Indicator and buzzer definition ...................................................................................................15
Chapter 4 Other information.....................................................................................................................15
4.1 Printer technical manual ....................................................................................................................15
4.2 Preprinted black mark specification....................................................................................................15
4.3 Auto dormancy/automatic awaken, automatic turnoff..........................................................................16

3
Precautions
◆ Safety Precautions
In using the present appliance, please keep the following safety regulations in order to prevent any
hazard or material damage.

4
◆ Operation Precautions
Be sure not to print continuously over 1meter, otherwise may cause damage to the printer head.

5
Water or other liquid should not spill into the printer, also the printer should not be appeared in the rain,
or else may cause printer damage.
Please do not open the paper case cover when printing; otherwise the printer may work improperly.
If print with serial interface, should not unplug the interface cable in the course of printing, or else some
printing data may be lost.
When print in Ir or IrDA mode, bus sure the Ir window of the host equipment face rightly the Ir window of
the printer, the distance should be within the range of 50cm, and the angle should be within the range of
30°.
When print with Bluetooth interface, the communication distance should be within10 meters, otherwise
the printer doesn’t print or prints rubbish codes.
Too high(50℃) or too low(-10℃)temperature and too high(80%) or too low (20%) relative humidity both
effect the quality.
The print paper in poor quality or stored for too long time also may reduce the print quality even damage
the printer.
In the black mark detecting mode, the printer requires that the preprinted black mark is accordant with
the black mark specifications (details please refer to 4.2); otherwise the black mark can not be detected
correctly.
Be sure to use up the power of the battery before charge it, as it can ensure the using life of the battery.
◆ Storage Precautions
The printer should be placed in such an environment that the temperature is between -20℃ and 70℃,
and the relative humidity is between 5% and 95%.
If the printer will be stored for a long time, please be sure to take out the battery, otherwise may damage
the battery and printer.
Normal thermal paper can’t be kept too long time. If you need to keep the receipt for a long period,
please choose long term effective thermal paper.
The paper should be keep away from high temperature environment and point-blank sunshine.
◆ Battery Safety Precautions.
Be sure to carefully read the user manual before using the produce.
Ignore the following instructions may cause battery overheating, fire, explosion, damage and/or

6
performance, and reduced product life.
1) Risk of explosion if battery is replaced by an incorrect type.
2) Dispose of used batteries according to the instructions.
3) Do not allow water, sea water from entering or leaking into the battery inside. If the batteries internal
safety device burn, when changing it, it may produce any abnormal current and/or voltage, and cause
any abnormal chemical reaction, then may cause the battery overheating, fire and/or explosion.
4) Do not use or place the battery nearby the stove or other high temperature places. Excessive heats
maybe damage the resin shell and/or the insulation materials, and then the battery may be caused
overheating, burning and/or explosion.
5) When charging, use a specified charger. Other conditions (high temperature, high pressure/high
current, using the modified battery charger, etc) excludes here may result in over-charging the battery
and abnormal current and/or voltage, cause abnormal chemical reaction, and may cause the battery
overheat, light and/or explosion.
6) Battery clearly marks with positive and negative. When connect the battery with the charger and/or
printer, be sure to verify the correct battery orientation. Reverse insertion will cause the reverse charging
and may cause abnormal chemical reaction, and then may cause the battery overheat, ignite, and/or
explosion.
7) Do not make the battery contact with the power outlet and/or car cigarette lighter socket. This may
cause high pressure and excessive current, and lead to the battery overheat, burning and/or explosion.
8) Do not heat the battery or put the battery into fire. This may melt insulation material and/or damage
safety devices or safety equipment, then ignite electrolytic solution, and cause the battery overheat,
burning and/or explosion.
9) Do not use the battery with contrary (+) and (-) Location. In the charging process, this will cause the
reverse charging and may cause abnormal chemical reaction. During use, may appear unpredictable
current exception, and cause the battery overheat, ignite, and/or explosion.
10) Do not make the battery (+) and (-) contact with any metal. Also, do not carry along or store batteries
with metal objects, such as necklaces, hair clips and so on. Battery internal short circuit may cause
excessive current, and lead to the battery overheats, ignite, and/or explosion and the adjacent metal
objects (necklaces, hairpins, etc.) may be overheating.
11) Do not throw or heavy attack the battery. If internal safety device of the batteries burn, the battery
charging may cause any abnormal current and/or voltage, and abnormal chemical reaction, and lead to
the battery overheat, ignite, and/or explosion.

7
Chapter 1 Product introduce
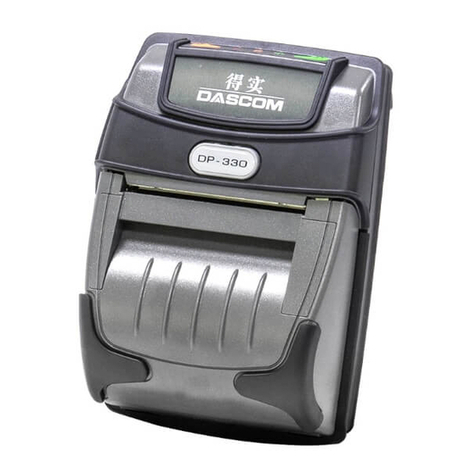
1.1 Printer exterior
1. Feed paper key
2. State indicator light
3. RS232 serial port socket
4. Infared ray(IR) interface
5. Printer upper cover
6. Power key
7. Power Charging indicator light
8. Power port
9. Mini USB port
10. Battery
11. Leather hang
Note: The status indicator and charging indicator light separately be set in above of the two keys. Using
red and blue to show different mean.
1.2 Accessory
1.2.1 Standard accessories

8
USB Interface Cable Battery Power Adapter
Paper Roll User Manual
1.2.2 Options accessories
CD cigarette lighter Serial Interface Cable Protective Case
jack charger
Chapter2 Function characters
2.1 Specifications
Model PTP-II/IR PTP-II/BT PTP-II/WIFI(Developing)
Printing method Line thermal printer
Printing speed 50~80mm/s

9
Dot pitch 8dots/mm, 384 dots/line
Printing width 48mm
Paper width 57.5±0.5mm
Paper roll outer
diameter 40mm (Max.)
Paper roll inner
diameter 13mm(Min.)
Paper thickness 60-80um
Overall
dimension(WxDxH):
79x110x45mm
Weight ( g) 210(non- including the paper roll)
Printing characters
ANK: 8x16,9X17, 9x24,12x24 GBK:24x24
Characters/line ANK:48, 42, 32 GBK:24, 16
Life cycle time 50km(printing density under 12.5%)/100 million pulses
Barcode type
1D: UPC-A,UPC-E,EAN-13,EAN-8,CODE39,CODE93,
CODE128,CODEBAR,ITF25
2D: QR CODE, PDF417
interface IRDA/VIR/RAW IR,
RS232,USB
Bluetooth V2.1 CLASS (V4.0
Developing)
CLASS ,RS232,USB
WIFI,RS232, USB
Power 2000mAh 7.4V rechargeable Lithium battery
Recharge adapter Stand by recharging / AC adapter
Black mark test Supported
Paper feeding Easy paper loading
Paper cut By hands
commands ESC/POS compatible with order sets
operate setting Temperature -10°C~50°C ; Humidity 20%~85%
Recharge Setting Temperature 5°C~40°C; Humidity 20%~85%
Storage Setting Temperature -20°C~70°C ; Humidity 5%~95%
Standard
accessories
leather coat, li-ion battery, AC adapter, USB interface cable, Long-term
preservable paper, user manual
Optional
accessories Serial interface cable/CD/Car charger
2.2 Other specifications
Paper feeding method: clamshell feeding, please refer to the chapter 3.1.2
Mark position: black mark position, please refer to the chapter 4.2
Paper sensor: LED indicator flashes when come to paper end meanwhile alarm.
Printing control indication: ESC/POS compatible with order set

10
Power supply: 2000mAh rechargeable Li-ion battery
Power alarm: indicator flashes when printer will run out of power and give out two short hoots. When
running out of power, it will give out interval hoot to indicate charging.
Battery full charge time: 2 to 4 hours.
Battery duration: under 15% print density, at least 100 to 200 meters, under 25% print density, at
least 100 meters, the standby time is over 15 days.
Chapter 3 Using method
3.1 Prepare before using
3.1.1 Li-ion battery installation
1) Refer to the picture, put the battery in the battery slot, and please pay attention to the correct
positive and negative.
2) Close the battery case.
3.1.2 Paper loading

11
Operation methods:
1) Use two fingers to press the place showed in the above picture and open the top cover.
2) Put the paper roll into the paper case, pay attention to the direction of paper. If loaded reversely, it
won’t print.
3) Pull paper out of paper case.
4) Make sure paper in the center then closed top cover.
3.2 Basic function using
3.2.1 Turn on
Under the close state, Press [POWER] button 2 seconds, the printer enters to the working state, the
power indicator light (Red).
NOTE: in cash the printer function indicator light(Blue) flash and with paper, it show the power will to be
exhaust, if continue to use, please change one new battery or charging power. The charging method,
please refer to chapter 3.2.3
3.2.2 Turn off
Opening state, press [POWER] button 2 seconds, the printer will be closed, all the indicator light will
be off.
3.2.3 Inspect itself
The user can inspect the printer by themselves after getting the printer. To check the current state and
setting.
Use two fingers to press this place
and open the top cover
Top cover
Rubber Roller
Thermal paper roller

12
Inspect method: turn-off. Hold [FEED] button, and then press [POWER] button the printer will
print out the inspect page, the inspect page including the current state, setting, example of printer.
3.2.4 Paper feeding
Under the usual working state, press [FEED] button, start to feed paper, and will stop till 250mm.
If the paper has dark mark approved by this printer, when print to the dark mark, the printer will stop feed
paper. If the feed length is setup as 0, it will be not affected by the dark mark.
3.2.5 Charging
When the power of batter to be exhausted, the function indicator shows (Blue) and flash, at the same
time, the printer will give an alarm, at the comment, the user should charge the power.
The charging method: connect to the power 100-240VAC,50/60HZ,during the charging , the charging
indicator light show blue and flash till finished, at the same time , the charging indicator light have been
lighting
During charging, the user can usually use the printer.
3.3 Print connection and printing
3.3.1 Serial connection
The printer have one DB-9 serial port cable as option (one port connect to the printer, the other connect
to MINI DIN plug)
3.3.2 RAW-IR and IrDA connection
PTP-II portable thermal printer can use IR to communicate with the host for transmitting the data.
Infrared Ray is the wireless data communication technology with infrared light as communication data
carrier that explored and developed by the IrDA association.
Using method:
Infrared ray interface as the wireless data transmitting port, because of its having lower power, manure
technology, easy using, is widely applicable to portable devices, such as all the palm computer with
WINCE, laptop, mobile cell, palm computer, data collector, measure device and etc.
PTP-II, its hardware meets the regulations of IrDA1.1 physical layer.
Because IR interface depend on the infrared light as data carrier, there can not having any remora
between the data sender and the receiver device; their infrared port should aim at and close each other.

13
When PTP-II/IR communicates with the host devices that hardware also meets the regulation of IrDA 1.1
physical layer, make the IR interfaces ( from both PTP-II and the host device ) right towards to each
other ( angle shall not be more than 30° ), without any obstacles between them, the distance shall be
less than 0.5M.
PTP-II/IR can use RAW-IR to communicate with the host device; also can adopt the Vir protocol or
IrCOMM protocol (IrDA).
When using RAW-IR to communicate with the host device, IR transceiver just change the serial interface
data signal into IR signal or change light signal into serial interface data signal according to the certain
coding regulation. Under this situation, this IR interface is called RAW-IR. When you use RAW-IR, it is
not compatible with IrDA because of the software do not use IrDA protocol during sending and receiving
data.
VIR is safer and more reliable IR communication way, that is, it adds VIR protocol based on RAW-IR. In
case the host device can not support IrCOMM protocol, advise to use VIR protocol.
Compared with VIR protocol, IrCOMM protocol is based on the hardware of RAW-IR, also IrCOMM is
more popular way which is made by international IR Communication association. IrCOMM is one of
subset of IrDA protocol that is wireless data communication protocol developed by IrDA association,
based on the hardware of RAW-IR for ensuring data transmission’s stability, reliability, easy using. All
portable devices supporting IrDA protocol inn (such as wince, pocket pc, palm, IR cell phones etc.) can
support IrCOMM. As if the host device can support IrDA protocol inn, which drive the printer to use the
operation system (such as WINCE, PALM OS). So that, for developer, IrCOMM interface is the virtual
serial port. As if the host device has no IrDA protocol inn and wants to realize IrCOMM data transmission,
the developer has to write IrDA protocol inn. Whether the host device can support IrCOMM, please refer
to the developing documents of the host device or make a consultation with the supplier of the host
device.
Due to the RAW-IR interface, VIR interface and IrCOMM interface of PTP-II printer use same hardware
source, so they can’t work at the same time. The default mode of PTP-II is IrCOMM. If you want to
change the current IR interface mode, please use the special tool of PTP-II——CONFIG modification
setting. Pls refer to the details【Chapter 3: PTP-II printer tool software】
As to the detailed IrDA protocol, please refer to IrDA official website: http://www.irda.org/
3.3.3 Bluetooth
PTP-II/BT support wireless data transmission interface, meet Bluetooth 1.1 regulations, power class 2.
PTP-II/BT is only sub-device, and user need to drive the printer by Bluetooth host devices (such as PDA,
mobile phone, laptop).and other Bluetooth sub-device (such as bluetooth earphone) can’t drive the
printer to print by Bluetooth.

14
Using method:
1. Through the Bluetooth tray (or on the control board), right click the Bluetooth logo, choose” Add
Bluetooth equipment
2. after some time, to show find out the new equipment “PTP-II”
3. Choose “next step”, input the password”0000” in the third option” input the password” till to the
finished
4. After finished, the system will show two serial port be added, general speaking, one is output port, the
anther is input port.
5. Use super terminal to open” output port “, the baud rate of device is 9600, open the port.
6. Choice menus” file->attribute”, choose setting page, click the button” ASCII setting code” ,choose
and tick the top two selection.
7. Click on the third button in the toolbar "call"
8 At the moment, Can enter any words, and then print it via Bluetooth printer
Note: Above 1-4 points as printer setting, 4-8 points as testing reference.
3.3.4 Matched pair
Before printing, PTP-II/BT need to pair with the host devices that drives the mobile thermal printer.
Pairing process is originated by the host devices.
Usual Pairing processes as follow:
1. Turn on the printer
2. The host device search exterior Bluetooth device
3. If there are some exterior Bluetooth devices, please select “PTP-II”
4. Enter password “0000”.
5. Finish pairing.
Detailed pairing methods, please refer to the Bluetooth function introduction of the host devices
When pairing, mobile thermal printer PTP-II must be turn on.
Note: when pairing, do not turn on many printers at the same time, otherwise it can’t judge which one

15
succeeds in pairing.
After finished pairing, other the host device (upper machine) still can pair with this mobile thermal printer.
One printer can be most allowed to pair with 8 units upper machines (the host devices) . If the ninth
device will be paired with the printer, the earliest ones will be deleted from printer paring list automatically.
If this earliest device will be allowed to drive the printer again, it need to pair with the printer again.
3.4 LED Indicator and buzzer definition
PTP-II has one buzzer and two LED indicators to indicate the printer status. The LED indicators indicate
current status and buzzer indicates the changes of status.
LED indicator(Blue) LED indicator(red) Printer status Buzzer
Flash quickly Lamp off Charging
Flash slowly Lamp off power lack Four beep one time per
1mins
Bright continuously Lamp off Finish charging Double beep one time
Lamp off Bright continuously Working
Flash slowly Flash slowly Paper end Three beep
continuously-warning
Lamp off Flash slowly dormancy
Chapter 4 Other information
4.1 Printer technical manual
PTP-II portable thermal printer technical manual can be provided by the supplier.
This manual including the hardware interface introduce of PTP-II (serial interface, IR interface), the
printing commands, and how print the dark mark, how to locate by the dark mark.
4.2 Preprinted black mark specification
If user wants to locate receipt by detecting preprinted black mark, shall accord to the following
specification for the black mark. Otherwise it may cause printer can’t recognize the black mark.
Printing position: black mark shall preprint at the left side of receipt.
Width rang:≥7mm
Height:4mm≤height≤6mm

16
Reflection rate to IR:<10% (reflection rate to the black mark on paper >65% )
Hps:Hps indicates the distance from down edge of detecting mark from beginning line.
0mm≤Hps≤1mm
4.3 Auto dormancy/automatic awaken, automatic turnoff
In order to save energy, prolong the using time, PTP-II printer adopts the advanced automatic dormancy,
automatic awaken technology.
After turning on the Printer, if without any data sent to the printer by the host within one minute, and
without pressing any buttons, the printer will be entering to the dormancy mode and the state indicator
light (RED) will be in a state of slow flash .
After dormancy, the power consumption greatly reduced, and it will not affect the using. When receiving
any printing data, the printer will be awaken automatically, without any other manual intervention.
After 2 hours, the printer does not receive any data, the printer will automatically turn off, and you should
start it by manual.

ValueEachGram

UserManual
v.201811
PT2
Table of contents
Other HiWeigh Printer manuals
