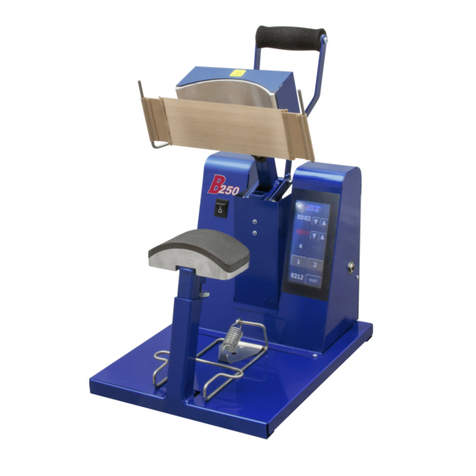
Hix HOBBY LITE User manual

HOBBY LITE
9”x12” Heat Transfer Machine
OWNER’S MANUAL
Receiving and Installation 2
Operation 3-4
Transfer Application 4-5
Thermostat Bypass 5-6
Maintenance 6
Trouble Shooting 7
Warranty 8
CONTENTS
BEFORE warranty repair you MUST get Prior Authorization:
Call 1-800-835-0606
For Customer Service, Call 1-800-835-0606
or Visit www.hixcorp.com
RV B_032311

2
RECEIVING & INSTALLATION
INTRODUCTION
Congratulations on your purchase of the Hobby Lite heat transfer
machine. Three simple variables are involved in the process of
transferring an image: pressure, temperature, and time. Pressure is
easily controlled and adjustable. Temperature is as simple as setting
your temperature control to the setting of your transfer.
Your Hobby Lite is designed for utility and fun in the application of heat
applied graphics. The Hobby Lite is not designed nor intended for high
volume or commercial heat press applications. The press is designed
to tilt forward on closing, if too much pressure is set. If you experience
tilting forward upon closing simply reduce the pressure adjustment
setting.
INSPECTION
After unpacking, inspect your machine for hidden shipping damage.
Contact the delivery company immediately, should you nd damage.
SHIPPING OR RETURNS
NOTE: Save all of your shipping/packing materials.
DO NOT RISK COSTLY SHIPPING DAMAGE!
SHIP ONLY IN ORIGINAL BOX.
1. Tie or tape handle securely to base.
2. Place in original box, and put side liner and top liner in place. Fold in
aps and seal the box. (Additional bottom boards, box and liners may
be obtained from your supplier for a nominal cost.)
CAUTION: Handle must be tied to base before moving or shipping.
UNPACKING
Remember to save all packing materials - including box, liner and board.
You may need these for shipping your machine or if a repair is necessary
in the future.
INSPECTION
Inspect your machine for hidden shipping damage. Contact the delivery
company immediately, should you nd damage.
INSTALLATION
1. Plug the machine into the correct grounded electrical outlet. In order
to prevent electrical shock, make sure that the electrical cord does not
come in contact with the heat platen at any time.
WARNING: When using an extension cord, use 12 or 14 ga.-3
conductor. Maximum length, 25’ (7.62 m).
ATTENTION:Utiliser des ralonges d’au moins 12 à 14 ga - 3 phases;
longueur maximale de 7.7 mètres
BREAK IN

3
OPERATION
Your new press does not require any “break in”. However, you may
notice your press will have an “unusual odor” when you rst begin to
use it.
This is normal and it is the “newness” baking o. You may also see a
faint vapor, especially if the press has set for a long period of time or if
you are in a humid area. It is simply the humidity that has accumulated
and is evaporating from the insulation.
PREPARATION
1. Move on-o/thermostat switch to desired temperature. Heat indicating
light should come on. While machine is heating (approx. 15 minutes),
the heat light will remain on, until it has reached set temperature, after
which it will go o. The heat light will cycle on and o in order to maintain
the desired temperature.
WARNING: The heat platen can cause severe burns. Do not
leave the machine on and unattended. Make sure all
persons and items (not being transferred) are out of
the path of the heat platen.
PRESSURE
1. The pressure control knob, located on the top of the machine, should
be set so that the heat head will lock down rmly. From time to time you
should reset the pressure.
2. Pressure is reduced by turning knob (with machine open)
counterclockwise and increased by turning it clockwise.
NOTE: Adjustments may be required from one garment to another and will
vary to achieve the desired result.
WARNING: Excessive pressure is unnecessary and can cause
structural damage, voiding the machine warranty!
ATTENTION:Pression excessive peut endommanger la machine
et annuler la garanti
1. Check your transfer paper instructions to get the proper guidelines on

4
TRANSFER APPLICATION
temperature, pressure, pressing time, and whether to peel the transfer
hot or cold.
2. Swing the heat platen all the way out making sure not to come in contact
with the electrical cord or any other item.
3. Align garment (or other item) on the lower platen and swing heat platen
back and clamp down to test your pressure setting. NOTE: Wrinkles may
also be removed by bringing heated platen in contact with the garment
before the transfer is positioned.
4. Swing heat platen back out and position your transfer where you want
it to appear on the garment (or other item) with printed side down.
(Make sure that you have “mirrored” your image before printing out the
transfer).
5. When doing double sided or sublimation transfers on garments, always
place a sheet of paper or cardboard between the layers of garments so
that bleeding through or reheating of the transfer already applied does
not occur.
6. Pull operating handle down locking the machine closed. After the
designated time has elapsed, open the machine.
7. When not transferring, leave the heat platen up in order to prevent
excessive wear on the silicone pad.
When you fail to make a successful transfer you can wonder, “Is it
the machine’s fault, or the transfer, wrong settings or what”?
FIRST, THE BASICS:
1. Be sure to set the heat transfer machine to the transfer manufacturer’s
recommended Temperature, Time and Pressure settings. If you don’t
have these specications, contact your transfer supplier for this infor-
mation and any other special application instructions as many of the
new “High Tech” transfers require signicantly dierent settings and/or
application techniques than those from years past.
2. When you start up your press for the rst time each day, preheat the
pad for a minute. If the press has sat for 3-5 minutes without use, be
sure to “preheat” the pad for 10-15 seconds before loading the shirt or
making the rst transfer.
3. After the shirt is positioned and centered on the preheated pad, “pre-
press” the shirt for 3 seconds to take the wrinkles out and more impor-
tantly, release any excess moisture out of the T-shirt fabric which can
reduce the chance of a successful transfer.
4. With all of the above recommendations, try making a transfer.
5. If successful, great! You are on your way to making some serious
money with your transfer machine!
6. If you have an area that isn’t transferring completely or as you would

5
TRANSFER TROUBLESHOOTING
like it to, follow these steps to determine the problem.
• Try increasing the pressure on the machine by 10-20%
• Recheck your temperature required. You may want to increase the
temperature 10 degrees.
• Try increasing the application time by 2-4 seconds
• If after trying these things there is still a “specic” area (say over in
one corner of the transfer) that isn’t coming out as you would like
it to, then try the same type transfer on a scrap shirt but rotate the
transfer 180 degrees (changing the failure location) If after doing
this the problem area is in the same physical location on the ma-
chine, then you probably have a problem with the pad or possibly a
warped platen if the machine has ever overheated severely. On the
other hand if the transfer failed in the same area on the transfer (af-
ter changing the location of where the problem had previously been
occurring), then you most likely have a problem with the transfer or
it’s application settings (Temperature, Time or Pressure) and you
should contact your transfer supplier to discuss the problem.
Following these basic guidelines can help you be more successful with
each and every transfer!

6
REPAIRS
MAINTENANCE
THERMOSTAT BYPASS
If your machine is not heating (temperature light does not come on).
WARNING: Before making repairs, turn temperature control knob
to “OFF” and unplug machine!
ATTENTION:Eteindre la machine avant de faire des réparations
1. Loosen recessed set screw in the thermostat knob and remove knob
by pulling knob upward.
2. Remove heat shield to gain access to the thermostat
3. Attach both “thermostat wires” on the “rear terminal”. Fig. 1
4. Plug machine in and turn the power switch “on” If heat light comes on,
and the machine starts heating, replace thermostat.
NOTE: If you feel your temp calibration is o, contact customer
service.
CLEANING THE HEAT PLATEN
1. Unplug the machine and allow to cool.
2. Swing the heat platen away for easier access.
3. Use a soap or detergent and nonmetallic scrubbing sponge to remove
any excess material from the heat platen.
LUBRICATION
1. Every 3 months, lubricate moving parts with ordinary household oil.
Fig. 1

7
TROUBLESHOOTING
Machine
overheats
NO
Problem solved?
NO
Does heat light remain on constantly
when overheating?
Replace thermostat.
YES
NO
NO
Call
Technical
Service
NO
Check tan wires
where they screw
onto the terminals on
the heating element.
Problem solved?
Check small tan
wires connected to
thermostat.
Repair if needed.
Problem solved?
Problem solved?
YES
Little or
no heat
Is power light on?
YES
Try another outlet.
NONO
Call
Technical
Service
Problem solved?
NO
Replace fuse.
Problem solved?
NO
Problem solved?
NO
Check power flow
with VOM meter
Repair if needed.
NO
Remove top cover
and check for loose
or broken wires
Repair if needed.
Bypass
thermostat.pg 7
Replace
thermostat.
∗
∗
Problem solved?
Is heat light on?
NO YES
Call
Technical
Service
*Customer Service Tech Sheets are available for this step. Visit
www.hixcorp.com to print or call 620-231-8568 and we will send
you one. Parts ordering is available on-line.

8
(Effective 3/1/2020)
HIX will automatically register the equipment on the date it was shipped to you or your distributor. If the
equipment was not purchased directly from HIX, but through a distributor (either domestic or foreign), please
keep a copy of their sales invoice showing the serial number and date it was sold/shipped to you with this war-
ranty. In this case, we will use the distributor’s invoice date as the beginning warranty date. STAPLE A COPY
OF YOUR PROOF OF PURCHASE TO THIS WARRANTY and keep in a safe place to provide verication of
your warranty should a problem occur. Thank you.
Please ll in the following information and attach a copy of your receipt for your records.
Date Purchased: From:
Model #: Serial #:
This warranty applies to equipment manufactured by the HIX Corporation (HIX), Pittsburg, Kansas, U.S.A.
HIX warrants to the original purchaser, its Ovens and Dryers, Heat Transfer Machines, Textile Printers, Spot
Heaters, and Exposure Units against defects in workmanship and material, except for wear and tear for a
period of “One Year” from the date of purchase. HIX warrants Accessories for a period of 90 days from the
date of purchase. doughXpress products are covered under separate warranty.
In the event of a defect, HIX, at its option, will repair, replace or substitute the defective item at no cost
during this warranty period subject to the limitations of insurance and shipping costs stated below (excludes
labor).
In the case of heat transfer presses (except the Hobby Lite and Large Format presses), HIX warrants the
heat casting for the “Life” of the machine for the original purchaser. If a part becomes obsolete at the time
for repair, and/or cannot be reasonably substituted for, HIX will credit, at half the then current list price or last
recorded price, only that part toward a new machine or any product HIX oers. This credit oer shall be the
sole responsibility of the HIX Corporation in the event of an obsolete part.
This warranty does not cover belts, rail tape, pads, mug wraps, canvas, rubber blankets, bulbs, glass.
Warranty does not cover damages due to accident, misuse/abuse, alterations or damage due to neglect, ship-
ping or lack of proper lubrication or maintenance. HIX shall not be responsible for repairs or alterations made
by any person without the prior written authorization by HIX. This warranty is the sole and exclusive warranty
of HIX and no person, agent, distributor, or dealer of HIX is authorized to change, amend or modify the terms
set forth herein, in whole or in part.
In the case of a problem with the equipment identied herein, HIX Corporation should be contacted during
regular business hours to discuss the problem and verify an existing warranty. HIX personnel will assist the
customer to correct any problems which can be corrected through operation or maintenance instructions,
simple mechanical adjustments, or replacement of parts. In the event the problem cannot be corrected by
phone, and upon the issuance of a return authorization by HIX, the equipment shall be returned to HIX or an
authorized service representative. All insurance, packaging and shipment/freight costs are solely the respon-
sibility of the customer, and not that of HIX, and HIX shall not be responsible for improper packaging, handling
or damage in transit. Contact HIX customer service for complete return authorization information. Correct
shipping boxes are available from HIX.
This expressed warranty is given in lieu of any and all other warranties, whether expressed or implied,
including but not limited to those of merchantability and tness for a particular purpose, and constitutes the
only warranty made by HIX Corporation.
In no event shall HIX’s liability for breach of warranty extend beyond the obligation to repair or replace the
nonconforming goods. HIX shall not be liable for any other damages, either incidental or consequential, or the
action as brought in contract, negligence or otherwise.
This warranty gives you specic legal rights and you may also have other rights which vary from state to
state.
WARRANTY
1201 E. 27th Terrace • Pittsburg, KS 66762 • U.S.A.
Web site: www.hixcorp.com • Phone: (800) 835-0606 • Fax: 620-231-1598
©2020 HIX Corp.
Design and Manufacturers of Graphic Imaging, Commercial Food, Industrial and Custom Drying Equipment
Table of contents
Other Hix Industrial Equipment manuals
