HM Digital FLM-3 User manual

- 5 -
www.hmdigital.com
FLM-3
FLOW MONITOR
RESETTING THE CUMULATED FLOW RATE
1. Power on the unit.
2. Press the “UP” and “UNIT/SET” buttons simultaneously and hold for 3
seconds.
3. You will hear two short beeps, indicating that the number has been
reset to 0.
If the ow rate goes out of
measurable range, (as in the
diagram above),“OFL” will
appear on the display screen.
If the cumulated ow rate goes
out of measurable range, (as in the
diagram above),“OFL” will appear
on the bottom of the display screen.
HOW TO USE THE FLM-3
1. Insert the 1/4” hose into to the tting on unit.
2. Remove the battery discharge protection tab which is located on the
bottom of the unit in order to turn the power on.
3. Press the “SET” button and hold for 3 seconds in order to select the
preferred unit of measurement (LPM or GPM).
4. Press the “SET” button and set the desired alarm value by pressing the
“SHIFT” and “UP” buttons.
5. Press the “SET” button in order to save the desired alarm value.
6. The counter on the LCD display will begin to change numbers as
water ows indicating that the unit is in operation.
Liters
Liters
LPM
LPM
Liters
Liters
LPM
LPM
ONE YEAR LIMITED WARRANTY
The Flow Monitor (”FLM-3”), manufactured by HM Digital, Inc.
("the Company") is warranted to the purchaser against defective materials and
workmanship for one (1) year from the date of purchase.
What is covered: Repair parts and labor, or replacement at the Company's option.
Transportation charges for repaired or new product to be returned to the purchaser.
What is not covered: Transportation charges for the defective product to be sent to
the Company. Any consequential damages, incidental damages, or incidental
expenses, including damages to property. This includes damages from abuse or
improper maintenance such as tampering, wear and tear, water damage, or any other
physical damage. The warranty does not cover water damage to the FLM-3 due to
parts not securely closed. Products with any evidence of such damage will not be
repaired or replaced.
How to obtain warranty performance: Attach to the product your name, address,
description of problem, phone number, and proof of date of purchase, package and
return to:
HM Digital, Inc.
ATTN: Returns
5819 Uplander Way
Culver City, CA 90230
U.S.A.
Implied Warranties: Any implied warranties, including implied warranties of
merchantability and tness for a particular purpose, are limited in duration to ve
years from date of purchase. Some states do not allow limitations on how long an
implied warranty lasts, so the above limitation may not apply to you. To the extent
any provision of this warranty is prohibited by federal and state law and cannot be
preempted, it shall not be applicable. This warranty gives you specic legal rights,
and you may also have other rights, which vary from state to state.
NOTE: Warranties are product-specic. Third-party products and products deemed
by HM Digital as "accessories" are not covered under warranty. Third-party products
include, but are not limited to, batteries and ttings. Accessories include, but are not
limited to batteries, lanyards and cases.
OUT OF MEASURABLE RANGE
USER’S GUIDE
PROFESSIONAL WATER
TESTING INSTRUMENTS
- 2 -
LCD SCREEN DESCRIPTION
1. ”SET” Mode icon
2. Volume per minute
3. Battery life indicator
4. LPM icon (liters/min)
5. GPM icon (gallons/min)
12
3
4
5
6
7
89
10
SET
ALARM
Liters
Liters
Gallons
Gallons
LPM
LPM
GPM
GPM
INSTALLATION INSTRUCTIONS CONT’D
Insert the hose towards the direction
where the arrow points to install.
How to Insert the Hose:
While pressing the grey ring, pull the
hose towards the direction where the
arrow points to separate the hose.
How to Remove the Hose:
6. Liters icon (for liters mode)
7. Gallons icon (for gallons mode)
8. Stacked volume used
9. Alarm icon
10. Counting indicator
(shows sensor is working)

- 1 -
- 3 - - 4 -
FEATURES
BUTTON EXPLANATION
INSTALLATION INSTRUCTIONS
ALARM SETTING FEATURE
HOW TO SET THE ALARM
If the cumulated ow rate exceeds the limit that the user originally set,
the water ow alarm will beep 5 times and the alarm icon on the LCD
display will blink. In this case, change your water purier lter and reset
the unit.
RESETTING AN ALARM VALUE
1. Power on the unit
2. Press “UNIT/SET” button and the word SET will then appear on the
LCD display.
3. Press the “UP” and “UNIT/SET” buttons simultaneously and hold for
3 seconds to reset the stacked volume used to 00000.
4. Press the “SET” button once again to save. You will hear a beeping sound.
1. Power on the unit.
2. Press the “UNIT/SET” button and hold
for 3 seconds in order to choose
between Liters or Gallons.
3. Press the “UNIT/SET” button and the word SET will then appear on the
LCD display. The rst digit of the stacked volume used number will
then begin to blink.
4. Press the “SHIFT” button in order to move the cursor between digits
and press the “UP” button to set the desired number.
5. Press the ”SET” button again to save the desired number. You will hear
a beeping sound indicating that the desired number has been saved.
SPECIFICATIONS
Range: 0-99999 Liters / 0-99999 Gallons
0.8-8.0 LPM / 0.2-2.1 GPM
Resolution: 1 Liter (1 Gallon); 0.1 LPM (0.1 GPM)
Sensor Housing Material: POM (KEPITAL, F20-03-KEP)
Accuracy: +/- 10%
Fitting: 1/4” ONE-TOUCH Type
Alarm: Sound over set point
Auto Shut-O: After 5 minutes (LCD Display)
Battery Life: Approximately 2 Years
Battery Type: 1.5V x 2 EA (AA SIZE)
Dimensions: 66 x 90 x 63 mm (2.6 x 3.54 x 2.48 inches)
Weight:7.3 oz (Includes Batteries)
Power “ON/OFF”.
Move the shift button to the right in order to choose digits
when setting an alarm.
Increases the number of the selected digit when setting an
alarm. Press and hold to speed up.
Press both buttons while in normal mode at the same
time and hold for 3 seconds in order to reset cumulated
ow rates.
Accesses the ow rate, “SET” mode, entry and save features.
+
Press and hold both buttons for 3 seconds while in
“SET” mode, in order for cumulated alarm value
to be reset.
+
There are two 1/4”connection ttings
on the unit. The left side tting is an
entrance for water and the right side
tting is an exit.
SET
Liters
Liters
LPM
LPM
In Out
Press and hold for 3 seconds or order to switch measurement
units from liters to gallons and vice versa.
The FM-200 is an easy-to-install ow monitor that enables you to
check and measure ow rates in Liters Per Minute (LPM) or
Gallons Per Minute (GPM).
This product enables users to manage clean water when a water
purier lter expiration date is set to match the ow rate capacity.
A user can set a specic ow rate limit, and if the ow rate exceeds
the set limit, an alarm will sound along with an icon that will appear
on the display screen.
- 6 -
How to shut o the alarm temporarily:
Turn the power on and press and hold the “ON/OFF” button for 3
seconds, the display will show OFF. The alarm is now shut o and will
not sound even if the ow rate exceeds the alarm value.
Whenever you turn o the unit and turn it back on again, the alarm
will automatically be turned back on.
AUTO LCD ON/OFF
The LCD display will turn o on the unit automatically after 5 minutes.
However, the unit will continue to take ow rate measurements even
while the display if o.
ALARM MUTE
CHANGING THE BATTERIES
When battery life display on the FLM-3 begins to blink and the unit
starts to beep, this will indicate that it’s time to replace the batteries.
How to turn on the alarm:
FEATURES OF THE FLM-3
Open the bottom cover of the device, removed the batteries and insert
new batteries while matching proper positioning. The battery type for
the device is two 1.5V AA Alkaline batteries.
**Caution: Do not mix and use batteries of dierent brands. If the
device will not be used for long periods of time, please remove batteries
and store the device.**

- 5 -
www.hmdigital.com
FLM-3
FLOW MONITOR
RESETTING THE CUMULATED FLOW RATE
1. Power on the unit.
2. Press the “UP” and “UNIT/SET” buttons simultaneously and hold for 3
seconds.
3. You will hear two short beeps, indicating that the number has been
reset to 0.
If the ow rate goes out of
measurable range, (as in the
diagram above),“OFL” will
appear on the display screen.
If the cumulated ow rate goes
out of measurable range, (as in the
diagram above),“OFL” will appear
on the bottom of the display screen.
HOW TO USE THE FLM-3
1. Insert the 1/4” hose into to the tting on unit.
2. Remove the battery discharge protection tab which is located on the
bottom of the unit in order to turn the power on.
3. Press the “SET” button and hold for 3 seconds in order to select the
preferred unit of measurement (LPM or GPM).
4. Press the “SET” button and set the desired alarm value by pressing the
“SHIFT” and “UP” buttons.
5. Press the “SET” button in order to save the desired alarm value.
6. The counter on the LCD display will begin to change numbers as
water ows indicating that the unit is in operation.
Liters
Liters
LPM
LPM
Liters
Liters
LPM
LPM
ONE YEAR LIMITED WARRANTY
The Flow Monitor (”FLM-3”), manufactured by HM Digital, Inc.
("the Company") is warranted to the purchaser against defective materials and
workmanship for one (1) year from the date of purchase.
What is covered: Repair parts and labor, or replacement at the Company's option.
Transportation charges for repaired or new product to be returned to the purchaser.
What is not covered: Transportation charges for the defective product to be sent to
the Company. Any consequential damages, incidental damages, or incidental
expenses, including damages to property. This includes damages from abuse or
improper maintenance such as tampering, wear and tear, water damage, or any other
physical damage. The warranty does not cover water damage to the FLM-3 due to
parts not securely closed. Products with any evidence of such damage will not be
repaired or replaced.
How to obtain warranty performance: Attach to the product your name, address,
description of problem, phone number, and proof of date of purchase, package and
return to:
HM Digital, Inc.
ATTN: Returns
5819 Uplander Way
Culver City, CA 90230
U.S.A.
Implied Warranties: Any implied warranties, including implied warranties of
merchantability and tness for a particular purpose, are limited in duration to ve
years from date of purchase. Some states do not allow limitations on how long an
implied warranty lasts, so the above limitation may not apply to you. To the extent
any provision of this warranty is prohibited by federal and state law and cannot be
preempted, it shall not be applicable. This warranty gives you specic legal rights,
and you may also have other rights, which vary from state to state.
NOTE: Warranties are product-specic. Third-party products and products deemed
by HM Digital as "accessories" are not covered under warranty. Third-party products
include, but are not limited to, batteries and ttings. Accessories include, but are not
limited to batteries, lanyards and cases.
OUT OF MEASURABLE RANGE
USER’S GUIDE
PROFESSIONAL WATER
TESTING INSTRUMENTS
- 2 -
LCD SCREEN DESCRIPTION
1. ”SET” Mode icon
2. Volume per minute
3. Battery life indicator
4. LPM icon (liters/min)
5. GPM icon (gallons/min)
12
3
4
5
6
7
89
10
SET
ALARM
Liters
Liters
Gallons
Gallons
LPM
LPM
GPM
GPM
INSTALLATION INSTRUCTIONS CONT’D
Insert the hose towards the direction
where the arrow points to install.
How to Insert the Hose:
While pressing the grey ring, pull the
hose towards the direction where the
arrow points to separate the hose.
How to Remove the Hose:
6. Liters icon (for liters mode)
7. Gallons icon (for gallons mode)
8. Stacked volume used
9. Alarm icon
10. Counting indicator
(shows sensor is working)

- 1 -
- 3 - - 4 -
FEATURES
BUTTON EXPLANATION
INSTALLATION INSTRUCTIONS
ALARM SETTING FEATURE
HOW TO SET THE ALARM
If the cumulated ow rate exceeds the limit that the user originally set,
the water ow alarm will beep 5 times and the alarm icon on the LCD
display will blink. In this case, change your water purier lter and reset
the unit.
RESETTING AN ALARM VALUE
1. Power on the unit
2. Press “UNIT/SET” button and the word SET will then appear on the
LCD display.
3. Press the “UP” and “UNIT/SET” buttons simultaneously and hold for
3 seconds to reset the stacked volume used to 00000.
4. Press the “SET” button once again to save. You will hear a beeping sound.
1. Power on the unit.
2. Press the “UNIT/SET” button and hold
for 3 seconds in order to choose
between Liters or Gallons.
3. Press the “UNIT/SET” button and the word SET will then appear on the
LCD display. The rst digit of the stacked volume used number will
then begin to blink.
4. Press the “SHIFT” button in order to move the cursor between digits
and press the “UP” button to set the desired number.
5. Press the ”SET” button again to save the desired number. You will hear
a beeping sound indicating that the desired number has been saved.
SPECIFICATIONS
Range: 0-99999 Liters / 0-99999 Gallons
0.8-8.0 LPM / 0.2-2.1 GPM
Resolution: 1 Liter (1 Gallon); 0.1 LPM (0.1 GPM)
Sensor Housing Material: POM (KEPITAL, F20-03-KEP)
Accuracy: +/- 10%
Fitting: 1/4” ONE-TOUCH Type
Alarm: Sound over set point
Auto Shut-O: After 5 minutes (LCD Display)
Battery Life: Approximately 2 Years
Battery Type: 1.5V x 2 EA (AA SIZE)
Dimensions: 66 x 90 x 63 mm (2.6 x 3.54 x 2.48 inches)
Weight:7.3 oz (Includes Batteries)
Power “ON/OFF”.
Move the shift button to the right in order to choose digits
when setting an alarm.
Increases the number of the selected digit when setting an
alarm. Press and hold to speed up.
Press both buttons while in normal mode at the same
time and hold for 3 seconds in order to reset cumulated
ow rates.
Accesses the ow rate, “SET” mode, entry and save features.
+
Press and hold both buttons for 3 seconds while in
“SET” mode, in order for cumulated alarm value
to be reset.
+
There are two 1/4”connection ttings
on the unit. The left side tting is an
entrance for water and the right side
tting is an exit.
SET
Liters
Liters
LPM
LPM
In Out
Press and hold for 3 seconds or order to switch measurement
units from liters to gallons and vice versa.
The FM-200 is an easy-to-install ow monitor that enables you to
check and measure ow rates in Liters Per Minute (LPM) or
Gallons Per Minute (GPM).
This product enables users to manage clean water when a water
purier lter expiration date is set to match the ow rate capacity.
A user can set a specic ow rate limit, and if the ow rate exceeds
the set limit, an alarm will sound along with an icon that will appear
on the display screen.
- 6 -
How to shut o the alarm temporarily:
Turn the power on and press and hold the “ON/OFF” button for 3
seconds, the display will show OFF. The alarm is now shut o and will
not sound even if the ow rate exceeds the alarm value.
Whenever you turn o the unit and turn it back on again, the alarm
will automatically be turned back on.
AUTO LCD ON/OFF
The LCD display will turn o on the unit automatically after 5 minutes.
However, the unit will continue to take ow rate measurements even
while the display if o.
ALARM MUTE
CHANGING THE BATTERIES
When battery life display on the FLM-3 begins to blink and the unit
starts to beep, this will indicate that it’s time to replace the batteries.
How to turn on the alarm:
FEATURES OF THE FLM-3
Open the bottom cover of the device, removed the batteries and insert
new batteries while matching proper positioning. The battery type for
the device is two 1.5V AA Alkaline batteries.
**Caution: Do not mix and use batteries of dierent brands. If the
device will not be used for long periods of time, please remove batteries
and store the device.**

- 5 -
www.hmdigital.com
FLM-3
FLOW MONITOR
RESETTING THE CUMULATED FLOW RATE
1. Power on the unit.
2. Press the “UP” and “UNIT/SET” buttons simultaneously and hold for 3
seconds.
3. You will hear two short beeps, indicating that the number has been
reset to 0.
If the ow rate goes out of
measurable range, (as in the
diagram above),“OFL” will
appear on the display screen.
If the cumulated ow rate goes
out of measurable range, (as in the
diagram above),“OFL” will appear
on the bottom of the display screen.
HOW TO USE THE FLM-3
1. Insert the 1/4” hose into to the tting on unit.
2. Remove the battery discharge protection tab which is located on the
bottom of the unit in order to turn the power on.
3. Press the “SET” button and hold for 3 seconds in order to select the
preferred unit of measurement (LPM or GPM).
4. Press the “SET” button and set the desired alarm value by pressing the
“SHIFT” and “UP” buttons.
5. Press the “SET” button in order to save the desired alarm value.
6. The counter on the LCD display will begin to change numbers as
water ows indicating that the unit is in operation.
Liters
Liters
LPM
LPM
Liters
Liters
LPM
LPM
ONE YEAR LIMITED WARRANTY
The Flow Monitor (”FLM-3”), manufactured by HM Digital, Inc.
("the Company") is warranted to the purchaser against defective materials and
workmanship for one (1) year from the date of purchase.
What is covered: Repair parts and labor, or replacement at the Company's option.
Transportation charges for repaired or new product to be returned to the purchaser.
What is not covered: Transportation charges for the defective product to be sent to
the Company. Any consequential damages, incidental damages, or incidental
expenses, including damages to property. This includes damages from abuse or
improper maintenance such as tampering, wear and tear, water damage, or any other
physical damage. The warranty does not cover water damage to the FLM-3 due to
parts not securely closed. Products with any evidence of such damage will not be
repaired or replaced.
How to obtain warranty performance: Attach to the product your name, address,
description of problem, phone number, and proof of date of purchase, package and
return to:
HM Digital, Inc.
ATTN: Returns
5819 Uplander Way
Culver City, CA 90230
U.S.A.
Implied Warranties: Any implied warranties, including implied warranties of
merchantability and tness for a particular purpose, are limited in duration to ve
years from date of purchase. Some states do not allow limitations on how long an
implied warranty lasts, so the above limitation may not apply to you. To the extent
any provision of this warranty is prohibited by federal and state law and cannot be
preempted, it shall not be applicable. This warranty gives you specic legal rights,
and you may also have other rights, which vary from state to state.
NOTE: Warranties are product-specic. Third-party products and products deemed
by HM Digital as "accessories" are not covered under warranty. Third-party products
include, but are not limited to, batteries and ttings. Accessories include, but are not
limited to batteries, lanyards and cases.
OUT OF MEASURABLE RANGE
USER’S GUIDE
PROFESSIONAL WATER
TESTING INSTRUMENTS
- 2 -
LCD SCREEN DESCRIPTION
1. ”SET” Mode icon
2. Volume per minute
3. Battery life indicator
4. LPM icon (liters/min)
5. GPM icon (gallons/min)
12
3
4
5
6
7
89
10
SET
ALARM
Liters
Liters
Gallons
Gallons
LPM
LPM
GPM
GPM
INSTALLATION INSTRUCTIONS CONT’D
Insert the hose towards the direction
where the arrow points to install.
How to Insert the Hose:
While pressing the grey ring, pull the
hose towards the direction where the
arrow points to separate the hose.
How to Remove the Hose:
6. Liters icon (for liters mode)
7. Gallons icon (for gallons mode)
8. Stacked volume used
9. Alarm icon
10. Counting indicator
(shows sensor is working)

- 1 -
- 3 - - 4 -
FEATURES
BUTTON EXPLANATION
INSTALLATION INSTRUCTIONS
ALARM SETTING FEATURE
HOW TO SET THE ALARM
If the cumulated ow rate exceeds the limit that the user originally set,
the water ow alarm will beep 5 times and the alarm icon on the LCD
display will blink. In this case, change your water purier lter and reset
the unit.
RESETTING AN ALARM VALUE
1. Power on the unit
2. Press “UNIT/SET” button and the word SET will then appear on the
LCD display.
3. Press the “UP” and “UNIT/SET” buttons simultaneously and hold for
3 seconds to reset the stacked volume used to 00000.
4. Press the “SET” button once again to save. You will hear a beeping sound.
1. Power on the unit.
2. Press the “UNIT/SET” button and hold
for 3 seconds in order to choose
between Liters or Gallons.
3. Press the “UNIT/SET” button and the word SET will then appear on the
LCD display. The rst digit of the stacked volume used number will
then begin to blink.
4. Press the “SHIFT” button in order to move the cursor between digits
and press the “UP” button to set the desired number.
5. Press the ”SET” button again to save the desired number. You will hear
a beeping sound indicating that the desired number has been saved.
SPECIFICATIONS
Range: 0-99999 Liters / 0-99999 Gallons
0.8-8.0 LPM / 0.2-2.1 GPM
Resolution: 1 Liter (1 Gallon); 0.1 LPM (0.1 GPM)
Sensor Housing Material: POM (KEPITAL, F20-03-KEP)
Accuracy: +/- 10%
Fitting: 1/4” ONE-TOUCH Type
Alarm: Sound over set point
Auto Shut-O: After 5 minutes (LCD Display)
Battery Life: Approximately 2 Years
Battery Type: 1.5V x 2 EA (AA SIZE)
Dimensions: 66 x 90 x 63 mm (2.6 x 3.54 x 2.48 inches)
Weight:7.3 oz (Includes Batteries)
Power “ON/OFF”.
Move the shift button to the right in order to choose digits
when setting an alarm.
Increases the number of the selected digit when setting an
alarm. Press and hold to speed up.
Press both buttons while in normal mode at the same
time and hold for 3 seconds in order to reset cumulated
ow rates.
Accesses the ow rate, “SET” mode, entry and save features.
+
Press and hold both buttons for 3 seconds while in
“SET” mode, in order for cumulated alarm value
to be reset.
+
There are two 1/4”connection ttings
on the unit. The left side tting is an
entrance for water and the right side
tting is an exit.
SET
Liters
Liters
LPM
LPM
In Out
Press and hold for 3 seconds or order to switch measurement
units from liters to gallons and vice versa.
The FM-200 is an easy-to-install ow monitor that enables you to
check and measure ow rates in Liters Per Minute (LPM) or
Gallons Per Minute (GPM).
This product enables users to manage clean water when a water
purier lter expiration date is set to match the ow rate capacity.
A user can set a specic ow rate limit, and if the ow rate exceeds
the set limit, an alarm will sound along with an icon that will appear
on the display screen.
- 6 -
How to shut o the alarm temporarily:
Turn the power on and press and hold the “ON/OFF” button for 3
seconds, the display will show OFF. The alarm is now shut o and will
not sound even if the ow rate exceeds the alarm value.
Whenever you turn o the unit and turn it back on again, the alarm
will automatically be turned back on.
AUTO LCD ON/OFF
The LCD display will turn o on the unit automatically after 5 minutes.
However, the unit will continue to take ow rate measurements even
while the display if o.
ALARM MUTE
CHANGING THE BATTERIES
When battery life display on the FLM-3 begins to blink and the unit
starts to beep, this will indicate that it’s time to replace the batteries.
How to turn on the alarm:
FEATURES OF THE FLM-3
Open the bottom cover of the device, removed the batteries and insert
new batteries while matching proper positioning. The battery type for
the device is two 1.5V AA Alkaline batteries.
**Caution: Do not mix and use batteries of dierent brands. If the
device will not be used for long periods of time, please remove batteries
and store the device.**

- 5 -
www.hmdigital.com
FLM-3
FLOW MONITOR
RESETTING THE CUMULATED FLOW RATE
1. Power on the unit.
2. Press the “UP” and “UNIT/SET” buttons simultaneously and hold for 3
seconds.
3. You will hear two short beeps, indicating that the number has been
reset to 0.
If the ow rate goes out of
measurable range, (as in the
diagram above),“OFL” will
appear on the display screen.
If the cumulated ow rate goes
out of measurable range, (as in the
diagram above),“OFL” will appear
on the bottom of the display screen.
HOW TO USE THE FLM-3
1. Insert the 1/4” hose into to the tting on unit.
2. Remove the battery discharge protection tab which is located on the
bottom of the unit in order to turn the power on.
3. Press the “SET” button and hold for 3 seconds in order to select the
preferred unit of measurement (LPM or GPM).
4. Press the “SET” button and set the desired alarm value by pressing the
“SHIFT” and “UP” buttons.
5. Press the “SET” button in order to save the desired alarm value.
6. The counter on the LCD display will begin to change numbers as
water ows indicating that the unit is in operation.
Liters
Liters
LPM
LPM
Liters
Liters
LPM
LPM
ONE YEAR LIMITED WARRANTY
The Flow Monitor (”FLM-3”), manufactured by HM Digital, Inc.
("the Company") is warranted to the purchaser against defective materials and
workmanship for one (1) year from the date of purchase.
What is covered: Repair parts and labor, or replacement at the Company's option.
Transportation charges for repaired or new product to be returned to the purchaser.
What is not covered: Transportation charges for the defective product to be sent to
the Company. Any consequential damages, incidental damages, or incidental
expenses, including damages to property. This includes damages from abuse or
improper maintenance such as tampering, wear and tear, water damage, or any other
physical damage. The warranty does not cover water damage to the FLM-3 due to
parts not securely closed. Products with any evidence of such damage will not be
repaired or replaced.
How to obtain warranty performance: Attach to the product your name, address,
description of problem, phone number, and proof of date of purchase, package and
return to:
HM Digital, Inc.
ATTN: Returns
5819 Uplander Way
Culver City, CA 90230
U.S.A.
Implied Warranties: Any implied warranties, including implied warranties of
merchantability and tness for a particular purpose, are limited in duration to ve
years from date of purchase. Some states do not allow limitations on how long an
implied warranty lasts, so the above limitation may not apply to you. To the extent
any provision of this warranty is prohibited by federal and state law and cannot be
preempted, it shall not be applicable. This warranty gives you specic legal rights,
and you may also have other rights, which vary from state to state.
NOTE: Warranties are product-specic. Third-party products and products deemed
by HM Digital as "accessories" are not covered under warranty. Third-party products
include, but are not limited to, batteries and ttings. Accessories include, but are not
limited to batteries, lanyards and cases.
OUT OF MEASURABLE RANGE
USER’S GUIDE
PROFESSIONAL WATER
TESTING INSTRUMENTS
- 2 -
LCD SCREEN DESCRIPTION
1. ”SET” Mode icon
2. Volume per minute
3. Battery life indicator
4. LPM icon (liters/min)
5. GPM icon (gallons/min)
12
3
4
5
6
7
89
10
SET
ALARM
Liters
Liters
Gallons
Gallons
LPM
LPM
GPM
GPM
INSTALLATION INSTRUCTIONS CONT’D
Insert the hose towards the direction
where the arrow points to install.
How to Insert the Hose:
While pressing the grey ring, pull the
hose towards the direction where the
arrow points to separate the hose.
How to Remove the Hose:
6. Liters icon (for liters mode)
7. Gallons icon (for gallons mode)
8. Stacked volume used
9. Alarm icon
10. Counting indicator
(shows sensor is working)
Table of contents
Other HM Digital Measuring Instrument manuals
HM Digital
HM Digital COM-100 User manual

HM Digital
HM Digital PH-200 User manual
HM Digital
HM Digital TDS-3 User manual
HM Digital
HM Digital DM-1 User manual
HM Digital
HM Digital COM-300 User manual

HM Digital
HM Digital COM-100 User manual
HM Digital
HM Digital HydroMaster HM-500 User manual
HM Digital
HM Digital CommPro Series User manual
Popular Measuring Instrument manuals by other brands
Shenzhen Hongdian Technologies
Shenzhen Hongdian Technologies NB007 user manual
Grandway
Grandway F2H FHO5000 manual
KERN
KERN MLS 50-3C operating manual
Thermo Scientific
Thermo Scientific EUTECH INSTRUMENTS OAKTON 450 Series Operation instructions
Bartec
Bartec MAK 3003 quick guide
Dinel
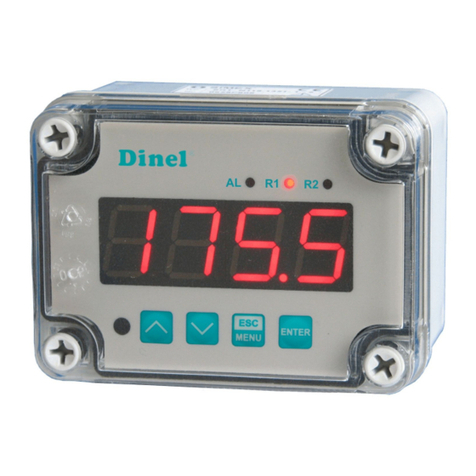
Dinel PDU-40-W Series user manual
