Table of Contents
SECTION 1. INTRODUCTION..............................................................................................1
SECTION 2. EQUIPMENT IDENTIFICATION..................................................................2
STANDARD EQUIPMENT.....................................................................................................................................2
OPTIONAL EQUIPMENT ......................................................................................................................................3
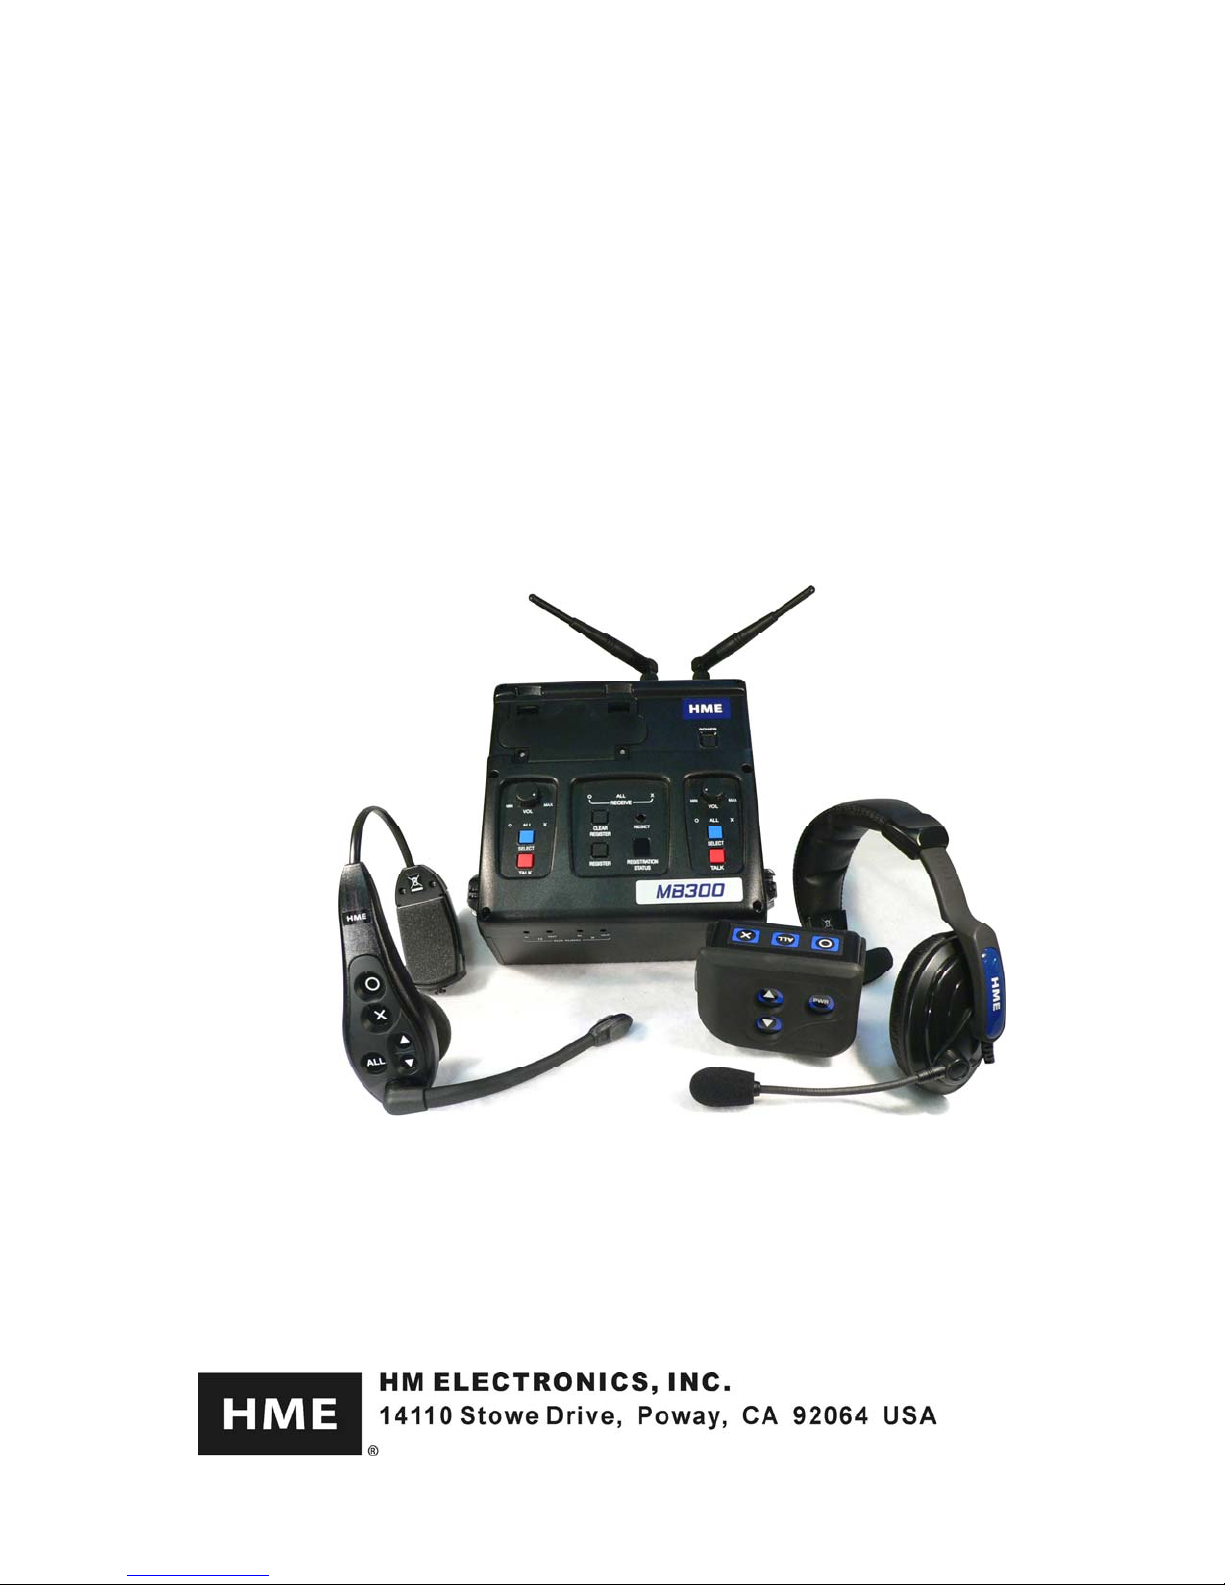
EQUIPMENT FEATURES ......................................................................................................................................4
Base Station .........................................................................................................................................................4
Beltpac .................................................................................................................................................................6
All-In-One Headset (optional) .............................................................................................................................6
SECTION 3. EQUIPMENT SETUP......................................................................................7
BATTERY CHARGER............................................................................................................................................7
BASE STATION......................................................................................................................................................8
Optional Battery Operation of Base Station......................................................................................................... 9
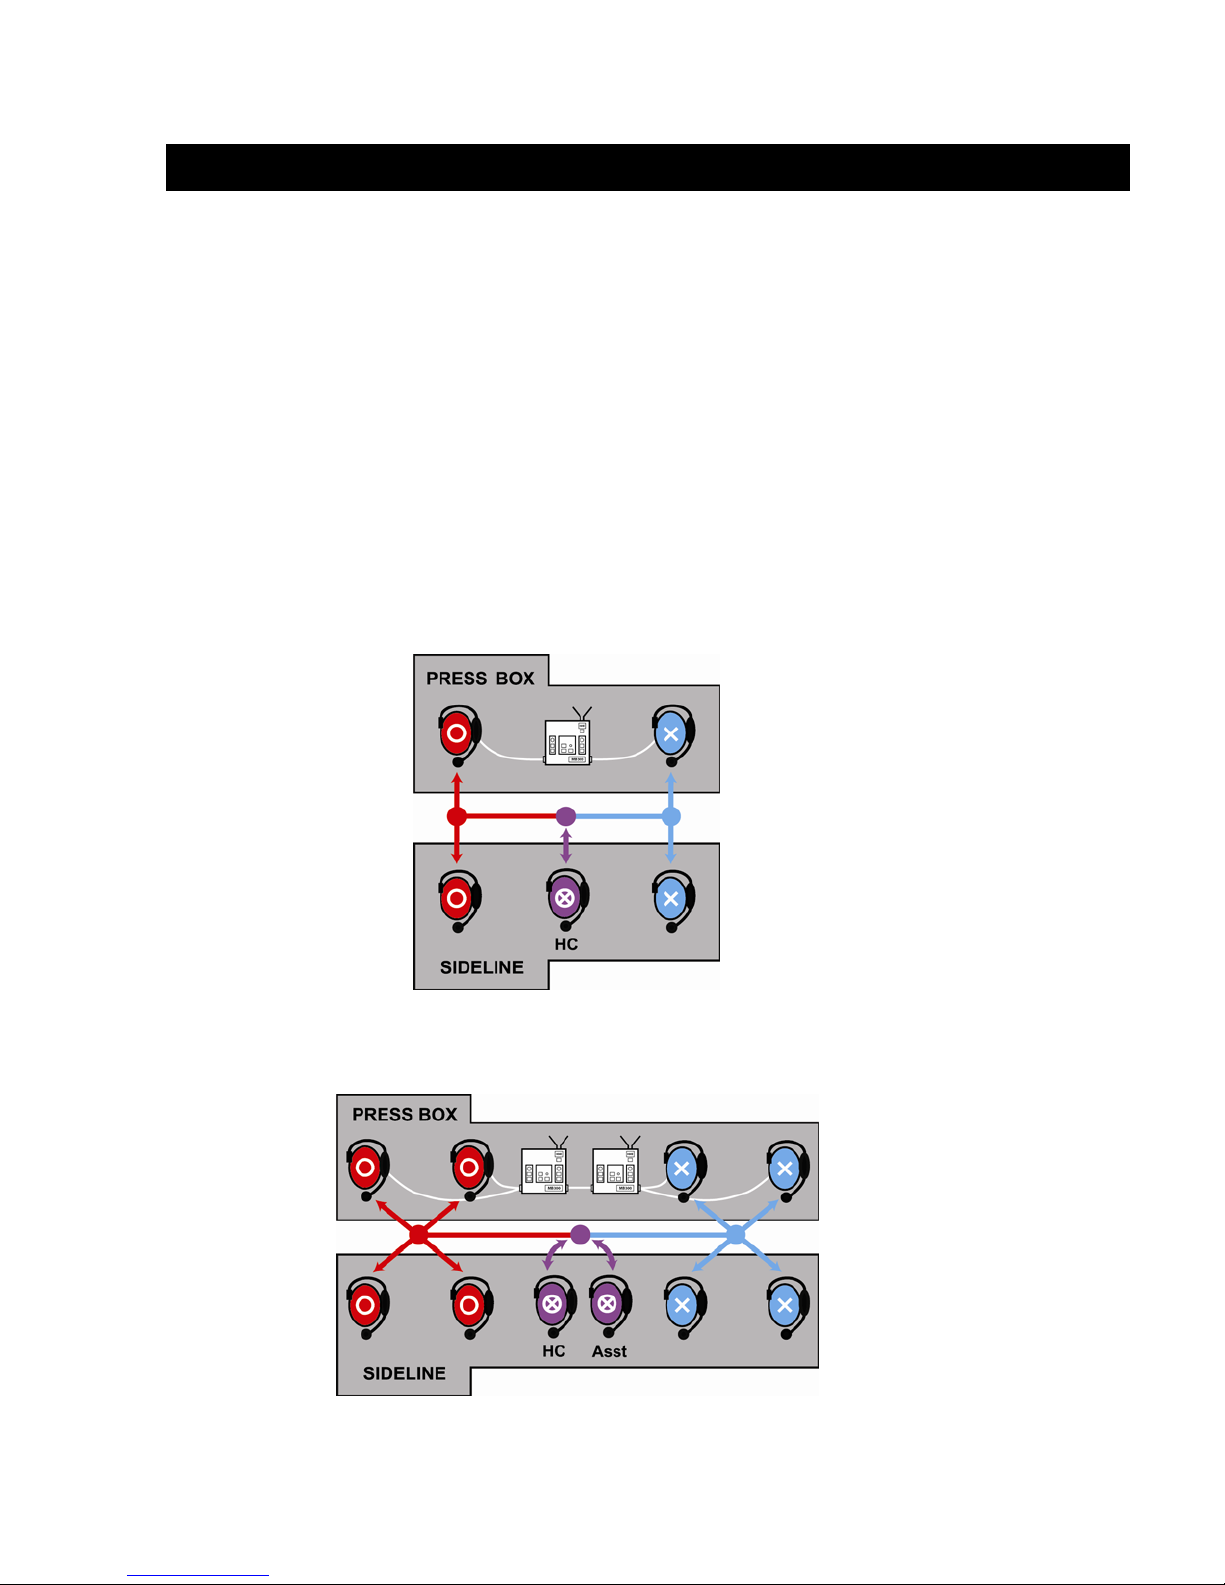
Multiple Base Stations ....................................................................................................................................... 10
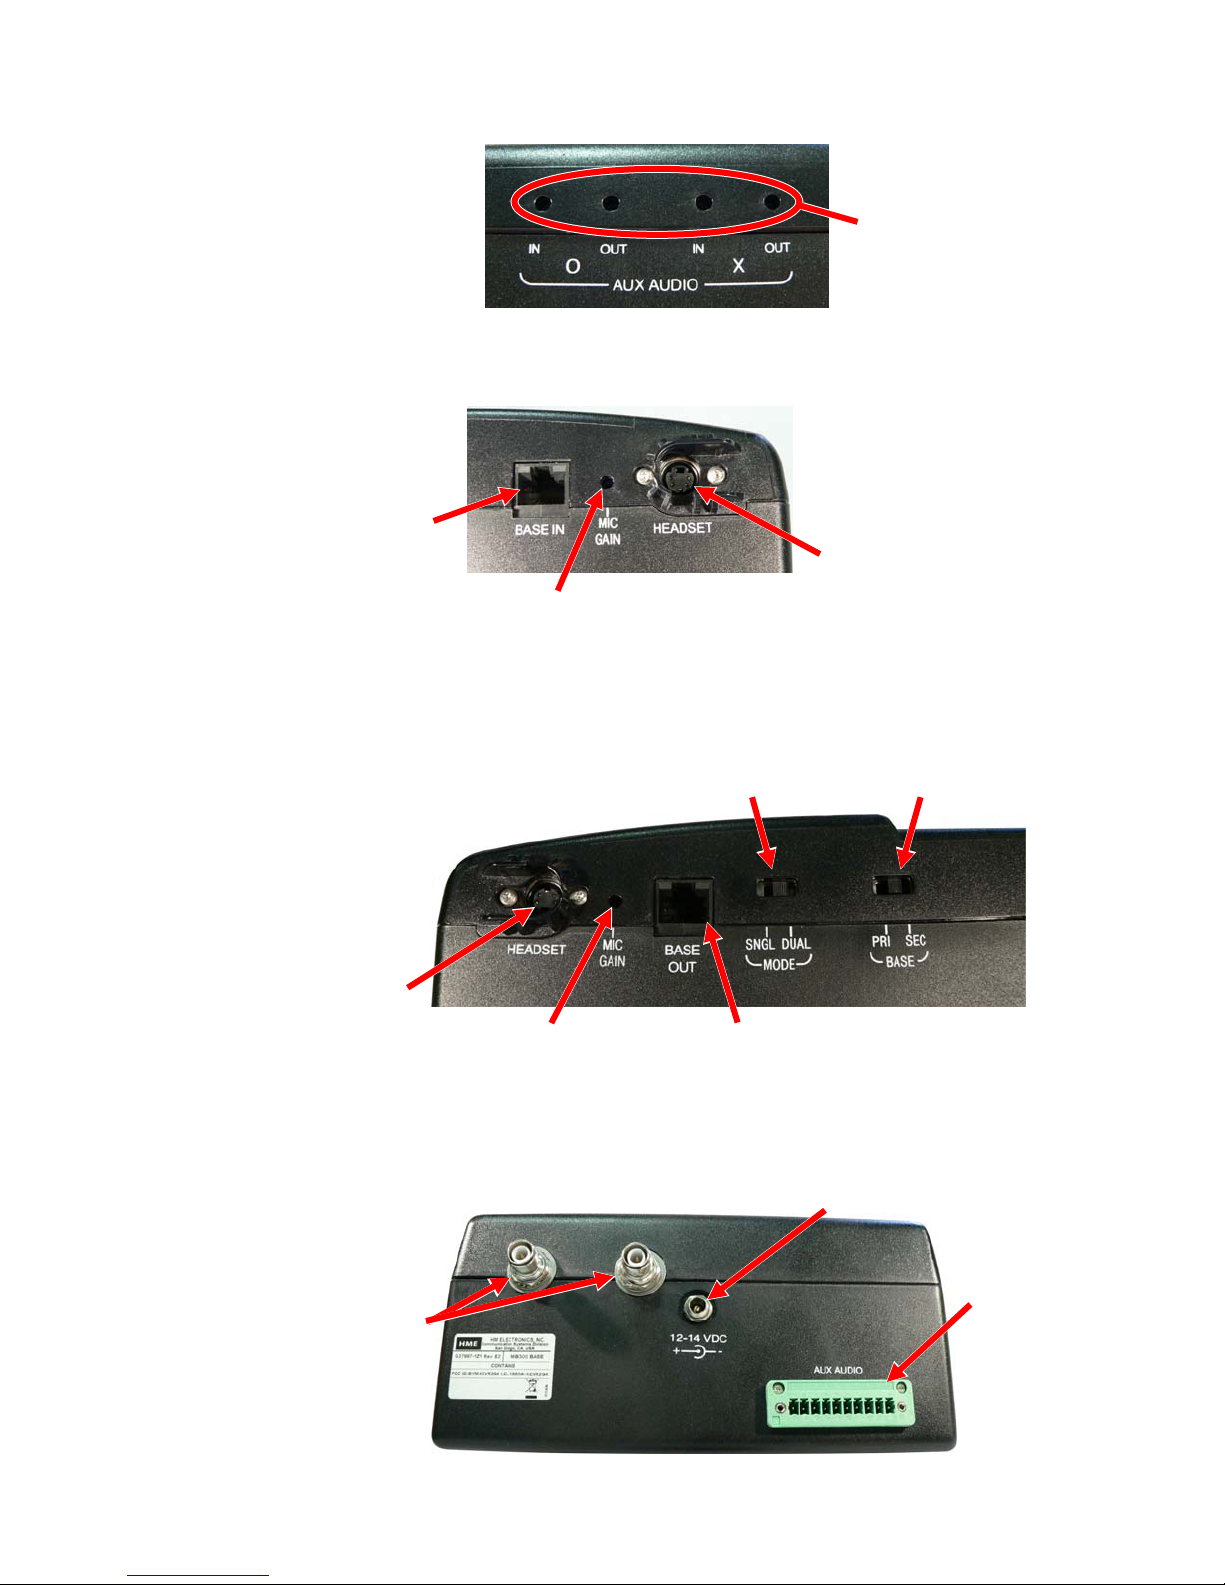
Audio Connection ......................................................................................................................................... 10
Single/Dual Channel Setting .........................................................................................................................10
Initialize Multiple Base Stations ................................................................................................................... 11
Base Station Microphone Gain Adjustment.......................................................................................................12
BELTPACS ............................................................................................................................................................13
Beltpac Registration........................................................................................................................................... 13
Beltpac or All-In-One Headset Operating Mode Setup ..................................................................................... 14
Beltpac or All-In-One Headset Adjustments .....................................................................................................15
Sidetone Adjustment (Beltpac only, not on all-in-one headset)....................................................................15
Microphone Gain Adjustment....................................................................................................................... 15
OPTIONAL REMOTE ANTENNA INSTALLATION......................................................................................... 16
OPTIONAL AUXILIARY EQUIPMENT CONNECTION....................................................................................17
SECTION 4. EQUIPMENT OPERATION.........................................................................18
THE BASICS ......................................................................................................................................................... 18
IN THE PRESS BOX – Base Station Operation.............................................................................................18
ON THE FIELD – Beltpac / All-In-One Headset Operation ..........................................................................19
Changing Batteries............................................................................................................................................. 20
SECTION 5. TROUBLESHOOTING..................................................................................21
FREQUENTLY ASKED QUESTIONS................................................................................................................. 23
SECTION 6. TECHNICAL DATA......................................................................................24
EQUIPMENT SPECIFICATIONS.........................................................................................................................24
Base Station...................................................................................................................................................24
Beltpac ..........................................................................................................................................................25
All-In-One Headset .......................................................................................................................................25
BLOCK DIAGRAM...............................................................................................................................................26
SECTION 7. INDEX...............................................................................................................27
© 2008 HM Electronics, Inc.
The HME logo and product names are registered trademarks ofHM Electronics, Inc. All rights reserved.
HM Electronics, Inc. is not responsible for equipment malfunctions due to erroneous translation of its publications from their
original English version. Illustrations in this publication are approximate representations of the actual equipment, and may
not be exactly as the equipment appears.