manuals.online logo
Brands
  1. Home
  2. •
  3. Brands
  4. •
  5. Hobby King
  6. •
  7. Quadcopter
  8. •
  9. Hobby King H4 User manual

Hobby King H4 User manual

This manual suits for next models

1

Other Hobby King Quadcopter manuals

Hobby King Predator 650 User manual

Hobby King

Hobby King Predator 650 User manual

Hobby King CX-20 User manual

Hobby King

Hobby King CX-20 User manual

Hobby King AssaultReaper 500 User manual

Hobby King

Hobby King AssaultReaper 500 User manual

Popular Quadcopter manuals by other brands

Alias 6608 owner's manual

Alias

Alias 6608 owner's manual

Autel Robotics EVO II Dual 640T quick guide

Autel Robotics

Autel Robotics EVO II Dual 640T quick guide

Carson X4 NANO instruction manual

Carson

Carson X4 NANO instruction manual

Kaiser Baas KBA15007 user guide

Kaiser Baas

Kaiser Baas KBA15007 user guide

Denver Electronics DCH-261 instructions

Denver Electronics

Denver Electronics DCH-261 instructions

Craig INTERCEPTOR owner's manual

Craig

Craig INTERCEPTOR owner's manual

IMAGINARIUM droni stream instructions

IMAGINARIUM

IMAGINARIUM droni stream instructions

dji MAVIC 2 PRO quick start guide

dji

dji MAVIC 2 PRO quick start guide

Walkera QR X900 quick start guide

Walkera

Walkera QR X900 quick start guide

dji PHANTOM 3 4K user manual

dji

dji PHANTOM 3 4K user manual

Attop W80 Instructions for use

Attop

Attop W80 Instructions for use

Ares RECON FPV owner's manual

Ares

Ares RECON FPV owner's manual

Skycat XS user manual

Skycat

Skycat XS user manual

Falcon S2-210 quick start guide

Falcon

Falcon S2-210 quick start guide

MJX X300C instruction manual

MJX

MJX X300C instruction manual

dji NAZA-F45 Assembling and parameters setup

dji

dji NAZA-F45 Assembling and parameters setup

Propel Trampolines HD VIDEO DRONE Setup guide

Propel Trampolines

Propel Trampolines HD VIDEO DRONE Setup guide

HobbyZone Zugo instruction manual

HobbyZone

HobbyZone Zugo instruction manual

manuals.online logo
manuals.online logoBrands
  • About & Mission
  • Contact us
  • Privacy Policy
  • Terms and Conditions

Copyright 2025 Manuals.Online. All Rights Reserved.

Author: John Taylor, UK Page 1 of 4 Date: 7/2/2014
Hobbyking H4 Copter Multi-Rotor Quadcopter
Introduction
I’ve created these build instructions to help people through the build of this copter without having
the problems I found whilst building the model myself.
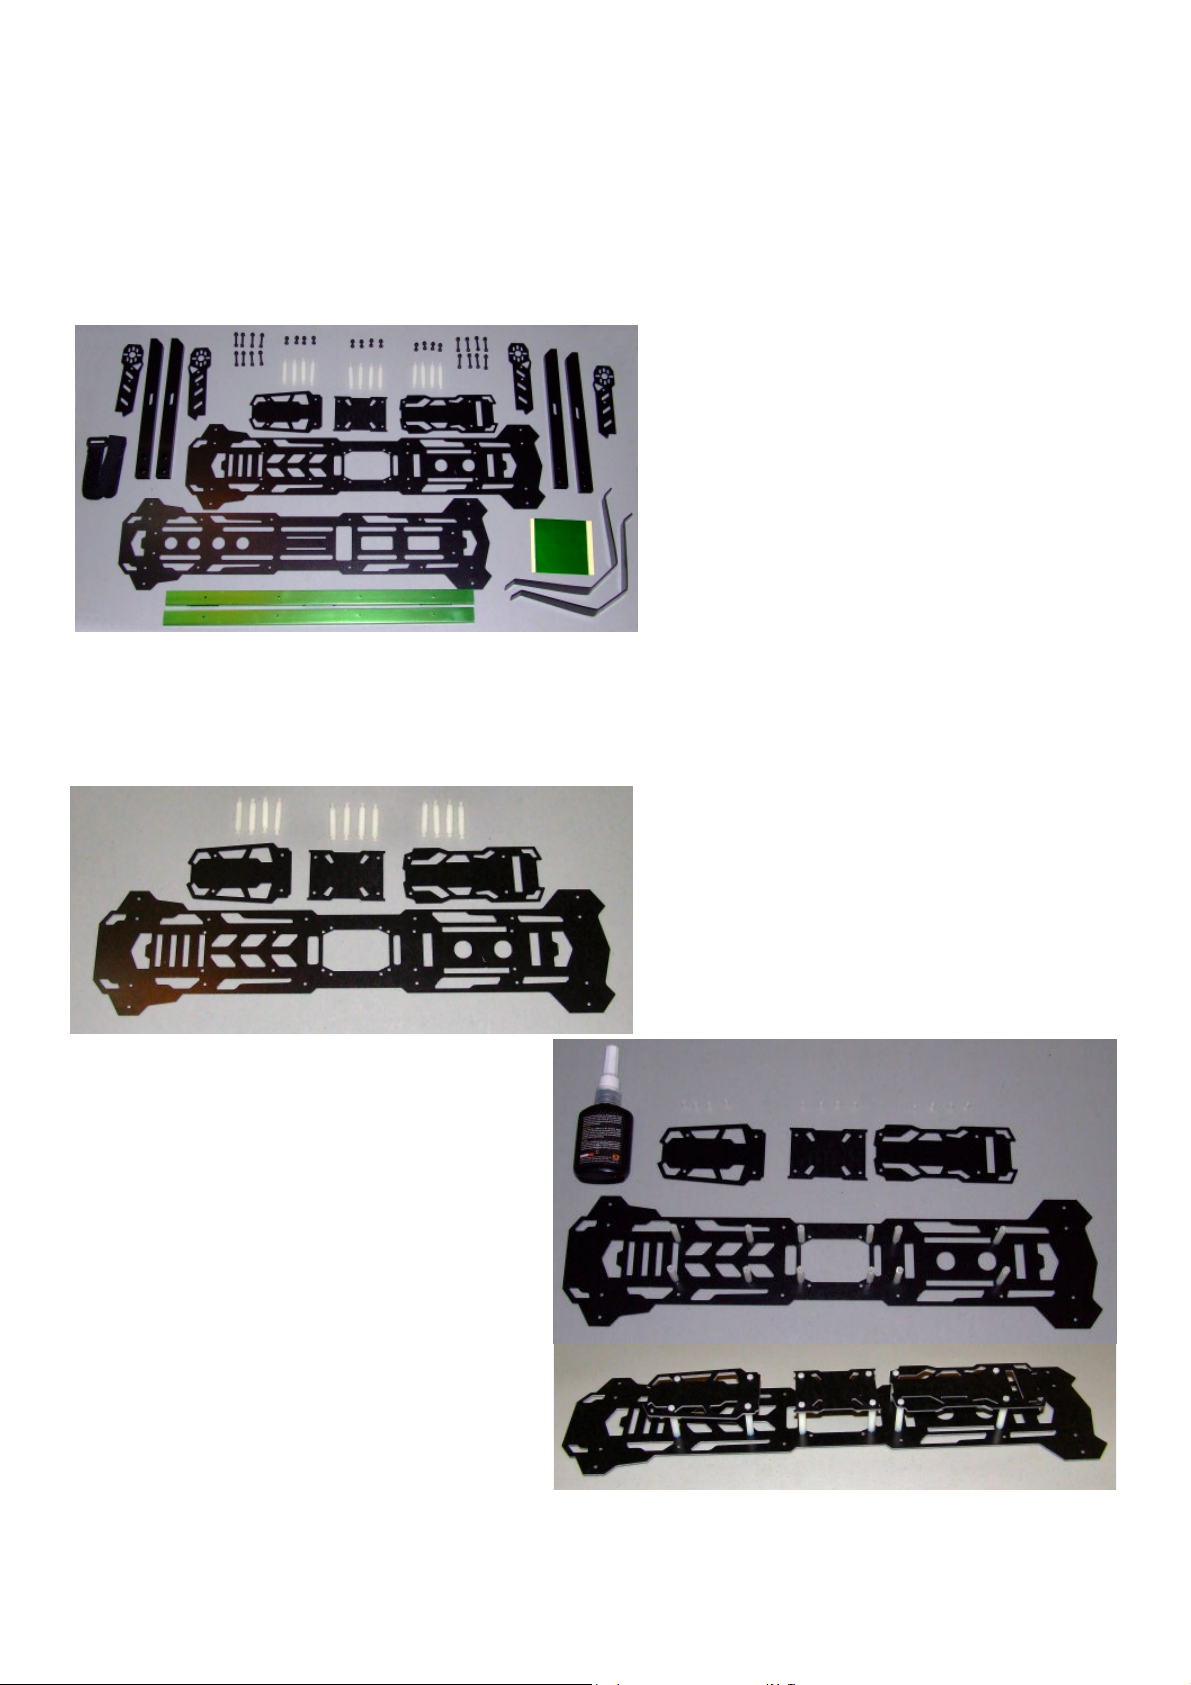
The diagram below shows the content of the kit as delivered.
Note: there were no build instructions in
the kit but I did find some helpful files on
the Hobbyking web site.
You will also need a straight screwdriver, a
H2.5 hex allen key and a 5.5 box spanner
or socket.
Assembly
The first thing I did was to asemble the top of the model as I realised if I assembled the main
fuselage first it would be difficult accessing the screws for the pillars holding the electronic mounts.
Parts required
You will need the top fuselage, this can be
identified by the extra holes for the post
mounts.
You’ll also need the 3 electronics mounts
and 12 plastic posts with screws both ends.
Screw the posts onto the upper fuselage
using some thread lock to ensure they do
not come loose from vibration.
Fit the electronics mounts but do not use
threadlock until you’ve fitted the electronics
and sure you do not need to removed the
plates again.
Author: John Taylor, UK Page 2 of 4 Date: 7/2/2014
The next step was to assemble the fuselage.
Parts required
The assembled top fuselage, bottom
fuselage, green strengthening tubes and 8
of the longer bolts and nuts.
Align the bolt holes and fit all 8 bolts.
Note: Threadlock is not required as the nuts
are lock nuts.
The next step was to fit the under carraige.
Parts required
The assembled fuselage, 2 legs and 4
shorter bolts with screws.
WARNING
I found that when fitting the engine mounts
the front legs made it very difficult to fit and
tightlen the inner bolt.
Front, engine mounts obstructed. Rear, engine mount bolts clear.
Author: John Taylor, UK Page 3 of 4 Date: 7/2/2014
My solution to this problem was to move the front undercarraige.
I marked out and drilled 2 holes as shown below.
Note: They align with holes in the top fuselage which allowed access to the heads of the bolts after
removing the front electronics plate.
The next step was to assemble the motor arms
Parts required
The 4 engine mount arms, 4 engine
mounts, 8 short bolts and nuts and the
green stickers.
Attach the sticker to the top of the engine mount arms, outer end
on the side with the smaller holes.
Punch a hold through the sticker and fit the engine mounts to the
arms.
Note: I forgot to do this until the end so had to remove the engine
mounts from the arms to fit them.
Author: John Taylor, UK Page 4 of 4 Date: 7/2/2014
Next step was to fit the engine mount arms to the fuselage
Parts required
The assembled fuselage, engine mount
arms and 8 long bolts with nuts.
Fit the outer bolts allowing the arms to
swing in tight to the fuselage.
Here’s the final assembly with green
stickers on the engine mount arms,
re-position undercarraige and folded out
engine mount arms.
Total weight once built 605 grams.
My next publication will include fitting the electronics.