manuals.online logo
Brands
  1. Home
  2. •
  3. Brands
  4. •
  5. Hogtunes
  6. •
  7. Amplifier
  8. •
  9. Hogtunes NCA 40.4 User manual

Hogtunes NCA 40.4 User manual

DESIGNED AND ENGINEERED IN CANADA FOR
THE GREAT AMERICAN CRUISER
For Use On 1998-Current
Harley Davidson FLHT/C/X
and FLTR* Models
*Hogtunes RG 40.4 Adaptor Kit is Required if Installing
this Amp in an FLTR Road Glide!
Version 1.2
NCA-40.4
INSTALLATION
MANUAL
Thank you for choosing the Hogtunes
NCA 40.4 Amplifier for your bike.
Since positive word of mouth is the best way
to grow our business, we want your new
system to work as well as it was designed to.
If you have any questions or
concerns, we are here to help.
Email: [email protected]
Tel: 705-719-6361
A video version of this manual is available at
www.hogtunes.com.
If you still need assistance, please
consider a professional installation by
your motorcycle dealer.
IMPORTANT: The NCA-40.4 makes its best power when
powering 2 ohm speakers. Running higher impedance
speakers (eg, 3,4,6, or 8 ohm) will reduce the amplifier’s power output!
The NCA-40.4 amplifier cannot be used if any external amplifier is
already on the bike. This includes CVO Models with the factory amplifier
under the tour-pak!! This kit will work on CVO models if the factory
amplifier and its wiring have been removed.
Harley-Davidson, Electra Glide, Road Glide, Street Glide, Ultra Classic, Tri Glide, CVO, Screamin Eagle and Tour-Pak are
Trademarks, and/or Registered Trademarks of Harley-Davidson, Inc., Milwaukee, Wisconsin, USA, and if Used or Implied
are for Reference Only. There is No Affiliation Between Harley-Davidson, Inc. and Hogtunes Inc.
2
GETTING STARTED
Please read the entire manual before starting. It WILL help and will familiarize you with all
the options of the amp.
Step #1: Remove the seat, and both wires (+ and -) from the battery.
Step #2: Remove the outer fairing/headlamp assembly. Refer to a service manual if you
need help with this. Note: A towel on the front fender can help prevent scratch-
es or “dings” from dropped tools or fasteners etc.
Note: If this amplifier is being mounted in a FLTR “Road Glide”, Hogtunes Part
RG 40.4 Adaptor Kit is required. (Drag Specialties Part #4405-0232)
Step #3: Take the 2 wires off each front speaker by gently pulling one at a time. Let the
factory speaker wires hang for now. If installing on an Ultra, remove each rear
speaker and let the rear speaker wires hang for now.
Step #4: On the side of the amplifier is a 2ch/4ch switch that needs to be set for your
system. In the “2ch” position, all 4 channels are driven equally with no option
of a fader on the radio controlling the front/rear. This is ideal for “Non-Ultras”
where your installing fairing speakers, (and tweeter pod if present), and either
rear speakers on a tour-pak, or speakers in fairing lower glove boxes. If install-
ing fairing speakers, and lower speakers on an Ultra, the amp will go in “2ch”
mode and the 4 front speakers are controlled by the front portion of the fader.
The rear speakers get powered by the radio, and are controlled by the rear
portion of the Ultras fader. When the amp is in 2ch mode, the 3 position “gain”
switch on the amp becomes active. Whatever speakers are plugged into the
rear output of the amp can now be controlled by this gain switch. This acts as
a “set it and forget it” quasi fader and allows for better control of your system.
Tip: The front channels always have full power going to whatever speakers they
are powering. If your powering fairing speakers and speakers in fairing lower
glove boxes, and find your front speakers are too loud, you can plug the front
speakers into the rear channels on the amp, and lower speakers into the front
channels of the amp. The gain switch will now allow you to adjust the power
going to the front speakers. This gives you awesome adjustment of your system!
Please finish your install as per this manual before adjusting.
If installing in an Ultra Classic where the amp will power front speakers (and
tweeter pod if present), and rear speakers, the amp will go into “4ch” mode.
This allows the radios fader to control front/rear adjustment.
Step #5: The power harness has an 8 pin white plug with 3 red wires, 3 black wires,
and 1 orange wire. Locate this and plug it into the white socket on the amplifier
marked “power”. The input harness has a smaller black 8 pin plug with smaller
gauge wire. Plug this into the black socket on the amplifier marked “hi level
input”. Locate the 4 pin black plug with black/brown, and black/blue wires.
This will plug into the “front out” on the amp, which is a 4 pin black socket.
34
A) If installing on an Ultra where the amp will power fronts and rears: Locate the
long “rear speaker” harness with 8 black wires in it. One end has an 8 pin white
plug, the other end has two 4 pin connectors. One of the 4 pin connectors on this
long harness will plug into the empty 4 pin plug on the input harness. It will only
go on one way. The other 4 pin plug on the rear harness will plug into the “rear
out” which is a white socket on the other side of the amp. Remember to have the
“2ch/4ch” switch set to “4ch”.
B) If installing on a EG Classic, Street Glide or Road Glide where the amp will power
fronts and rears: Locate the long “rear speaker” harness with 8 black wires in it.
One end has a white 8 pin connector, the other end has two 4 pin connectors. One
4 pin plug on the rear harness will plug into the “rear out” which is a white socket
on the output side of the amp. The other white connector on the same end of this
harness is not used. Remember to have the “2ch/4ch” switch on “2ch”
C) If installing where the amp will power fairing speakers, and fairing
lower glove box speakers: Locate the wire harness with a white 4 pin white
plug on one end and a 4 pin black plug covered in heat shrink. Plug the white plug
on this harness into the rear output on the side of the amp. Remember to have the
“2ch/4ch” switch on “2ch”. If adding rears to this configuration, locate
the long “rear speaker” harness with 8 black wires in it. One end has a white 8
pin connector, the other end has two 4 pin connectors. One 4 pin plug on the rear
harness will plug into the “bypass out” which is the blue socket on the output side of
the amp. The other white connector on the same end of this harness is not used. Re-
member to have the “2ch/4ch” switch on “2ch”. IMPORTANT: The radios power
is diverted to this set of speakers, so the speakers ohms (Ω) used in this location
MUST match the ohms the radio works with. For 2006-Current factory radios, 2
ohm speakers are required. For 1998-2005 factory radio’s, 4-8 ohm speakers are
required.
The amplifier is designed to mount on top of the radio inside the fairing so when installed,
the large factory wire harness that goes across the back of the speedometer and tachom-
eter will sit in the trough or “dish” cut into the top of the amplifier, as show in Diagram 1.1
below.
Diagram 1.1 (Amp Shown on 06+ Ultra With Rubber “Foot”)
CB MODULE
SUPPLIED FOOT
5
There is a black rubber “foot” in the kit. On 2006+ Ultras, the CB module is mounted on
top of the radio on the clutch side. The foot is used to fill the void next to the CB, so when
installed, the amplifier has ample support. On 1998-2005 bikes, or 2006+ bikes with the
CB and XM modules, or 2006 bikes with the CB removed, the foot is not used. See the 4
options below, and pick the one for your bike to prepare the amp to be installed in place.
Review the 4 options below, and pick the option best suited for your bike to
prepare the amp to be installed in place.
1)
If you have an 06+ Ultra with the CB as shown in Diagram 1.1, the foot
will be installed using supplied screws to the 2 holes on the bottom of the “brake side”
of the amplifier. The foot has an angle cut in it so it will clear the outer fairing going
back on. Make sure the angled portion of the foot sits adjacent to the angled part of
the amp. Place one side of the supplied “hook and loop” adhesive on the CB Module,
trimming it to fit if you like, and the other side of the “hook and loop” adhesive on the
underside of the amplifier. Place the small piece of “hook and loop” adhesive between
the screw holes on the underside of the foot. This helps the amp sit level when properly
installed. Please note that most adhesives work best at room temperature or higher and
on clean surfaces. Put the amp in place. There is an “overhang” built into the foot. The
amp is far enough back when the overhang meets the back of the radio.
2) If you have an 06+ with the CB AND XM Module , or a 98-05 Ultra. place
one side of the supplied “hook and loop” across the CB Module,/XM Module or across
the top of the 98-05 radio, and the other side of the “hook and loop” adhesive on the
underside of the amplifier. Please note that most adhesives work best at room tempera-
ture or higher and on clean surfaces. Put the amp in place so the back of the amp is as
close to the back of the speedo/tach as possible, or the outer fairing will not go back
on.
3) If you have a 2006+ with no CB (or XM) module you will notice a “bump that
runs from the front to the back of the radio in the center. Take one side of the hook and
loop adhesive, cut it in half, and place each half on either side of the bump. Place the
other side of the “hook and loop” adhesive on the underside of the amp. Please note
that most adhesives work best at room temperature or higher and on clean surfaces. Put
the amp in place so the back of the amp is as close to the back of the speedo/tach as
possible, or the outer fairing will not go back on.
4) If you have a Road Glide. You will mount the amp using the instructions that came
in your RG 40.4 Adaptor Kit. Once the amp is in place with the harnesses all plugged
into the amp, you can move to the next step.
Note: If wiring to speakers other than Hogtunes, the smaller
connector on Hogtunes products is always positive (+)
AMP PREPARATION
WIRING THE AMPLIFIER
6
Step #1: With amplifier in place, take the yellow/black wires on the input connector of
the amplifier, and plug them into the front factory speaker wires on the clutch
side of the bike. They will only go in one way. Take the brown/black wires on
the “front out” connector and plug them into the front clutch side speaker.
Step #2: Take the green/black wires on the input connector and plug them into the front
factory speaker wires on the brake side of the bike. Take the blue/black on the
front out plug, and plug them into the brake side front speaker.
The orange wire on the power harness is the “remote turn on lead” and tells the
amp to turn on whenever it sees +12v (.5 amp min.). Unplug the center wire (+)
on the cigarette lighter. Plug the orange lead from the amplifier directly onto the
lighter using the female connector. Plug the factory lighter wire to the male “take
off” connector which is part of the amps orange turn on lead.
ROUTING THE POWER WIRE HARNESS
Step #1: The power/ground harness and rear harness (if used) will pass together under
the inner fairing where the main wire harness passes through on the brake side
of the bike. Loosen the tanks “chrome console” and run wires up and over the
gas tank, but under the tanks chrome console. There is a provision on the front
of the tank console for wires to pass.
Stock Harness and Amplifiers
Harnesses Passing From Fairing To
Just In Front Of Tank (Arrow A).
Cable Tying the 2 Amp Harnesses To
The Main Bike Harness Just In Front
Of The Tank (Arrow B) Allows The
Amp Harnesses To Go Up Towards
The Tanks Chrome Console Easier
And Makes For a Cleaner Install.
When correctly installed, the power and ground wires are the right length to connect to the
battery, and if used, the rear wire 8 pin harness is the right length to be zip-tied to the clutch
side fender strut. Be sure to run the 8 pin harness UNDER the air line for the clutch side
rear shock.
B
A
7
If running a supplied harness to the rears
On the 8 pin rear harness “end” or “pigtail”, you will see 2 pairs of black shorter wires in
a sheath, and 2 pairs of black longer wires in a second sheath. Put the ends of the shorter
wires into the brake side rear speaker box.
If Installing on an Ultra
these wires will enter where the factory wires enter the rear speaker box. Plug the factory
rear speaker wires into the male wires of the amp harness-they will only go on one way.
Take a rear speaker and plug the female connectors of the amp harness into the speaker.
Repeat this step using the longer wires on the clutch side of the bike.
If using Hogtunes Rear Speaker Pods, the wires will enter through a “slice” in the
vinyl on the lower inside part of the box.
Attach the amps red wire to the positive (+) battery terminal, and the amps
black wire to the negative (-) battery terminal. The factory battery wires are also
re-installed at this point. Note: when attaching the power and ground wires, it
is always a good practice to do the negative first. When the positive connector
touches the battery, some sparking is normal. This is a function of the capacitors in
the amplifier charging up.
Step#7: Turn the stereo on, and at low volume, test to make sure all speakers are working.
Note: Sound quality is best with the fairing mounted and secured on the bike.
Re-install the seat making sure the amplifiers “+” and “-” connectors are positioned
in such away so they will not bend or break when the riders weight is on the seat.
This is the best time to take a few minutes to “clean up” the wiring, and secure
using supplied zip-ties.
Before re-installing outer fairing, turn front wheel
to each extreme side making sure any wiring is not
impeding the steering of the motorcycle. Failure to do
so can result in serious injury or death!
Re-install the fairing
and your system is now
ready to enjoy!
Adjusting the Bass levels:
The MAXXBASS feature built into this amp has almost as much power as a
386 computer! This feature allows us to “tune” the amps sound for the motorcycle
application. On Radio Sound (1998-2005 model ) radios, between 5-6 “bars”
is all that is needed on the bass level screen. On Harman-Kardon(2006+) radios,
1-3 bars above center is what we have found works best. This is a suggestion only.
Adjust the system for what sounds best to you!
WARRANTY INFORMATION
Hogtunes Amplifiers are warranted for 1 year from original purchase date. Proof of
purchase is required for all warranty claims. The warranty applies to the original retail
customer, and is not transferable. All Warranty claims must be made through the dealer this
product was originally purchased from. Products found to be defective during the warranty
period will be repaired or replaced (with a product deemed to be equivalent) at Hogtunes
sole discretion. Hogtunes complete warranty policy is available on our website at www.
hogtunes.com/warranty.html
What Is Not Covered:
1) Any expense related to the removal or re-installation of Hogtunes products.
2) Repairs to these products performed by anyone other than Hogtunes.
3) Subsequent damage to any other components.
4) Any product purchased from a non-authorized Hogtunes dealer.
5) Damage to Hogtunes products due to an accident or collision.
6) Hogtunes Amplifiers with broken or removed “warranty void” stickers.
TECHNICAL SPECIFICATIONS
Hogtunes NCA 40.4 Amplifier
RMS Power at 2 Ohms: 40 watts x 4
Max Current Draw: < 8 Amps
Freq. Response: 40hz-18khz
Efficiency: >60%
Fuse at Amp: 15 amp
Amp (only) Weight: 1 KG (2.2 Lbs.)
8
Hogtunes products will play much louder than the
Original Equipment, which can be a distraction to the
rider and/or passenger. Please use caution when adjusting,
or playing your stereo at high volume, especially in traffic.

Other Hogtunes Amplifier manuals

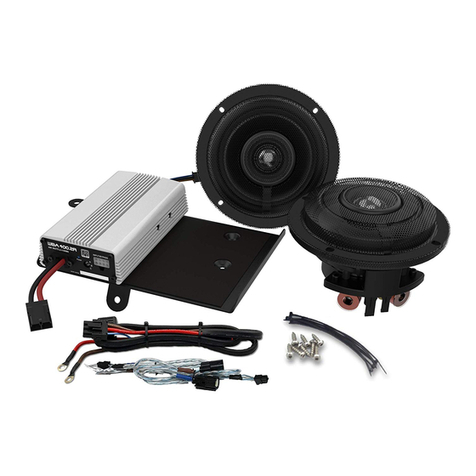
Hogtunes WILD BOAR AUDIO WBA 600.4 User manual

Hogtunes

Hogtunes WILD BOAR AUDIO WBA 600.4 User manual

Hogtunes REV 200SG KIT-RM User manual

Hogtunes

Hogtunes REV 200SG KIT-RM User manual

Hogtunes REV 200-AA User manual

Hogtunes

Hogtunes REV 200-AA User manual

Hogtunes Wild Boar Audio WBA 400.2R User manual

Hogtunes

Hogtunes Wild Boar Audio WBA 400.2R User manual

Hogtunes Wild Boar Audio WBA 800.4SG KIT User manual

Hogtunes

Hogtunes Wild Boar Audio WBA 800.4SG KIT User manual

Hogtunes NCA70.2 User manual

Hogtunes

Hogtunes NCA70.2 User manual

Hogtunes NCA 450-RM User manual

Hogtunes

Hogtunes NCA 450-RM User manual

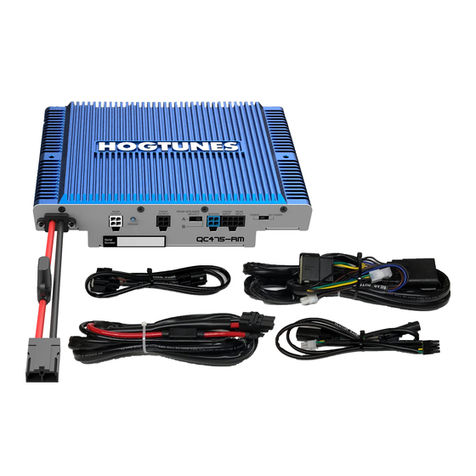
Hogtunes Quadcast QC475-RM User manual

Hogtunes

Hogtunes Quadcast QC475-RM User manual

Hogtunes NCA 450-AA User manual

Hogtunes

Hogtunes NCA 450-AA User manual

Hogtunes WILD BOAR AUDIO WBARG KIT 2R User manual

Hogtunes

Hogtunes WILD BOAR AUDIO WBARG KIT 2R User manual

Hogtunes Wild Boar Audio Wbass Kit User manual

Hogtunes

Hogtunes Wild Boar Audio Wbass Kit User manual

Hogtunes USA 24.2 User manual

Hogtunes

Hogtunes USA 24.2 User manual

Hogtunes REV 200-RM User manual

Hogtunes

Hogtunes REV 200-RM User manual

Popular Amplifier manuals by other brands

Fender Rumble LT25 owner's manual

Fender

Fender Rumble LT25 owner's manual

Pioneer GM-D505 Service manual

Pioneer

Pioneer GM-D505 Service manual

ASL INTERCOM V2000 installation guide

ASL INTERCOM

ASL INTERCOM V2000 installation guide

promethean Activesound One instruction manual

promethean

promethean Activesound One instruction manual

Fuchs Audio Technology ODS-II Operation manual

Fuchs Audio Technology

Fuchs Audio Technology ODS-II Operation manual

Pyle PTA44BT user manual

Pyle

Pyle PTA44BT user manual

Phaedrus Audio GROOVE SLEUTH MK.II EC8020 user manual

Phaedrus Audio

Phaedrus Audio GROOVE SLEUTH MK.II EC8020 user manual

DSPPA MAG6806 operation instruction

DSPPA

DSPPA MAG6806 operation instruction

HELIX Blue B ONE instruction manual

HELIX

HELIX Blue B ONE instruction manual

Linear Technology LTC6404-1 Demo Manual

Linear Technology

Linear Technology LTC6404-1 Demo Manual

Inter-m PA-920D operating manual

Inter-m

Inter-m PA-920D operating manual

Somogyi Elektronic SAL MPA 120 instruction manual

Somogyi Elektronic

Somogyi Elektronic SAL MPA 120 instruction manual

ifi ZEN CAN user guide

ifi

ifi ZEN CAN user guide

Time Machine Boost LegendaryTones user guide

Time Machine Boost

Time Machine Boost LegendaryTones user guide

Peavey ARTIST owner's manual

Peavey

Peavey ARTIST owner's manual

Audio international AI-ST100X Guide to installation & operations

Audio international

Audio international AI-ST100X Guide to installation & operations

Traynor DYNABASS 200 - parts list

Traynor

Traynor DYNABASS 200 - parts list

NAD M2 - CONNECTING A SUBWOOFER manual

NAD

NAD M2 - CONNECTING A SUBWOOFER manual

manuals.online logo
manuals.online logoBrands
  • About & Mission
  • Contact us
  • Privacy Policy
  • Terms and Conditions

Copyright 2025 Manuals.Online. All Rights Reserved.