Hogtunes USA 24.2 User manual

Practice Safe Sound!
Hogtunes products will play much louder than the
Original Equipment, which can be a distraction to
the rider and/or passenger. Please use caution
when adjusting, or playing your stereo
at high volume, especially in traffic.
You are a valued customer so please:
Ride Alert
Arrive Alive!
HOGTUNES
Audio Solutions For The Great American Cruiser
Designed and Engineered in Canada For
The Great American Cruiser
www.hogtunes.com
Installation Manual
Adds Speakers Into HD Fairing Lowers
on 1998 and Newer Bikes With No
Existing Amp*
*Maybe Used on CVO Ultra’s With Addendum To Manual Found
At http://www.hogtunes.com/tech_files/CVO%203%20Way.pdf
Version 1.1

Thank-you for choosing the Hogtunes Model 0326 Amplified Fairing
Lower Speaker kit! Since positive word of mouth is the best way to grow
our business, we want your new system to work as well as it was designed
to. If you have any questions or concerns, we are here to help. Email
719-6361. If you still need help, please consider a professional installation
by your motorcycle dealer.
Important: The Hogtunes 0326 works on any 1998 and newer bike with a
factory radio and fairing lowers. The radio will power the existing speak-
ers, and the amp powers the speakers in the lowers only. NEVER hook up
more speakers to the amp in this configuration. DO NOT install this kit if
ANY existing power amp besides radio power only is on your bike!
Important: If you are installing this kit on a Screamin Eagle® Ultra Classic
you will need to download and follow the addendum to this manual for that
bike found at http://www.hogtunes.com/tech_files/CVO%203%20Way.pdf
Please take a moment to identify all the included components.
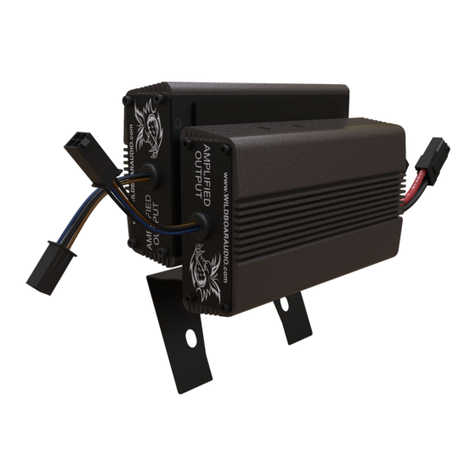
1 ea. Hogtunes USA 24.2 Motorcycle Amplifier
1 ea. FLSK/AMP Wire Harness
1 pr. Hogtunes Fairing Lower Speaker Adaptors
1 pr. Hogtunes Fairing Lower Speaker Adaptor Grills
1 pr. Hogtunes #0902-AA Speakers
1 ea. Assorted Parts (nuts, bolts, washers, zip-ties, etc)
2 ea. Hogtunes Helmet Stickers
Getting Started:
Step #1: Remove the seat, and both wires (+ and -) from the battery.
Step #2: Remove the outer fairing/headlamp assembly. Refer to a service
manual if you need help with this. Note: A towel on the front fender can
help prevent scratches or “dings” from dropped tools or fasteners etc.
Diagram 1.1
2
What Is Not Covered:
1)Any expense related to the removal or re-installation of Hogtunes products.
2)Repairs to these products performed by anyone other than Hogtunes.
3)Subsequent damage to any other components.
4)Any product purchased from a non-authorized Hogtunes dealer.
5)Damage to Hogtunes products due to an accident or collision.
6)Hogtunes Amplifiers with broken or removed “warranty void” stickers.
Technical Specifications:
Hogtunes USA 24.2 Amplifier
RMS Power at 2 Ohms: >30 watts/Channel
Max Current Draw: < 4.5 Amps
Freq. Response: 40hz-18khz
Efficiency: >60%
Fuse: 7.5 amp
Amp (only) weight 450 grams (1lb.)
Hogtunes #902.2-AA Speakers
Power Handling: 50 RMS-100 Peak
Frequency Response: 55hz-25Khz
Sensitivity : 92 db 1watt/1meter
Nominal Impedance: 2.0 Ohms
Harley-Davidson, Electra Glide, Road Glide, Street Glide, Ultra Classic, Tri Glide
CVO, Screamin Eagle and Tour-Pak®are Trademarks, and/or Registered Trade-
marks of Harley-Davidson, Inc., Milwaukee, Wisconsin, USA, and if Used or Im-
plied are for Reference Only. There is No Affiliation Between Harley-Davidson,
Inc., and Hogtunes Inc.
Radio Sound®is a Registered Trademark of Radio Sound, Inc., Louisville, Ken-
tucky, USA and is Used for Reference Only. There is No Affiliation Between Radio
Sound Inc. and Hogtunes Inc.
Harman Kardon®is a Registered Trademark of Harmon International Industries
Inc., and is Used for Reference Only. There is No Affiliation Between Harman
International Industries Inc. and Hogtunes Inc.
MaxxBass®is a Registered Trademark of Waves Audio Ltd., Tel-Aviv Israel.
There is No Affiliation Between Waves Audio Ltd., and Hogtunes Inc.
Ultrasound™ is a Trademark of Hogtunes Inc, Ontario, Canada.
7

Step#5: Locate the silver “posts” with the hex key opening and put silver
lock washers and washers on them. Place an 0902-AA speaker into open-
ing in adaptor. Start each thread into the brass inserts in the angled
speaker holder BY HAND!!!!! After all the threads are started, use sup-
plied hex key to tighten speaker into place. Press the grill into place by lin-
ing up the holes on the inside of the grills on to the silver posts.
Step#6: Once everything is complete in both lowers, use the supplied wire
ties to secure the exposed speaker wires to the crash bar. Moving back into
the fairing, use supplied wire ties to secure the FLSK/AMP harness to the
bike.
Step#7: Turn the stereo on, and test to make sure all 4 front speakers are
working. The front speakers will turn on immediately, and the fairing
lower speakers will turn on after the amplifier delay of about 2 seconds. On
the clutch side of the amplifier is the amp level. Adjusting the amp level
sets the “balance” between front and fairing lower speakers. It is recom-
mended that you start with the level at “0” and turn up (+3)or down (-3) if
desired. Re-install the seat making sure the amplifiers “+” and “-” connec-
tors are positioned in such away so they will not bend or break when the
riders weight is on the seat. Note: Sound quality is best with the fairing
mounted and secured on the bike. Re-install the fairing.
Before re-installing outer fairing, turn front wheel to each
extreme side making sure any wiring is not impeding the
steering of the motorcycle. Failure to do so can result in se-
rious injury or death!
Adjusting the bass levels: The USA 24.2 Ultrasound™ Amplifier yields
HUGE bass due to the MaxxBass®feature. On Radio Sound®radios,
between 5-6 “bars” is all that is needed on the bass level screen. On
Harman-Kardon®radios, 4-5 bars is what we have found works best. This
is a suggestion only. Adjust the system for what sounds best to you!
When washing your bike, water may collect on speakers in lowers. Gently
wipe of with a soft cloth before playing and all will be OK!
Warranty Information:
Hogtunes speakers are warranted for a period of 20 years to the original pur-
chaser. Hogtunes Amplifiers are warranted for 1 year from original purchase
date. Proof of purchase is required for all warranty claims. All Warranty
claims must be made through the dealer this product was originally purchased
from. Speakers found to be defective during the warranty period will be re-
paired or replaced (with a product deemed to be equivalent) at Hogtunes sole
discretion. Amplifiers will be repaired.
6
Step #3: The amplifier gets mounted to the top of the factory radio using
the supplied “hook and loop” adhesive, and must sit so you can read the
text on top of the amplifier as in diagram 1.1 .The amplifier needs to mount
as far back on the radio as possible so the fairing can go back on. The mini-
mum distance from the back of the radio to the most forward edge of the
amplifier is 5/8” (15mm). On pre-2006 model bikes, it is a tight fit--but will
go. Advanced Audio radios in 2006 and newer Ultras have the CB Radio
mounted on top of the radio. The supplied hook and loop adhesive is strong
enough to have half the amp sitting on top of the CB radio. 2006 and newer
bikes non-Ultras have a “bump” on top of the radio that runs from front to
back down the center of the radio. Cut the hook and loop adhesive in half
and apply on either side of the bump. The amplifier will then mount flush.
Note: Most adhesives work best at room temperature or higher.
Wire Color Codes:
Yellow/Black: Clutch Side Amplifier Input From Factory Radio
Brown/Black: Clutch Side Radio Output to Front Speaker
Green/Black: Brake Side Amplifier Input From Factory Radio
Blue/Black: Brake Side Radio Output to Front Speaker
Orange: Remote Turn On Lead
Red: 12v Positive--Attaches Directly to “+” Battery Post
Black: 12v Negative--Attaches Directly to “-” Battery Post
Wiring the Amplifier:
Step #1: Plug the 2 connectors of the main wire harness into “Power” and
“Audio Input/Output” on the amplifier. Tighten (snug) the 2 small flathead
screws on the power connector to prevent it from backing out while riding.
Step #2: Locate the yellow/black pair of wires with the male connectors. Un
plug the factory speaker wires on the clutch side of the bike and plug the
yellow/black wires in to those. They will only go in one way. Locate the
brown/black pair of wires and plug them directly onto the clutch side
speaker--again--they will only go on one way.
3

Fairing Lower Speaker Kit Installation
Step #1: Remove access covers from the glove boxes. Using a cutting tool
such as side cutters, the 4 male parts each access panel snaps into will be
cut and removed. Cutting them from inside the glove box will eliminate
marks on the front of the glove box. When cut, parts may “fly” so please be
careful and wear eye protection! On non vented lowers (up to and includ-
ing 2004 models), the plastic trim bezel the 4 male plugs sit “in” must also
be removed.
Vented Lowers (05 and Newer) Complete Steps 2 and 3
Non Vented Lowers (Up to 2004) Move To Step 3a
Step #2: Looking inside the glove box, locate the 2 nuts at the back of the
glove boxes, and remove. This will release the painted lower fairing “cap”
so be careful it doesn't fall and get scratched!! Remove and put aside.
Step #3: Looking from the front side of lower, locate the flat plane approx.
1” towards the motor, directly across from the lower bolt hole for the fair-
ing cap just removed. Drill a 1/8”(3mm) pilot hole in the center of this
plane, then a final 5/16”(8mm) hole-you will go through 2 layers. If work-
ing on Clutch Side, pass speaker wire marked “Clutch side” into glove box,
large connector first. The sticker can be removed to fit through the hole if
needed. Pull up any slack into the glove box so that wire will go along crash
bar, making sure to keep quick release plugs in the center. Using the sup-
plied black “gummy” material, seal the hole around the wire inside the
glove box. Move to Step #4.
Step #3a: Remove the “cap” on the front of the fairing lower held on with
Phillips screws. Directly under the bottom of the clamp that holds the fair-
ing lower to the crash bar is a flat plane. Drill a 1/8”(3mm) pilot hole in the
center of this plane, then a final 5/16” (8mm) hole-you will go through 2
layers. If working on the Clutch Side, insert the speaker wire marked
“Clutch side”, large connector first. The sticker can be removed to fit
through the hole if needed. Take up any slack into the glove box so that
wire will go along crash bar, making sure to keep quick release plugs in the
center. Using the supplied black “gummy” material, seal the hole around
the wire inside the glove box.
Step #4: Locate the angled speaker holder for the side of the bike your
working on and attach it to the glove box opening using the black hardware
in the kit, through the holes made when male plugs were cut. On non-
vented lowers, 3 of the 4 holes will line up and a 3/16” hole must be drilled
to expose the 4th hole. Washers are used INSIDE the glove box only for this
step. Once the angled speaker holder is secured, reinstall the painted lower
fairing cap. Take a speaker and attach the speaker wires.
5
Step #3: Locate the green/black pair of wires with the male connectors. Un
plug the factory speaker wires on the brake side of the bike and plug the
green/black wires in to those. Locate the blue/black pair of wires and plug
them directly onto the brake side speaker.
Step #4: The orange wire is the “remote turn on lead” and tells the amp to
turn on whenever it sees +12v (.5 amp min.). Unplug the center wire (+) on
the cigarette lighter. Plug the orange lead from the amplifier directly onto
the lighter using the female connector. Plug the factory lighter wire to the
male “take off” connector which is part of the amps orange turn on lead.
Step #5: The red and black wires, and the wires marked “Clutch Side” and
“Brake Side” of the main wire harness will pass under the inner fairing
where the throttle and idle and/or bikes main wire harness pass through on
the brake side of the bike. Let the Clutch Side and Brake Side wires hang
on the front side of the crash bar for now. The red and black wires are de-
signed to be routed under the gas tank and across the motor mount on the
brake side of the bike, and come out just behind the gas tank. You may
need to undo the back bolt of the gas tank and pivot the tank up to allow
the harness to pass through at the back of the gas tank. Be sure to re-install
this bolt and torque to factory specs! When correctly installed, the power
and ground wires are the right length to connect onto the battery.
NOTE: on 07 and newer bikes it is much easier to run power and ground
wires up and over the gas tank, but under the chrome gas tank console!
Step #6: Attach the red wire to the positive (+) battery terminal, and the
black wire to the negative (-) battery terminal. The factory battery wires
are also re-installed at this point. Secure the FLSK/AMP harness to the
bikes factory harness’ along the frame and behind the tank using supplied
zip ties.
4
Diagram 1.2
Diagram 1.2 Stock Harness and FLSK/AMP Harness Passing From
Fairing To Under Tank. Note: Harness will pass over front gas tank
mount/bolt. Careful!--The ring can easily scratch paint!
This manual suits for next models
1
Table of contents
Other Hogtunes Amplifier manuals

Hogtunes
Hogtunes WILD BOAR AUDIO WBARG KIT 2R User manual

Hogtunes
Hogtunes Wild Boar Audio Wbass Kit User manual

Hogtunes
Hogtunes NCA70.2 User manual

Hogtunes
Hogtunes REV 200-RM User manual

Hogtunes
Hogtunes NCA 450-RM User manual

Hogtunes
Hogtunes Quadcast QC475-RM User manual

Hogtunes
Hogtunes WILD BOAR AUDIO WBA 600.4 User manual

Hogtunes
Hogtunes NCA 450-AA User manual

Hogtunes
Hogtunes Wild Boar Audio WBA 400.2R User manual

Hogtunes
Hogtunes REV 200SG KIT-RM User manual