7
Installation
Step 3 – Fixing to a brick or masonry wall
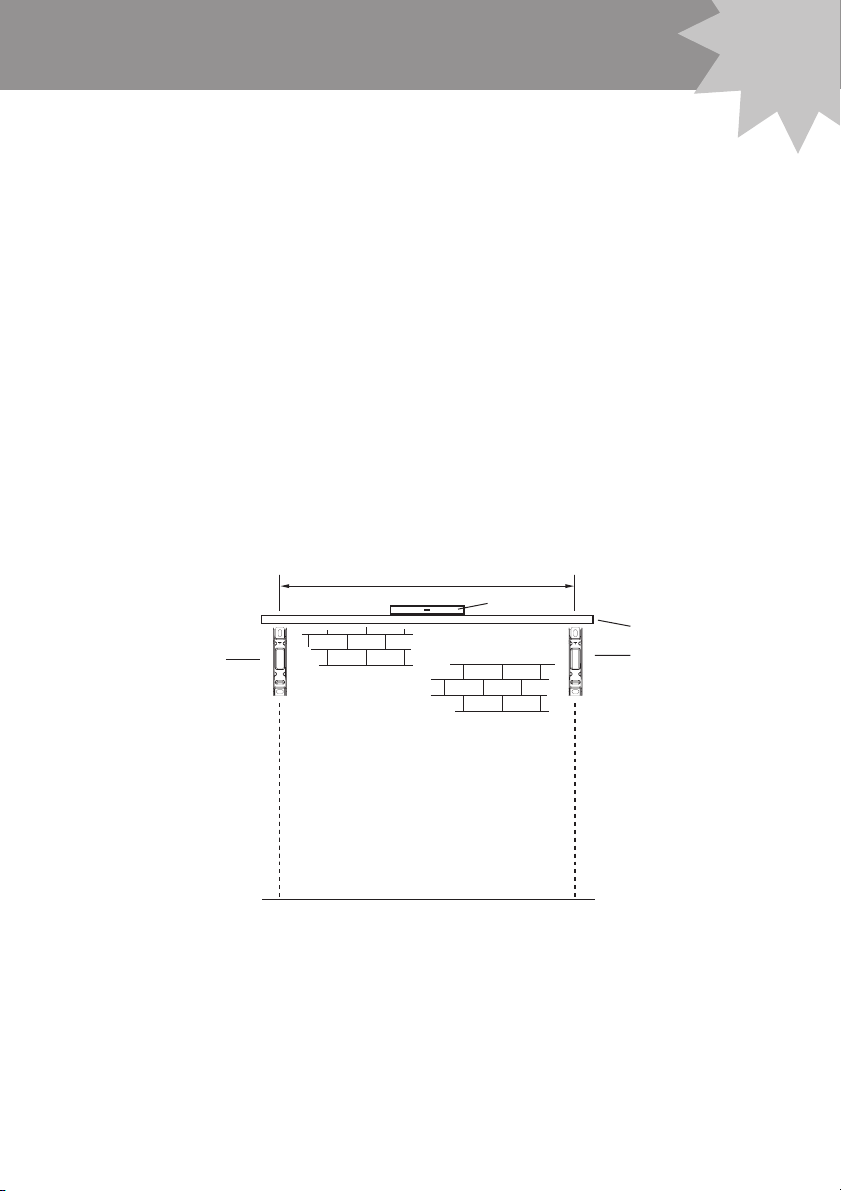
3.1 Double check to ensure you have sufficient clearance and the area is free from pipes
and other obstructions.
3.2 Mark the position of the mount bracket hole centres on the wall.
If you are replacing an existing Sun King Folding Frame product using the original
fasteners, ensure they are suitable and still in good condition.
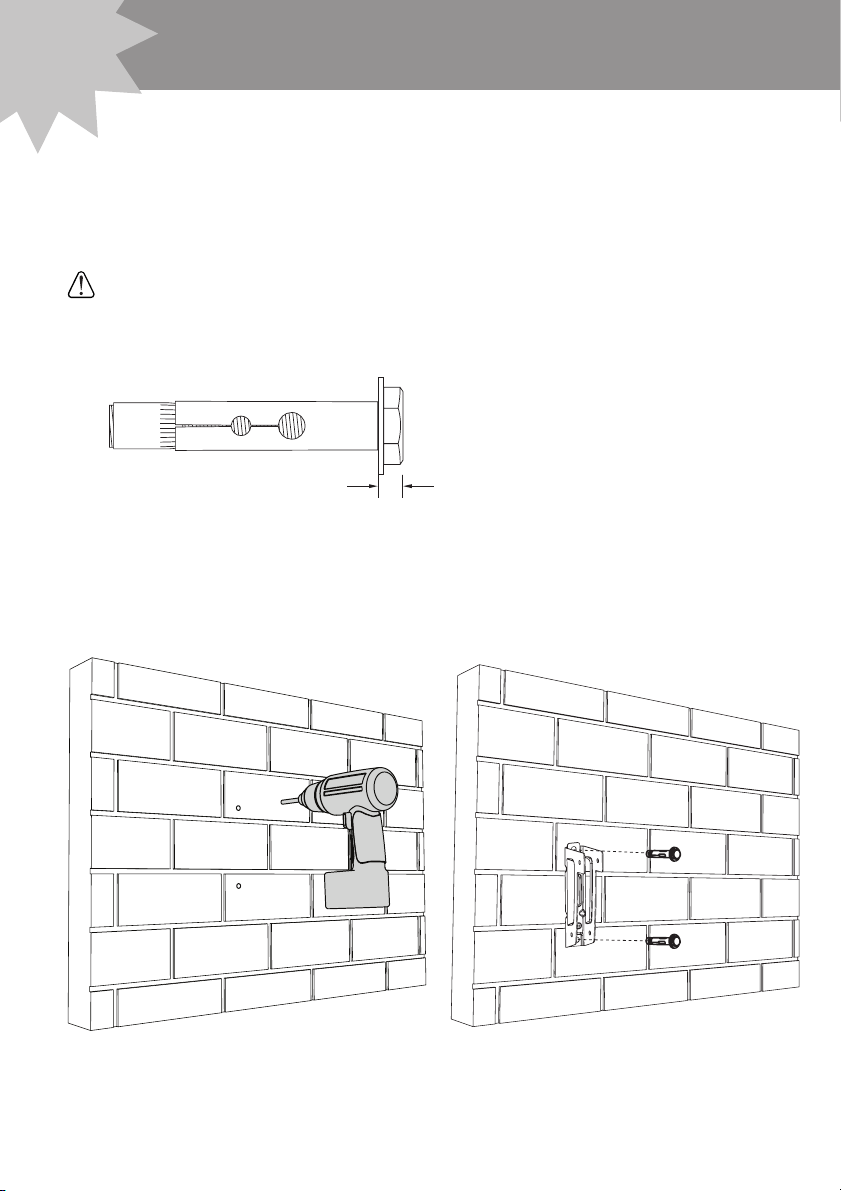
For sound brick/masonry walls, we recommend using appropriate flush head 10mm
diameter fasteners.
3.3 Drill appropriately sized holes in your wall to suit the fasteners being used. Refer Fig. 3.
3.4 Clear holes of dust and debris before inserting fastener. Refer Fig. 4.
Fig. 5
Step 4 – Fixing to a stud wall
4.1 Double check to ensure you have sufficient clearance and the area is free from pipes and
other obstructions.
4.2 Locate the vertical studs in your wall.
4.3 Determine if you need to adjust your product width.
You may need to reduce the width of your Folding Clothesline to match existing stud
centres, (refer to step 7 on page 11 for details).
4.4 Mark the position of the mount bracket’s hole centres on the wall (corresponding with the
stud positions). Refer Fig. 5.
4.5 Drill the correct size holes in your wall to suit the fasteners being used.
• For timber stud walls, we recommend using four 8mm (5/16") x 75mm (3") long wood
screws.
• For other stud and wall construction materials, we recommend you consult your local
hardware store for the appropriate fasteners.
• When drilling into timber studs, always drill a pilot hole to reduce the chance of the studs
splitting.
It is critical that your Folding Clothesline mount brackets are securely fastened to the vertical
studs in your wall. Appropriate fasteners must be used, strong enough to support full loads
of wet washing.
for long, compact and mini (fig6)
or mono and duo (fig7)
for long, compact and mini (fig6)
Stud centres and
mount hole centres
must match
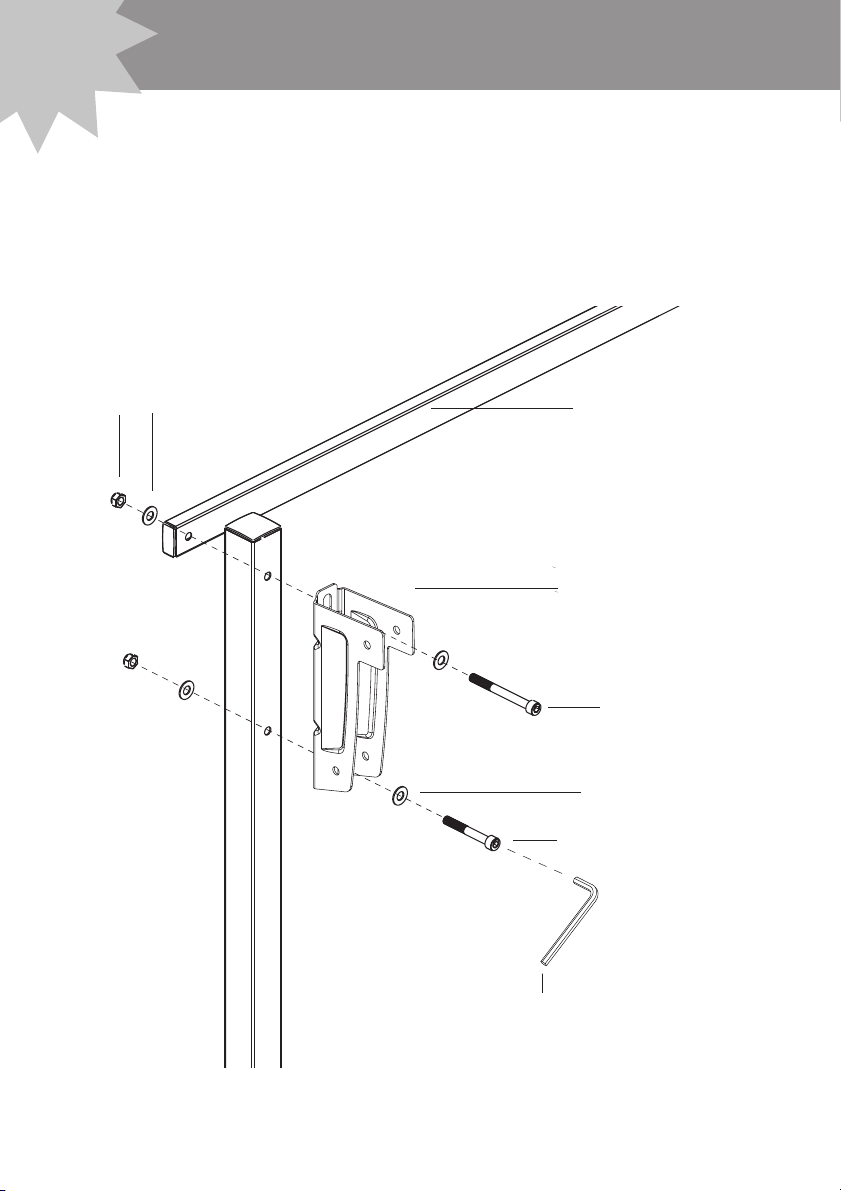
Wall bracketWall bracket