Page 2A
OPERATOR'S MANUAL
HOLMAN CONVEYOR TOASTERS
MODELS S710(H), S714(H)
FULL KEY LOCKING COVER
FITS OVER CONTROLS AND
SIDE PANELS TO PREVENT
TAMPERING
S710LOK.WMK
HOLMAN
Fig. 1
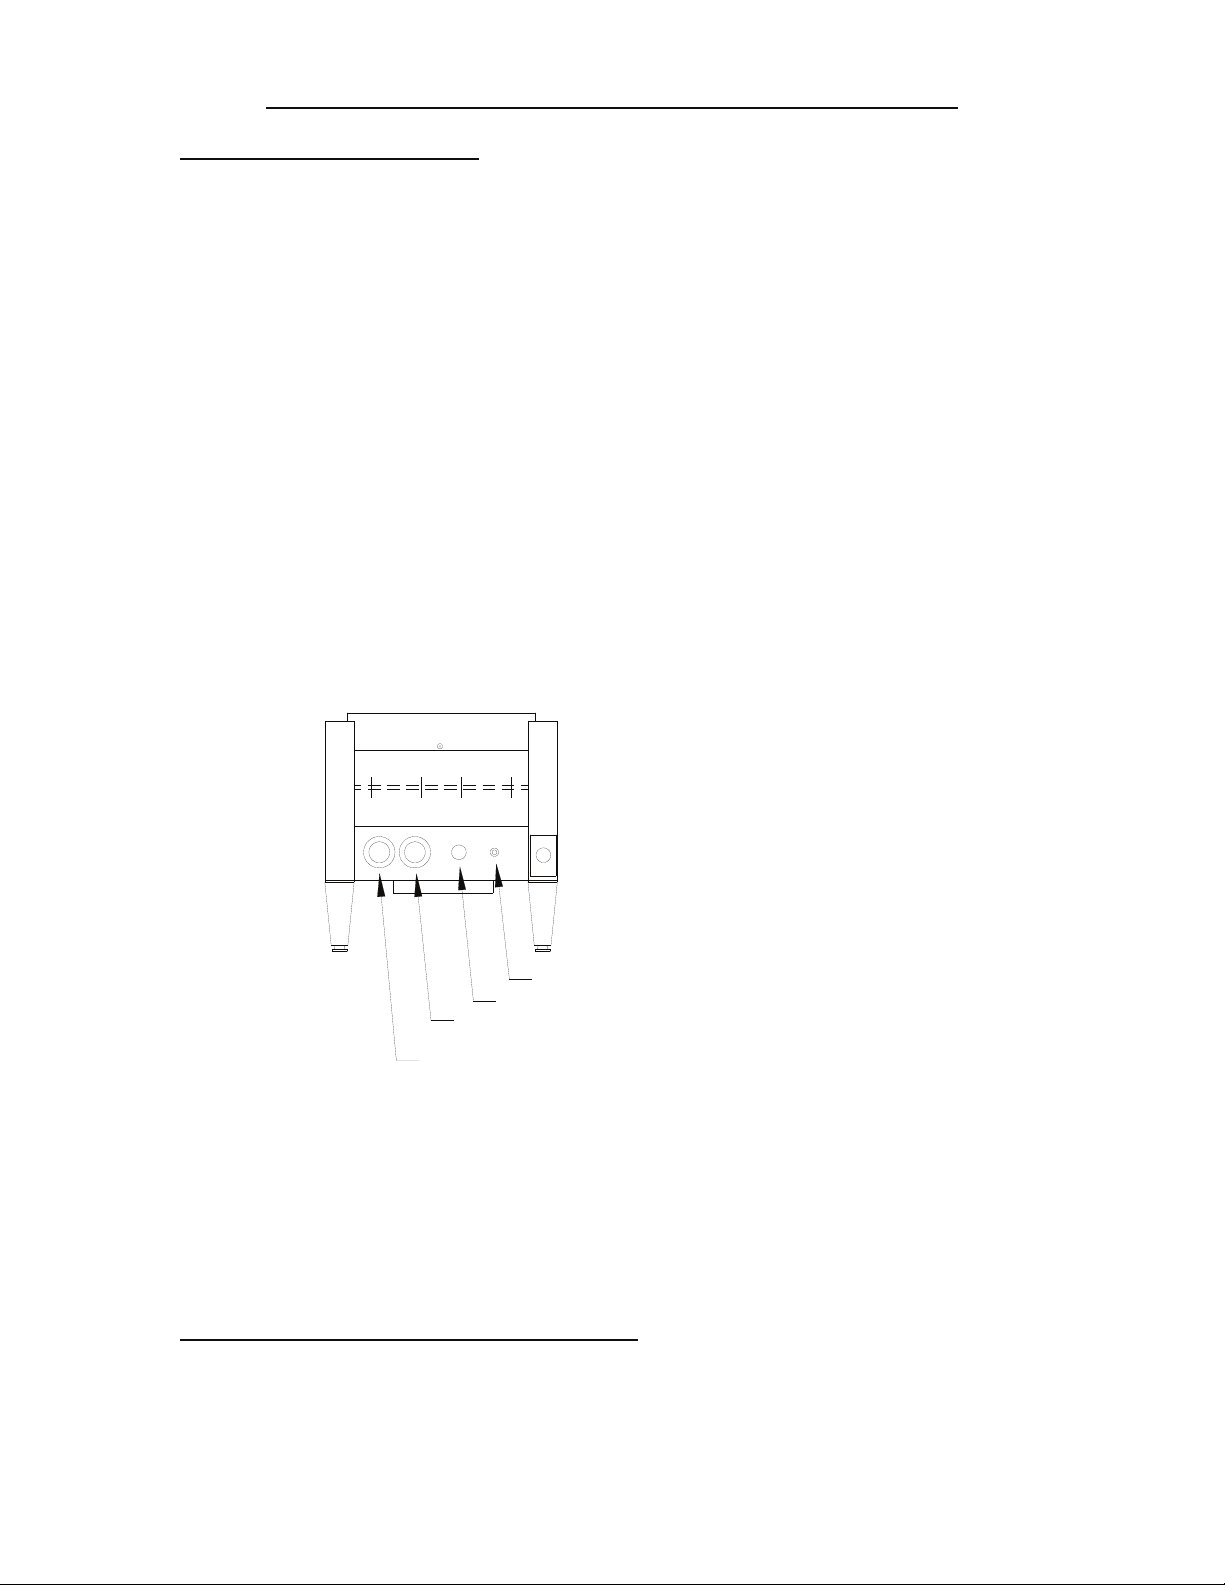
SECURITY COVER :
Your Holman models S710 and S714 are quipped
with a full front key locking cover (fig.1). This over fits
over the front and sides of the unit. The security
cover must be removed with a key in order to gain
access to the controls, side panels, legs and toast
chute to be removed.
To remove, unlock the cover using the key. Pull
locked side of cover out and away from the unit. The
right side will release at the same time.
To replace the cover, Hook the right side of the cover
over the latch on right front of the unit while sliding
the left side of the cover over the lock. Secure cover
using key.
S710CHUT.WMF
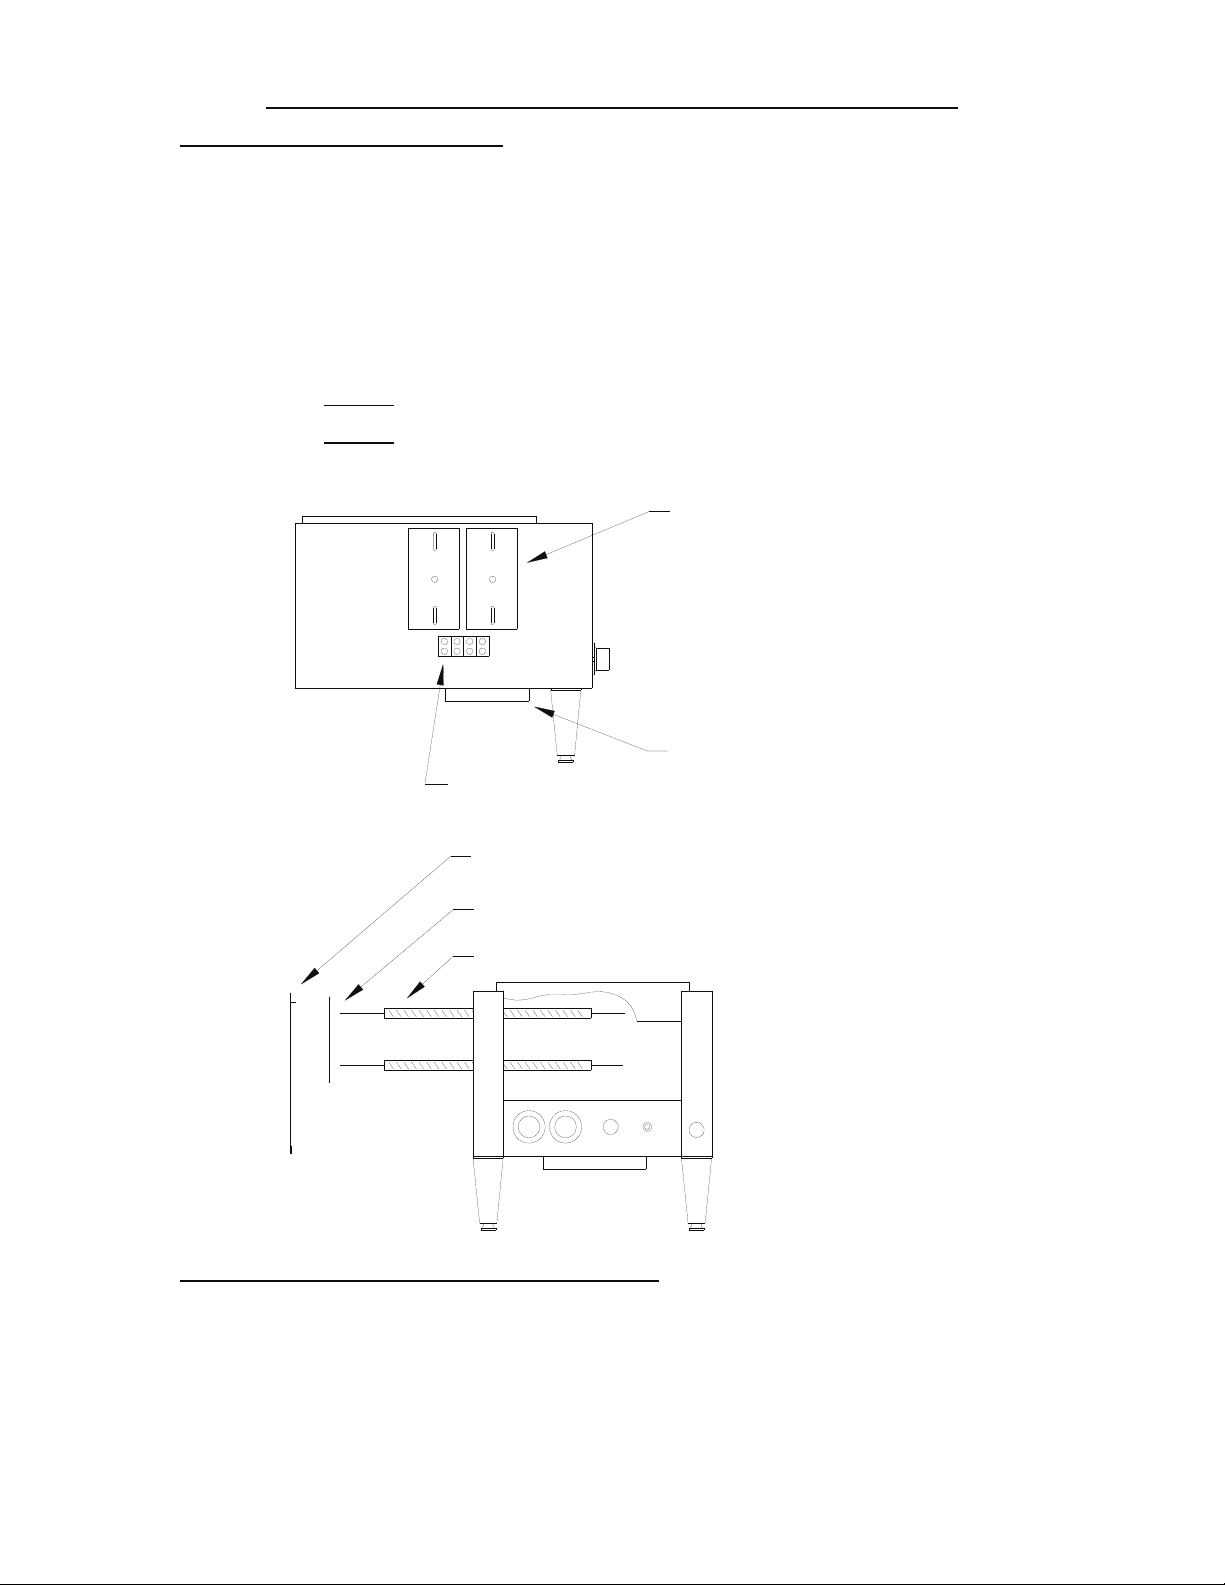
SECURITY TOAST
CHUTE MOUNTING
ROD
TOAST CHUTE MOUNTING ROD
SLIDES THOUGH MOUNTING HOLE
IN CHASSIS AND THROUGH LOOP IN
TOP OF TOAST CHUTE
Fig. 2
TOAST CHUTE ;
To install the toast chute (fig. 2), Remove the left side
panel by removing two screws and pulling the top
part of the panel out while lifting up. Remove the
mounting rod by sliding it through chassis.
Next, place the toast chute beneath toaster as
shown. Line up the looped end of toast chute with
holes in the rear of toaster as shown. Insert mounting
rod through the holes in chassis and the toast chute
(If legs have not been installed, do so now).
Reinstall side panel and secure with screws. Toast
chute is now ready for use.
S710LEG.WMF
HOLMAN
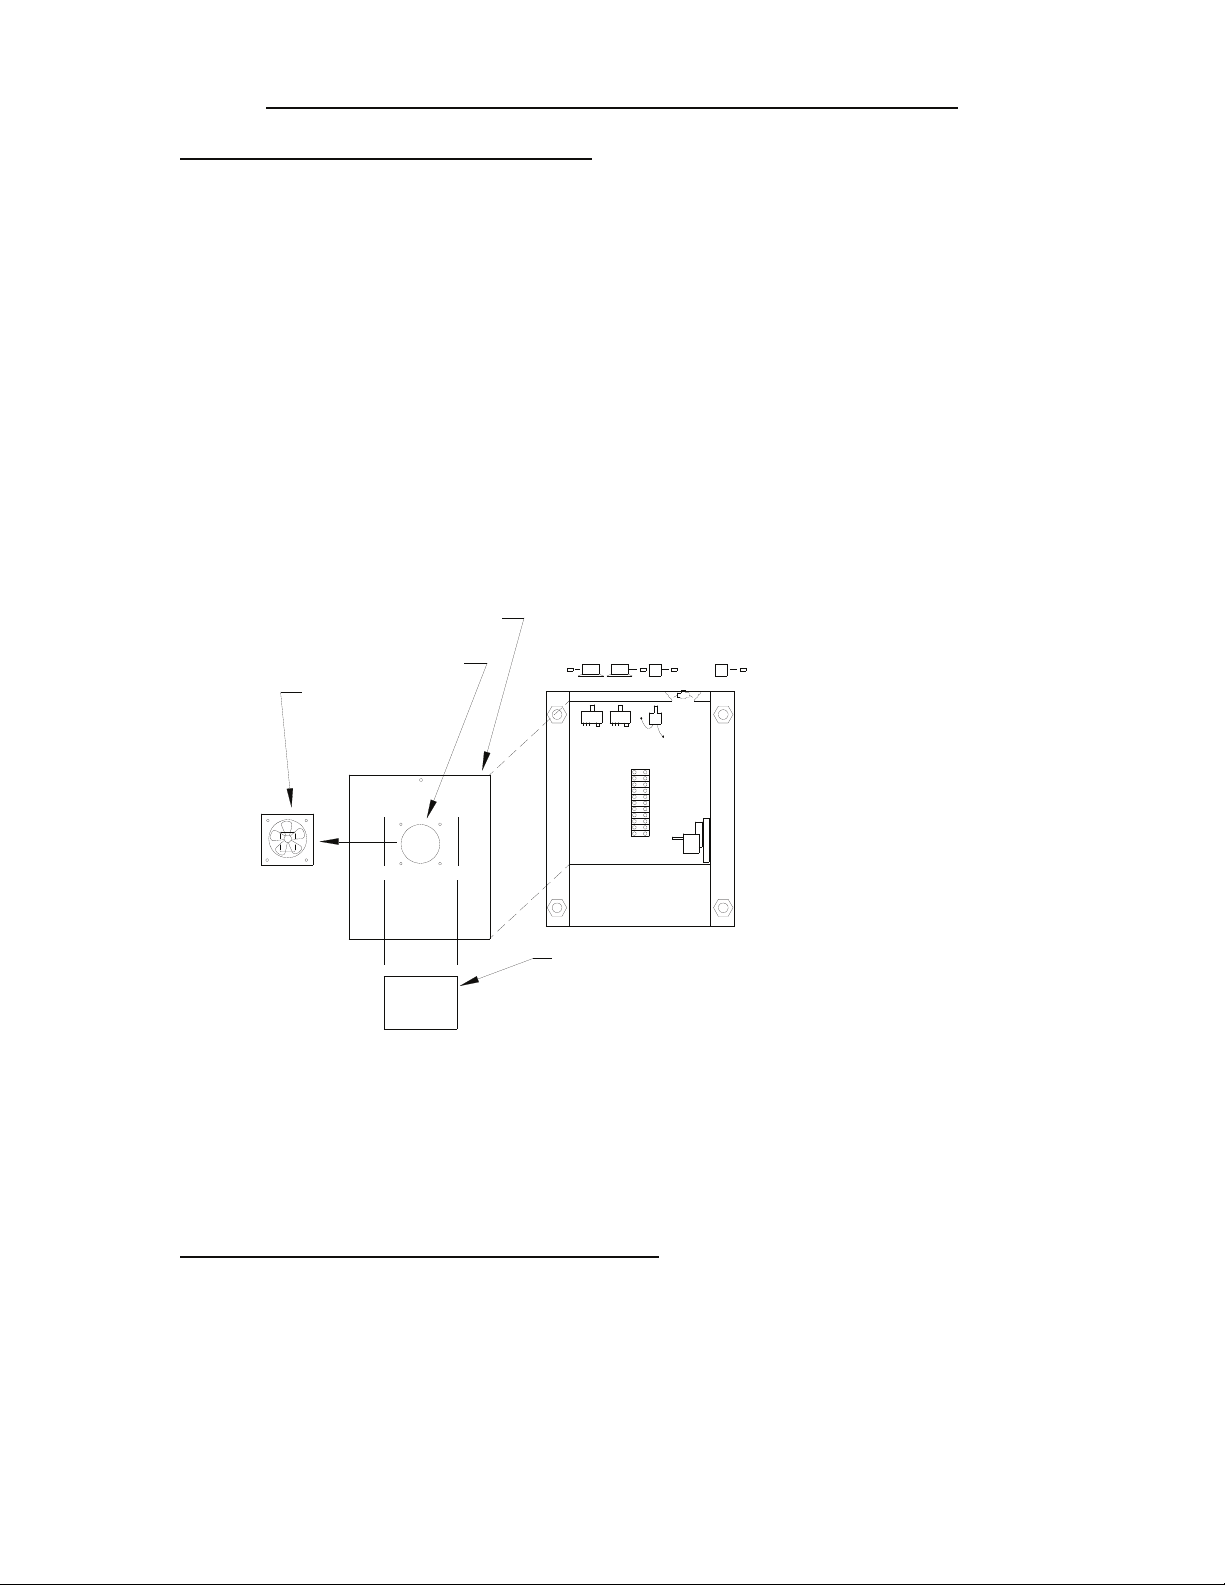
SECURITY COUNTER MOUNTING
BRACKET ATTACHES TO LEG FOOT
AND IS SECURED TO COUNTER
WITH A SCREW.
MOUNTING
BRACKET
FOOT SCREWS
INTO BOTTOM
OF LEG
LEG SCREWS
INTO THE BOTTOM
OF TOASTER
COTTER PIN
KEY LOCK
COTTER PIN
Fig. 3
LEGS :
To secure the toaster to the counter (fig.3), Remove
both side panels by removing two screws and pulling
the top of the panel out while lifting up. Unscrew the
foot of each leg and slide counter-mounting brackets
onto the legs. Screw the foot back onto each leg and
install legs onto the toaster. Place the small cotter pin
through the holes in threaded portion of each leg.
Secure the mounting brackets to the counter with a
screw or bolt. Reinstall both side panels and secure
with screws.
NOTE: Security models are not supplied with a
power saver switch.
REVISED 9/10/2008
PAGE 3
OPERATOR'S MANUAL