Holzstar DB 305 VARIO User manual

DB 305 VARIO
Operating instructions
DB VARIO SERIE
Woodturning lathe
DB 305 VARIO
DB 460 XL VARIO
DB 460 XL VARIO

2 DB Vario Serie | Ver ion 1.01
Imprint
Product identification
Woodturning lathe Item number
DB 305 VARIO 5920305
DB 460 XL VARIO 5920462
Manufacturer
Stürmer Ma chinen GmbH
Dr. Robert-Pfleger-Str. 26
D-96103 Hall tadt, Germany
Fax: 0049 (0) 951 96555 - 55
email: info@holz tar.de
Internet: www.holz tar.de
Indications regarding the operating instructions
Original in truction
According to DIN EN ISO 20607:2019
Edition: 2021-12-17
Ver ion: 1.02
Language: German
Author: ES/MS
Indications regarding the copyright
Copyright © 2021 Stürmer Ma chinen GmbH, Hall tadt,
Germany.
Subject to technical modification and error.
Content
1 Introduction......................................................... 3
1.1 Copyright..................................................................3
1.2 Cu tomer ervice .....................................................3
1.3 Limitation of liability..................................................3
2 Safety................................................................... 3
2.1 Symbol explanation..................................................3
2.2 Operator re pon ibility.............................................4
2.3 Staff qualification......................................................5
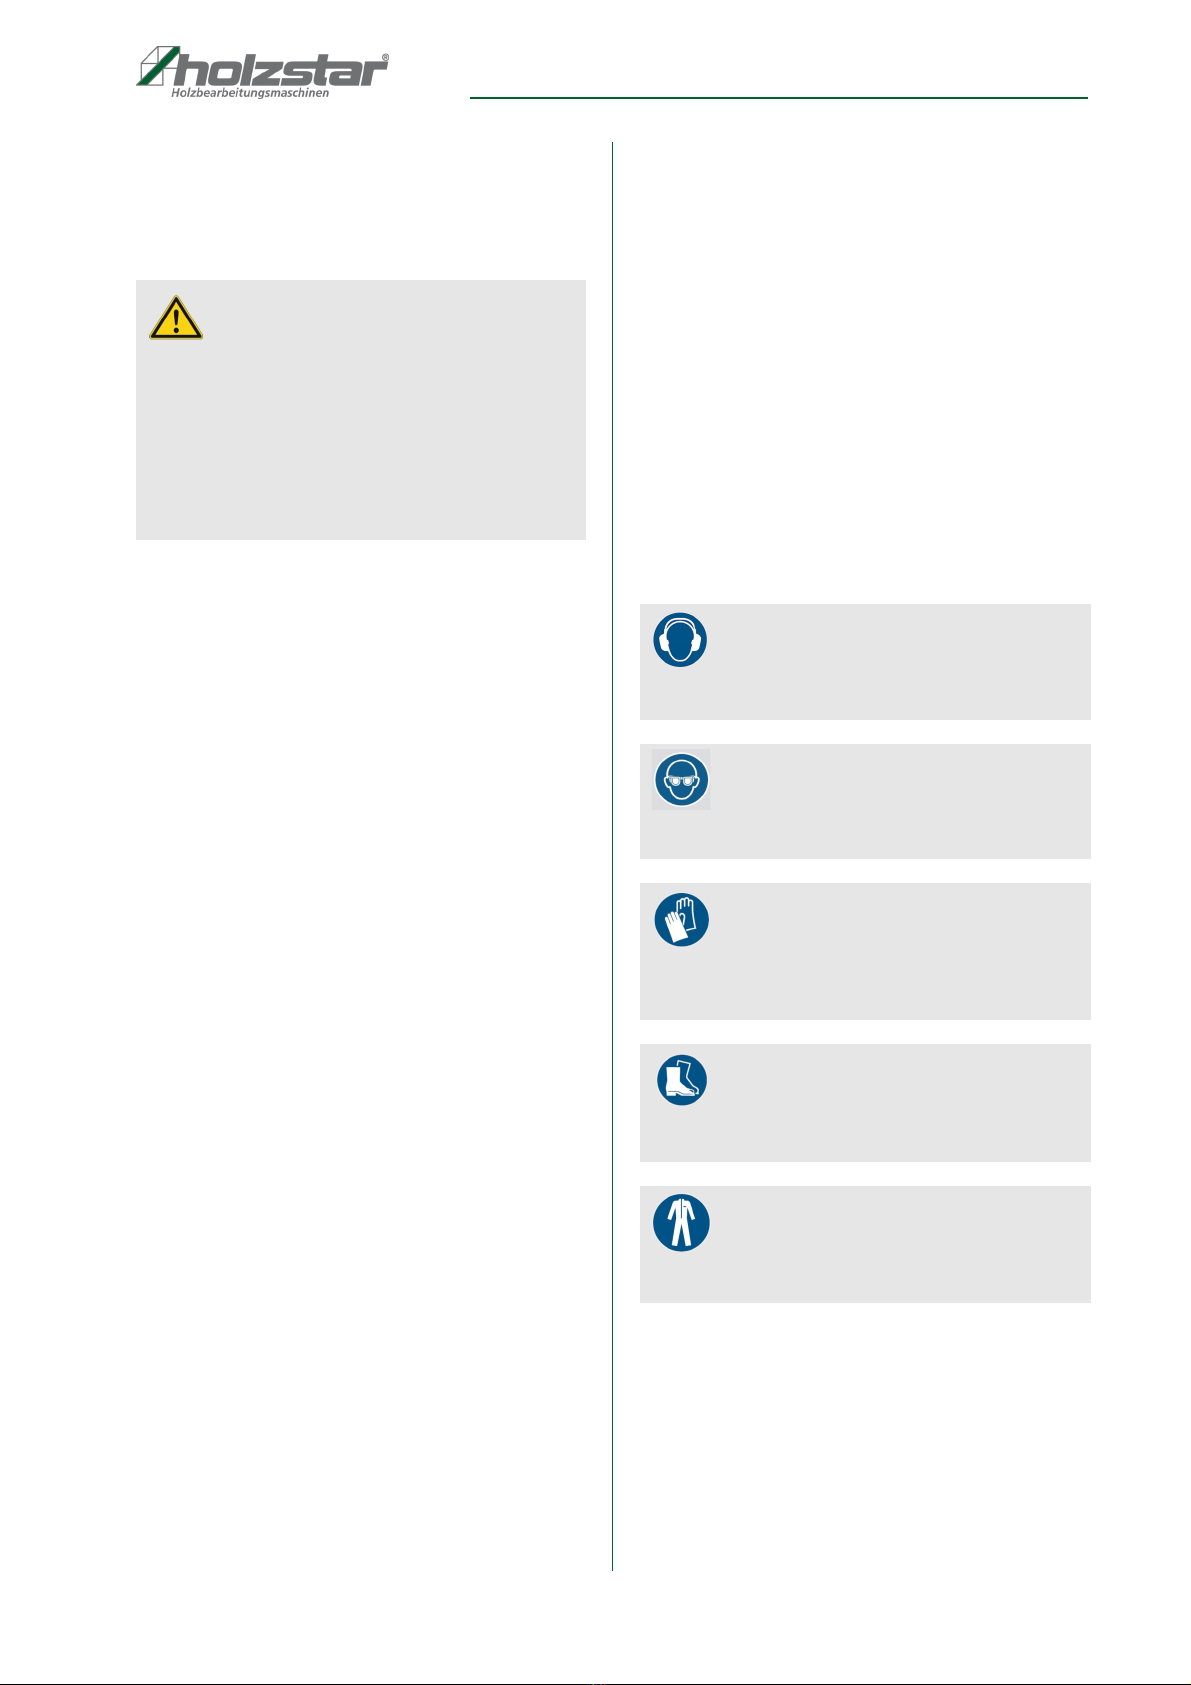
2.4 Per onal protective equipment ................................5
2.5 Safety marking on the machine..............................6
2.6 Safety data heet ...................................................6
2.7 Safety device ..........................................................6
2.8 General afety note ................................................6
2.9 Machine- pecific afety mea ure ...........................7
3 Intended use ....................................................... 8
3.1 Rea onably fore eeable mi u e..............................8
3.2 Re idual ri k ...........................................................8
4 Technical data..................................................... 8
4.1 Type plate ................................................................8
5 Transportation packaging storage ................. 9
5.1 Delivery and tran port..............................................9
5.2 Tran portation..........................................................9
5.3 Packaging ................................................................9
5.4 Storage ....................................................................9
6 Description of the device................................. 10
6.1 Machine .................................................................10
6.2 Scope of delivery ...................................................10
6.3 Acce orie ............................................................10
7 Setting up and connecting .............................. 11
7.1 In tallation ite requirement .................................11
7.2 In tallation..............................................................11
7.3 Electrical connection ..............................................13
8 Prior to commissioning ................................... 13
9 Operating the woodturning lathe .................... 14
9.1 Switching on the machine ......................................14
9.2 Switching off the machine ......................................14
9.3 Speed adju tment ..................................................14
9.4 Adju ting the tail tock ............................................15
9.5 Adju ting the tool re t ............................................16
9.6 Replacing the belt, pindle, and bearing................16
9.7 Material election ...................................................17
9.8 Material preparation...............................................17
9.9 Centring the workpiece ..........................................17
9.10 Po ition of the tool re t ........................................17
9.11 Working with the lathe..........................................17
10 Care maintenance servicing/repair............. 18
10.1 Care at the end of work........................................18
10.2 Maintenance and repair .......................................18
11 Troubleshooting ............................................. 19
12 Disposal recycling of used devices............. 19
12.1 Decommi ioning.................................................19
12.2 Di po ing of electrical device .............................20
12.3 Di po al of lubricant ...........................................20
12.4 Di po al via municipal collection facilitie ............20
13 Spare parts...................................................... 20
13.1 Ordering of pare part ........................................20
13.2 Spare part drawing ...........................................21
14 Electrical circuit diagrams............................. 28
15 EU Declaration of Conformity ....................... 29

Introduction
DB Vario Serie | Ver ion 1.01 3
1 Introduction
Congratulation on purcha ing your HOLZSTAR
woodturning lathe.
Please read the operating instructions carefully
before commissioning.
They form an important part of the delivery and mu t be
kept at a location within the vicinity of the woodturning
lathe that i acce ible to every u er.
The in truction contain important information relating to
proper commi ioning, the intended u e a well a the
afe and efficient operation and maintenance of your
woodturning lathe. Plea e al o ob erve the local
accident prevention regulation and general afety
regulation relating to the different application area of
your table router.
1.1 Copyright
The content of the e in truction are protected by
copyright and are the ole property of Stürmer
Ma chinen GmbH. U e of the e in truction i permitted
within the cope of lathe u e. An application beyond the
de cribed application i not allowed without written
approval of the manufacturer.
Pa ing on a well a copying of thi document, the u e
and di tribution of it content are prohibited if not
explicitly permitted.
Contravention are liable to compen ation.
We regi ter trademark, patent and de ign right to
protect our product , in ofar a thi i po ible in
individual ca e . We trongly oppo e any infringement
of our intellectual property.
1.2 Customer service
Plea e contact your peciali t dealer if you have
que tion about the woodturning lathe or need technical
a i tance. They will help you with peciali t information
and expert advice.
Germany:
Stürmer Ma chinen GmbH
Dr. Robert-Pfleger-Str. 26
D-96103 Hall tadt, Germany
Repair service:
Fax: 0049 (0) 951 96555-111
Email: ervice@ tuermer-ma chinen.de
Internet: www.holz tar.de
Spare part order:
Fax: 0049 (0) 951 96555-119
Email: er atzteile@ tuermer-ma chinen.de
We are alway intere ted in information and experience
that re ult from the application and can be valuable for
the improvement of our product .
1.3 Limitation of liability
All information and note in the e operating in truction
were ummari ed while taking applicable tandard and
rule , the tate-of-the-art technology and our long-term
knowledge and experience into con ideration.
In the following ca e the manufacturer i not liable for
damage :
- Failure to ob erve the e operating in truction
- U e other than intended,
- U e of incompetent or unqualified per onnel,
- Unauthori ed modification ,
- Technical change ,
- U e of not allowed pare part .
The actual cope of delivery may deviate from the
explanation and pre entation de cribed here in ca e
of pecial model , when u ing additional ordering
option or due to late t technical modification .
The obligation agreed in the delivery contract, the
general term and condition a well a the delivery
condition of the manufacturer and the legal regulation
at the time of the conclu ion of the contract are
applicable.
2 Safety
Thi ection give an overview of all the important afety
package for protecting per onnel and for afe, trouble-
free operation. Other ta k-ba ed afety note are
included in the individual chapter .
2.1 Symbol explanation
Safety instructions
The afety note in the e operating in truction are
highlighted by ymbol . The afety note are introduced
by ignal word which expre the concern of the ri k.

4 DB Vario Serie | Ver ion 1.01
Safety
It i nece ary to ob erve the afety note quoted in
the e operating in truction in order to reduce the ri k
for per onal injurie and damage to property.
2.2 Obligations of the operating company
The operating company or operator i the per on who
independently operate the woodturning lathe for
commercial rea on , or leave it to a third party for u e
or application, and who bear the legal product
re pon ibility for the protection of the u er, the taff or for
third partie .
Obligations of the operating company:
If the woodturning lathe i u ed for commercial
purpo e , the operating company mu t comply with the
legal working afety regulation . Therefore, the afety
note in thi operating manual, a well a the afety,
accident prevention and environment protection
regulation applying for the area of application of the
woodturning lathe mu t be met. The following applie in
particular:
- The operating company mu t be informed about
the applicable indu trial afety regulation and
conduct a ri k a e ment to identify additional
hazard re ulting from the pecial working
condition at the machine' place of u e.
The company mu t include thi information in
operating manual for operating the woodturning
lathe.
- Throughout the lifetime of the woodturning lathe,
the operating company mu t verify whether the op-
erating manual it ha prepared corre pond to the
late t regulation , and adapt them, if nece ary.
- The operating company mu t unambiguou ly
regulate and determine the re pon ibilitie for
in tallation, operation, trouble hooting,
maintenance and cleaning.
- The operating company mu t en ure that all
per on who work with the woodturning lathe have
read and under tood thi manual. Furthermore he
mu t in truct the taff in regular interval and
inform them about the hazard .
- The operator mu t provide the nece ary protec-
tive equipment to the taff and order the u e of the
nece ary protective equipment in a binding way.
Furthermore, the operating company i re pon ible for
maintaining the woodturning lathe in a technically
flawle tate. Thu , the following applie :
- The operator mu t en ure that the maintenance
interval de cribed in thi manual are ob erved.
- The operator mu t have all afety device checked
regularly for their good working order and their
integrity.
DANGER!
Thi combination of ymbol and ignal word indicate
an imminently hazardou ituation which will re ult in
death or eriou injury if not avoided.
WARNING!
Thi combination of ymbol and ignal word indicate
a potentially dangerou ituation that will re ult in
death or eriou injury if not avoided.
CAUTION!
Thi combination of ymbol and ignal word indicate
a potentially hazardou ituation which may re ult in
minor or light injury if not avoided.
ATTENTION!
Thi combination of ymbol and ignal word indicate
a potentially hazardou ituation which may re ult in
damage to property and the environment if not
avoided.
NOTE!
Thi combination of ymbol and ignal word indicate
a potentially hazardou ituation which may re ult in
damage to property and the environment if not
avoided.
Tips and recommendations
Thi ymbol highlight u eful tip and recommenda-
tion a well a information for an efficient and trou-
ble-free operation.

Safety
DB Vario Serie | Ver ion 1.01 5
2.3 ualification of personnel
The different ta k de cribed in thi manual repre ent
different requirement to the qualification of the per on
entru ted with the e ta k .
Only per on reliable working procedure can be
expected from, are allowed to perform all work . Per on
the re pon ivene of which i affected by e. g. drug ,
alcohol or medication, are not allowed to work with the
machine.
The qualification of the per onnel for the different ta k
are mentioned below:
Operator:
The operator i in tructed by the operating company
about the a igned ta k and po ible ri k in ca e of
improper behaviour. Any ta k which need to be
performed beyond the operation in the tandard mode
mu t only be performed by the operator if it i indicated
in the e in truction and if the operating company
expre ively commi ioned the operator.
Electrical specialist:
With profe ional training, knowledge and experience a
well a knowledge of re pective tandard and regulation ,
qualified electrician are able to perform work on the
electrical y tem and recogni e and avoid any po ible
danger .
Qualified personnel:
Due to their profe ional training, knowledge and
experience a well a their knowledge of relevant
regulation the peciali t taff i able to perform the
a igned ta k and to recogni e and avoid any po ible
danger them elve .
Manufacturer:
Certain work may only be performed by peciali t
per onnel of the manufacturer. Other per onnel i not
authorized to perform the e work . Plea e contact our
cu tomer ervice for the execution of all ari ing work.
2.4 Personal protective equipment
The per onal protective equipment erve to protect
per on again t impairment of afety and health while
working. The taff member ha to wear per onal
protective equipment while performing different ta k on
and with the machine which are indicated in the
individual paragraph of the e in truction .
The per onal protective equipment i explained in the
following paragraph:
WARNING!
Danger in case of insufficient
qualification of the staff!
In ufficiently qualified per onnel are not capable of
a e ing the ri k a ociated with machine u e and
may expo e them elve and other to the ri k of
evere or fatal injurie .
- Have all work only performed by qualified per on .
- Keep in ufficiently qualified per on out of the work-
ing area.
Ear protection
The hearing protection protect again t damage of
hearing due to noi e.
Safety goggles
The afety goggle are u ed to protect the eye from
flying part .
Protective gloves
The protective glove erve to protect the hand
again t harp component a well a again t friction,
abra ion or deep injurie .
Safety boots
Safety boot protect the feet again t cru hing, falling
part and lipping over on lippery ground.
Protective work clothing
Protective work clothing i clo e-fitting work clothing,
without protruding part , with low tear re i tance.

6 DB Vario Serie | Ver ion 1.01
Safety
2.5 Safety markings on the
machine
The following afety marking affixed to the woodturning
lathe (Fig. 1) mu t be ob erved and followed.
Fig. 1: Safety marking : 1 Mandatory ign (ob erve in truction for
u e / wear ear protection / wear eye protection / u e a ma k /
wear protective clothing / wear afety hoe / di connect the
plug) |
Warning ign (2 Warning of entanglement ri k / 3 Warning of
dangerou electrical voltage) |
4 Prohibition ign (operation with long hair / tie prohibited)
The afety marking attached to the woodturning lathe
mu t not be removed. Damaged or mi ing afety
marking may lead to error , per onal and material
damage . Immediately replace them.
Decommi ion the machine if the ecurity ymbol
cannot be recogni ed nor under tood at the fir t glance,
until the new ecurity ymbol are applied.
2.6 Safety data sheets
Safety data heet for hazardou material can be
obtained from your peciali t dealer or by calling
+49 (0)951/96555-0. Speciali t dealer can find afety
data heet in the download area of the partner portal.
2.7 Safety devices
Motor protection switch
Cover circuit breaker
Emergency stop button
2.8 General safety notes
- The lathe may only be operated and maintained by
per onnel who have read and under tood the e
operating in truction . The operator mu t be
adequately trained in the application, adju tment
and operation of the lathe.
- Alway keep the machine and it working environ-
ment clean. Provide for ufficient illumination.
- Do not u e the lathe in area where there i a ri k of
expo ure to fire, explo ion or damp.
- Protect the woodturning lathe from environmental
influence and do not leave expo ed to direct
unlight or rain.
- Never u e tool in a damp or wet environment.
- Keep children and per on who are not familiar with
the woodturning lathe away from your working
environment.
- Do not overload the machine! It work better and
more afely within the pecified power range.
- Never pull the cable to remove the plug from the ocket.
Protect the cable again t heat, oil and harp edge .
- If the main cable i damaged, hut down the
machine immediately and have the cable replaced
by a qualified electrician.
- When laying the main cable, make ure that it i not
cru hed or bent and doe not get wet.
- In order to avoid operating error , familiari e
your elf with the po ition of the witche before
turning on the machine.
Memori e the location of the emergency top button
o that you can u e it immediately whenever
nece ary.
- Never leave the machine un upervi ed during
operation. Before leaving the work area, witch off
the machine and wait until the motor i tationary!
Then di connect the plug from the power upply.
NOTE!
The motor on the woodturning lathe i equipped with
a thermal circuit breaker that witche off the motor
automatically in the event of thermal overload.
The motor can be re tarted once the cau e of the
overload ha been rectified and the motor ha cooled
down completely.
1
4
7
2
3
NOTE!
The cover circuit breaker i located under the front
cover. If the cover i not fitted or clo ed, the witch
prevent the motor from tarting.
NOTE!
The emergency top button
i located above the con-
trol panel. The emergency top button i u ed to
quickly witch the lathe to a afe tate in the event of
danger or avert a hazard.

Safety
DB Vario Serie | Ver ion 1.01 7
- Only operate the machine with all the afety device
attached correctly and do not make any
modification to the machine.
- Before each u e of the woodturning lathe, make
ure that no part have been damaged. Immediately
replace damaged part in order to avoid ource of
danger.
- Before witching on the machine, make ure that
any wrenche and adju tment tool have been
removed.
- Before tarting work, remove item uch a ring ,
watche , bracelet , tie , etc., a they may become
entangled in different part of the machine.
- Never work under the influence of illne e that
affect concentration, drug , alcohol or medication, or
when uffering from fatigue.
- Protect and tie up long hair to prevent it from
becoming entangled in moving machine part .
- Alway wear the nece ary afety equipment ( afety
goggle , apron , afety hoe , ear protection, etc.).
Wearing non- lip footwear i recommended when
operating the machine.
- Alway wear a protective ma k when machining
material that generate du t and chip .
- Avoid adopting an abnormal po ture.
- Make ure that you are tanding in a table po ition.
2.9 Machine-specific safety measures
- The wood du t produced when machining material
can po e a health ri k. Alway operate the
woodturning lathe in a well-ventilated area with
proper du t extraction. U e an extraction y tem,
if po ible.
- Alway po ition the tool re t over the centre line of
the lathe before machining a workpiece.
- Never operate the woodturning lathe in the wrong
rotational direction. The rotational direction mu t
alway match the direction of the arrow on the
machine (anti-clockwi e rotational direction).
- The machine may only be u ed with operational
afety device . If a afety device i faulty or
become ineffective, top the machine immediately.
- Firmly ecure the workpiece you wi h to proce .
- Do not machine cracked or flawed piece of wood.
- U e the lowe t peed immediately after clamping a
new workpiece in po ition.
- Ob erve the warning information on the woodturning
lathe.
- In order to avoid being ejected, the material clamped in
the lathe mu t not be too unbalanced.
- Before witching on the motor, rotate the clamped
workpiece a few time by hand to prevent colli ion .
- Do not wear working glove a they can become
caught on the workpiece.
- Avoid nagging the tool when machining the
workpiece.
- Place the tool on the re t. Po ition the cutting edge
on the tool at the centre of the workpiece.
- Remove any loo e knot before turning on the
machine.
- Before tarting any maintenance or repair work,
ecure the lathe to prevent it from being put into
operation.
- Never touch a rotating tool with your hand .
- Do not u e compre ed air to clean the lathe or
remove chip .

8 DB Vario Serie | Ver ion 1.01
Intended use
3 Intended use
The lathe i de igned exclu ively for turning wood or
wood-ba ed material .
It i intended for u e in the hobby ector and mall
work hop . The proper u e al o include ob erving all
indication in the e operating in truction .
3.1 Reasonably foreseeable misuse
Any u e beyond the proper u e or any other u e i
regarded a mi u e.
- U ing the woodturning lathe to machine material
other than wood (e.g. metal or pla tic).
- Machining unbalanced or heavy workpiece .
- Indu trial u e.
Mi u e of the woodturning lathe can re ult in dangerou
ituation .
Stürmer Ma chinen GmbH i not liable for any de ign
and technical modification to the woodturning lathe.
Any claim due to damage becau e of intended u e are
excluded.
3.2 Residual risks
Even if all afety regulation are ob erved and if the
machine i operated properly, there are re idual ri k
which are li ted a follow :
- Health hazard from wood du t.
- Health hazard from noi e.
- Ri k of injury from contact with live component .
- Ri k of injury to finger and hand from rotating
part .
- Ri k of injury from flying workpiece part .
- Ri k of injury (particularly cut ) from improper
handling/guidance of tool .
4 Technical data
4.1 Rating plate
Fig. 2: DB 305 VARIO rating plate
Model DB 305
VARIO
DB 460 XL
VARIO
Max. turning Ø 200 mm 305 mm
Centre height 100 mm 155 mm
Centre width 305 mm 460 mm
Spindle head thread M 33 x 3.5 M 33 x 3.5
Speed [rpm] 750-3200 650-1430 |
1240-2790 |
1600-3800
Speed etting 1 3
Speed regulation
control
Electroni-
cally variable
Electroni-
cally variable
Tail tock cone MT 2 MT 2
Sleeve adju tment 35 mm 55 mm
Connection voltage
(~50 Hz)
230 V 230 V
Current type/
pha e( )
AC / 1 AC / 1
Output power 0.15 kW 0.35 kW
Rated input 0.25 kW 0.55 kW
Approx. length
(product)
740 mm 900 mm
Approx. width /
depth
(product)
320 mm 340 mm
Approx. height
(product)
360 mm 410 mm
Weight 19 kg 38 kg

Transport packaging storage
DB Vario Serie | Ver ion 1.01 9
5 Transport, packaging, storage
5.1 Delivery and transport
Delivery
Check the woodturning lathe for vi ible tran port
damage immediately after delivery. If you notice any
damage on the woodturning lathe, plea e inform the
carrier or di tributor immediately.
5.2 Transport
The improper tran port of individual device and pack-
aged or unpackaged device that are tacked on top of
one another or next to one another un ecured, i liable to
cau e accident and damage or malfunction for which
we cannot a ume liability or provide any guarantee.
Tran port the cope of delivery ecured again t hifting
or tilting with a ufficiently dimen ioned indu trial truck to
the in tallation ite.
General risks during internal transport
Load may only be tran ported by authori ed and
qualified per on . Act re pon ibly during tran port and
alway con ider the con equence . Refrain from daring
and ri ky action .
Gradient and de cent (e.g. driveway , ramp and the
like) are particularly dangerou . If uch pa age are
unavoidable, pecial caution i required.
Before tarting the tran port check the tran port route for
po ible danger point , unevenne and di turbance
a well a for ufficient trength and load capacity.
Danger point , unevenne and di turbance point mu t
be in pected before tran port. The removal of danger
pot , unevenne , and di turbance by other
employee at the time of tran port pre ent a major ri k.
Careful planning of internal tran port i therefore e ential.
5.3 Packaging
All packaging material and packaging aid u ed for the
woodturning lathe are recyclable and mu t therefore
alway be recycled.
The delivery packaging i made of cardboard, o plea e
di po e carefully by having it chopped up and given to
the recycling collection.
The film are made of polyethylene (PE) and the
uphol tery part are made of poly tyrene (PS). Deliver
the e ub tance to a collection point for recyclable
material or to the wa te di po al company which look
after your region.
5.4 Storage
The woodturning lathe mu t be cleaned thoroughly prior
to torage in a clean, dry, fro t-free environment. Cover
the machine with a protective tarpaulin.
Ambient temperature range: –25 °C to +55 °C.
CAUTION!
Ri k of injury from device falling over or falling from
a forklift, pallet truck or tran port vehicle.
Only u e tran port device and load u pen ion gear
that can hold the total weight of the load.
CAUTION: DANGER OF TIPPING
The device may be lifted un ecured by a maximum
of 2cm.
Employee mu t remain out ide the danger zone
and out of range of the load.
Warn employee and advi e them of the hazard.

10 DB Vario Serie | Ver ion 1.01
Description of the device
6 Description of the device
6.1 Machine
Illustrations in these operating instructions may
deviate from the original.
Fig. 3: Woodturning lathe DB 305 VARIO
1 Tail tock
2 Sleeve clamping lever
3 Sleeve with centre point
4 Locking lever for tail tock
5 Tool re t
6 Drive plate
7 Head tock
8 On/off button
9 Speed regulator
10 Drive motor
11 Locking lever for tool re t
12 Locking handle for tool re t
13 Machine bed
f
6.2 Scope of delivery
DB 305 VARIO
1x Turning teel upport 110 mm
1x Turning teel upport 172 mm
1x Clamping di c 52 mm
1x Clamping di c 145 mm
1x Four pur drive centre
1x Travelling centre
DB 460 XL VARIO
1x Turning teel upport 150 mm
1x Turning teel upport 300 mm
1x Clamping di c 145 mm
1x Four pur drive centre
1x Travelling centre
6.3 Accessories
14
56
7
8
910
11
12
13
2
3
Description Item no. Compatible with
DB 305
VARIO
DB 460
XL
VARIO
Bed exten ion
550 mm
5930460 x
Turning tool et,
8-piece
5931011 x x
4-jaw chuck
Ø 150 mm
M33 x 3.5
5931020 x
4-jaw chuck
Ø 100 mm
M33 x 3.5, et 1
5931021 x x
4-jaw chuck
Ø 100 mm
M33 x 3.5, et 2
5931023 x x
Tang et MT2,
3-piece
5931056 x
4-jaw chuck
Ø 95 mm
Premium et
5931057 x x
4-jaw chuck
Ø 115 mm
Premium et
5931058 x x

Setting up and connecting
DB Vario Serie | Ver ion 1.01 11
7 Setting up and connecting
7.1 Installation site requirements
The woodturning lathe mu t be et up ecurely on a olid,
level urface. Make ure that there i adequate pace to work
The in tallation ite hould meet the following criteria:
- The upport urface mu t be level, firm and free of
vibration .
- The upport urface mu t not be permeable to
lubricant .
- The in tallation room or work pace mu t be dry and
well ventilated.
- Machine that produce du t and chip hould not be
operated near the lathe.
- There mu t be ufficient pace for operating
per onnel to work and handle material a well a
perform adju tment and maintenance ta k .
- There mu t be adequate lighting at the in tallation
ite.
7.2 Assembly
The machine mu t be fully a embled prior to being
commi ioned. In order to en ure a mooth a embly
proce , fir t clean any part that are covered or coated
with a heavy-duty ru t inhibitor (if applicable).
Mounting the woodturning lathe on the tabletop
(DB 305 VARIO)
Step 1: Mea ure and mark the three hole on the
tabletop a hown in Fig. 4.
Step 2: Drill through the tabletop. Po ition the
woodturning lathe on the tabletop.
Step 3: In ert the bolt with wa her (not upplied) into
the hole from underneath the tabletop and
crew into the threaded hole on the under ide
of the lathe frame.
The bolt hould engage at lea t 25 mm into
the thread on the lathe frame.
Fig. 4: Mounting on DB 305 VARIO
Locking lever
The locking lever for the tail tock pindle and the tool
re t come in everal part .
The bolt (item 1, Fig. 5) i crewed through the pring
(item 2, Fig. 5) and into the clamping lever (item 3,
Fig. 5). If a locking lever come loo e or ha fallen apart
in tran it, rea emble and crew into po ition.
Fig. 5: Locking lever
Drive plate
The woodturning lathe incorporate two drive plate with
different diameter . U e the di c that i mo t uitable for
the ize of the workpiece. Secure the workpiece to the
drive plate u ing wood crew (not upplied). Make ure
that the crew are not o long that they penetrate into
the area of the workpiece where you intend to remove
material.
Step 1: Screw the drive plate (item 1, Fig. 6) onto the
end of the head tock haft and tighten by hand.
Step 2: Place the wrench (item 2, Fig. 6) onto the drive
plate.
ATTENTION!
Make ure that the machine i freely acce ible for
the operating per onnel and material tran port a well
a adju tment and maintenance ta k .
NOTE!
The lever on the woodturning lathe are de igned to
collide a infrequently a po ible with other part of
the machine or the workpiece. To tighten the lever,
pu h it down and turn it clockwi e. If you pull the
lever outward , it i relea ed from the interlock and
can be adju ted a required.
594 mm
52 mm
1
2
11 mm 11 mm
571 mm
133 mm
105 mm

12 DB Vario Serie | Ver ion 1.01
Setting up and connecting
NOTE
: Since the head tock haft i belt-
driven, it rotate freely if not held while the face
plate i tightened or loo ened.
Step 3: In ert the tip of the locating rod (item 3, Fig. 6)
into one of the lot on the ide of the
head tock haft.
Step 4: Hold the locating rod and turn the wrench to
either tighten or loo en the drive plate.
Step 5: Remove the locating rod and the wrench.
When removing the drive plate, continue
turning it until it become detached from the
pindle thread.
Fig. 6: Drive plate
Inserting the centre point
Step 1: Make ure that the mating urface of the
centre point and pindle are clean. You can
u e a cloth dampened with acetone to remove
other re idue , oil, etc.
Step 2: In ert the centre point (item 1, Fig. 7) through
the drive plate and into the head tock mount
( leeve).
Fig. 7: Fitting the centre point
Removing the centre point
Step 1: Hold the centre point firmly to prevent it from
falling. U e a cloth to protect your hand from
harp edge .
Step 2: In ert the locating rod (item 1, Fig. 8) through
the pindle hole to loo en the centre point.
Fig. 8: Removing the centre point
ATTENTION!
Never feed the workpiece to the centre of the pindle
while the centre point i located in the head tock.

Prior to commissioning
DB Vario Serie | Ver ion 1.01 13
7.3 Electrical connection
When connecting the cable to the power upply, make
ure that the cable propertie (voltage, main frequency,
fu e protection) match the information on the rating plate
and for the motor.
If you need to u e an exten ion cable, make ure it i in
good condition and rated for the power con umption of
the device. An under ized cable will cau e the main
voltage to drop, re ulting in power lo and overheating.
U e a eparate circuit for the woodturning lathe. Before
connecting the motor to the main power upply, make
ure that the witch i et to OFF.
Step 1: In ert the plug into a 230 V ocket.
Step 2: The machine i now operational.
8 Prior to commissioning
After completing a embly, perform a te t run to en ure
that the machine i connected to the power upply cor-
rectly and the afety component are working properly.
If you identify an unu ual problem during the te t run,
top the machine immediately, di connect from the
main power upply and re olve the problem BEFORE
operating the machine again. The trouble hooting table
in thi manual may help you re olve the i ue.
During the te t run, the machine check whether the
motor i performing and operating correctly.
Carry out a test run on the machine as follows:
Step 1: Remove all tool required for a embly from
the machine.
Step 2: Set the machine to the neutral po ition and
turn the pindle peed knob anti-clockwi e a
far a it will go.
Step 3: Connect the machine to the power upply.
Step 4: Make ure that the machine i operating
correctly by pre ing the ON button and lowly
turning the pindle peed control clockwi e.
The pindle mu t rotate.
Step 5: Turn the pindle peed knob anti-clockwi e.
Step 6: When operating correctly, the machine run
quietly without generating vibration or friction
noi e. The pindle hould rotate anti-
clockwi e.
Step 7: Pre the OFF button.
DANGER!
Risk of death from electric shock!
There i a danger of life in ca e of contact with cur-
rent running through component . Switched on elec-
trical component can execute uncontrolled
movement and lead to evere injurie .
ATTENTION!
Work on the electrical in tallation mu t alway be
carried out by a qualified electrician.
The hou ing mu t be earthed to protect again t the
ri k of electric hock.
Check the ocket and make ure that it i
earthed properly.
ATTENTION!
Before tarting up the machine, check the electrical
connection, cable and contact .

14 DB Vario Serie | Ver ion 1.01
Operating the woodturning lathe
9 Operating the woodturning lathe
The following personal protective equipment must
be worn while working on the device:
Chapter 2.4 "Per onal protective equipment" include an
explanation of the pictogram .
9.1 Switching on the machine
Step 1: Turn the peed control to the lowe t etting.
Select the rotational direction u ing the
elector witch.
Step 2: Pre the "ON" button.
9.2 Switching off the machine
Step 1:
Pre the "OFF" button.
9.3 Speed adjustment
9.3.1 DB 305 VARIO
Fig. 9: Control box
The control box i connected to the motor' electrical
connection and incorporate two external control
element : ON/OFF witch (1) and peed control (2).
Step 1: Set the witch to the ON po ition (item 1,
Fig. 9) to tart the motor. Power i upplied to
the motor immediately.
The activation delay is 1 to 3 seconds.
The time it takes for the motor to reach the
speed selected using the speed control
depends on the size and weight of the
workpiece.
Step 2: Set the witch to the OFF po ition to top the
woodturning lathe.
The power is interrupted immediately, ut the
spindle and workpiece will continue to rotate
and eventually come to a stop.
LUBRICATION NOTE!
All moving part mu t be lubricated before the wood-
turning lathe i u ed for the fir t time. The belt cover
mu t be removed in order to lubricate the bearing
and drive haft . Do not u e any lubricant other than
adhe ive grea e, otherwi e the machine may mal-
function!
In addition, all guide , leeve and bearing mu t be
lubricated or oiled with commercially available lubri-
cating grea e.
DANGER!
There i danger to life for the operator and for other
per on if they do not comply with the following rule .
- The woodturning lathe may only be operated by one
per on. Other per on mu t not enter the working
area during operation.
CAUTION!
Risk of crushing!
Working on the machine improperly po e a ri k of
injury to the upper limb .
NOTE!
If you do not intend to u e the woodturning lathe for
longer period , di connect the main plug.
2
1

Operating the woodturning lathe
DB Vario Serie | Ver ion 1.01 15
Speed control
The peed control (item 2, Fig. 9) can be u ed to et the
peed according to the weight of the workpiece. Turning
the rotary knob clockwi e after tarting the woodturning
lathe increa e the peed of the pindle.
Turning the knob anti-clockwi e decrea e the peed of
the pindle.
Adju t the rotary knob until the lathe reache the
required peed.
9.3.2 DB 460 XL VARIO
The detachable control box can be mounted up to 90 cm
away from the lathe (mounting material included).
After mounting the control box, in ert the connector on
the box into the plug connector on the motor.
The woodturning lathe i fitted with a 3- tage belt pulley
configuration for the different peed range (Fig. 10).
Fig. 10: Belt configuration
Changing belts to change speed
Step 1: Di connect the connector plug from the
woodturning lathe.
Step 2: Open the protective cover.
Step 3: Relea e the clamping lever o that the motor
plate can be moved upward .
Step 4: Tilt the control box to the ide to acce the
motor pulley. Move the belt drive from one
pulley to another to change the peed
(Fig. 10).
Always move from the larger pulley to the
smaller pulley!
Step 5: Tighten the clamping lever again to ten ion the
belt drive.
Step 6: Clo e the protective cover.
9.4 Adjusting the tailstock
You al o have the option of moving the tail tock on the
lathe onto the machine bed after relea ing the locking
lever.
Step 1: In order to move the tail tock (item 5, Fig. 11),
relea e the locking lever (item 1, Fig. 11) and
lide the tail tock to the required po ition on
the bed.
Step 2: Tighten the locking lever (item 1, Fig. 11)
again.
Step 3: The tail tock pindle (item 4, Fig. 11) can be
moved by relea ing the pindle locking lever
(item 2, Fig. 11) and then turning the
handwheel (item 3, Fig. 11).
ATTENTION!
Alway et the peed control to the lowe t etting be-
fore tarting the woodturning lathe. Never tart the
lathe at maximum peed!
Spindle
Motor
Speed table:
ATTENTION!
Only remove the protective cover when the woodturn-
ing lathe i di connected from the power upply.
Every time you repo ition the V-belt, alway clo e and
ecure the protective cover afterward .
ATTENTION!
Make ure that the V-belt ten ion i correct.
If the V-belt i ten ed too trong or too weak it might
re ult in damage .
The V-belt are ten ioned correctly if they deflect
about 1 cm when pre ed with your finger.
ATTENTION!
The tail tock may fall off the machine bed when
moved.

16 DB Vario Serie | Ver ion 1.01
Operating the woodturning lathe
Turn the handwheel clockwi e to extend the
pindle, and anti-clockwi e to retract the
pindle.
Lock the tail tock locking lever (item 1, Fig. 11)
and the pindle locking lever (item 2, Fig. 11)
before operating the woodturning lathe.
The tail tock pindle i hollow and can be
acce ed from the handwheel end. U e the
ram to remove the centre point or drill hole
through the centre of a workpiece on a drive
plate.
Fig. 11: Tail tock
9.5 Adjusting the tool rest
U e the tool re t to afely guide the turning tool and
upport your hand.
Step 1: To move the tool re t (item 1, Fig. 12), relea e
the locking lever (item 4, Fig. 12) and the
clamping lever 3, then move the ba e to the
right or left and forward or backward .
Step 2: After aligning the tool re t, tighten the lever
(item 4, Fig. 12) again.
Step 3: To adju t the angle of the tool re t (item 2,
Fig. 12), relea e the locking lever (item 3,
Fig. 12), lide the tool re t to the required
po ition and tighten the locking lever.
Step 4: To fit the other tool re t, relea e the locking
lever (item 3, Fig. 12) and remove the tool re t
(item 2, Fig. 12) from the tool re t ba e, in ert
the other tool re t, po ition a required and
tighten the locking lever (item 3, Fig. 12) again.
Fig. 12: Adju ting the tool re t
9.6 Replacing the belt, spindle, and bearing
DB 460 XL VARIO
( ee pare part drawing, Fig. 15).
Step 1: To change the belt (item 53), the pindle
(item 14) or the bearing (item 4), you mu t fir t
loo en the two clamping crew (item 2) and
relea e the handwheel (item 1).
Step 2: Loo en the knurled crew (item 8) and remove
the top acce panel (item 7), then loo en the
clamp crew (item 69) on the drive pulley
(item 52).
Step 3: Knock out the pindle with a hammer.
Then u e a lotted crewdriver to pu h the
pindle out completely. Make ure you do not
to damage the bearing or thread.
Belt:
The pindle only ha to be moved far enough for a
new belt to be fitted.
Spindle:
The pindle mu t be knocked all the way out
through both bearing .
Bearing:
Once the pindle ha been removed,
the bearing mu t be knocked all the way out of the
head tock.
WARNING!
Make ure that the tool re t i po itioned a clo e to
the workpiece a po ible.
Turn the workpiece by hand to check the di tance
before witching on the lathe.
NOTE!
Replace the bearing, pindle, or belt a required.

Operating the woodturning lathe
DB Vario Serie | Ver ion 1.01 17
To do thi , guide a long rod or crewdriver through one of
the head tock bearing toward the oppo ite bearing.
Knock hard to remove the bearing from the ca t part.
When knocking out the bearing, make ure that the
circlip (item 13) are not damaged.
In ert the new bearing by knocking them in from the
out ide. In ert the pindle again.
You may need to relea e the locking lever (item 44, 45,
46) to rein tall the pindle pulley (52), collar (3), and belt
(53). Tighten the clamping crew on the pulley, leaving
enough clearance to the bearing, and clo e the acce
panel.
9.7 Material selection
The turning wood mu t have a good quality and mu t be
free of flaw uch a tran ver e crack or knot . Flawed
wood tend to plinter and po e a ri k to the u er and the
machine. Only experienced craft men hould machine
workpiece made of glued wood. Before thi type of
wood can be turned, it mu t be glued carefully and any
weak point mu t be eliminated, a the workpiece may
fall apart due to the centrifugal force that are generated.
9.8 Material preparation
Before tarting to machine long workpiece , the material
mu t be cut into a quare hape. Similarly, before
tarting to machine tran ver e workpiece , the material
mu t be cut roughly into a quare hape. You can cut the
tran ver e workpiece roughly into hape u ing a band
aw, for example. An octagonal hape i ideal, a it
prevent vibration .
9.9 Centring the workpiece
It i extremely important that you centre the prepared
workpiece before clamping them in the machine.
Centring mean mea uring the centre point of the
workpiece, marking it with a centre punch and making a
1.5 to 2 mm indentation at the centre point. If the
workpiece i not centred exactly, the imbalance will
cau e exce ive vibration . The workpiece may be
ejected a a re ult.
9.10 Position of the tool rest
Po ition the tool re t approximately 3.2 mm away from
the edge of the workpiece and approximately 3.2 mm
above the centre of the workpiece
Fig. 13: Po ition of the tool re t
9.11 Working with the lathe
The unmachined workpiece mu t be machined at a low
peed. After pre-turning the workpiece, i.e. when the
ba ic hape of the workpiece and even rotation have
been achieved, the peed can be increa ed. From time
to time, the revolving centre point mu t be readju ted
u ing the handwheel with the motor witched off. The
centre point mu t be in erted firmly into the wood. Turn
the workpiece by hand to check it i eated ecurely
between the point .
NOTE!
Clean rotation can only be achieved by centring the
workpiece accurately.

18 DB Vario Serie | Ver ion 1.01
Care maintenance and overhaul/repair
10 Care, maintenance and
overhaul/repair
10.1 Care at the end of work
Step 1: Di connect the main plug from the ocket.
Step 2: Clean any chip and du t from the machine
u ing compre ed air (caution: wear afety
goggle !) and/or a dry cloth. If the tail tock or
centre point wa u ed a a guide through the
centre of a workpiece, blow any awdu t or chip
out of both pindle a well. (Attention: wear
afety goggle and a du t ma k!).
Step 3: Spray all unpainted metal urface with a little
anti-ru t pray or lubricate accordingly.
Step 4: Check the leeve and grea e the thread .
Step 5: Check the machine for damage to the afety
device . If nece ary, carry out or arrange for
repair to be carried out according to the afety
in truction .
Step 6: Check the machine regularly for the following:
- Appropriate ten ion of the drive belt
- Loo e crew , bolt and nut
- Worn or damaged witche
Step 7
:
Check the drive belt every 6 month , or monthly
if u ed daily, and replace if worn or damaged.
10.2 Maintenance and repair
Maintenance and repair work mu t only be performed
by peciali t .
If the woodturning lathe doe not work properly, plea e
contact your peciali t dealer.
Immediately rea emble all protective and afety
equipment after completing the repair and maintenance
of the device.
Lubrication
Lubricate or oil the haft , thread , leeve , bearing
and guide regularly (at lea t once a month or more
frequently, if nece ary).
Only lubricate the elector and drive haft with adhe ive
grea e, otherwi e the belt may malfunction.
DANGER!
Risk of death from electric shock!
There i a danger of life in ca e of contact with cur-
rent running through component . Switched on elec-
trical component can execute uncontrolled
movement and lead to evere injurie .
- Before tarting any cleaning and maintenance work,
witch off the machine and di connect the main
plug!
- Connection and repair of the electrical equipment
may only be carried out by pecialized electrical
taff.
Use protective gloves!
NOTE!
Never u e trong cleaning agent in order to clean the
device. Such cleaning agent might damage or de-
troy the device.

Troubleshooting
DB Vario Serie | Ver ion 1.01 19
11 Troubleshooting
12 Disposal, recycling of used devices
In your own intere t and for the benefit of the
environment, plea e alway di po e of any machine
component at de ignated and approved facilitie .
12.1 Decommissioning
Immediately decommi ion u ed machine
profe ionally in order to avoid ub equent mi u e and
endangerment of the environment or per on .
Step 1: Remove all environmentally hazardou operating
material from the u ed machine.
Step 2: If required, di a emble the machine into ea y-
to-handle and u able component and part .
Step 3: Supply the machine component and operating
material to the provided di po al route .
Failures Possible cause Remedial action
The urface of the workpiece i too
rough
1. Turning tool blunt
2. Turning tool bounce
1. Re harpen the turning tool
2. Hold the turning tool with le
overhang
The workpiece become conical 1. Centre are not aligned (tail tock
off et)
1. Align the tail tock with the centre
The workpiece judder 1. Workpiece come loo e during
turning
2. Centring not in the centre
3. Speed exce ive
1. Ob erve the working note in the
operating in truction
2. Centre the workpiece
3. Select a lower peed
Exce ive vibration 1. Workpiece warped, out of round,
ha large weak point /crack , or
ha not been prepared for turning
2. Spindle bearing worn
3. Belt worn
4. Motor mount loo e
5. Woodturning lathe po itioned on
an uneven urface
1. Plane and cut the workpiece in
preparation for turning
2. Have the pindle bearing re-
placed
3. Replace the belt
4. Tighten the crew and handle
5. Place the lathe on a level urface
and align
Motor doe not tart 1. Motor connected incorrectly
2. Fu e i faulty
1. Have it checked by a peciali t
2. Have it checked by a peciali t
Motor overheat and lack
power
1. Motor overloaded?
2. In ufficient main voltage
3. Motor connected incorrectly
1. Reduce feed rate
2. Di connect immediately and have
it checked by authorized
per onnel
3. Have it checked by a peciali t
Preci ion of the work deficient 1. Irregularly heavy or ten ed
workpiece
2. Horizontal po ition of the tool re t
i impreci e
1. Balance the piece tatically and
ecure without training
2. Align the tool re t
Digital di play doe not work 1. Digital di play en or not in the
correct po ition
1. Open the belt cover and po ition
the en or o that it detect the
crew

20 DB Vario Serie | Ver ion 1.01
Spare parts
12.2 Disposing of electrical devices
Plea e note that electrical device contain a large
number of recyclable material a well a
environmentally hazardou component .
Plea e en ure that the e component are di po ed of
eparately and profe ionally. In ca e of doubt, plea e
contact your local municipal wa te management
authority.
If appropriate, call on the help of a peciali t wa te
di po al company for the treatment of the material.
12.3 Disposal of lubricants
The manufacturer of the lubricant make the di po al
in truction for the u ed lubricant available.
If nece ary, reque t the product- pecific data heet .
12.4 Disposal via municipal collection facilities
Di po al of u ed electrical and electronic component
(Applicable in the countrie of the European Union and
other European countrie with a eparate collecting
y tem for tho e device ).
The ign on the product or on it packing
indicate that the product mu t not be handled
a common hou ehold wa te, but that i need
to be di po ed of at a central collection point for
recycling. Your contribution to the correct di po al of thi
product will protect the environment and the health of
your fellow human . Incorrect di po al con titute a ri k
to the environment and public health. Recycling of
material will help reduce the con umption of raw
material . For further information about the recycling of
thi product, plea e contact your Di trict Office,
municipal wa te collection centre or the hop where you
purcha ed the product.
13 Spare parts
13.1 Ordering spare parts
Spare part can be purcha ed from peciali t dealer .
Indicate the following ba ic information for reque t or
order of pare part :
- Type of device
- Item No.
- Po ition No.
- Year of con truction:
- Quantity
- Required mode of di patch (mail, freight, ea, air,
expre )
- Addre of di patch
Spare part order which do not include the above
indication may not be taken into con ideration. If the
indication regarding the mode of di patch are mi ing,
the product i di patched at the di cretion of the upplier.
Refer to the rating plate on the compre or for
information on the device type, item number, and year of
manufacture.
Example
You wi h to order a motor for woodturning lathe
DB 305 VARIO. The number of the motor i 41 in the
pare part drawing.
When ordering pare part , end a copy of the pare
part drawing with marked component (motor) and
marked item number (41) to the authori ed dealer
together with the following information:
- Type of device:
Woodturning lathe
DB 305 VARIO
- Item number:
5920305
- Po ition No.:
41
In ca e of ervice, the following drawing hall help to
identify the nece ary pare part .
DANGER!
Danger of injury by the use of
wrong spare parts!
Danger may re ult for the u er and damage a well
a malfunction may be cau ed by u ing wrong or
damaged pare part .
- Only u e original pare part of the manufacturer or
pare part admitted by the manufacturer.
- Alway contact the manufacturer in ca e of uncer-
taintie .
Tips and recommendations
The u e of non-approved pare part will void the
manufacturer' warranty.
This manual suits for next models
1
Table of contents
Other Holzstar Lathe manuals
Popular Lathe manuals by other brands

ATEK MAKINA
ATEK MAKINA JUMBO DOUBLE Instruction booklet

YILMAZ
YILMAZ PCC 6505 user manual

Promac
Promac PBD-2555V operating instructions

General International
General International 25-650ABC M1 Setup & operation manual

Woodstock
Woodstock SHOP FOX W1704 instruction manual

Meec tools
Meec tools 268-920 Operating instruction