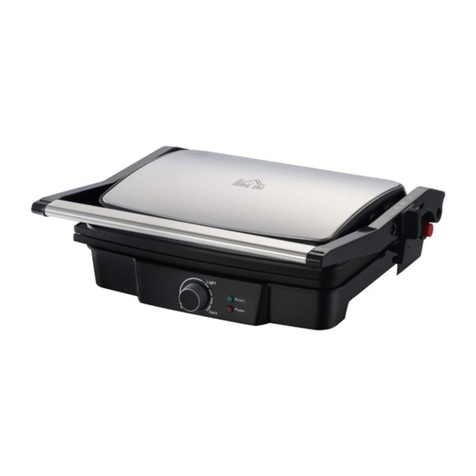
HOMCOM 800-137V70 User manual

ASSEMBLY INSTRUCTION
INcsb060_UK_DE_IT
800-137V70_800-137V90
IMPORTANT, RETAIN FOR FUTURE REFERENCE: READ CAREFULLY
CONTACT GRILL
INSTRUCTION MANUAL
KONTAKTGRILL
GEBRAUCHSANWEISUNG
GRIGLIA A CONTATTO
MANUALE DELLE ISTRUZIONI

EN
IMPORTANT SAFEGUARDS
Definitions
Whenever used, the following identify safety and property damage
messages and designate a level of hazard seriousness.
-This is the safety alert symbol. It alerts you to potential personal
injury hazards. Obey all safety messages that follow this symbol to
avoid possible injury or death.
DANGER-Indicates a hazardous situation, which, if not avoided,
will result in death or serious injury. Usage of this signal word is
limited to the most extreme situations.
WARNING-Indicates a hazardous situation, which, if not avoided,
could result in death or serious injury.
CAUTION-Indicates a hazardous situation, which, if not avoided,
may result in minor/moderate injury.
NOTICE-Addresses practices not related to personal injury, such
as product and/or property damage.
When using electrical products, always follow basic safety precautions,
including the following:
READ ALL INSTRUCTIONS BEFORE USE.
WARNING—To reduce the risk of fire, electric shock, or serious personal
injury:
● Do not touch hot surfaces. Use the Handle.
● Do not immerse the Power Cord, Plug, or Base in water/liquid.
● Unplug the Power Cord from the electrical outlet when the product is
not in use and before cleaning it. Allow to cool before putting on or taking
off parts.
● Do not use attachments not recommended for use with this product by
the product manufacturer. Attachments may become hot during use, so
allow them to cool before handling.
● Do not place the product on or near a hot gas or electric burner, or in a
heated oven.
● Use extreme caution when moving a product containing hot oil or other
hot liquids.
● Do not leave unattended while in use.
● Do not plug or unplug the product into/from an electrical outlet with a
wet hand.
● Take proper precautions to prevent the risk of burns, fire, or other
personal or property damage, as this product generates heat during use.
● If the product falls into water, immediately unplug it from the electrical
outlet.

EN
Do not touch or reach into the water.
● Use in a well-ventilated area. Keep at least 4-6 inches of space on
all sides to allow adequate air circulation.
● If the supply cord is damaged, it must be replaced by the
manufacturer, its service agent or similarly qualified persons in order
to avoid a hazard.
●This product has no user-serviceable parts. Do not attempt to
examine or repair it yourself. Only qualified service personnel should
perform any servicing; take the product to the appliance repair shop of
your choice for inspection and repair.
● This appliance can be used by children aged from 8 years and above
and persons with reduced physical, sensory or mental capabilities or
lack of experience and knowledge if they have been given supervision
or instruction concerning use of the appliance in a safe way and
understand the hazards involved. Children shall not play with the
appliance. Cleaning and user maintenance shall not be made by
children unless they are older than 8 and supervised.
● Keep the appliance and its cord out of reach of children less than 8
years.
● This appliance is not intended to be operated by means of external
timer or separate remote-control system.
● [symbol IEC 60417-5041(2002-10)] Caution, hot surface.
● This appliance is intended to be used in household and similar
applications such as:
– Staff kitchen areas in shops, offices and other working
environments;
– Farm houses;
– By clients in hotels, motels and other residential type environments;
– Bed and breakfast type environments.
CAUTION—To reduce the risk of personal injury:
● This product is intended solely for indoor, non-commercial, non-
industrial, household use in cooking/heating food for human
consumption. Do not use the product outdoors or for any other purpose.
● Do not allow the Power Cord to hang where it may be tripped over or
pulled(e.g., over the edge of a table or counter), and do not allow the
Cord to touch hot surfaces.
● Always wear protective oven mitts or heat-resistant gloves when using
this product and use utensils.
● To disconnect from the electrical outlet, pull directly on the Plug; do not
pull on the Power Cord.
● Always use the product on a flat, level, stable, heat-resistant surface.

SAVE THESE INSTRUCTIONS FOR FUTURE REFERENCE
EN
SPECIAL INSTRUCTIONS:
A short power-supply cord is provided to reduce the risk resulting from
becoming entangled in or tripping over a longer cord. Extension cords
are available and may be used if care is exercised in their use. If an
extension cord is used:
- The marked electrical rating of the extension cord must be at least as
great as that of the product;
- The cord should be arranged so that it will not drape over the counter
top or tabletop where it can be pulled on by children or tripped over
unintentionally;
- The extension cord must be a grounding-type 3-wire cord.
Parts
1. Handle 8. Button for base
2. Upper cover 9. Oil plate
3. Handle cover plate 10. Spatula
4. Base 11. Red light cover
5. Knob 12. Green light cover
6. Button for upper cover
7. Grill

EN
Before First Use
Press the Upper Plate Release Button to remove the upper Grill Plate
and then press the Lower Plate Release Button to remove the lower
Grill Plate. Clean the Grill Plates, the Drip Cups, and the
Scraper/Cleaning Tool in warm, soapy water; rinse and let dry. These
parts may also be washed in an automatic dishwasher. NEVER
IMMERSE THE BASE INTO OR EXPOSE IT TO WATER.
Reinsert the upper and lower Grill Plates into their respective
positions before use. See the “Inserting/Changing Plates” subsection
below for detailed instructions.
NOTE: When using the Grill Plates for the first time, spray or apply a
thin layer of cooking oil onto the nonstick surfaces of the Plates with a
paper towel in order to season the nonstick surface. As necessary,
reapply a thin layer of cooking oil throughout the life of the Plates to
maintain best nonstick performance.
To Assemble
Place the product on a clean, flat, level, stable, heat-resistant
surface with at least 4-6 inches of space on all sides to allow
adequate air circulation.
Positioning the Upper Housing:
1. Closed/Heating Position: The Upper
Housing is closed and rests on the
Base. Use this position when starting
/heating the product and when grilling
most foods.
2. Open Position: The Upper Housing
is open. Place the Product in this
position when starting to use the Grill
function, and when grilling certain foods
in which the upper Grill Plate is not
appropriate, such as pizza or fish. Lift
the Handle until the Upper Housing is at
about a 90°angle.

Setting Temperature
Min close
Max 425°F(230°C)
EN
Inserting/Changing Plates:
1. Slide the notches in the rear of the lower Grill Plate into the
retaining hooks, then press down on the front of the plate to snap it
into place. Repeat to attach the upper Grill Plate.
To Use
WARNING: The Grill Plates and metal surfaces of the Upper Housing
and Handle will become very hot during use. To avoid a burn hazard,
wear protective oven mitts or heat-resistant gloves when using and
touch only the black portion of the Handle.
Hinge Release
3.Flat Position: The Upper Housing is
open and level with the Base, Hinge
Release creating two cooking surfaces.
Use the product in this position when
grilling larger amounts of food. To
flatten, pull up on the Hinge Release
and push the Handle down.
NOTICE: Use only heat-resistant wooden, plastic, or silicone utensils to
add/remove food. Do not use a metal utensil as it may scratch the
surface of the item.
NOTE: During the initial use this item may emit some light smoke. This
is normal and will subside with further use.
Contact Grill:
Use to cook burgers, boneless or thin pieces of meat and fish, and
vegetables. In the “Closed” position, food will cook quickly since both
sides cook at the same time.
1. Set the product to the “Closed” position and plug the power cord into
a standard electrical outlet. The Power Indicator will illuminate red,
indicating power is on.
2. Place a Drip Cup below the drip spout.
3. Turn the Temperature Control to the desired setting, as listed below

EN
NOTE: It may take up to seven minutes to reach the selected cooking
temperature. The Ready Indicator will illuminate green when the
product is ready for cooking and will alternate on and off during
cooking, indicating the product is maintaining the selected cooking
temperature.
4. Place food onto the lower Grill Plate and lower the upper Grill
Plate onto the food (the “Closed” position). The upper Grill Plate will
self-adjust to the thickness of the food. If cooking items in which the
upper Grill Plate is not needed, such as kebabs or fish, leave the
product in the “Open” position.
NOTE: If cooking more than one piece of food at a time, food items
should be similar in thickness to ensure the upper Grill Plate rests
evenly on the food for even cooking.
5.When cooking is completed, remove food, unplug the product from
the electrical outlet, and allow the product to cool (at least 30
minutes) before moving, disassembling, or cleaning it.
CAUTION: Always unplug the product from the electrical outlet when
cooking is complete and when the product is not in use.
Panini Press:
Use upper and lower Grill Plates in the “Closed” position to grill any
combination of ingredients (for example, vegetables, meats, and
cheeses) layered between two pieces of bread or a folded tortilla/pita.
1. Follow steps 1 through 3 in the “Contact Grill” section, above.
2. Place food on the Lower Grill Plate and lower the upper Grill Plate
onto the food. The Upper Housing will self-adjust to the thickness of the
food.
NOTE: If cooking more than one piece of food at a time, food items
should be similar in thickness to ensure the upper Grill Plate rests
evenly on the food for even cooking.
3. When cooking is completed, remove food, unplug the product from
the electrical outlet, and allow the product to cool(about 30 minutes)
before moving, disassembling, or cleaning it.
CAUTION: Always unplug the product from the electrical outlet when
cooking is complete and when the product is not in use.
Flat Grill:
Using the product in the “Flat” position doubles the cooking surface area
and allows cooking of items with different thicknesses simultaneously, or
cooking foods on different plates to avoid combining flavors. Use for
cooking French toast, hash browns, open face sandwiches, and kebabs.
1. Set the product to the “Flat” position and plug the power cord into a
standard electrical outlet. The Power Indicator will illuminate red,
indicating power is on.
2. Use both Drip Cups when cooking in the Flat position.

Care and Maintenance
WARNING: Always make sure the product is unplugged from the
electrical outlet and allowed to completely cool before relocating,
disassembling, or cleaning it.
NOTICE: Do not use harsh or abrasive cleaners or pads to clean the
product.
1. After completely cooling, gently remove the Drip Cups and discard
contents.
2. Remove any leftover food from the Grill Plates using the
Scraper/Cleaning Tool.
3. Clean the Grill Plates, Drip Cups, and Scraper/Cleaning Too in warm,
soapy water; rinse and let dry. These parts may also be washed in an
automatic dishwasher.
WARNING: Do not immerse the Base into or expose it to water or other
liquids.
4. Wipe the Upper Housing and Base with a water-dampened sponge and
dry with a soft cloth or paper towel.
5. Store the product in a cool, dry location.
Electrical Specifications
220~240V AC 2000W
Voltage Frequency Wattage
Disposal
This marking indicates that this product should not be
disposed with other household wastes throughout the EU. To
prevent possible harm to the environment or human health
from uncontrolled waste disposal, recycle it responsibly to
promote the sustainable reuse of material resources. To
return your used device, please use the return and collection
systems or contact the retailer where the product was
purchased. They can take this product for environmental
safe recycling.
50-60Hz
EN
3. Turn the Temperature Control to the desired setting.
NOTE: It may take up to eight minutes to reach the selected cooking
temperature. The Ready indicator will illuminate green when the product
is ready for cooking. The Ready indicator will alternate on and off during
cooking, indicating the product is heating to maintain the selected
cooking temperature.
4.Place food onto the Grill Plates.
5.When cooking is completed, remove food, unplug the product from the
electrical outlet, and allow the product to cool (about 30 minutes) before
moving, disassembling, or cleaning it.
CAUTION: Always unplug the product from the electrical outlet when
cooking is complete and when the product is not in use.

DE
WICHTIGE
Definitionen
Die folgenden Symbole weisen auf Sicherheits- und Sachschäden hin
und bezeichnen den Schweregrad der Gefahr, wenn sie verwendet
werden.
-Dies ist das Sicherheitswarnsymbol. Es macht Sie auf mögliche
Verletzungsgefahren aufmerksam. Befolgen Sie alle
Sicherheitshinweise, die auf dieses Symbol folgen, um mögliche
Verletzungen oder Tod zu vermeiden.
GEFAHR - Weist auf eine gefährliche Situation hin, die, wenn sie
nicht vermieden wird, zum Tod oder zu schweren Verletzungen führen
wird. Die Verwendung dieses Signalworts ist auf die extremsten
Situationen beschränkt.
WARNUNG - Weist auf eine gefährliche Situation hin, die, wenn sie
nicht vermieden wird, zum Tod oder zu schweren Verletzungen führen
kann.
VORSICHT - Weist auf eine Gefahrensituation hin, die, wenn sie nicht
vermieden wird, zu leichten/mittleren Verletzungen führen kann.
HINWEIS - Weist auf Praktiken hin, die nicht mit Personenschäden
verbunden sind, wie z. B. Produkt- und/oder Sachschäden.
Beachten Sie bei der Verwendung von Elektrogeräten stets die
grundlegenden Sicherheitsvorkehrungen, einschließlich der folgenden:
LESEN SIE VOR DEM GEBRAUCH ALLE ANWEISUNGEN.
WARNUNG — Um das Risiko eines Brandes, eines Stromschlags oder
schwerer Verletzungen zu verringern:
● Berühren Sie keine heißen Oberflächen. Benutzen Sie den Handgriff.
● Tauchen Sie das Stromkabel, den Stecker oder den Sockel nicht in
Wasser/Flüssigkeit ein.
● Ziehen Sie den Netzstecker aus der Steckdose, wenn das Gerät nicht
benutzt wird und bevor Sie es reinigen. Lassen Sie es abkühlen, bevor
Sie Teile anbringen oder abnehmen.
● Verwenden Sie keine Aufsätze, die nicht vom Hersteller für die
Verwendung mit diesem Gerät empfohlen werden. Aufsätze können
während des Gebrauchs heiß werden, lassen Sie sie daher vor der
Handhabung abkühlen.
● Stellen Sie das Gerät nicht auf oder in die Nähe eines heißen Gas-
oder Elektrobrenners oder in einen beheizten Ofen.
● Seien Sie äußerst vorsichtig, wenn Sie ein Gerät mit heißem Öl oder
anderen heißen Flüssigkeiten bewegen.

DE
● Lassen Sie das Gerät nicht unbeaufsichtigt, während es in Betrieb ist.
● Stecken Sie das Gerät nicht mit nassen Händen in eine Steckdose
und ziehen Sie den Stecker nicht aus der Steckdose.
● Treffen Sie geeignete Vorsichtsmaßnahmen, um das Risiko von
Verbrennungen, Feuer oder anderen Personen- oder Sachschäden zu
vermeiden, da dieses Produkt während des Gebrauchs Hitze erzeugt.
● Wenn das Gerät ins Wasser fällt, ziehen Sie sofort den Netzstecker
aus der Steckdose. Berühren Sie das Wasser nicht und greifen Sie
nicht in das Wasser.
● Verwenden Sie das Gerät in einem gut belüfteten Bereich. Lassen Sie
an allen Seiten mindestens 4–6 Zoll Platz, um eine ausreichende
Luftzirkulation zu gewährleisten.
● Wenn das Netzkabel beschädigt ist, muss es durch den Hersteller,
seinen Kundendienst oder ähnlich qualifizierte Personen ersetzt
werden, um eine Gefährdung zu vermeiden.
● Dieses Produkt hat keine vom Benutzer zu wartenden Teile.
Versuchen Sie nicht, es selbst zu untersuchen oder zu reparieren.
Bringen Sie das Gerät zur Inspektion und R Lassen Sie das Gerät nur
von qualifiziertem Fachpersonal warten; bringen Sie es zur
Überprüfung und Reparatur in eine Fachwerkstatt Ihrer Wahl.
● Dieses Gerät kann von Kindern ab 8 Jahren und darüber, sowie von
Personen mit verringerten physischen, sensorischen oder mentalen
Fähigkeiten oder Mangel an Erfahrung und Wissen benutzt werden,
wenn sie beaufsichtigt oder bezüglich des sicheren Gebrauchs des
Geräts unterwiesen wurden und die daraus entstehenden Gefahren
verstehen. Kinder dürfen nicht mit dem Gerät spielen. Die Reinigung
und Benutzerwartung dürfen nicht von Kindern durchgeführt werden, es
sei denn, sie sind älter als 8 Jahre und werden beaufsichtigt.
● Bewahren Sie das Gerät und sein Kabel außerhalb der Reichweite
von Kindern unter 8 Jahren auf.
● Dieses Gerät darf nicht mit einer externen Zeitschaltuhr oder einem
separaten Fernbedienungssystem betrieben werden.
● [Symbol IEC 60417-5041(2002-10)] Vorsicht, heiße Oberfläche.
● Dieses Gerät ist für die Verwendung im Haushalt und ähnlichen
Anwendungen vorgesehen, wie z. B.:
– Personalküchenbereiche in Geschäften, Büros und anderen
Arbeitsumgebungen;
– Bauernhöfe;
– Von Kunden in Hotels, Motels und anderen wohnungsähnlichen
Umgebungen;
– Übernachtung mit Frühstück-Unterkünften.

DE
VORSICHT—Um das Risiko von Verletzungen zu verringern:
·Dieses Produkt ist ausschließlich für den nicht-kommerziellen, nicht-
i n d u s t r i e l l e n, h ä u sl i c h e n G e b ra u c h i n I n ne n r ä u m e n z u m
Kochen/Erwärmen von Speisen für den menschlichen Verzehr
bestimmt. Verwenden Sie das Gerät nicht im Freien oder für andere
Zwecke.
·Lassen Sie das Stromkabel nicht dort hängen, wo man darüber
stolpern oder daran ziehen kann (z. B. über die Kante eines Tisches
oder einer Theke), und achten Sie darauf, dass das Kabel keine heißen
Oberflächen berührt.
·Tragen Sie immer Schutzhandschuhe oder hitzebeständige
Handschuhe, wenn Sie das Gerät benutzen und Utensilien verwenden.
·Um das Gerät von der Steckdose zu trennen, ziehen Sie direkt am
Stecker, nicht am Stromkabel.
·Verwenden Sie das Gerät immer auf einer flachen, ebenen, stabilen
und hitzebeständigen Oberfläche.
BESONDERE ANWEISUNGEN:
Ein kurzes Stromkabel wird mitgeliefert, um die Gefahr zu verringern,
sich in einem längeren Kabel zu verheddern oder darüber zu stolpern.
Verlängerungskabel sind erhältlich und können verwendet werden,
wenn sie mit Sorgfalt eingesetzt werden. Wenn ein Verlängerungskabel
verwendet wird:
- Die angegebene elektrische Leistung des Verlängerungskabels
muss mindestens so groß sein wie die des Produkts;
- Das Kabel sollte so verlegt werden, dass es nicht über die Arbeits-
oder Tischplatte hängt, wo Kinder daran ziehen oder unbeabsichtigt
darüber stolpern können;
- Das Verlängerungskabel muss ein geerdetes 3-adriges Kabel sein.
BEWAHREN SIE DIESE ANWEISUNGEN ZUM SPÄTEREN
NACHSCHLAGEN AUF

DE
Teile
1. Handgriff 8. Knopf für Sockel
2. Obere Abdeckung 9. Ölpfanne
3. Abdeckplatte des Griffs 10. Spatel
4. Basis 11. Rotes Licht Abdeckung
5. Knopf 12. Grünes Licht Abdeckung
6. Knopf für obere Abdeckung
7. Grill
Vor der ersten Verwendung
Drücken Sie die Entriegelungstaste für die obere Platte, um die obere
Grillplatte zu entfernen, und drücken Sie dann die Entriegelungstaste
für die untere Platte, um die untere Grillplatte zu entfernen. Reinigen
Sie die Grillplatten, die Tropfschalen und den
Schaber/Reinigungswerkzeug in warmem Seifenwasser; spülen Sie
sie ab und lassen Sie sie trocknen. Diese Teile können auch in einer
Spülmaschine gereinigt werden. TAUCHEN SIE DEN SOCKEL
NIEMALS IN WASSER EIN ODER SETZEN SIE IHN DIESEM AUS.
Setzen Sie die obere und untere Grillplatte vor dem Gebrauch wieder
in ihre jeweilige Position ein. Detaillierte Anweisungen finden Sie im
Unterabschnitt „Einsetzen/Wechseln der Platten“ weiter unten.
HINWEIS: Wenn Sie die Grillplatten zum ersten Mal verwenden,
sprühen Sie eine dünne Schicht Speiseöl auf die
antihaftbeschichteten Oberflächen der Platten oder tragen Sie es mit
einem Papiertuch auf, um die antihaftbeschichteten Oberflächen zu
schützen. Tragen Sie während der gesamten Lebensdauer der
Platten bei Bedarf erneut eine dünne Schicht Speiseöl auf, um die
beste Antihaftwirkung zu erzielen.

DE
Montage
Stellen Sie das Produkt auf eine saubere, flache, ebene, stabile,
hitzebeständige Oberfläche mit mindestens 4-6 Zoll Platz auf allen
Seiten, um eine ausreichende Luftzirkulation zu ermöglichen.
Positionieren des oberen Gehäuses:
1. Geschlossen/Heizposition: Das
obere Gehäuse ist geschlossen und
ruht auf dem Sockel. Verwenden Sie
diese Position zum Starten/Erwärmen
des Geräts und zum Grillen der meisten
Speisen.
2. Offene Position: Das Obere
Gehäuse ist offen. Stellen Sie das
Gerät in diese Position, wenn Sie die
Grillfunktion nutzen möchten und wenn
Sie bestimmte Speisen grillen möchten,
für die die obere Grillplatte nicht
geeignet ist, z. B. Pizza oder Fisch.
Heben Sie den Griff an, bis sich das
obere Gehäuse in einem Winkel von
etwa 90° befindet.
3. Scharnierentriegelung
Flache Position: Das obere Gehäuse ist
geöffnet und befindet sich auf gleicher
Höhe mit dem Sockel, so dass zwei
Kochflächen entstehen. Verwenden Sie
das Gerät in dieser Position, wenn Sie
größere Mengen von Speisen grillen.
Ziehen Sie zum Abflachen die
Scharnierentriegelung nach oben und
drücken Sie den Griff nach unten.
Einsetzen/Wechseln der Platten:
1. Schieben Sie die Einkerbungen an der Rückseite der unteren
Grillplatte in die Haltehaken und drücken Sie dann die Platte vorne
nach unten, um sie einzurasten. Wiederholen Sie den Vorgang, um
die obere Grillplatte anzubringen.
Scharnierentriegelung

DE
Zum Gebrauch
WARNUNG: Die Grillplatten und die Metallflächen des oberen
Gehäuses und des Griffs werden während des Gebrauchs sehr heiß.
Um Verbrennungsgefahr zu vermeiden, tragen Sie bei der Benutzung
Schutzhandschuhe oder hitzebeständige Handschuhe und berühren
Sie nur den schwarzen Teil des Griffs.
HINWEIS: Verwenden Sie nur hitzebeständige Holz-, Kunststoff- oder
Silikonutensilien zum Hinzufügen/Entfernen von Speisen. Verwenden
Sie keine Metallutensilien, da diese die Oberfläche des Geräts
zerkratzen können.
HINWEIS: Bei der ersten Verwendung des Geräts kann es zu einer
leichten Rauchentwicklung kommen. Dies ist normal und lässt bei
weiterer Verwendung nach.
Kontaktgrill:
Zum Garen von Hamburgern, knochenlosen oder dünnen Fleisch- und
Fischstücken und Gemüse. In der Stellung „Geschlossen“ werden die
Speisen schnell gegart, da beide Seiten gleichzeitig gegart werden.
1. Stellen Sie das Gerät auf die Position „Geschlossen“ und schließen
Sie das Stromkabel an eine normale Steckdose an. Die
Betriebsanzeige leuchtet rot auf und zeigt damit an, dass das Gerät
eingeschaltet ist.
2. Stellen Sie einen Tropfbecher unter den Tropfauslauf.
3. Drehen Sie den Temperaturregler auf die gewünschte Einstellung,
wie unten aufgeführt
Einstellung Temperatur
Minuten Schließen
Maximal 425℉ (230℃)
HINWEIS: Es kann bis zu sieben Minuten dauern, bis die gewählte
Gartemperatur erreicht ist. Die Bereitschaftsanzeige leuchtet grün,
wenn das Gerät bereit ist, und schaltet sich während des Garvorgangs
abwechselnd ein und aus, um anzuzeigen, dass das Gerät die gewählte
Gartemperatur hält.
4. Legen Sie das Grillgut auf die untere Grillplatte und senken Sie die
obere Grillplatte auf das Grillgut (Position „Geschlossen“). Die obere
Grillplatte passt sich der Dicke des Grillguts an. Wenn Sie Speisen
zubereiten, für die die obere Grillplatte nicht benötigt wird, wie z. B.
Spieße oder Fisch, lassen Sie das Gerät in der Position „Offen“.
HINWEIS: Wenn Sie mehr als eine Speise auf einmal garen, sollten die
Speisen eine ähnliche Dicke haben, damit die obere Grillplatte
gleichmäßig auf den Speisen aufliegt und ein gleichmäßiges Garen
gewährleistet ist.

DE
5. Nach Beendigung des Garvorgangs nehmen Sie die Speisen heraus,
ziehen Sie den Netzstecker aus der Steckdose und lassen Sie das
Gerät abkühlen (mindestens 30 Minuten), bevor Sie es bewegen,
zerlegen oder reinigen.
VORSICHT: Ziehen Sie immer den Netzstecker aus der Steckdose,
wenn der Garvorgang abgeschlossen ist und das Gerät nicht benutzt
wird.
Panini-Presse:
Verwenden Sie die oberen und unteren Grillplatten in der Position
„Geschlossen“, um eine beliebige Kombination von Zutaten (z. B.
Gemüse, Fleisch und Käse) zwischen zwei Brotstücken oder einer
gefalteten Tortilla/Pita zu grillen.
1. Führen Sie die Schritte 1 bis 3 im Abschnitt „Kontaktgrill“ (siehe
oben) aus.
2. Legen Sie das Grillgut auf die untere Grillplatte und senken Sie die
obere Grillplatte auf das Grillgut. Das obere Gehäuse passt sich
automatisch an die Dicke des Grillguts an.
HINWEIS: Wenn Sie mehr als eine Speise auf einmal garen, sollten die
Speisen eine ähnliche Dicke haben, damit die obere Grillplatte
gleichmäßig auf den Speisen aufliegt und ein gleichmäßiges Garen
gewährleistet ist.
3. Wenn der Garvorgang abgeschlossen ist, nehmen Sie die Speisen
heraus, ziehen Sie den Netzstecker aus der Steckdose und lassen Sie
das Gerät abkühlen (etwa 30 Minuten), bevor Sie es bewegen, zerlegen
oder reinigen.
VORSICHT: Ziehen Sie immer den Netzstecker aus der Steckdose,
wenn der Garvorgang abgeschlossen ist und das Gerät nicht benutzt
wird.
Flacher Grill:
Wenn Sie das Gerät in der Position „Flach“ verwenden, verdoppelt sich
die Kochfläche und ermöglicht das gleichzeitige Garen von
unterschiedlich dicken Speisen oder das Garen von Speisen auf
verschiedenen Platten, um eine Geschmacksvermischung zu
vermeiden. Verwenden Sie das Gerät zum Garen von French Toast,
Hash Browns, Sandwiches und Spießen.
1. Stellen Sie das Gerät auf die Position „Flach“ und schließen Sie das
Stromkabel an eine normale Steckdose an. Die Betriebsanzeige
leuchtet rot auf und zeigt damit an, dass das Gerät eingeschaltet ist.
2. Verwenden Sie beide Tropfschalen, wenn Sie das Gerät auf Flach
stellen.
3. Drehen Sie den Temperaturregler auf die gewünschte Einstellung.
HINWEIS: Es kann bis zu acht Minuten dauern, bis die gewählte
Gartemperatur erreicht ist. Die Bereitschaftsanzeige leuchtet grün,
wenn das Gerät zum Garen bereit ist. Die Bereitschaftsanzeige schaltet
sich während des Garvorgangs abwechselnd ein und aus, um
anzuzeigen, dass das Gerät auf die gewählte Gartemperatur erhitzt
wird.

DE
4. Legen Sie die Speisen auf die Grillplatten.
5. Wenn der Garvorgang abgeschlossen ist, nehmen Sie die Speisen
heraus, ziehen Sie den Netzstecker aus der Steckdose und lassen Sie
das Gerät abkühlen (ca. 30 Minuten), bevor Sie es bewegen, zerlegen
oder reinigen.
VORSICHT: Ziehen Sie immer den Netzstecker aus der Steckdose, wenn
der Garvorgang abgeschlossen ist und das Gerät nicht benutzt wird.
Pflege und Wartung
WARNUNG: Vergewissern Sie sich immer, dass das Gerät vom
Stromnetz getrennt und vollständig abgekühlt ist, bevor Sie es
bewegen, zerlegen oder reinigen.
HINWEIS: Verwenden Sie zur Reinigung des Geräts keine scharfen
oder scheuernden Reinigungsmittel oder Kissen.
1. Entfernen Sie nach dem vollständigen Abkühlen vorsichtig die
Tropfschalen und entsorgen Sie den Inhalt.
2. Entfernen Sie Speisen von den Grillplatten mit dem
Schaber/Reinigungswerkzeug.
3. Reinigen Sie die Grillplatten, die Abtropfschalen und den
Schaber/Reinigungswerkzeug in warmem Seifenwasser; spülen Sie
sie ab und lassen Sie sie trocknen. Diese Teile können auch in einer
Spülmaschine gereinigt werden.
WARNUNG: Tauchen Sie den Sockel nicht in Wasser oder andere
Flüssigkeiten und setzen Sie sie nicht diesen aus.
4. Wischen Sie das obere Gehäuse und den Sockel mit einem mit
Wasser angefeuchteten Schwamm ab und trocknen Sie es mit einem
weichen Tuch oder Papiertuch.
5. Lagern Sie das Produkt an einem kühlen, trockenen Ort.
Elektrische Daten
220~240 V AC 50-60 Hz 2.000 W
Spannung Frequenz Wattzahl
Entsorgung
Diese Kennzeichnung weist darauf hin, dass dieses Produkt
in der gesamten EU nicht zusammen mit anderen
Haushaltsabfällen entsorgt werden darf. Um mögliche
Schäden für die Umwelt oder die menschliche Gesundheit
durch unkontrollierte Abfallentsorgung zu vermeiden,
recyceln Sie es verantwortungsbewusst, um die nachhaltige
Wiederverwendung von Materialressourcen zu fördern. Um
Ihr Altgerät zurückzugeben, nutzen Sie bitte die Rückgabe-
und Sammelsysteme oder wenden Sie sich an den Händler,
bei dem das Produkt gekauft wurde. Diese können das
Produkt einem umweltgerechten Recycling zuführen.

IT
IMPORTANTI PRECAUZIONI
Definizioni
Ogni volta che il prodotto è in uso, quanto segue identifica i
messaggi di sicurezza e di potenziali danni alla proprietà privata e
indica il livello di gravità del pericolo.
-Questo è il simbolo di avviso di sicurezza. Vi avverte di potenziali
rischi di lesioni personali. Rispettare tutti i messaggi di sicurezza
che seguono questo simbolo per evitare possibili lesioni personali
o morte.
PERICOLO-Indica una situazione pericolosa che, se non evitata,
provocherà la morte o lesioni personali gravi. L'uso di questa
parola chiave è limitato alle situazioni più estreme.
AVVERTENZA-Indica una situazione pericolosa che, se non
evitata, potrebbe provocare la morte o lesioni personali gravi.
ATTENZIONE-Indica una situazione pericolosa che, se non
evitata, può provocare lesioni personali lievi/moderate.
AVVISO-Indica pratiche non correlate a lesioni personali, come
danni al prodotto e/o alla proprietà privata.
Quando si utilizzano prodotti elettrici, seguire sempre le precauzioni di
sicurezza di base, incluse le seguenti:
LEGGERE TUTTE LE ISTRUZIONI PRIMA DELL‘USO.
AVVERTENZA— Per ridurre il rischio di incorrere in incendi, scosse
elettriche o gravi lesioni personali:
● Non toccare le superfici roventi. Usare la maniglia.
● Non immergere il cavo di alimentazione, la spina o la base in
acqua/altri liquidi.
● Scollegare il cavo di alimentazione dalla presa di corrente quando il
prodotto non è in uso e prima di pulirlo. Lasciare raffreddare prima di
collegare o togliere le parti.
● Non utilizzare accessori non consigliati dal produttore per l'uso con
questo prodotto. Gli accessori possono surriscaldarsi durante l'uso,
quindi vanno lasciati raffreddare prima di maneggiarli.
● Non posizionare il prodotto sopra o vicino a fornelli a gas o elettrici
caldi o in un forno riscaldato.
● Prestare estrema cautela quando si sposta un prodotto che contiene
al suo interno olio bollente o altri liquidi caldi.
● Non lasciare il prodotto incustodito durante l'uso.
● Non collegare o scollegare il prodotto a/da una presa di corrente con
le mani bagnate.

IT
● Prendere le dovute precauzioni per prevenire il rischio di ustioni,
incendi o altre lesioni personali o danni materiali, poiché questo
prodotto genera calore durante il funzionamento.
● Se il prodotto cade in acqua, scollegarlo immediatamente dalla presa
di corrente. Non toccarlo o afferrarlo in acqua.
● Utilizzare in un'area ben ventilata. Mantenere almeno 4-6 pollici di
spazio tutto attorno ai lati per consentire un'adeguata circolazione
dell'aria.
● Se il cavo di alimentazione è danneggiato, deve essere sostituito dal
produttore, dal suo agente di servizio o da personale qualificato per
evitare pericoli.
● Questo prodotto non è dotato di parti riparabili direttamente
dall'utente. Non tentare di esaminarle o ripararle da soli. Gli interventi di
manutenzione devono essere eseguiti solo da personale di assistenza
qualificato; portare il prodotto all'officina di riparazione degli
elettrodomestici di vostra fiducia per l'ispezione e la riparazione.
● Questo apparecchio può essere utilizzato da bambini di età pari o
superiore a 8 anni e da persone con capacità fisiche, sensoriali o
mentali ridotte o prive di esperienza e conoscenza tecnica, se sono
supervisionati o istruiti sull'uso dell'apparecchio in modo sicuro e ne
hanno compreso i pericoli. I bambini non devono giocare con
l'apparecchio. La pulizia e la manutenzione non devono essere
eseguite da bambini a meno che non abbiano più di 8 anni e non siano
supervisionati.
● Tenere l'apparecchio e il suo cavo di alimentazione fuori dalla portata
dei bambini di età inferiore a 8 anni.
● Questo apparecchio non è progettato per essere azionato tramite
timer esterno o sistema di controllo remoto separato.
● [simbolo IEC 60417-5041(2002-10)] Attenzione, superficie calda.
● Questo apparecchio è progettato per essere usato in ambienti
domestici o simili come:
– Aree cucina del personale in negozi, uffici e altri ambienti di lavoro;
– Agriturismi;
–Clienti in hotel, motel e altri ambienti di tipo residenziale;
– Ambienti come bed and breakfast.
ATTENZIONE—Per ridurre il rischio di lesioni personali:
● Questo prodotto è destinato esclusivamente all'uso in ambienti
interni, non commerciali, non industriali e domestici per la
cottura/riscaldamento di alimenti per il consumo umano. Non utilizzare
il prodotto all‘esterno o per altri scopi.
● Non lasciare che il cavo di alimentazione penda dove ci si potrebbe
inciampare o lo si potrebbe tirare (ad es. sul bordo del tavolo o del
bancone) e non permettere che il cavo venga a contatto di superfici
calde.

CONSERVARE QUESTE ISTRUZIONI PER RIFERIMENTI
FUTURI
IT
● Indossare sempre guanti da forno protettivi o guanti resistenti al
calore quando si utilizza questo prodotto e gli accessori.
● Per scollegare dalla presa di corrente, tirare direttamente la spina;
non tirare dal cavo di alimentazione.
● Utilizzare sempre il prodotto su una superficie in piano, livellata,
stabile e resistente al calore.
ISTRUZIONI SPECIALI:
Viene dato in dotazione un cavo di alimentazione più corto per ridurre il
rischio che si impigli o inciamparvi qualora fosse più lungo. Sono
disponibili prolunghe che possono essere utilizzate se si fa attenzione
nel loro utilizzo. Se si utilizza una prolunga:
- La tensione indicata del cavo di prolunga deve essere almeno pari a
quella del prodotto;
- Il cavo deve essere disposto in modo che non ricada sul piano di
lavoro o sul piano del tavolo dove può essere tirato dai bambini o ci si
può inciampare involontariamente;
- La prolunga deve essere un cavo a 3 fili con messa a terra.
Parti
1. Maniglia 8. Pulsante della base
2. Coperchio superiore 9. Piastra dell‘olio
3. Placca protettiva maniglia 10. Spatola
4. Base 11. Spia rossa del coperchio
5. Manopola 12. Spia verde del coperchio
6. Pulsante del coperchio superiore
7. Griglia

IT
Prima del primo uso
Premere il pulsante di rilascio della piastra superiore per rimuovere la
piastra superiore della griglia e premere il pulsante di rilascio della
piastra inferiore per rimuoverla. Pulire le piastre della griglia, i
gocciolatoi e la spatola/utensile per la pulizia immergendoli in acqua
calda e sapone; sciacquare e lasciare asciugare. Queste parti
possono anche essere lavate in lavastoviglie. NON IMMERGERE MAI
LA BASE O ESPORLA ALL'ACQUA.
Reinserire le piastre della griglia superiore e inferiore nelle rispettive
posizioni prima dell'uso. Fare riferimento alla sottosezione
"Inserimento/sostituzione delle piastre" di seguito per le istruzioni
dettagliate.
NOTA: quando si utilizzano le piastre della griglia per la prima volta,
spruzzare o applicare uno strato sottile di olio da cucina sulle
superfici antiaderenti delle piastre passando con un tovagliolo di
carta per coprire la superficie antiaderente. Se necessario,
riapplicare un sottile strato di olio da cucina per tutta la vita utile delle
piastre per mantenere le migliori prestazioni antiaderenti.
Per Assemblare
Posizionare il prodotto su una superficie pulita, in piano, livellata,
stabile e resistente al calore con almeno 4-6 pollici di spazio su tutti i
lati per consentire un'adeguata circolazione dell'aria.
Posizionamento dell‘alloggiamento
superiore:
1. Posizione chiusa/di riscaldamento:
L‘alloggiamento superiore è chiuso e
poggiato sulla base. Tenerlo in questa
posizione quando si accende/riscalda il
prodotto e quando si griglia la maggior
parte dei cibi.
2. Posizione aperta: l‘alloggiamento
superiore è aperto.
Tenere il prodotto in questa posizione
quando si inizia ad usare La funzione
Griglia, e quando la griglia superiore
non è adatta Per grigliare alcuni cibi,
come pizza o pesce Sollevare la
maniglia fino a che l‘alloggiamento
superiore ha un‘angolazione di circa 90°
gradi.
This manual suits for next models
1
Table of contents
Languages:
Other HOMCOM Grill manuals