PART#462‐680/681
ASSEMBLYINSTRUCTIONSPage|205/02/2014
Assembly Notes
Portions of this assembly may be easier with two people.
Plastic bag’s surrounding the individual components within the packaging can be dangerous.
Keep the bags away from small children to avoid the danger of suffocation.
Loosely assemble all parts per the step by step procedure shown below prior to tightening each
connection.
Do not over tighten hardware.
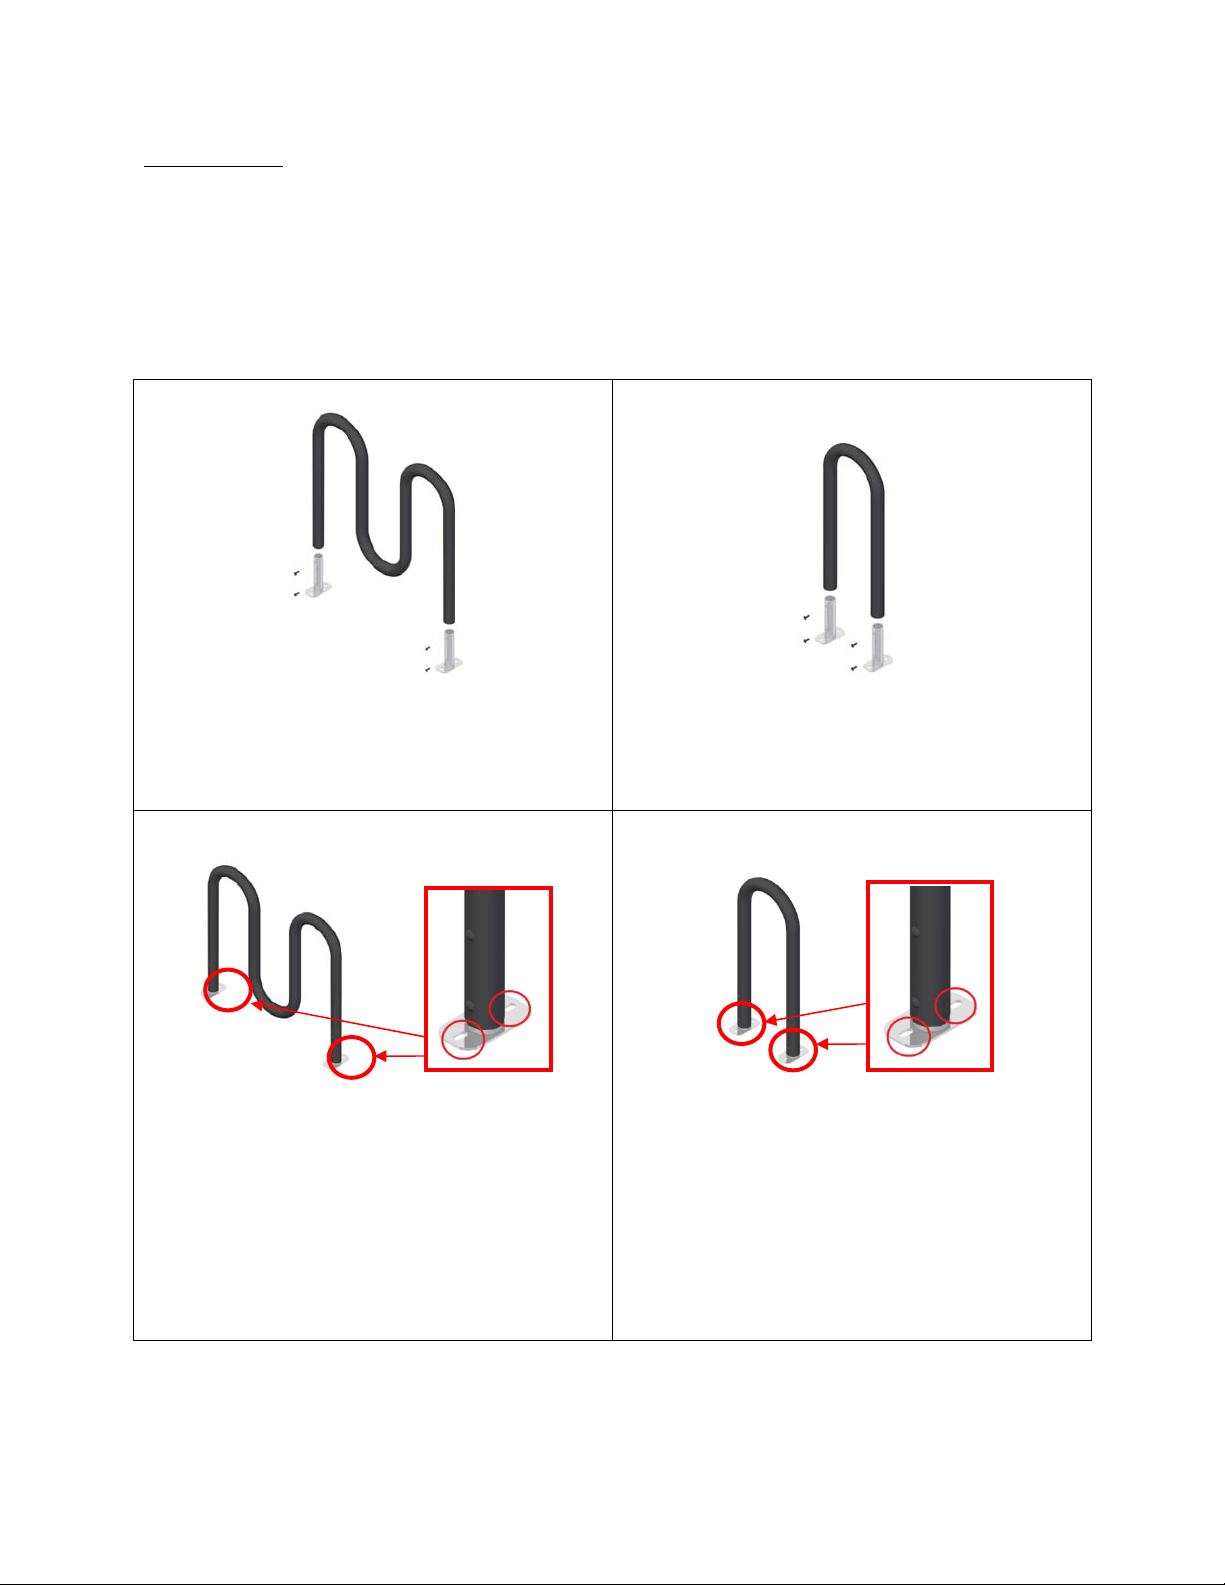
Step 1(2 Hump):
Slide Main tube (Item #1) over two foot plates
(Item #2) and secure foot plates to main tube
using supplied 5/16-18 hardware (Item #3) in (4x)
places.
Step 1(1 Hump):
Slide Main tube (Item #1) over two foot plates
(Item #2) and secure foot plates to main tube
using supplied 5/16-18 hardware (Item #3) in (4x)
places.
Step 2 (2 Hump):
Locate the Bike rack where you would like to
permanently install to a solid surface. Mark the
four mounting holes (shown circled in red) on the
solid surface, remove the bike rack and Drill a 3/8”
Diameter pilot hole 1-3/4” deep into the solid
surface in each location. Place anchor hardware
(Item #5) into the (4x) Pilot holes and slide the
Bike rack’s foot plate mounting holes over the
anchor bolts. Secure the Bike rack to the ground
by securing the anchors to the bike rack with the
3/8” flat washers and 3/8-16 Hex nuts supplied.
Step 2 (1 Hump):
Locate the Bike rack where you would like to
permanently install to a solid surface. Mark the
four mounting holes (shown circled in red) on the
solid surface, remove the bike rack and Drill a 3/8”
Diameter pilot hole 1-3/4” deep into the solid
surface in each location. Place anchor hardware
(Item #5) into the (4x) Pilot holes and slide the
Bike rack’s foot plate mounting holes over the
anchor bolts. Secure the Bike rack to the ground
by securing the anchors to the bike rack with the
3/8” flat washers and 3/8-16 Hex nuts supplied.


