HomeSmart SHGW-001S User manual

Worldclass Intelligent Network 1
Model: SHGW-001S
Infra-red Intelligent Control Gateway Manual

Worldclass Intelligent Network 2
Contents
Foreword......................................................................................................................... 1
Gateway Packaging List................................................................................................. 1
Product Parameters......................................................................................................... 2
Gateway Descpription.....................................................................................................3
Status Indicator Discription............................................................................................ 4
APP Description..............................................................................................................5
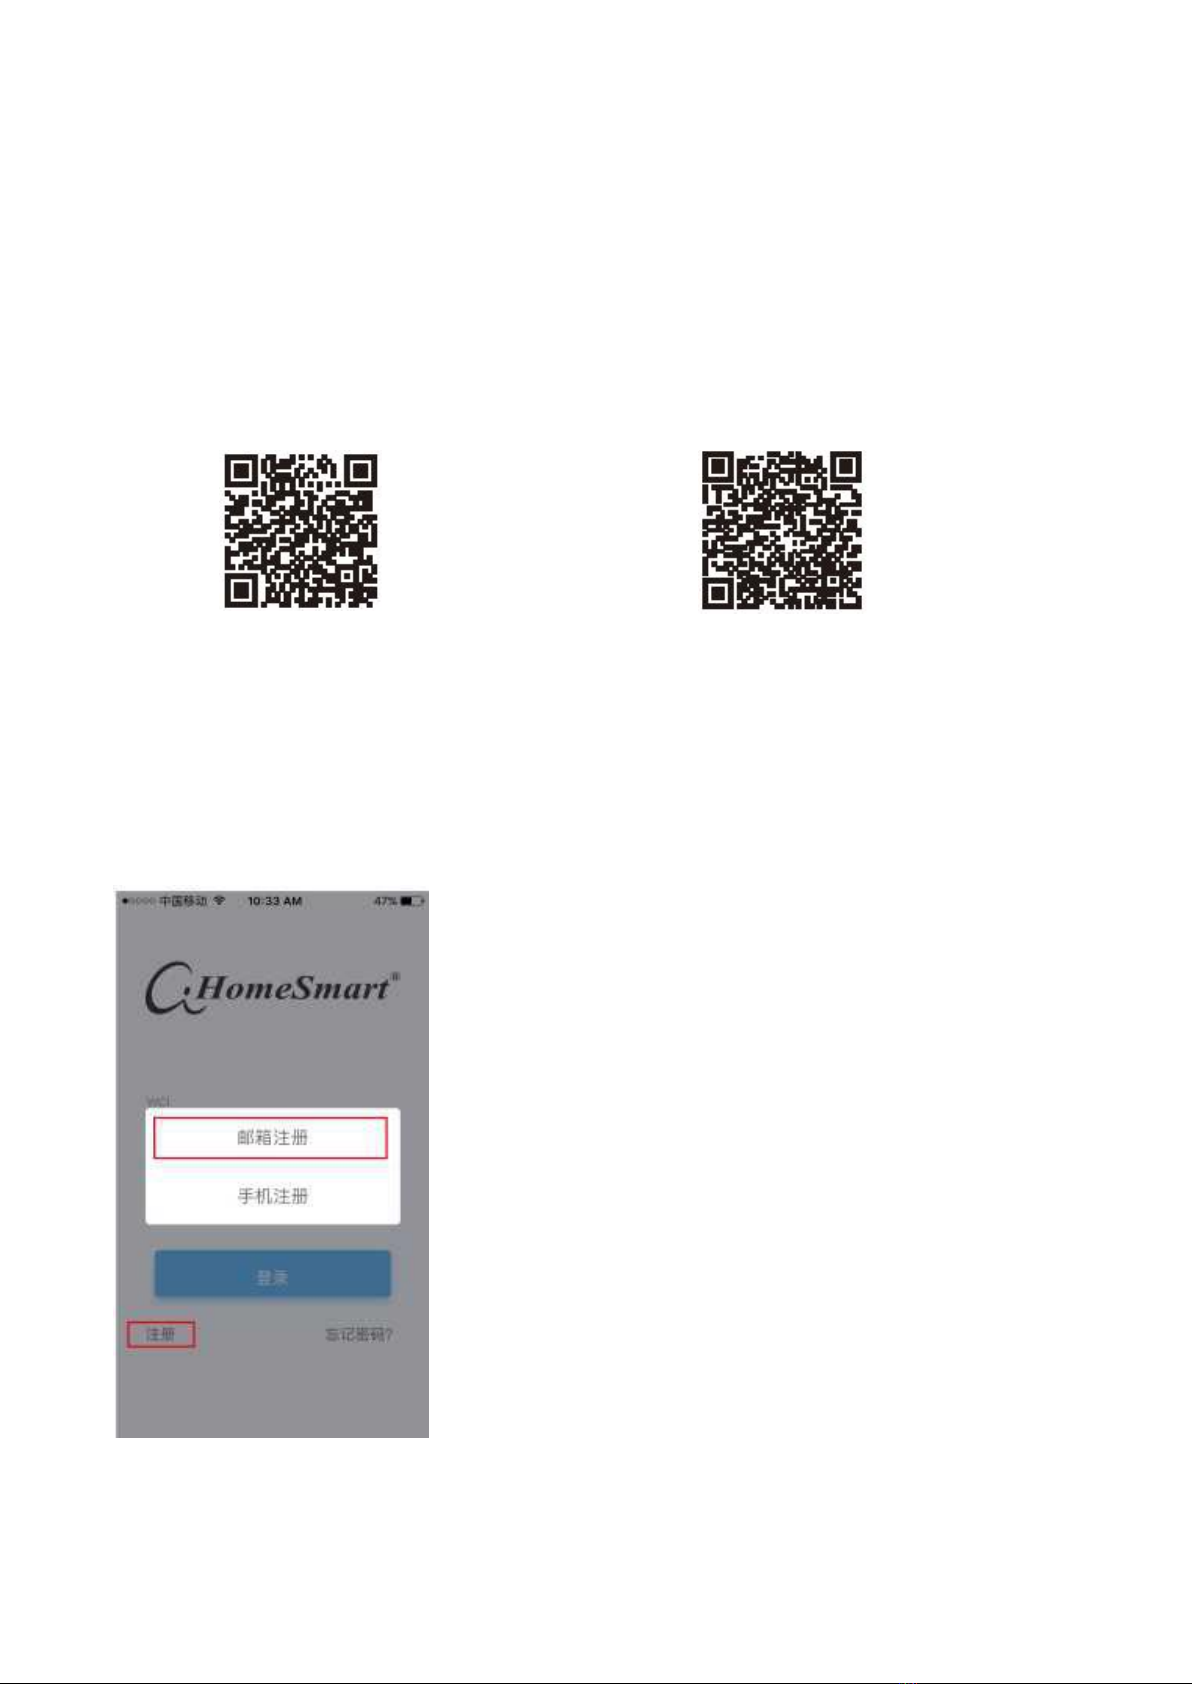
Registration Procedure....................................................................................................5
Mailbox Registration...................................................................................................... 5
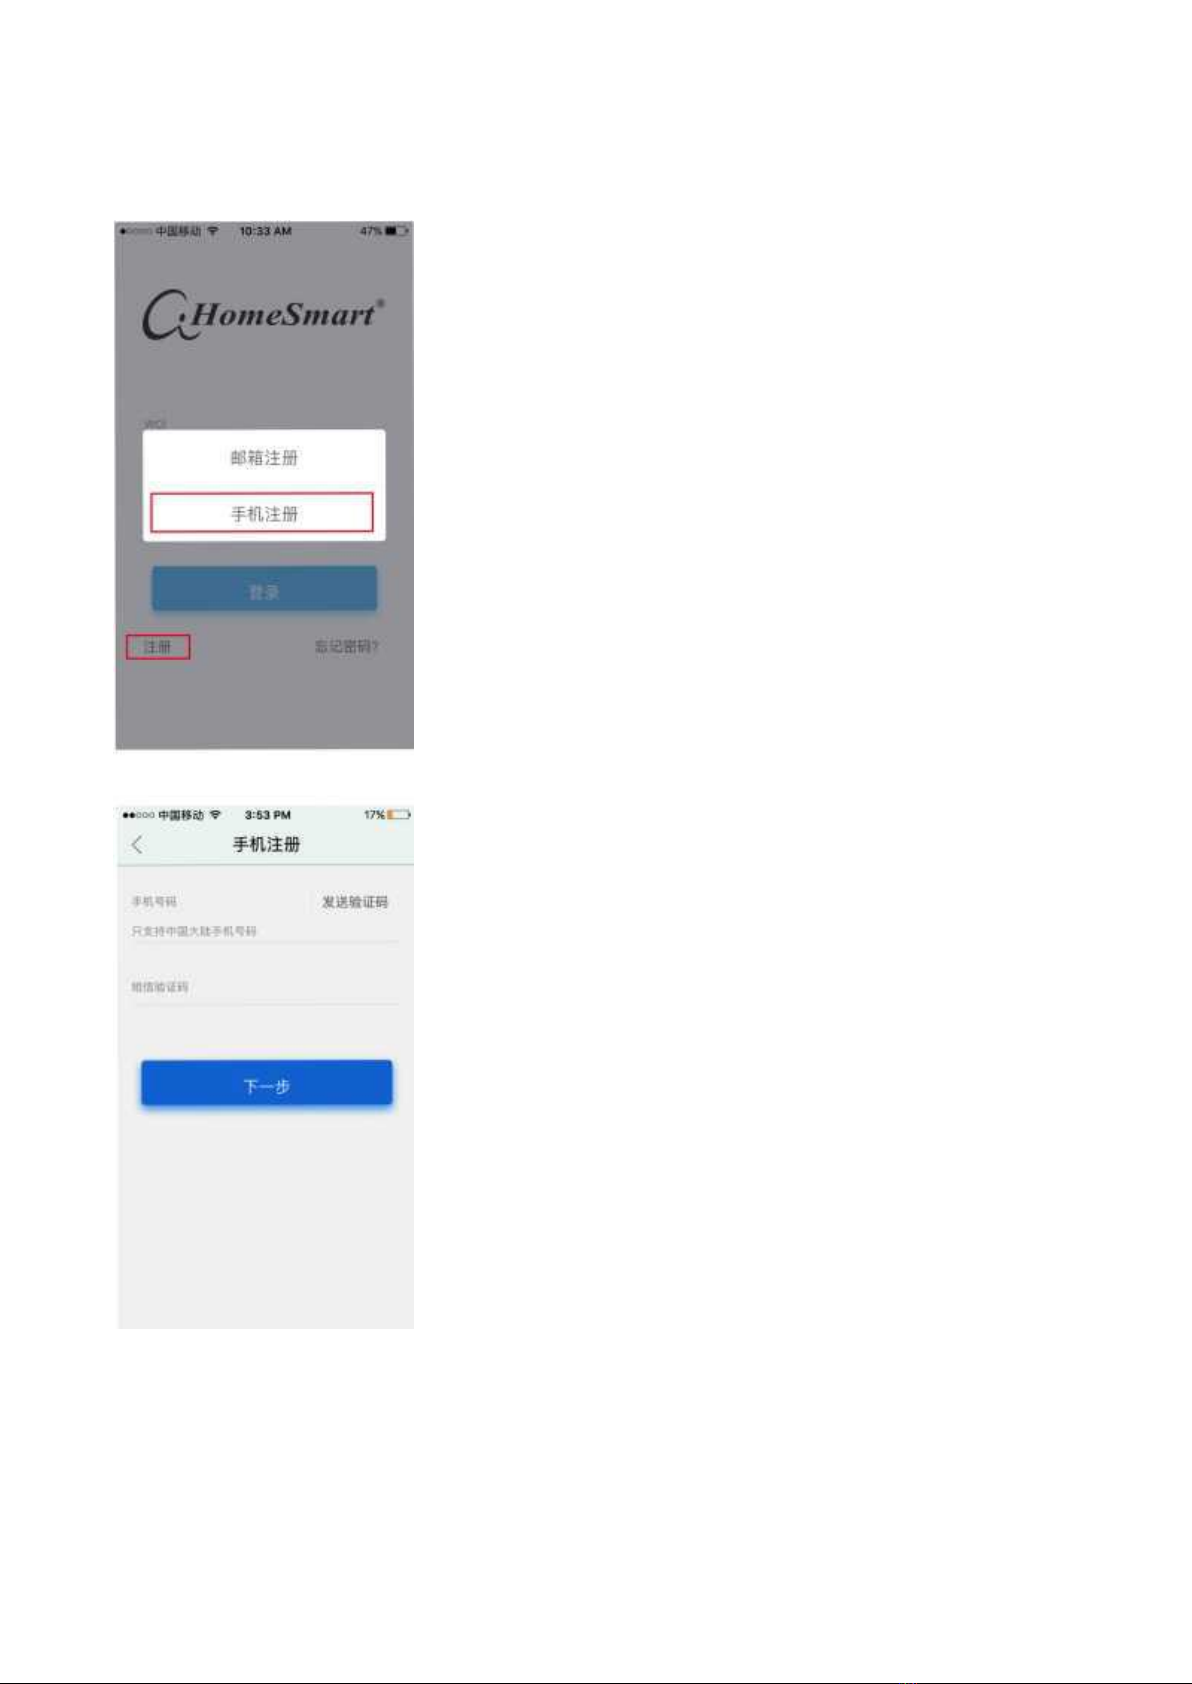
Mobile Phone Registration............................................................................................. 7
Login Procedure..............................................................................................................8
Process after Forgetting Password..................................................................................9
Change password by mobile phone verification............................................................ 9
Change password by mailbox verification..................................................................... 9
APP Settings..................................................................................................................10
Gateway Replacement Description.............................................................................. 10
Gateway Unbinding Description.................................................................................. 11
Gateway Firmware Upgrade Description.....................................................................12
Gateway Add Process................................................................................................... 13
Modify Gateway WIFI Configuration..........................................................................18
Addition of Air Conditioning....................................................................................... 22
Process of Room Addition............................................................................................25
Add/Change/Rename/Delete a Room...........................................................................27
One-click Scenario Description....................................................................................28
Timing Scenario Description........................................................................................31
Use Linkage.................................................................................................................. 34
Sign Out........................................................................................................................ 38
Family Sub-account Management................................................................................ 39

1
Worldclass Intelligent Network 3
Foreword
Dear users, you are welcome to use infrared intelligent control gateway. This manual
will help you to understand and familiarize yourself with the function and experience
of the product.
Note: This product needs network support
Infra-red intelligent control gateway is the core equipment of Worldclass Smart Home.
It can be used as an infrared device with remote infrared emission from mobile phone
APP (Worldclass Smart Home). It can control TV, air-conditioning and cable set-top
box. It has built-in 80000+ off-line remote control code library.
Configure other smart home products of the company to cover most of the home
appliances in your home, making your home life easier and more convenient.
Gateway Packaging List
Infrared Intelligent Control Gateway X1
USB Power adapter (5V/1A) X1
Instruction X1

2
Product Parameters
Operating voltage:
AC100V~240V to DC5V
Operating current:
≤90mA
WIFI Operating frequency:
2.4G~2.5G(2400M~2483.5M)
WIFI Transmitting power:
802.11b: +20dBm/802.11g
+17dBm/802.11n: +14dBm
WIFI Receiving sensitivity:
802.11b:-91dbm/802.11g
-75dbm/802.11n:-72dbm
WIFI Support mode:
Station/SoftAP/SoftAP+Station
WIFI Encryption type:
WEP/TKIP/AES
433 Operating frequency:
433.92MHz
433 Modulation mode:
ASK (AM)/FSK (FM)
433 Transmitting power:
≤20db
433 Receiving sensitivity:
≤-121dBm
433 Communication distance:
>40 m (indoor visual distance)
Infrared emission distance:
>10 meters (no obstacle).
Working environment:
Temperature -20°C~70°C, Relative humidity
20~90%
Shell material:
ABS
Colour of shell:
White/black
Number of gateway adapter
devices:
≤80
Set scenario for each account:
≤40
Number of adapters per scene:
≤25

3
Gateway Descpription
Power interface
External USB5V/1A power supply
Power indicator light (Green)
Display the power on condition,
normally long bright
Key
Restart or enter WIFI configuration mode
1. Restart: Short press gateway key
2. Enter the WIFI configuration: Long press
the gateway key for 5 seconds
Status indicator light (Red)
Display the current working status of
the gateway
Status indicator light (Red)
Power interface
Key
Power indicator light (Green)

4
Status Indicator Discription
Run Long Bright: After the gateway is
powered on, it will start up within 10
seconds. If the gateway has been
configured with WIFI, the indicator light
will remain on for a long time to indicate
that the connection network is successful
and start working.
Configuration Flash: Gateway is
not configured with a wireless network,
indicator light will flash for half a
second, and the gateway enters the
wireless configuration mode. Please
refer to the gateway addition process.
Long Bright Flashing: the gateway
receives the message when it is working
normally, and it flashes for half a second
each time.
Fault Slow Flashing: network
failure (1 second on, 4 seconds off)
Check if the wireless router’s network is
connected in this state.
Disconnect Flashing: When the
wireless router is not connected, the
gateway status indicator is blinking (half a
second on, 2 seconds off), please restart the
wireless router or check if the wireless
password is correct.
Upgrade Flashing: when the
gateway is upgraded, download the
firmware (3 seconds slow flash) to
install the firmware (half a second flash),
upgrade completed (0.1 seconds flash),
restart (lights out), upgrade completed
(long light)

5
APP Description
System version: Android 4.1 above or iOS 6.0 above
Mobile memory: over 50MB
WIFI network: up to 8M or above
Please scan the following QR code to download the APP
Android
iOS
Registration Procedure
→Mailbox Registration
A. Click the "Registration" button in the lower left
corner of the login interface, to enter the
"Registration" page, and click "Mailbox
Registration".

6
B. On the "Registration" page, enter the email
address and click the "Send Verification Code"
button. Enter the verification code received by the
mailbox at the "SMS Verification Code". Click
next to enter the "Complete Information" page.
Note: If you do not receive the verification code,
please check the spam mailbox.
C. On the "Complete Information" page, enter the
account name in the "User Name" field, enter the
password in the "Password" field, and click
"Complete" to complete the operation of the
registration account.

7
→Mobile Phone Registration
A. Click the "Registration" button in the lower left
corner of the login interface, to enter the
"Registration" page, and click "Mailbox
Registration".
B. Enter the phone on the “Registration” page, click
the “Send Verification Code” button. Enter the
verification code received by the phone at the
“SMS Verification Code”. Click Next to go to the
“Complete Information” page.

8
C. In the "Complete Information" page, enter the
name of the account at the "User Name", enter the
password at the "Password", click "Complete",
and complete the operation of the registered
account.
Login Procedure
A.In addition to the "User Name/Mobile Number" of the login page, enter the name of
the account when you registered or the phone number you filled in. Enter the
password at the “Password” and click the “Login” button to complete the login
operation.
B.You can click the box before “Remember the Password” to remember the password.
The next time you log in, you will log in directly without entering the account
password.
C.The newly installed software, when used for the first time, will enter the account
password and click “Login” to enter the boot page.

9
Process after Forgetting Password
Change password by mobile phone verification
A.Click the "Forget the Password?" button in the lower right corner of the login
interface, and the verification method selection page will pop up.
B.Click the "Mobile Phone Verification" to enter the "Mobile Phone Verification"
page.
C.At the "Mobile Phone Number", enter the phone number you entered during
registration, and click the "Get Verification Code" button.
D.At the "Verification Code", enter the verification code received by the phone and
enter the password at “New Password”
E. Click the "Finish" button to complete the password change operation.
Change password by mailbox verification
A.Click the "Forget the Password?" button in the lower right corner of the login
interface, and the verification method selection page will pop up.
B. Click the “Mailbox Verification” to enter the “Mailbox Verification” page
C.At the "Mailbox", enter the email account bound to the account, and click the "Get
Verification Code" button.
D.At the "Verification Code", enter the verification code received by the mailbox and
enter the password at the "New Password".
E. Click the "Finish" button to complete the password change operation.
Note: This method requires you to log in to the software and bind on
the mailbox to the "Basic Information Modification" page.

10
APP Settings
→Gateway Replacement Description
A. Each gateway can only be bound to one
account/phone. If you need to use the same
gateway, you can only log in the sub-account
established by the main account. When the user
account is bound to multiple gateways, you can
click “Settings” in the lower right corner and click
"Device Configuration".
B. Enter the page and click on the gateway you want
to use. Return to the home page and manually
refresh the home page to view the devices
associated with the currently selected gateway.

11
APP Settings
→Gateway Unbinding Description
A. If you want to switch the gateway to another
account/phone binding, the original
account/mobile phone must be unbound. Click
"Settings" in the lower right corner, click "Device
Configuration" to enter the "Device
Configuration" page.
B. Click the "Unbind" in the lower right corner and
click the gateway that needs to be un bound. Click
the "OK" in the upper right corner.
The pop-up "Do you want to clear the device
association and device traces" prompt (click "Yes"
to empty the device trace, click "No" to keep the
device trace, keep adding the device record), click
yes or no to complete the unbind operation.

12
APP Settings
→Gateway Firmware Upgrade Description
A.Click "Settings" in the lower right corner of the
software, go to the "Settings" page, click
"Firmware Upgrade", and the software will
check if the gateway program is up to date. When
prompted for a new version of the gateway
program, click “Yes” to wait for the gateway
update. (After the success of the firmware
upgrade, it will prompt the success of the
upgrade, and failure will prompt the failure of the
upgrade)
Note: If the gateway flashes slowly and does not flash quickly during
the update, the Gateway will reset and restart automatically, please
wait patiently.

13
Gateway Add Process
A. Click the "Device" menu, and then click the "+"
button in the upper right corner to enter the
"Add" page.
B. Click "Gateway" on the "Add" page, enter the
device name according to the APP prompt, and
click “Confirm”.

14
C. Scan the QR code at the bottom of the gateway.
If you can't scan, please enter the serial number
manually.
D. On the pop-up page, enter the device verification
code of four-digits (located on the TAB at the
bottom of the gateway), click "Confirm" to enter
the WiFi settings page.

15
E. See this page and switch the APP to the
background running.
F.
Long press the key for 5 seconds
See indicator light flashing

16
G. Click the phone "Settings" to find the "Wireless
LAN".
H. Find EasyConf-4ACE's wireless LAN, click the
connection and switch back to Smart Home APP.

17
I. Select your home wireless WIFI, enter the
password, and complete the addition.
J. When you see the device page displaying
"Gateway" and the status "Online", it indicates
that the addition is successful.
Note: If the status shows "Offline", please confirm whether the WiFi password is
typed incorrectly.

18
Modify Gateway WIFI Configuration
Modify the gateway WIFI configuration to change the gateway to connect to
WIFI
A. Click to enter the “Device” menu, and click the
gateway device to enter the gateway interface.
B. In the gateway interface, right-click the "。。。"
and select "Modify WIFI Settings".
Table of contents
Popular Gateway manuals by other brands

ArtDio
ArtDio IPS 1000 Series user manual

RTA
RTA 460MMUS-NNA1 Product user guide

Quanmax
Quanmax UbiQ-100 user guide

Rapid Controls
Rapid Controls XG555 Product specification

Viessmann
Viessmann WAGO BACnet/IP Installation and service instructions

Turbo
Turbo Econet GTA Gateway Unit Use and maintenance instructions

NanoSense
NanoSense EnOcean user manual

SMC Networks
SMC Networks EliteConnect SMCWHSG14-G Specifications

ZyXEL Communications
ZyXEL Communications VMG1312-BX0D user guide

SMC Networks
SMC Networks FieldServer FS-EZX-MOD-BAC Startup guide

Billion
Billion BiGuard S10 Specifications

Arris
Arris SurfBoard SVG2482AC user guide