6
www.homewerksww.com
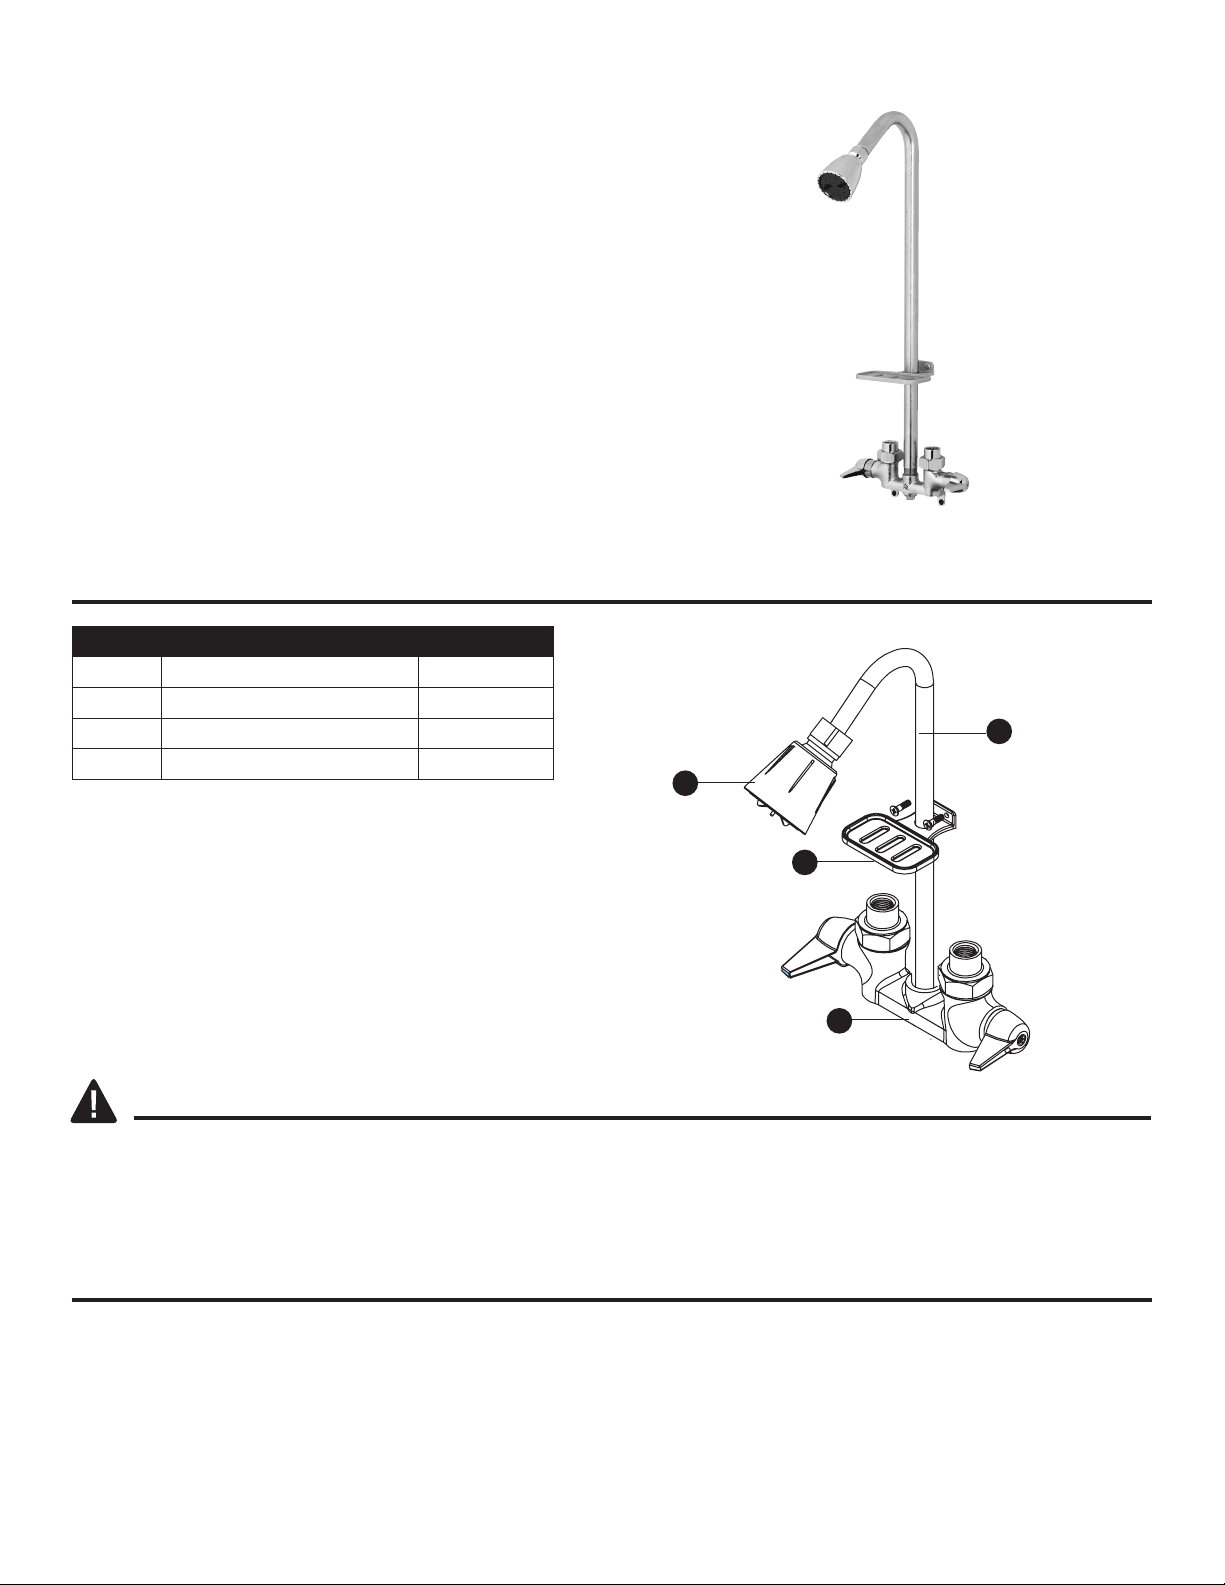
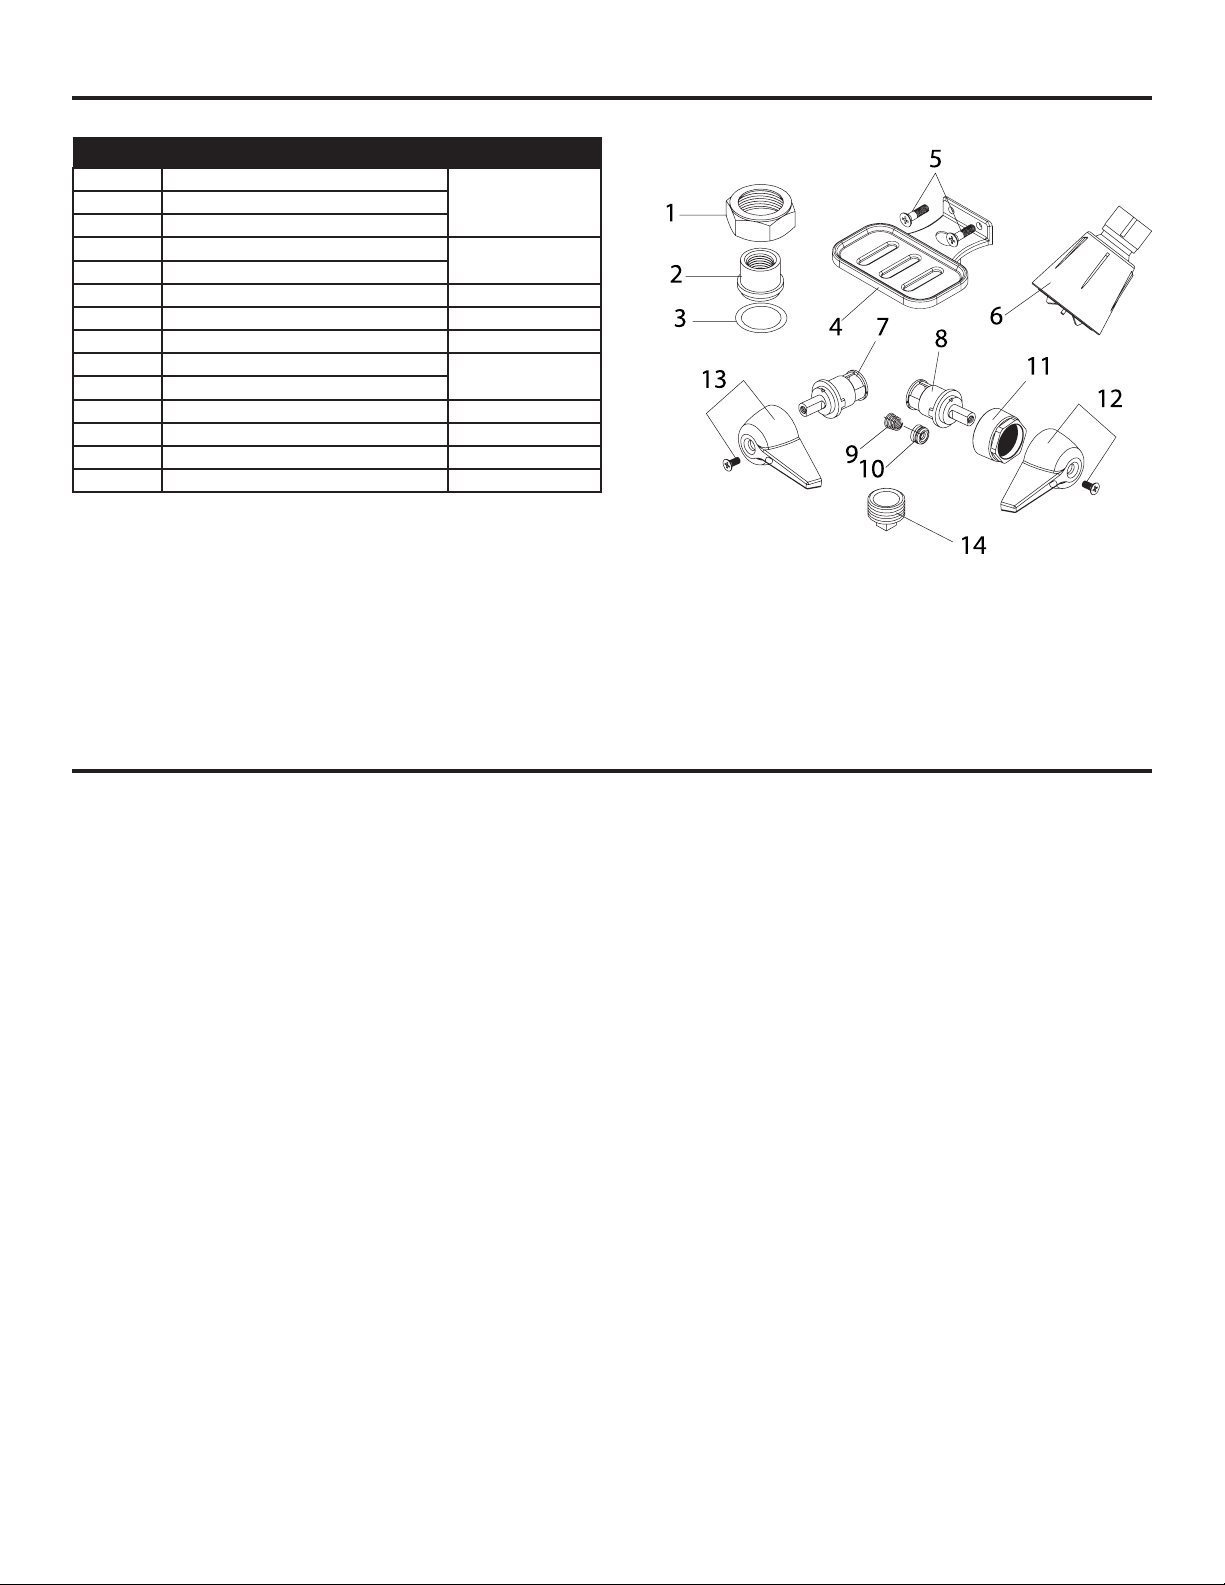
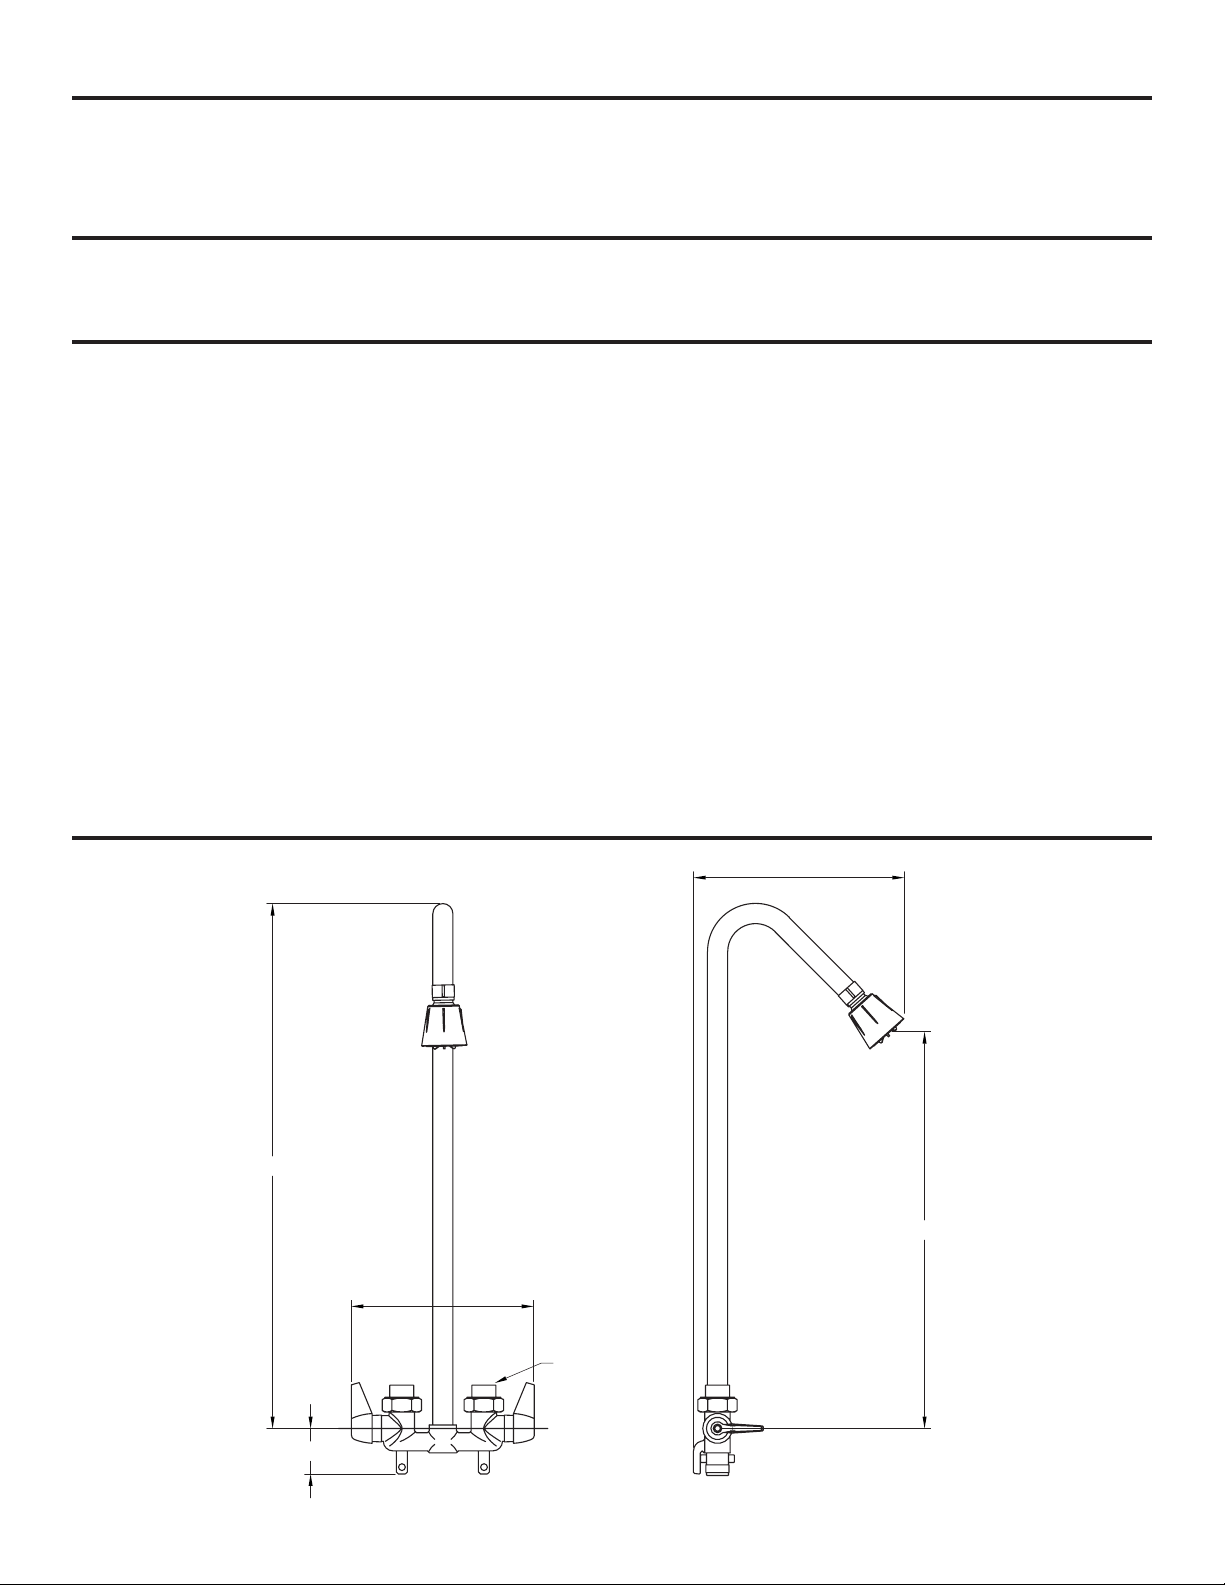
ESPECIFICACIONES DEL PRODUCTO
ESPECIFICACIONES ESPECIFICACIONES
Max. Caudal: 1,8 GPM (6,8 LPM) a 80 PSI El peso total del material: 1,706 libras.
Cromado
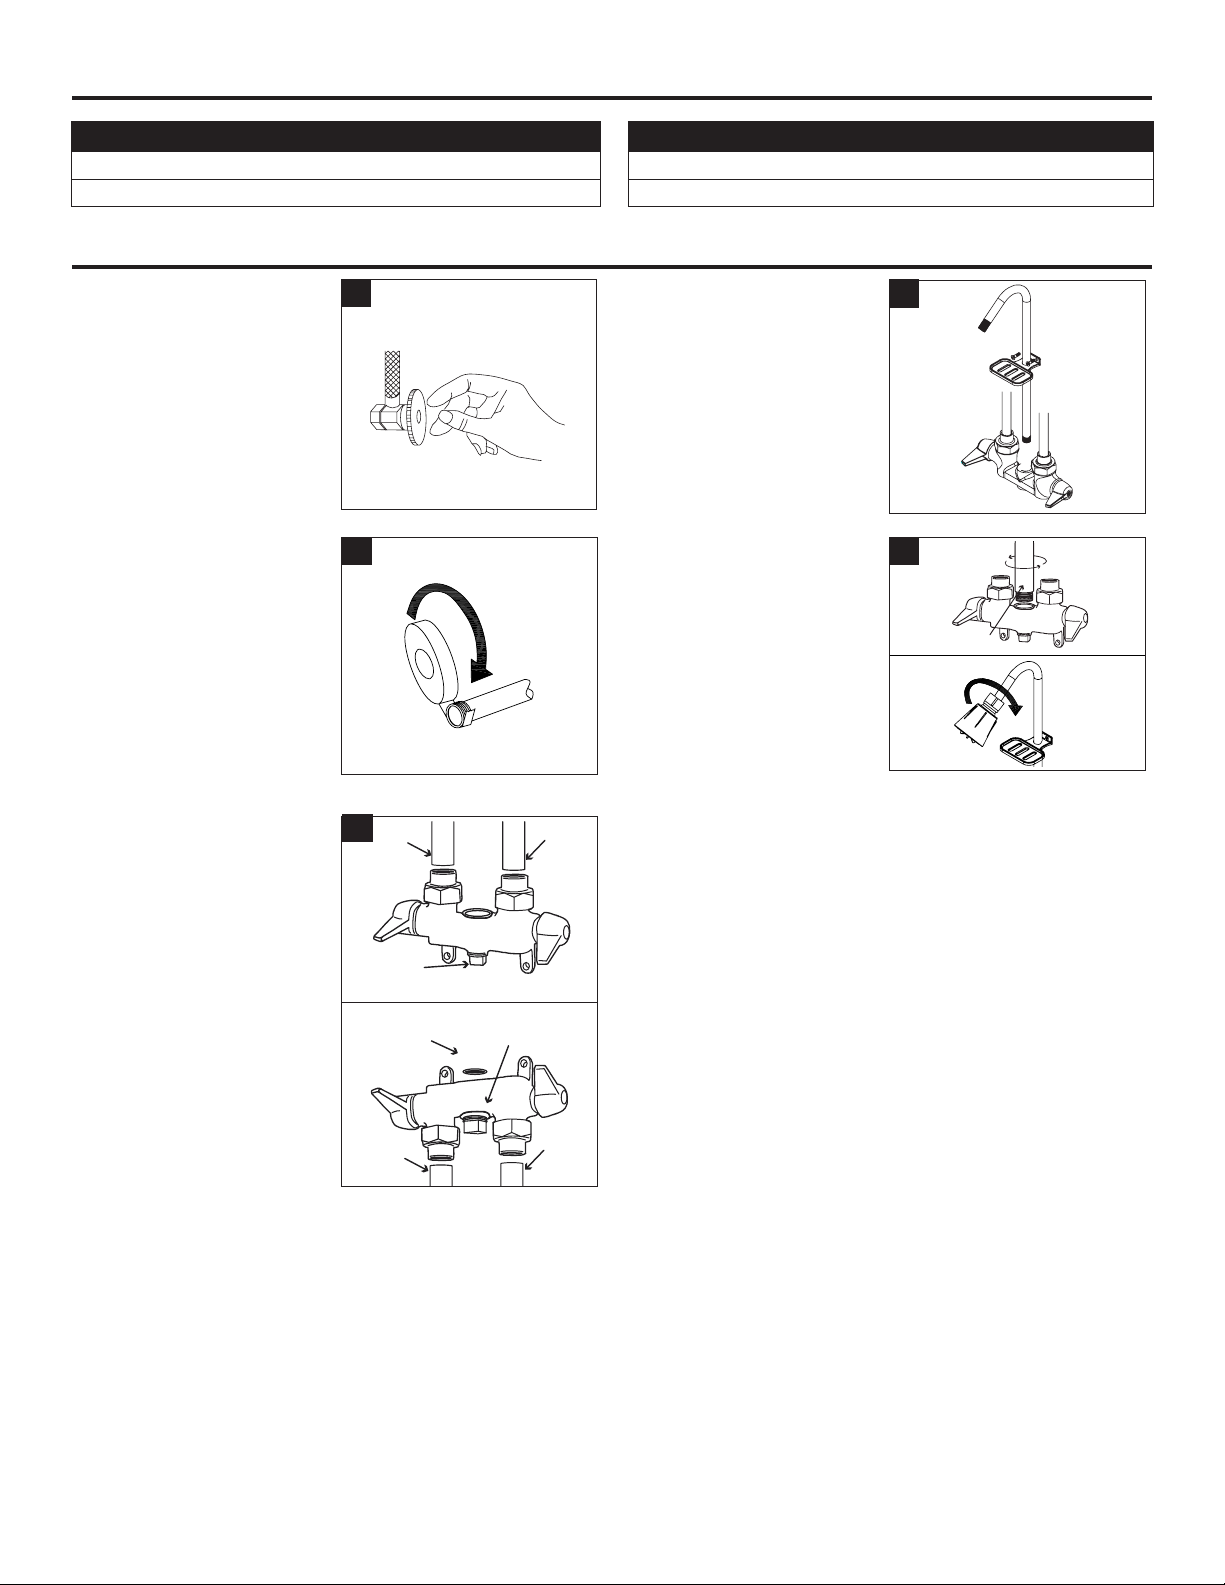
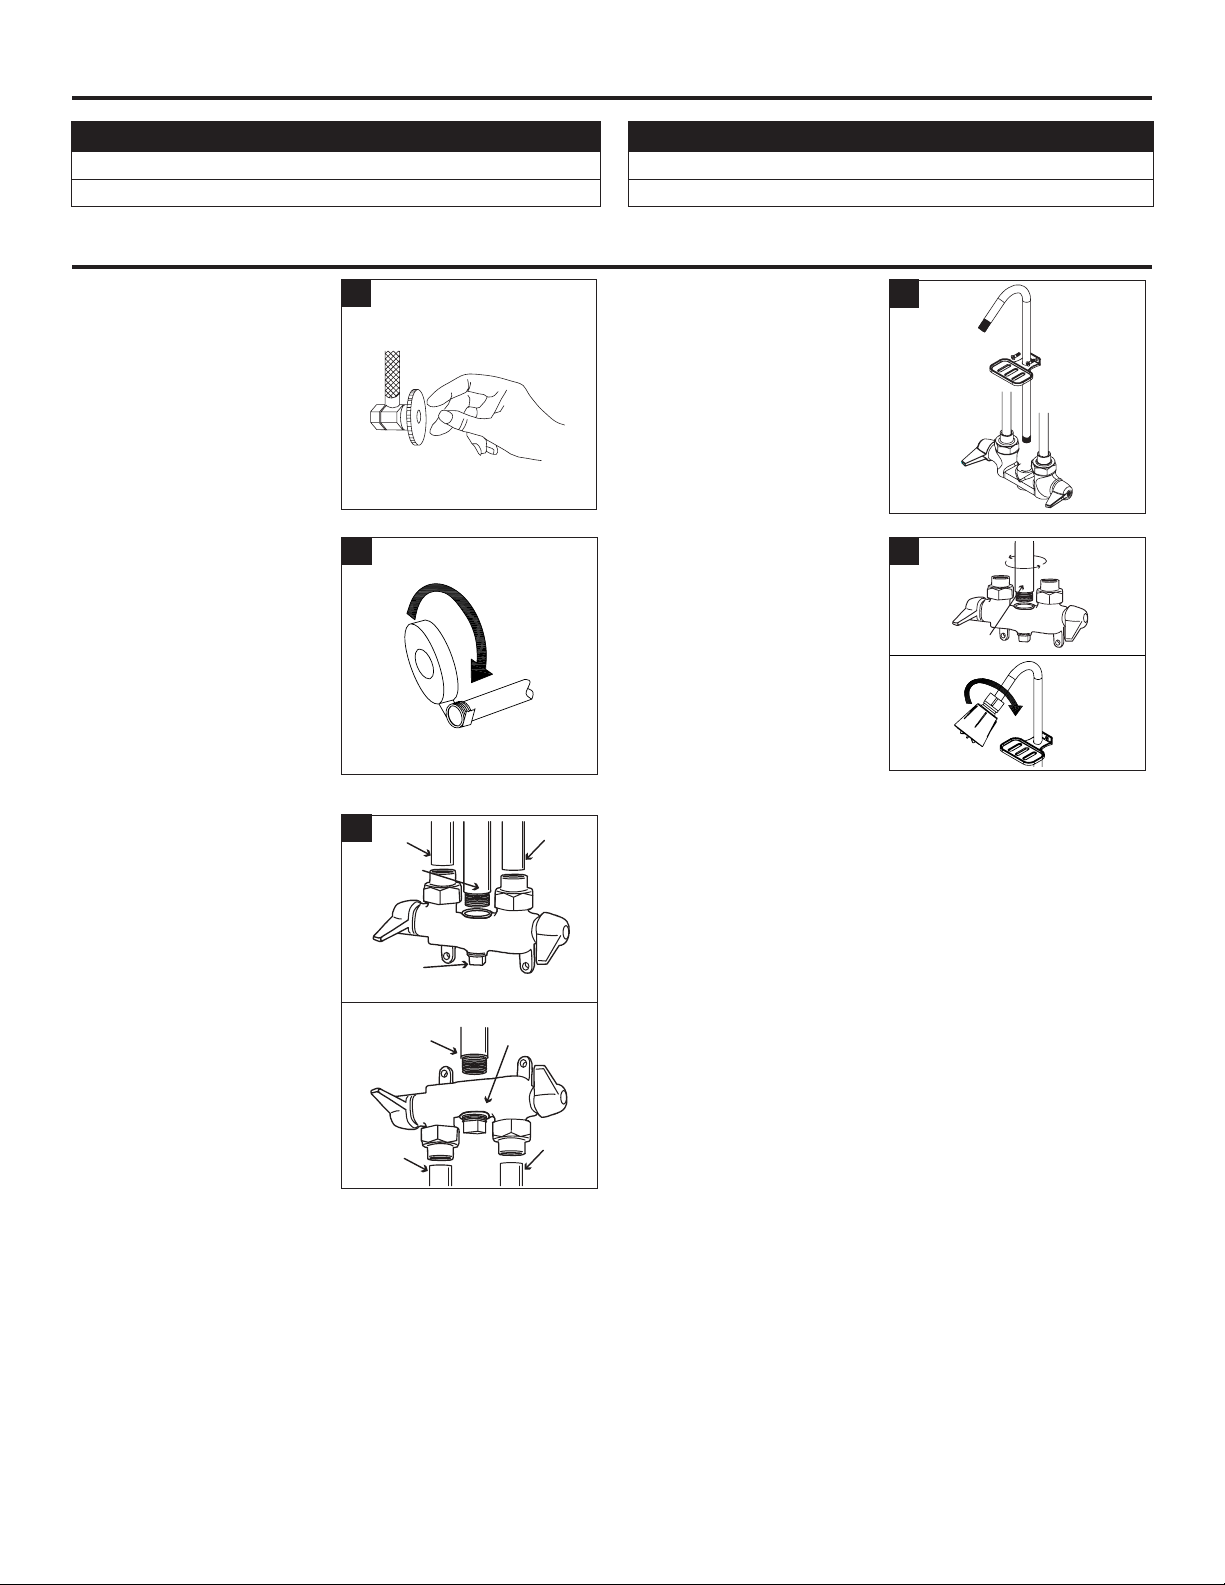
INSTRUCCIONES DE MONTAJE
1. Cierre el agua en la válvula de
suministro debajo del fregadero
o en el suministro de agua
principal, desconecte la línea
de alimentación y retire la llave
vieja.
Limpia y seca el área de la
supercie donde se montará
nuevo grifo.
14. Deslice jabonera sobre el brazo
de ducha. Asegúrese de que las
lengüetas de montaje del plato
de jabón están apuntando hacia
arriba hacia la curva del brazo de
la ducha (señalando hacia el
lugar donde será alcachofa de la
ducha).
4
2. El uso de cinta selladora de
roscas (a la derecha envuelta)
o compuesto para juntas de
tuberías, cubrir todas las áreas
expuestas con rosca macho.
Posición kit de ducha para los
controles estarán a una altura
cómoda y el conjunto de mango
tiene una supercie rme sólido
(2 x 4, bloque de hormigón) para
montar a.
25. Fondo de la rosca del brazo de la
ducha sobre el conjunto del
soporte de la ducha. Giro hasta
que quede apretado, haga
sección de la cabeza de ducha
Seguro (curva en el brazo) está
apuntando lejos de las orejas de
montaje en el conjunto del
mango.
Coloque la cabeza de ducha al
brazo de ducha superior en un
movimiento hacia la derecha.
El uso de tornillos suministrados,
je el plato de jabón a la altura
deseada en la pared.
SHOWER
ARM
5
3. Determinar si el suministro de
agua está llegando desde arriba
o por debajo del conjunto de
mango de ducha. Si viene desde
arriba, continúe con el siguiente
paso. Si desde abajo, utilizar
una llave para quitar el tapón del
desviador en el soporte de la
ducha
Asamblea. Envolver los hilos de
cinta de PTFE o compuesto.
Coloque el tapón en la abertura
del tapón opuesto (enfrente de
las orejas colgantes). Apriete
rmemente.
Para utilizar al aire libre o con
una sola fuente de agua (fría).
Adaptar el suministro de agua
para encajar en el lado de
suministro de agua fría.
Asegúrese de que el grifo de
agua caliente permanece
cerrada en todo momento.
ADVERTENCIA: NO use con
sólo un gancho de agua
caliente para arriba. Se
producirán quemaduras
graves.
SHOWER
ARM
COLDHOT
HOT COLD
DIVERTER
PLUG
DIVERTER
PLUG
36. Uso de 1/2 pulg. adaptadores macho, conecte las líneas de
suministro de agua caliente y fría. Caliente debe ir en la parte
izquierda según se mira en el conjunto del mango.
Abra el agua en la válvula principal.
Encienda ducha y purgar las tuberías de agua caliente y fría
durante 30 segundos para eliminar los residuos.
Apagar la ducha y adjuntar alcachofa de la ducha.
7. Coloque la cabeza de ducha de la parte superior de brazo de
ducha. No apriete demasiado. Utilice un paño en las mordazas de
la llave para proteger el acabado de la alcachofa de la ducha.
8. Conjunto de mango de ducha del montaje a una supercie sólida
mediante el uso de anclas / pernos / tornillos (no incluidos) a
través de las orejas de montaje.