manuals.online logo
Brands
  1. Home
  2. •
  3. Brands
  4. •
  5. Honeywell
  6. •
  7. Security Sensor
  8. •
  9. Honeywell V-Plex IS3050A-SN User manual

Honeywell V-Plex IS3050A-SN User manual

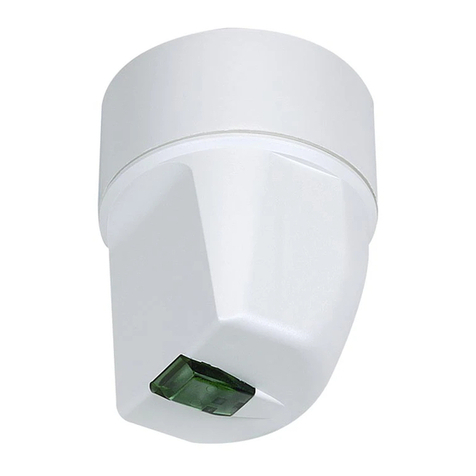
V-Plex® Series Motion Sensors
IS3050A-SN V-Plex
®
Passive Infrared Motion Sensor with Anti-Mask – Quick Installation Guide
D tecteur de mouvement â infrarouge passif avec Anti-masque IS3050A-SN V-Plex
®
– Guide d'installation rapide
Sensor de Movimiento Pasivo Infrarrojo con Antienmascarmiento IS3050A-SN V-Plex
®
– Guía Rápida de Instalación
Sensor de Movimento infravermelho passivo com Anti-máscara IS3050A-SN V-Plex
®
– Guia rápido de instalação
1
2.1 - 2.7 m
(6' 9" - 8' 9")
30 cm
(12")
*
* Keep Clear
*
2.3 m
(7' 6")
IS3050A-SN_step1-QIG
2
3
1
2
IS3050A-SN_step2-QIG
#6
(3.5 mm)
A
A
BB
B
3
A
B
#6 x 1 1/4"
(3.5 mm x 32 mm)
X X
A
B
BB
IS3050A-SN_step3-QIG
4
P U L L
TO D I S A B L E
L O O K DO W N
ON
HIG H TR AFFIC INH IB IT
AN TI -M AS K
LE D
OF F
ON
1 2 3
IS3050A-SN_step4-QIG
*Look
Down
Enabled
Look
Down
Disabled
*Factory default
LED
*Anti-mask
Disabled
Anti-mask
Enabled
ON
OFF
1 2 3
*
*
Keep Clear
*Effacez
* Mant ngase alejado
* Mantenha desobstruído
Look Down Disabled /
Désactivation de la vue
vers le bas / Mirar hacia
abajo desactivado /
Visão para baixo
desativada
*Look Down Enabled /
*Activation de la vue
vers le bas / *Mirar
hacia abajo activado /
*Visão para baixo
ativada
Anti
-
mask Enabled
Activationde l'anti-masque
Anti enmascaramiento activado
Antimáscara ativada
*Anti
-
mask Disabled
*Antimáscara desativada
*Anti enmascaramiento desactivado
*Antimáscara desativada
*Factory Default
* Paramètres d'usine
*Predeterminado de fábrica
* Padrão de fábrica
**
Avoid mounting anything within 12" (30cm) in front of the sensor / **
Évitez d’installer quoi que ce soit en-deçà de 30 cm
(12 po) du capteur / ** Evitar la colocación de objetos a menos de 30 cm (12”) al frente del sensor* / ** Evitar a instalação de
qualquer item a uma distância de 30 cm à frente do sensor
*.
**
- 2 -
5
22-20 AWG
(0.31-0.52mm2)
1
2
IS3050A-SN_step5-QIG
2 1
V-V+
Polling Loop
9 - 13V
Pk - PK
Note: A masking condition can occur when blocking or reflective material is placed in front of the sensor. Keep 12” (30cm) in front of the sensor clear.
Remarque : Une condition de masquage peut se produire quand du matériel bloquant ou réfléchissant est placé devant le capteur. Gardez u
n espace
libre de 30 cm (12 po) devant le capteur.
Nota: Una condición de enmascaramiento puede ocurrir si se coloca frente al sensor algún objeto que bloquee o refleje. Guarde una distancia de
30cm (12”) frente al sensor.
Nota: Uma condição de mascaramento pode ocorrer quando se um mate
rial reflector ou que bloqueia é colocado em frente do sensor. Mantenha uma
distância de 30 centímetros (12 ") em frente do sensor.
6
20 sec
30
0
45
20
10
Walk Test Reset
1/2 sec.
hold 4x
< 4’ (1.2m)
IS3050A-SN_step6-QIG
ON
1 2 3
ON
OFF
1. Close the sensor and apply power to the sensor. Initialization is
complete when the LED stops flashing slowly (about 20 seconds).
2. Walk through the detection area and observe the LED.
Walk test mode is active for 10 minutes, then automatically exits test mode,
disables the LED and enters normal operation mode. For an additional 10
minute walk test, enable Walk Test mode again with the flashlight feature.
Note: During power up and walk test modes the LED is active regardless of
the LED Enable/Disable DIP switch setting.
1. Alimentez la sonde. L'initialisation est terminée lorsque le voyant DEL
cesse de clignoter lentement (environ 20 secondes).
2. Walk through the detection area and observe the LED.
Le test de marche dure 10 minutes, puis le système quitte automatiquement
le mode test, désactive le voyant DEL et retourne au mode de
fonctionnement normal. Pour 10 minutes de test de marche supplémentaires,
activez de nouveau le mode test de marche avec la fonction lampe de poche.
Remarque: Pendant les modes Allumage et Test de marche, le voyant DEL
est activé indépendamment du réglage du commutateur DIP
d'activation/désactivation du voyant DEL.
Voyant
DEL
Mise sous
tension
Test de
marche Normal Anomalie
Anti
-
masque
Rouge
Clignotement
lent
Alarme
ACTIVÉE
Alarme
ACTIVÉE
Clignotement
rapide ARRÊT
Jaune
ARRÊT ARRÊT ARRÊT ARRÊT
Clignotement
rapide
1. Conecte el sensor. La inicialización estará completa cuando la luz LED
deje de parpadear lentamente (aproximadamente 20 segundos).
2. Realice una prueba de detección de presencia en el área de detección y
observe la luz LED.
El modo de prueba de detección de presencia estará activo durante 10
minutos, luego saldrá automáticamente del modo de prueba, desactivará la
luz LED e ingresará en el modo de funcionamiento normal. Si necesita una
prueba de detección de presencia durante otros 10 minutos, active el modo
de detección de presencia nuevamente con la función de linterna.
Nota: Durante los modos de encendido y prueba de detección de presencia,
la luz LED estará activa independientemente del ajuste del interruptor Activar
LED/Desactivar DIP.
LED Encendido
Prueba de
detección
de
presencia
Normal Problema Anti
enmascaramiento
Rojo
Parpadeo
lento
Alarma
Encendida
Alarma
Encendida
Parpadeo
rápido APAGADO
Amarillo
APAGADO
APAGADO APAGADO APAGADO
Parpadeo
rápido
1. Ligue o sensor. A inicialização é concluída quando o LED para de piscar
lentamente (em cerca de 20 segundos).
2. Caminhe pela área de detecção e observe o LED.
O sistema fica ativo no modo de teste de caminhada por 10 minutos, sai
automaticamente do modo de teste, desativa o LED e entra no modo de
operação normal. Para um teste adicional de 10 minutos, ative o modo de
teste de caminhada novamente com o recurso lanterna.
Observação: Durante a inicialização e modos de teste de caminhada, o
LED fica ativo independentemente da configuração do interruptor DIP de
ativar/desativar LED.
LED Ligado Teste de
caminhada Normal Problema Antimáscara
Vermelho
Intermitência
lenta
Alarme
ligado
Alarme
ligado
Intermitência
rápida Desligado
Amarelo
Desligado Desligado Desligado Desligado Intermitência
rápida
LED Power Up
Walk Test Normal Fault Anti-Mask
Red Slo
Blink
ON
Alarm
ON
Alarm
Fast
Blink OFF
Yellow OFF OFF OFF OFF Fast
Blink
Walk Test Reset / Réinitialisation du test de marche
/
Restablecimiento de prueba de detección de presencia /
Redefinição de teste de caminhada
Polling Loop, 9
-
13V PK
-
PK
Boucle d’invitation, 9-13V PK-PK
Bucle de llamada selectiva, 9-13V PK-PK
Loop de sondagem, 9-13V PK-PK
½ sec. hold 4x
Appuyez dessus et maintenez enfoncé pendant ½ sec. 4x
Espera 4x de ½ seg.
Espere 4x de ½ seg.
- 3 -
Top View
Vue de dessus
Vista Desde Arriba
Vista Superior
Side View
Vue de coté
Vista Lateral
Vista Lateral
0
0.5
1.85
2.3m
PLAN VIEW
ALL ZONES
7’
2 m
0
0
13’
4 m
20’
6 m
7’
8 m
33’
10 m
40’
12 m
7’
2 m
13’
4 m
20’
6 m
7’
8 m
33’
10 m
40’
12 m
7’
2 m
13’
4 m
20’
6 m
7’
8 m
33’
10 m
40’
12 m 46’
14 m
53’
16 m
7’
2 m
0
13’
4 m
20’
6 m
7’
8 m
33’
10 m
40’
12 m
46’
14 m
53’
16 m
IntermediateC10
Long
Zones
D36
Look-downA2
LowerB12
B C D
7
IS3050A-SN_step7-QIG
TROUBLESHOOTING:
TROUBLE*
NORMAL
Mask
1
Self
-
Test Failure
2
Red LED
Off Off Flashing
Yellow LED
Off Flashing Off
*TROUBLE CONDITIONS:
1
Mask condition: Sensor IR window is blocked or masked.
2
Self-Test Failure conditions:
• PIR self-test failure: The sensor is disabled.
• Temperature compensation failure: The temperature compensation is disabled.
Depending on the Trouble condition, take the following corrective actions:
• Verify the sensor is not blocked or masked.
• Cycle power to the sensor.
• Walk test the sensor.
If the Trouble condition does not clear, replace the sensor.
DÉPANNAGE :
*PANNES:
1
État du masque : La fenêtre IR de la sonde est bloquée ou masquée.
2
Conditions d'échec de l'auto-test:
• Échec de l'auto-test du PIR: Le capteur est désactivé.
• Échec de compensation de température : La compensation de température est
désactivée.
Appliquez les mesures correctives suivantes en fonction des pannes :
• Vérifiez que la sonde n'est pas bloquée ou masquée.
• Remettez la sonde sous tension.
• Effectuez un test de marche de la sonde.
Si la panne persiste, remplacez la sonde.
ANOMALIE*
NORMAL
Masque
1
Échec de l'auto
-
test
2
Voyant DEL
rouge Arrêt Arrêt Clignotement
Voyant DEL
jaune Arrêt Clignotement Arrêt
RESOLUCIÓN DE PROBLEMAS:
*CONDICIONES DE PROBLEMAS:
1
Condición de enmascaramiento: La ventana IR del sensor está bloqueada o
enmascarada.
2
Condiciones de falla de autoverificación:
• Falla de autoevaluación de PIR: El sensor está desactivado.
• Falla de compensación de temperatura: Compensación de temperatura
desactivada.
Según la condición del problema, tome las siguientes medidas correctivas:
• Verifique que el sensor no está bloqueado o enmascarado.
• Desconecte y vuelva a conectar el sensor.
• Realice una prueba de detección de presencia con el sensor.
Si el problema persiste, cambie el sensor.
PROBLEMA*
NORMAL
Enmascaramiento
1
Falla de
autoverificación
2
LED roja
Apagado Apagado Parpadeando
LED
amarilla Apagado Parpadeando Apagado
SOLUÇÃO DE PROBLEMAS:
*CONDIÇÕES DE PROBLEMA:
1
Condição de máscara: Janela de IR de sensor está bloqueada ou obstruída.
2
Condições de falha de autoteste:
• Falha de autoteste de PIR: O sensor está desativado.
• Falha de compensação de temperatura: A compensação de temperatura está
desativada.
Dependendo da condição do problema, adote as seguintes medidas corretivas:
• Verifique se o sensor não está bloqueado ou obstruído.
• Ligue e desligue o sensor.
• Faça um teste de caminhada no sensor.
Se a condição de problema não for solucionada, substitua o sensor.
PROBLEMA*
NORMAL
Máscara
1
Falha de autoteste
2
LED
vermelho Apagado Apagado Piscando
LED amarelo
Apagado Piscando
Apagado
SPECIFICATIONS /
SP
É
CIFICATIONS /
ESPECIFICACIONES /
ESPECIFICAÇÕES
Electrical Ratings: 9.5 – 15VDC, Max. 4mA at 9.5VDC; Max. 6.2mA at 15VDC.
Operating Temperature: 14°to 131°F / -10°to 55°C / Température de fonctionnement: -10 à 55 °C / 14 à 131 °F /
Temperatura de operación: -10°a 55°C / 14°a 131°F / Temperatura de Operação: -10°to 55°C / 14°to 131°F
Relative Humidity: 5 to 93% (UL tested at 93%); non-condensing / Humidité relative: 5 % à 93 % (testé UL à 93 %), sans condensation /
Humedad Relativa: 5 to 93% (Prueba UL al 93%); sin-condensación / Humidade Relativa: 5 to 93% (testado pela UL a 93%); sem condensação
Zones / Zones / Zonas / Zonas
A
2
Look-down / Basses / Vista Zona 0 /
Vigilância inferior
B
12
Lower / Courtes / Cercana/ Mais baixas
C
10
Intermediate / Intermédiaires / Intermedia /
Intermédias
D
36
Long / Longues / Largo Alcance / Longo
alcance
- 4 -
APPROVAL/ LISTINGS:
•FCC part 15, Class B verified
•IC ICES-003, Class B verified
•UL 639
•ULC S306-03
•SIA-PIR-01 Passive Infrared detector standard features for false alarm
immunity.
Product must be tested at least once each year / Le fonctionnement du produit doit être vérifié au moins une fois par année /
El producto debe ser probado al menos una vez al año / O produto deve ser testado pelo menos uma vez por ano
All wiring must be in accordance with: the National Electrical Code (ANSI/NFPA70); the Canadian Electrical Code, Part I (where applicable); UL681,
Standard for Installation and Classification of Burglar and Holdup Alarm Systems; ULC-S302, Standard for Installation and Classification of Burglar
Alarm Systems for Financial and Commercial Premises, Safes and Vaults; ULC-S310, Standard for Installation and Classification of Residential Burglar
Alarm Systems; local codes and the authorities having jurisdiction.
The products are intended to be powered by a power-limited output of a UL/CUL Listed Burglar Alarm control unit, or via a Listed UL603/ULC-S318
power-limited power supply that provides 4 hours of standby power.
The sensor must be mounted indoors, within the protected premises, and on a wooden stud, solid wood or with a robust wall anchor.
UL Notes: All interconnecting devices must be UL listed. The anti-mask feature has not been evaluated by UL.
•REFER TO THE INSTALLATION INSTRUCTIONS FOR THE CONTROL WITH WHICH THIS DEVICE IS USED FOR DETAILS REGARDING LIMITATIONS OF THE ENTIRE ALARM SYSTEM.
•POUR OBTENIR DES RENSEIGNEMENTS SUR LA GARANTIE ET LES LIMITATIONS DU SYSTğME D'ALARME DANS SON ENSEMBLE, CONSULTEZ LE GUIDE D'INSTALLATION ET DE CONFIGUR
ATION RELATIF AU PANNEAU DE COMMANDE UTILISḩ EN CONJONCTION AVEC L'APPAREIL.
•CONSULTE LA GUíA DE INSTALACIłN Y CONFIGURACIłN PARA EL CONTROL CON EL CUAL SE UTILIZA ESTE DISPOSITIVO, PARA OBTENER INFORMACIłN SOBRE LA GARANTíA, Y CONOCE
R LAS LIMITACIONES DE TODO EL SISTEMA.
•CONSULTE AS INSTRUÇÕES DE INSTALAÇÃO PARA O CONTROLE COM O QUAL O DISPOSITIVO É USADO PARA OBTER DETALHES SOBRE AS LIMITAÇÕES DE TODO O SISTEMA DE
ALARME.
For the latest documentation and online support information, please go to:
Pour de l’assistance en ligne, visitez :
Para recibir soporte en línea, visite:
Para qualquer informação adicional, contacte:
http:// .security.honey ell.com/hsc/resources/MyWebTech/
For the latest U.S. arranty information, please go to: .honey ell.com/security/hsc/resources/ a or
Please contact your local authorized Honey ell representative for product arranty information.
Pour obtenir de l'information sur la garantie de ce produit, veuillez communiquer avec le représentant
autorisé de Honey ell de votre région.
Por favor contacte con su distribuidor Honey ell Security para información sobre la garantía del producto.
Contacte o representante autorizado Honey ell local para obter informações relativas a garantia.
2017 Honey ell International Inc. Honey ell, V-Plex and DUAL TEC are registered trademarks of Honey ell International Inc.
All other trademarks are the properties of their respective o ners. All rights reserved.
P/N 800-23447-2 07/17 Rev A
FEDERAL COMMUNICATIONS COMMISSION STATEMENTS
The user shall not make any changes or modifications to the equipment unless authorized by the Installation Instructions or User's Manual.
Unauthorized changes or modifications could void the user's authority to operate the equipment.
CLASS B DIGITAL DEVICE STATEMENT
This equipment has been tested to FCC requirements and has been found acceptable for use. The FCC requires the following statement for your
information:
This equipment generates and uses radio frequency energy and if not installed and used properly, that is, in strict accordance with the
manufacturer's instructions, may cause interference to radio and television reception. It has been type tested and found to comply with the limits for
a Class B computing device in accordance with the specifications in Part 15 of FCC Rules, which are designed to provide reasonable protection
against such interference in a residential installation. However, there is no guarantee that interference will not occur in a particular installation. If this
equipment does cause interference to radio or television reception, which can be determined by turning the equipment off and on, the user is
encouraged to try to correct the interference by one or more of the following measures:
• Reorient the receiving antenna until interference is reduced or eliminated.
• Move the radio or television receiver away from the receiver/control.
• Move the antenna leads away from any wire runs to the receiver/control.
• Plug the receiver/control into a different outlet so that it and the radio or television receiver are on different branch circuits.
• Consult the dealer or an experienced radio/TV technician for help.
INDUSTRY CANADA CLASS B STATEMENT
This Class B digital apparatus complies with Canadian ICES-003.
Cet appareil numérique de la classe B est conforme à la norme NMB-003 du Canada.
FCC / IC STATEMENT
This device complies with Part 15 of the FCC Rules, and Industry Canada’s license-exempt RSSs. Operation is subject to the following two
conditions: (1) This device may not cause harmful interference, and (2) This device must accept any interference received, including interference
that may cause undesired operation.
Cet appareil est conforme à la partie 15 des règles de la FCC et exempt de licence RSS d’Industrie Canada. Son fonctionnement est soumis aux
conditions suivantes: (1) Cet appareil ne doit pas causer d’interférences nuisibles. (2) Cet appareil doit accepter toute interférence reçue y compris
les interférences causant une réception indésirable.
To protect the environment, a detailed installation
guide is available on the Honey ell ebsite –
Please consider before printing the document!
2 Corporate Center Drive, Suite 100
P.O. Box 9040, Melville, NY 11747
www.honeywell.com/security
For patent information, see
.honey ell.com/patents
Pour des informations sur les brevets, voir .honey ell.com/patents
Para información de Patentes, vea .honey ell.com/patents
Para informações sobre patentes, acesse
.honey ell.com/patents

Other Honeywell Security Sensor manuals

Honeywell Viewguard DUAL AM FAI Instruction manual

Honeywell

Honeywell Viewguard DUAL AM FAI Instruction manual

Honeywell Miller 8172 Operator's manual

Honeywell

Honeywell Miller 8172 Operator's manual

Honeywell SIXCO User manual

Honeywell

Honeywell SIXCO User manual

Honeywell 5800PIR-OD Instruction Manual

Honeywell

Honeywell 5800PIR-OD Instruction Manual

Honeywell MIDAS-T-HTP User manual

Honeywell

Honeywell MIDAS-T-HTP User manual

Honeywell Satronic IRD 1010 User manual

Honeywell

Honeywell Satronic IRD 1010 User manual

Honeywell 5800CO Assembly instructions

Honeywell

Honeywell 5800CO Assembly instructions

Honeywell C7061A1020 User manual

Honeywell

Honeywell C7061A1020 User manual

Honeywell 5800COMBO-CN User manual

Honeywell

Honeywell 5800COMBO-CN User manual

Honeywell Ex-Or Digital Gold Series Installation and operation manual

Honeywell

Honeywell Ex-Or Digital Gold Series Installation and operation manual

Honeywell DUAL TEC DT-7450 User manual

Honeywell

Honeywell DUAL TEC DT-7450 User manual

Honeywell Ex-Or MLS2401CDR Installation and operation manual

Honeywell

Honeywell Ex-Or MLS2401CDR Installation and operation manual

Honeywell Activ8 PIR User manual

Honeywell

Honeywell Activ8 PIR User manual

Honeywell Sensepoint XCD RFD Release Note

Honeywell

Honeywell Sensepoint XCD RFD Release Note

Honeywell DT7235T User manual

Honeywell

Honeywell DT7235T User manual

Honeywell C7076A User manual

Honeywell

Honeywell C7076A User manual

Honeywell HAQSPA-R User manual

Honeywell

Honeywell HAQSPA-R User manual

Honeywell IRD 1020.1 User manual

Honeywell

Honeywell IRD 1020.1 User manual

Honeywell FIRE-LITE ALARMS W-SD355 User manual

Honeywell

Honeywell FIRE-LITE ALARMS W-SD355 User manual

Honeywell ToxiPro CO User manual

Honeywell

Honeywell ToxiPro CO User manual

Honeywell HAQSPA User manual

Honeywell

Honeywell HAQSPA User manual

Honeywell Lyric User manual

Honeywell

Honeywell Lyric User manual

Honeywell FlexGuard 5853 User manual

Honeywell

Honeywell FlexGuard 5853 User manual

Honeywell 5898 User manual

Honeywell

Honeywell 5898 User manual

Popular Security Sensor manuals by other brands

schmersal RSS 36-D manual

schmersal

schmersal RSS 36-D manual

Tecnar accuraspray CS Quick setup guide

Tecnar

Tecnar accuraspray CS Quick setup guide

SWARCO Caiman Installation

SWARCO

SWARCO Caiman Installation

Optex FMX-ST installation instructions

Optex

Optex FMX-ST installation instructions

B.E.G. LUXOMAT Indoor 180-M-2C Installation and operating instruction

B.E.G.

B.E.G. LUXOMAT Indoor 180-M-2C Installation and operating instruction

SPX Radiodetection RD7000+ Operation manual

SPX

SPX Radiodetection RD7000+ Operation manual

B.E.G. LUXOMAT PD4-M-2C-DUO Installation and operating instructions

B.E.G.

B.E.G. LUXOMAT PD4-M-2C-DUO Installation and operating instructions

Bircher Reglomat EasyMotion operating instructions

Bircher Reglomat

Bircher Reglomat EasyMotion operating instructions

SIM SIM-04 installation instructions

SIM

SIM SIM-04 installation instructions

Atal AT-VLC-ND-A2-RS user manual

Atal

Atal AT-VLC-ND-A2-RS user manual

Tractel Stopcable EN 353-1 Operating and maintenance instructions

Tractel

Tractel Stopcable EN 353-1 Operating and maintenance instructions

DSC WLS912L-900 installation instructions

DSC

DSC WLS912L-900 installation instructions

LEGRAND CP Electronics EBMHS-BLV Product guide

LEGRAND

LEGRAND CP Electronics EBMHS-BLV Product guide

LEGRAND Tynetec ZXT424 manual

LEGRAND

LEGRAND Tynetec ZXT424 manual

ESA Corona CAD Operating and maintenance manual

ESA

ESA Corona CAD Operating and maintenance manual

Omron F3SJ-B**N25 Series instruction sheet

Omron

Omron F3SJ-B**N25 Series instruction sheet

PCE Health and Fitness PCE-LDC 8 user manual

PCE Health and Fitness

PCE Health and Fitness PCE-LDC 8 user manual

Argus Security TW-DM-01/916 manual

Argus Security

Argus Security TW-DM-01/916 manual

manuals.online logo
manuals.online logoBrands
  • About & Mission
  • Contact us
  • Privacy Policy
  • Terms and Conditions

Copyright 2025 Manuals.Online. All Rights Reserved.