manuals.online logo
Brands
  1. Home
  2. •
  3. Brands
  4. •
  5. Honeywell
  6. •
  7. Security Sensor
  8. •
  9. Honeywell Satronic IRD 1010 User manual

Honeywell Satronic IRD 1010 User manual

1
A Honeywell Company
certified Qualitysystem
ISO 9001 / EN 29001
Reg. Nr. 10529
746e/08/98
IRD 1010
Flame monitoring device for yellow- or blue-
burning oil flames
INTRODUCTION
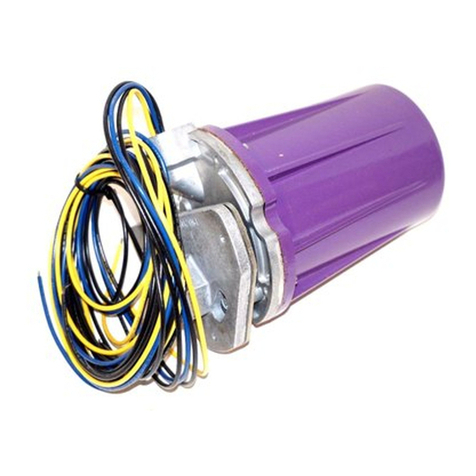
The IRD 1010 is employed to monitor the flame of an oil
burner. This flame monitoring device should be connected
to a Satronic oil burner control box. Monitoring is based on
the infra-red flicker principle, in other words, the flickering
infra-red light of the flame is detected. The steady radiation
from, for example, the glowing refractory layer on the inside
of the boiler, has no effect on the detector. The IRD 1010
replaces the models IRD 910, 911 and 911 vi. If exchanging
the units, care must be taken to connect them correctly (see
page 3).
TYPES AVAILABLE (also see page 4, Variants)
Item no. Designation
16501 Flicker detector IRD 1010 right
16502 Flicker detector IRD 1010 end-on
16503 Flicker detector IRD 1010 left
The infra-red flicker detector is suitable for use with the
following control boxes:
IRD 1010 DKO 970, 972, 974, 976
DKW 974, 976
DMO 976
TF 801, 802.1, 804
TF 830.1, 832.1, 834.1, 834E.1, 834.2, 836
TF 844, TF 974, 976
MMD 900, 900.1,
TTO 872, 876
MMO 872, 876
TMO 720-4
CONSTRUCTIONAL FEATURES
The infra-red sensor and the pre-amplifier are hermetically
sealed in glass and along with the electronics form an
integrated unit in the flame detector. Wiring is by way of a
plug connection. The sensitivity control and two LED’s for
indication of the flame signal are situated on the rear of the
flicker detector.
Infra-red flicker detector
TECHNICAL DATA
Supply voltage 220 / 240 V (-15... +10%)
50 Hz (50 - 60 Hz)
Nominal current input approx. 4 mA
Power consumption 1 VA
Ambient temperature -20°C to +60°C
Insulation standard IP 41
Mounting attitude any
Weight 40 g
Flame viewing attitude side-on or end-on according
to type
Spectral response 800 - 1100 nm
(with daylight filter) maximum 950 nm
Frequency range 15 Hz.... 250 Hz (-12 dB)
Sensitivity adjustment
range approx. 1 : 20 (26 dB)
Switch-on delay < 3.5 sec.
(after connecting
operating voltage)
Response time < 0.1 sec.
Cut-out time < 1 sec.
2
TECHNICAL FEATURES
1. Flame detection
- Yellow-aswellasblue-burningoilflamescanbemonitored.
- The flame detector is suitable for operation where the
ambient temperature is within the range -20°to +60°C.
- The flickering detector IRD 1010 becomes active not
before a minimum threshold-level of steady light is
exceeded. That guarantees that neither electromagnetic-
nor ignition-spark noise are affecting the IRD.
- Sensitivity is adjustable.
- LED 1 is a warning indicator for the pre-purge phase as
well as normal operation. LED 2 indicates the actual status
of the detector: On or off.
- During pre-purge, LED 1 indicates possible stray light,
which may be produced either by a flickering or by
a steady light source, before the detector switches on
(LED 2).
- When the burner is operating normally, LED 1 acts as a
warning indication of the flame signal current sensitivity
being set too low - it begins to flicker or extinguishes
before the detector switches off.
- The compact dimensions of the detector allow it to be
installed on any burner. The detector shaft has the same
dimensions as the FZ 711 S. It therefore also fits into the
FZ holder M 74.
- Unlike UV tubes, the IRD 1010 flicker detector does not
deteriorate with age.
2. Installation instructions
- The detector probe should be fitted so that it receives the
light which pulsates most strongly. This can be achieved
by positioning the detector as close as possible to the
flame or by directing it at a particular zone of the flame (e.g.
by using a sighting tube).
- No stray light must be allowed to fall on the detector (e.g.
through cracks or from a sight glass). Pulsating stray light
(e.g. from fluorescent lighting or light bulbs) could cause
the system to switch to lockout. Due to the very high
sensitivity of the detector, it should not be exposed
directly or indirectly (reflections) to the ignition spark.
- The infra-red flicker detector should be fitted in such a way
that the ambient temperature cannot under any
circumstances rise above 60 °C. At higher temperatures,
thereis a risk ofincorrect operation and thelife expectancy
of the unit could be reduced. In addition, care should be
taken that the detector is not subjected to unusually harsh
vibration and receives no hard knocks.
COMMISSIONING AND MAINTENANCE
During commissioning and after servicing, the flame
monitoringsystemshould be checkedforfaultlessoperation
as follows:
1. Check that the detector is connected properly. Wrong
connectionsarea risk tosafety,and could causedamage
to the detector unit or burner system.
2. Adjust to maximum sensitivity and start the burner: If the
LED indicator is lit after the start impulse, carefully adjust
the sensitivity control until LED 1 extinguishes. No LED
should light up during the pre-purge phase.
3. With the system set for normal operation, pull out the
detector probe and cover it up to cut off light. Both LED
indicatorsmustextinguish.Thecontrol box should switch
to lockout or attempt to re-start the sequence.
4. Attempt to re-start with the flame detector covered.
There must be no indication from the LED’s after the start
impulse. The burner control box must switch to lockout
at the end of the safety interval.
5. Attempt to start the burner with the detector exposed to
stray light e.g. from fluorescent lighting, a cigarette
lighter or light bulb (not daylight or an electric torch):
Depending on the type of control box, it should switch to
lockout either immediately or at the end of the pre-purge,
as a result of stray light.
6. When the burner is operating normally, carefully turn
back the sensitivity control until LED 1 begins to flicker.
Increase the setting again by one or two increments until
both LED’s are lit. If LED 1 does not flicker even at po-
sition1: Leave potentiometeratposition 1-2. Thisadjust-
ment should be carried out when the flame signal current
is weakest (shortly after flame establishment or after
stabilisation).
The flame detection device requires no maintenance of any
kind, and as it is classed as safety equipment, no attempt
should be made to open the housing.
Because the nature of the flame can change in time due to
the accumulation of dirt, the indicators on the detector
should be checked periodically.
Please note:
Burner operating normally = both LED’s on
Burner in pre-purge phase = both LED’s off
For safety reasons the sensitivity must not be set
higher than necessary.
IRD 1010
3
Control box type MMD 900 TTO 872 MMO 872
MMD 900.1 TTO 876 MMO 876
Terminal no. 2 1 or 8 1 or 8
Terminal no. 1 2 2
Terminal no. 9 9 9
CONNECTION OF IRD 1010 TO SATRONIC BURNER CONTROL BOXES
IRD 1010
IRD 1010
blue
black
brown
blue
black
brown
1) By installing the IRD/TTO adaptor cable (Item no. 72002)
between the IRD 1010 and the detector cable in conjunction
with the TTO 8.. or MMO 8.. control boxes, the uniform
system of baseplate wiring (blue = terminal 2, brown =
terminal 9, black = terminal 1) can be adhered to.
Possible faults
1. LED’s light up during the pre-purge phase (control
box switches to lockout):
a) Sensitivity set too high
b) Stray light
c) Ignitionsparkvisibletodetector(directlyorreflection).
Correct by preventing direct sight of ignition spark.
d) Interference from ignition cable (lay cables some
distance apart, or possibly screen the detector).
2. NoindicationfromLED’safterestablishmentof flame:
a) Incorrect or faulty wiring
b) Sensitivity set too low
c) Detector positioned wrongly (receives no light)
d) Detector or viewing window dirty
e) Defective detector
IRD 1010 TERMINALS
1
2
3
4
5
6
7
1 2
brown black blue
The standard-sensitive version of the IRD 1010 has a
blueinprint.Whiteorredinprintsaremarkingdetectors
with special attributes.They may be used only on
burners which are approved for these detectors.
IRD 1010
Control box type TF 8.. TF 9.. DKO 9..
DKW 9..
DMO 9..
Terminal no. 2 7 2
Terminal no. 1 1 1
Terminal no. 9 9 9
Control box type TMO 720-4
Terminal no. 2
Terminal no. 1
Terminal no. 9
IRD 1010
blue
black
brown
1)
1)
4
A Honeywell Company
Satronic AG
Brüelstrasse 7
Postfach 324
CH-8157 Dielsdorf
HOLDER M74
VARIANTS
IRD 1010
ORDERING INFORMATION
ITEM DESIGNATION ITEM NO.
Flame sensor Flicker detector IRD 1010 right 16501
optional Flicker detector IRD 1010 end-on 16502
optional Flicker detector IRD 1010 left 16503
Mounting flange Holder M74 59074
Connectioncable Plug type, 3 core cable, 0.6 m with tag wire ends 7236001
The above ordering information refers to the standard version.
Special versions are also included in our product range.
Specifications subject to change without notice.
35 3
ø20
48
4.5
26
4
7
ø 14
FLICKER DETECTOR IRD 1010
Light entrance from right Item no. 16501
104
29 50 44
ø13.5
21.8
Satronic
IRD 1010
Satronic
IRD 1010
Satronic
IRD 1010
End-on light entrance Item no. 16502
Light entrance from left Item no. 16503

Other Honeywell Security Sensor manuals

Honeywell EC-P2 User manual

Honeywell

Honeywell EC-P2 User manual

Honeywell 5809 User manual

Honeywell

Honeywell 5809 User manual

Honeywell FlexGuard FG-1625TAS User manual

Honeywell

Honeywell FlexGuard FG-1625TAS User manual

Honeywell Minipeeper C7027A Operation manual

Honeywell

Honeywell Minipeeper C7027A Operation manual

Honeywell Gamewell FCI 2151 User manual

Honeywell

Honeywell Gamewell FCI 2151 User manual

Honeywell SS2-A User manual

Honeywell

Honeywell SS2-A User manual

Honeywell MultiPro User manual

Honeywell

Honeywell MultiPro User manual

Honeywell Miller EN 358 User manual

Honeywell

Honeywell Miller EN 358 User manual

Honeywell 301W User manual

Honeywell

Honeywell 301W User manual

Honeywell TRADELINE C554A User manual

Honeywell

Honeywell TRADELINE C554A User manual

Honeywell Miller Revolution Harness User manual

Honeywell

Honeywell Miller Revolution Harness User manual

Honeywell Midas User manual

Honeywell

Honeywell Midas User manual

Honeywell Miller DuraHoist Operator's manual

Honeywell

Honeywell Miller DuraHoist Operator's manual

Honeywell 5800PIR-COM User manual

Honeywell

Honeywell 5800PIR-COM User manual

Honeywell FF-SPS4 Series User manual

Honeywell

Honeywell FF-SPS4 Series User manual

Honeywell HAQSPA-R User manual

Honeywell

Honeywell HAQSPA-R User manual

Honeywell FS24X User manual

Honeywell

Honeywell FS24X User manual

Honeywell FG-730 User manual

Honeywell

Honeywell FG-730 User manual

Honeywell FlexGuard FG-1625SN V-Plex User manual

Honeywell

Honeywell FlexGuard FG-1625SN V-Plex User manual

Honeywell Miller 6-2550L User manual

Honeywell

Honeywell Miller 6-2550L User manual

Honeywell SPM Flex User manual

Honeywell

Honeywell SPM Flex User manual

Honeywell BW Solo User manual

Honeywell

Honeywell BW Solo User manual

Honeywell SC100 User manual

Honeywell

Honeywell SC100 User manual

Honeywell PEHA D-LS1000R User manual

Honeywell

Honeywell PEHA D-LS1000R User manual

Popular Security Sensor manuals by other brands

PCB Piezotronics 482C24-SU Installation and operating manual

PCB Piezotronics

PCB Piezotronics 482C24-SU Installation and operating manual

DMP Electronics 1129 WIRELESS GLASSBREAK DETECTOR installation guide

DMP Electronics

DMP Electronics 1129 WIRELESS GLASSBREAK DETECTOR installation guide

Versahaul VH-SR quick start guide

Versahaul

Versahaul VH-SR quick start guide

Smartwares SH5-TSM-A quick start guide

Smartwares

Smartwares SH5-TSM-A quick start guide

THORLABS PDA10DT user guide

THORLABS

THORLABS PDA10DT user guide

Risco Industrial LuNAR RK200DTG3 installation guide

Risco

Risco Industrial LuNAR RK200DTG3 installation guide

ELTEX UPG-Stitch instructions

ELTEX

ELTEX UPG-Stitch instructions

Newport 818-BB-20 user guide

Newport

Newport 818-BB-20 user guide

LEGRAND CP Electronics EBMHS-BLV Product guide

LEGRAND

LEGRAND CP Electronics EBMHS-BLV Product guide

D+H VRS 10 Original instructions

D+H

D+H VRS 10 Original instructions

SICK deTem4 Core A/P operating instructions

SICK

SICK deTem4 Core A/P operating instructions

SICK deTem4 Core Ex operating instructions

SICK

SICK deTem4 Core Ex operating instructions

Edwards SIGA2-HRS Installation and operation

Edwards

Edwards SIGA2-HRS Installation and operation

Tactix 488132 manual

Tactix

Tactix 488132 manual

System Sensor 1112/24D Installation and maintenance instructions

System Sensor

System Sensor 1112/24D Installation and maintenance instructions

Bullard H3000 Installation instruction

Bullard

Bullard H3000 Installation instruction

Eelectron KNX PD00E00KNX Product handbook

Eelectron

Eelectron KNX PD00E00KNX Product handbook

Jung FMDW360WW operating instructions

Jung

Jung FMDW360WW operating instructions

manuals.online logo
manuals.online logoBrands
  • About & Mission
  • Contact us
  • Privacy Policy
  • Terms and Conditions

Copyright 2025 Manuals.Online. All Rights Reserved.