manuals.online logo
Brands
  1. Home
  2. •
  3. Brands
  4. •
  5. Honeywell
  6. •
  7. Thermostat
  8. •
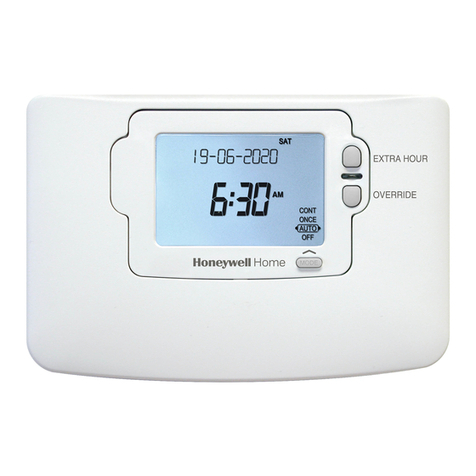
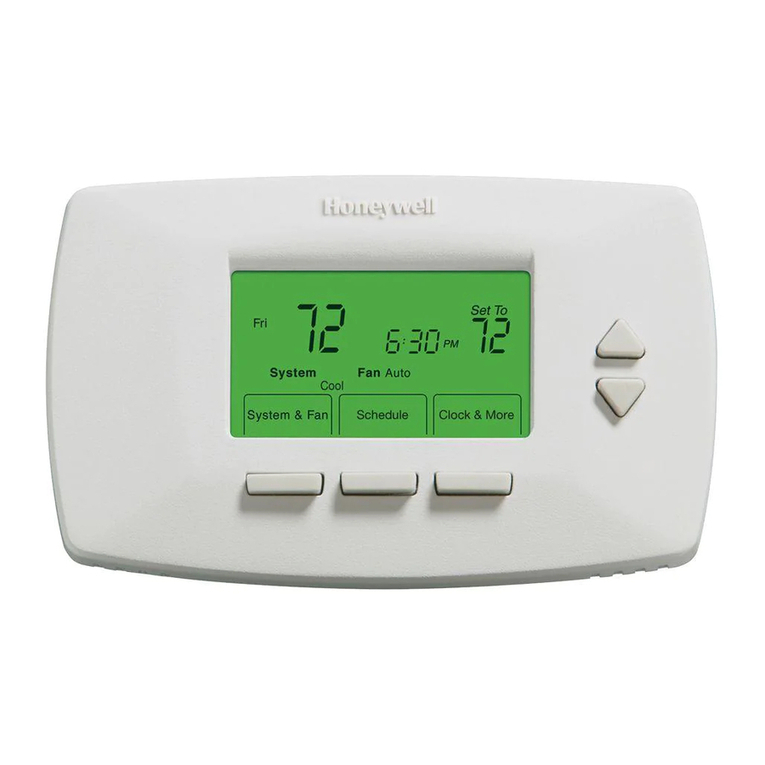
  9. Honeywell Comfort Window User manual

Honeywell Comfort Window User manual

Other Honeywell Thermostat manuals

Honeywell Q539A User manual

Honeywell

Honeywell Q539A User manual

Honeywell SUITEPRO TB6575 User manual

Honeywell

Honeywell SUITEPRO TB6575 User manual

Honeywell RTH6300 User manual

Honeywell

Honeywell RTH6300 User manual

Honeywell CT3451 User manual

Honeywell

Honeywell CT3451 User manual

Honeywell TH2110DV User manual

Honeywell

Honeywell TH2110DV User manual

Honeywell FocusPRO TH5320R01 User manual

Honeywell

Honeywell FocusPRO TH5320R01 User manual

Honeywell CM900 User manual

Honeywell

Honeywell CM900 User manual

Honeywell T8624 User manual

Honeywell

Honeywell T8624 User manual

Honeywell UtilityPRO Series User manual

Honeywell

Honeywell UtilityPRO Series User manual

Honeywell TH114-A-240D User manual

Honeywell

Honeywell TH114-A-240D User manual

Honeywell RLV450 User manual

Honeywell

Honeywell RLV450 User manual

Honeywell PRO 3000 Series User manual

Honeywell

Honeywell PRO 3000 Series User manual

Honeywell HH07AT216 User manual

Honeywell

Honeywell HH07AT216 User manual

Honeywell CM927 User manual

Honeywell

Honeywell CM927 User manual

Honeywell Chronotherm IV T8602D User manual

Honeywell

Honeywell Chronotherm IV T8602D User manual

Honeywell RTH2510 Series User manual

Honeywell

Honeywell RTH2510 Series User manual

Honeywell PRESTIGE THX9321 User manual

Honeywell

Honeywell PRESTIGE THX9321 User manual

Honeywell T641A User manual

Honeywell

Honeywell T641A User manual

Honeywell PROGRAMMABLE THERMOSTAT RTH6350 User manual

Honeywell

Honeywell PROGRAMMABLE THERMOSTAT RTH6350 User manual

Honeywell RTH111 series User manual

Honeywell

Honeywell RTH111 series User manual

Honeywell T7525 User manual

Honeywell

Honeywell T7525 User manual

Honeywell RTH2300 series User manual

Honeywell

Honeywell RTH2300 series User manual

Honeywell Electronic Thermostat User manual

Honeywell

Honeywell Electronic Thermostat User manual

Honeywell INNCOM e7w User manual

Honeywell

Honeywell INNCOM e7w User manual

Popular Thermostat manuals by other brands

Full Gauge TIC-17C product manual

Full Gauge

Full Gauge TIC-17C product manual

Imit Chronomix S manual

Imit

Imit Chronomix S manual

ChiliTec ST-35 ana instruction manual

ChiliTec

ChiliTec ST-35 ana instruction manual

Salus VS05 Installer's/user's manual

Salus

Salus VS05 Installer's/user's manual

Azel D-500 user guide

Azel

Azel D-500 user guide

Charmeg MP-R user manual

Charmeg

Charmeg MP-R user manual

dixell WING XW40LS Installing and operating instructions

dixell

dixell WING XW40LS Installing and operating instructions

Network Thermostat NetX X7C-WIFI Installation and programming manual

Network Thermostat

Network Thermostat NetX X7C-WIFI Installation and programming manual

Radio Thermostat CT80 Operation guide

Radio Thermostat

Radio Thermostat CT80 Operation guide

HAI Omnistat RC-120 installation manual

HAI

HAI Omnistat RC-120 installation manual

Lennox iComfort E30 Installation and setup guide

Lennox

Lennox iComfort E30 Installation and setup guide

Lux Products PSD011Ba Installation and operating instructions

Lux Products

Lux Products PSD011Ba Installation and operating instructions

Computherm Q20 operating instructions

Computherm

Computherm Q20 operating instructions

Heatmiser neoStat user manual

Heatmiser

Heatmiser neoStat user manual

Mars HEAT CONTROLLER IR Wireless Thermostat user manual

Mars

Mars HEAT CONTROLLER IR Wireless Thermostat user manual

LUX LP0511D user manual

LUX

LUX LP0511D user manual

Saswell SAS920XWHB-7-S-RF User manual and warranty card

Saswell

Saswell SAS920XWHB-7-S-RF User manual and warranty card

Aircalo TFP1-ET85P2 operating manual

Aircalo

Aircalo TFP1-ET85P2 operating manual

manuals.online logo
manuals.online logoBrands
  • About & Mission
  • Contact us
  • Privacy Policy
  • Terms and Conditions

Copyright 2025 Manuals.Online. All Rights Reserved.

PCB0001C-01-BHP-PDII0914
I. Feature Summary
•ComfortWindow Technology
•Internet control with compatible WiFi™
network & Webpage/Smart-Phone pp
•Save on Electricity w/ Hidden Comfort
Regions and Economizer Control
•Extra Comfort System (“Free Cooling /
Heating” w/ Economizer)
•Convenient Interface (1-Touch Overrides
& Graphical Program Schedule)
•Humidifier Control, uto-Dehumidification
•Built-in Ventilation Controls
•High Resolution Color Touch-screen LCD
(18 bit color, 320x240, 3.5”)
•Compatible with most HV C Systems
•Remote Indoor Temp Measurement
•Outdoor Temp/Humidity Sensor &
Display
•rmchair Programming Option
II. Introduction
Comfort Window is the next generation in smart
thermostat design. With innovative energy
efficient technology, Comfort Window saves in
electricity costs; and with a full color touch-
screen LCD, Comfort Window presents a
modern and elegant look to fit in with any d cor.
Comfort Window not only controls temperature,
it also controls humidity. With ComfortWindow
technology, users can see at a glance whether
their home is within their own personalized
window of comfort, taking into account humidity.
Comfort Window can also cool or heat their
home even further into their window of comfort
for free by utilizing outdoor air to cool or heat the
home when it is possible to do so. Not only
does this create a more comfortable
environment, it also lowers total compressor run-
time significantly, thus reducing electric bills and
lowering the home's total carbon footprint.
With a comprehensive array of output controls,
internet control via smart-phone apps, and
outdoor temperature and humidity measurement
capability, Comfort Window is truly versatile.
1 of 29
Comfort Window™
lectronic Digital Thermostat USER MANUAL &
Comfort Control System QUICK-START GUIDE
Copyright © 2014
www.yourcomfortwindow.com
[email protected]
Table of Contents:
I. Feature Summary ........................1
II. Introduction...................................1
III. Compliance Information................2
IV. Quick-start Guide.........................8
V. Feature Description....................21
VI. Wiring Guide.............................29
Figure 1: Comfort Window
PCB0001C-01-BHP-PDII0614
III. Quickstart Guide
1. Reco d cu ent wi ing colo s/functions
► In order to properly connect wires from a pre-
existing thermostat to Comfort Window's screw
terminals, it is important to know what color
wires were connected to what functions on your
existing thermostat. If the wiring colors are not
easily distinguishable, label each wire with its
current function.
► While there are some industry-wide coloring
conventions, some thermostat makers do not
follow these conventions; it is also possible that
whoever installed any previous wiring may not
have followed these conventions.
2. Tu n off Elect icity & Install Wall-plate
► ALWAYS turn off electricity to the HVAC system
at the breaker box before connecting wiring and
before connecting thermostat to the baseplate.
► Using the provided screws and drywall anchors,
mount the wall-plate to the wall.
► Adjust the angle of the wall-plate utilizing the
slack given in each of the holes for each screw.
3. Connect the mostat wi e to wall-plate
► For single compressor, single heater
installations (non-Heat Pump), wire the
thermostat as shown in Figure 3, according to
Chart 1. For any other HVAC configuration,
please refer to the Wiring Guide (Section 5).
► If a ground wire has not already been pulled to
the thermostat's location, first see if there are
any unused thermostat wires that you can use
for Common (C). Otherwise, it will be necessary
to run an 18 GUAG ONLY wire down the wall
and feed it through the hole to the wall-plate.
Screw
Terminal
Number
Connect To Function
Std.
Wire Color*
0Jumper to 1 PWR N/A
1Jumper to 4 RC2 Red
2Jumper to 3 RH2 Red
3Jumper to 4 RH1 Red
4
Compressor
Transformer
+24VAC
RC1 Red
5Compressor Control Y Yello
6Fan Control G Green
7Heat Control W White
15 -24VAC (Ground) C Bro n/Black**
**Note: Brown or Black are the most common
colors for 24V C ground; however, white and
blue are also frequently used.
3 of 24
Figure 2: Wallplate
*
*
*Caution! While there are some industry-wide
color-coding conventions, some thermostat makers
do not follow these conventions, so it is imperative to
record the previous configuration (both color and
function) so the correct wire can be connected to the
appropriate location on Comfort Window's wall-plate.
Cha t 1: Wi ing Configu ation fo Single
Comp esso , Single Heate Installations
*
*
*Caution! It is very important to be careful
that the existing wires do not fall down into the
hole in the wall.
PCB0001C-01-BHP-PDII0614
4. Install Remote Indoo Senso
► First, you must install the remote indoor sensor.
Drill a 3/16th inch hole ~5 inches below the
thermostat. Feed the stripped end of the indoor
temperature sensor wire through the hole,
angling upwards, and fish the wires out of the
hole in the wall-plate*. Or, route the remote
indoor sensor to the location in the house you
wish to measure temperature. Connect sensor
wires to wallplate according to Chart 2 and
Figure 3.
*Note: If you are unable to fish the indoor
sensor wire out of the hole in the wall under the
wall-plate, connect the sensor wires to the wall-
plate and simply drop the remote sensor into
the wall cavity to measure your home's internal
temperature.
Screw
Terminal
Number
Connect To Function
Std.
Wire
Color*
16 Remote Temp Sense 1 T1in Black**
17 Remote Temp Sense 2 T2in Yello **
1 Remote Temp Sense 3 T3in Red**
**Note: The remote indoor temperature sensor
(RITS) wires are contained within an insulating
sleeve. Take care to connect the red, yellow,
and black wires coming from the RITS sleeve
rather than the red, yellow, and black wires that
may be in the wall already for thermostat
control. Connecting the red, black or yellow
thermostat wire to pins 16, 17, or 19 can
permanently damage the thermostat and/or
remote temperature sensor.
5. Install The mostat onto Wall-plate
► Slide thermostat through the keyed slots on
each side of the wall-plate, mating the pins with
the receptors until it rests flush with the wall *
6. Re-Apply Powe & Configu e The mostat
► Reconnect electricity at the breaker box. If your
system is something other than a Single
Compressor / Single Gas Heate * system or if
you have any extra outputs other than those
shown in Chart 1, it is critical to first configure
the settings for the thermostat, the Regular vs
Heat Pump mode setting, and the Gas/ lectric
Heater setting. Touch the settings icon, scroll
to the second page, and configure the
Equipment Control settings appropriately.
4 of 24
Figure 3: Single Compressor, Single Heater Wiring
Cha t 2: Wi ing Configu ation fo Remote
Indoo Tempe atu e Senso
Figure 4: Thermostat to Wall-plate Installation
*
*
*Caution! Only AFTER connecting
the mostat to baseplate should you
econnect elect icity to the HVAC system and
the mostat.
*
*
*Caution! Incorrectly mating the thermostat
to the baseplate can potentially cause
permanent damage to the thermostat or to the
remote temperature sensor. Only AFTER
the mostat is connected should you e-
connect elect icity to the HVAC system &
the mostat.
PCB0001C-01-BHP-PDII0614
► Next, set the Date/Time and set your Comfort
Window Settings. To reach the settings page,
follow the touch diagrams sequence below.
► Set Date/Time: Touch the Settings icon
and select the Set Date/Time selection, and set
the date and time appropriately. Note that
Comfort Window automatically adjusts for
Daylight savings time.ext, set the Date/Time and
set your Comfort
5 of 24
Figure 5: Equipment Controls Page Figure 6: Set Date/Time Page
PCB0001C-01-BHP-PDII0614
► Set Your ComfortWindow Settings: Set your
personalized comfort window settings by
pressing the Settings icon on the Home Screen
and then pressing the Set Comfort Window
Settings button. Adjust each setting to your
comfort preferences.*
*Note: The Comfort Settings will be the default
settings for the thermostat when there are no
program entries scheduled to run. lso, it is
recommended to maintain the Relative
Humidity settings between 20% and 55% RH to
reduce potential for mold or mildew growth.
7. Configure Thermostat Program
► Touch the calendar icon in the icon menu bar at
the bottom of the home screen. You may need
to scroll over to see all of the available icons by
using the arrows to the sides of the icons.
► A sample program schedule for a typical work
week will be loaded by default. If you wish to
start from a different starting point, load a
different sample program schedule using the
internet controls online or on your smartphone.
► Add as many or as few entries into the program
as you desire* by touching the Add button on
the calendar home screen. To edit any entry,
first select the entry in the calendar, and then
edit by touching the Edit button. In the screen
that appears, specify the start and end times,
the high and low temperature settings, and
which days for which the setting applies.
*Note: With the Comfort Window, there is no
need to ensure that all of the program settings
align end to end as is necessary with other
programmable thermostats. Whenever a
program setting expires, Comfort Window will
automatically revert the temperature and
humidity settings back to your personalized
ComfortWindow settings. If you desire to have
the program control the settings at all times
without reverting back to the ComfortWindow
6 of 24
Figure 7: Program Comfort Window Settings
Figure 8: Configuring Program Schedule
PCB0001C-01-BHP-PDII0614
settings, simply create as many or as few
settings for each day as you would like and
align the settings so that they do align end to
end. lso note that it is typical to only have 3-4
entries total since each entry can be associated
with multiple days. This makes it very easy to
set up a program schedule from scratch.
7. Ove ide
► If you desire to temporarily override the
thermostat's temperature setting, simply touch
the up or down arrow on the home screen. In
the screen that appears, set the temperature to
the desired level. Specify the duration of the
override by adding or decrementing the override
time.
7 of 24
Figure 9: Performing Manual Override
PCB0001C-01-BHP-PDII0614
IV. Feature Description
Comfort Window provides true comfort control,
saves electricity costs, and gives you a
convenient and elegant user interface.
Comfo t Cont ol
Comfort Window builds on the traditional
model of a programmable thermostat, adding
a crucial layer for comfort control. With
ComfortWindow technology, the Comfort
Window not only eases the programming
difficulties of most programmable thermostats,
it also provides baseline comfort settings used
when there are no program entries set to run.
Additionally, with humidity/ temperature
compensation, you won't feel clammy or
sweaty when your thermostat is supposedly
within the appropriate temperature range, but
instead Comfort Window will compensate the
temperature to accommodate what humidity
levels are in your home. As such, users will
feel less variation in comfort when they set
their thermostat to any given value.
Comfort Window does the hard work for you
by calculating things like heat enthalpy which
take into account the humidity within the air
rather than relying solely on a raw temperature
reading. This will enable you to concentrate
on more important things in life, rather than
being bothered by changing your thermostat
every time the humidity levels change within
your home.
To help you
visualize how the
temperature and
humidity levels in
your home
correspond to your
personalized
comfort settings,
Comfort
Window also
provides a quick
way to view
your home's current conditions. The
ComfortWindow technology on the home
screen will show the current conditions in
graphical format, with temperature on the
vertical axis and humidity on the horizontal
axis. As long as the dot is within the window
on your home screen, you can know that your
home is within your personal window of
comfort. ComfortWindow technology not only
provides a quick and easy way to view if your
home is within your window of comfort, it also
provides a way to make sure your thermostat
is doing its job to save you money for times
when the current condition point should be
outside of your ComfortWindow settings (ie:
during a program entry).
To change your ComfortWindow settings,
simply touch the ComfortWindow quickview
graph or go into the settings and touch
Comfort Window Settings.
8 of 24
Figure 10: Home Screen
Figure 11: ComfortWindow
Figure 12: ComfortWindow Settings
PCB0001C-01-BHP-PDII0614
Elect icity Savings
According to Energy Star, “as much as half of
the energy used in your home goes to heating
and cooling.” With this much energy being
spent on heating and cooling, it is essential to
install a thermostat that will think wisely about
when to turn on the furnace and AC.
Comfort Window uses an innovative method,
with our Economizer feature, to bring outdoor
air indoors to heat or cool a home whenever it
is possible and advantageous to do so. This is
especially useful in the evenings in the Spring
and Fall months where the air outdoors has
dropped in temperature quickly while the air
inside your home is still hot and stuffy. The
reason that the outdoor air temperature may
quickly fall while the air inside is still hot is that
your walls and furniture hold the heat from the
middle of the day much longer than the quickly
moving air outdoors, and this thermal mass
continues to radiate off this heat into your
living space well into the evening. These
evening hours are significant in terms of time
that we spend awake and active inside of our
homes, and so it is important that we can
condition our homes during this time of day.
Traditional thermostats will run the compressor
during these evening times to try to bring this
temperature down, using valuable energy that
does not need to be used. Instead, Comfort
Window will save that money by simply
bringing outdoor air inside. In fact, there
should be no more reason to manually open a
window in order to drop the temperature in
your home ever again as this process is
completely automated. Comfort Window not
only automates this process, but it carefully
evaluates the outdoor air before bringing it
indoors. It is important to measure the
humidity of the outdoor air to make sure that
only air that doesn't contain too much humidity
is allowed indoors. This is important because
it is potentially dangerous to allow too much
moisture into your home. If you manually
open windows, you never really know how
much humidity you could be allowing into your
home – opening yourself up to potential indoor
air quality issues, letting uncomfortable air
inside, and even problems due to mold or
mildew growth. Comfort Window constantly
measures the outdoor humidity, taking out the
guesswork as to when to actually open the
windows, and computes the enthalpy to be
sure that only the air that should be let in is let
in. Also, manually opening windows will only
solve the problem when you are able and
willing to go and open your windows. Comfort
Window is constantly thinking about when to
bring the outdoor air inside, thus significantly
reducing your compressor/furnace run-time.
With initial estimates, a user could expect to
see 10-15% savings on the heating/cooling
portion of his or her electric bill during the
Spring and Fall months.
9 of 24
Figure 14: Economizer Closed Off
Figure 13: Economizer in Operation
PCB0001C-01-BHP-PDII0614
In order to implement something that will
cause such as significant change in energy
savings must be difficult or expensive to have
installed, right? Actually, with our
recommended method for installation, there
are simply two additional ducts, three
additional dampers, and the outdoor sensor
compatible with Comfort Window that must be
installed in order to enable this feature.
Comfort Window does the rest.
Comfort Window also allows the Economizer
feature to use either your system fan
(controlled by the G output) or to use a
separately installed fan (controlled by the ECD
outptut). Depending on how the Economizer
is installed, it is important to direct the
operation of the system fan with this setting.
Ext a Comfo t...Fo F ee
Comfort Window not only provides a quick and
easy basis for comfort control and significantly
lowers your heating/cooling costs, but it also
allows for more comfort than you would be
able to get with a traditional thermostat, for
free! On a traditional thermostat, in the
summer, the thermostat's temperature setting
is normally the maximum temperature you are
willing to tolerate for the price that you are
expecting to pay. Normally, this means that
your home's temperature always oscillates
around that setting – keeping you on the edge
of being uncomfortable. Comfort Window, on
the other hand, will bring your home's
temperature deeper into your window of
comfort when it can – virtually for free. By
utilizing outdoor air to heat or cool the inside of
the home, Comfort Window can bring you
more comfort without turning on the
compressor or the furnace. For the minimal
cost of running your system fan, Comfort
Window brings your home's
temperature/humidity point close to the center
of your window of comfort before shutting off
the outdoor air feature.
P og am Schedule
Comfort Window builds on the classical
programmable thermostat design utilizing an
easy to use user interface to make the setup
experience easy and hassle-free. While
traditional programmable thermostats require
the user to program in every temperature
setpoint for every section of time of each day
of the week, Comfort Window is uniquely set
up to revert back to the baseline Comfort
Window settings whenever a program setting
expires and there is no other program setting
scheduled to start afterward. In this way, the
user is only required to input as many or as
few program settings as he or she desires, for
times when he or she will be away from the
home. Additionally, each entry can be
associated with multiple days of the week,
further reducing the complexity involved in
setting up the program schedule. Instead of
entering a separate entry for each 8-5 shift on
each day of the work-week, a user is only
required to enter a single entry for this
10 of 24
Figure 16: Program Schedule User Interface
Figure 15: Economizer Controls
PCB0001C-01-BHP-PDII0614
repeating activity.
Comfort Window also gives the user the option
to set Heating (winter-time) and Cooling
(summer-time) schedules up front, so that
there is no need to re-program the schedules
twice per year. The program schedules also
work when Comfort Window is operating in
Auto mode as Comfort Window will simply use
both the Heating and Cooling schedules at the
same time.
Finally, Comfort Window adds the capability to
save multiple program schedules online to be
used at various times. One example would be
for multiple users who wish to have separate
program schedules used on the thermostat.
Another example is someone who may have a
schedule that does not follow a weekly pattern,
such as 2 weeks working followed by 2 weeks
off. For these cases, Comfort Window
provides a Save Schedule to Profile control
and a Load Schedule Profile control.
To save the current Program Schedule to a
given Profile, use the Program Profiles feature
online and create a new profile entry by
clicking the “+” symbol. To load a saved
program schedule to the active program
schedule, simply click the Set to Active
Program Schedule button below the profile
that was previously saved.
11 of 24
Figure 17: dd/Edit Program Entry
This page is intentionally left blank.