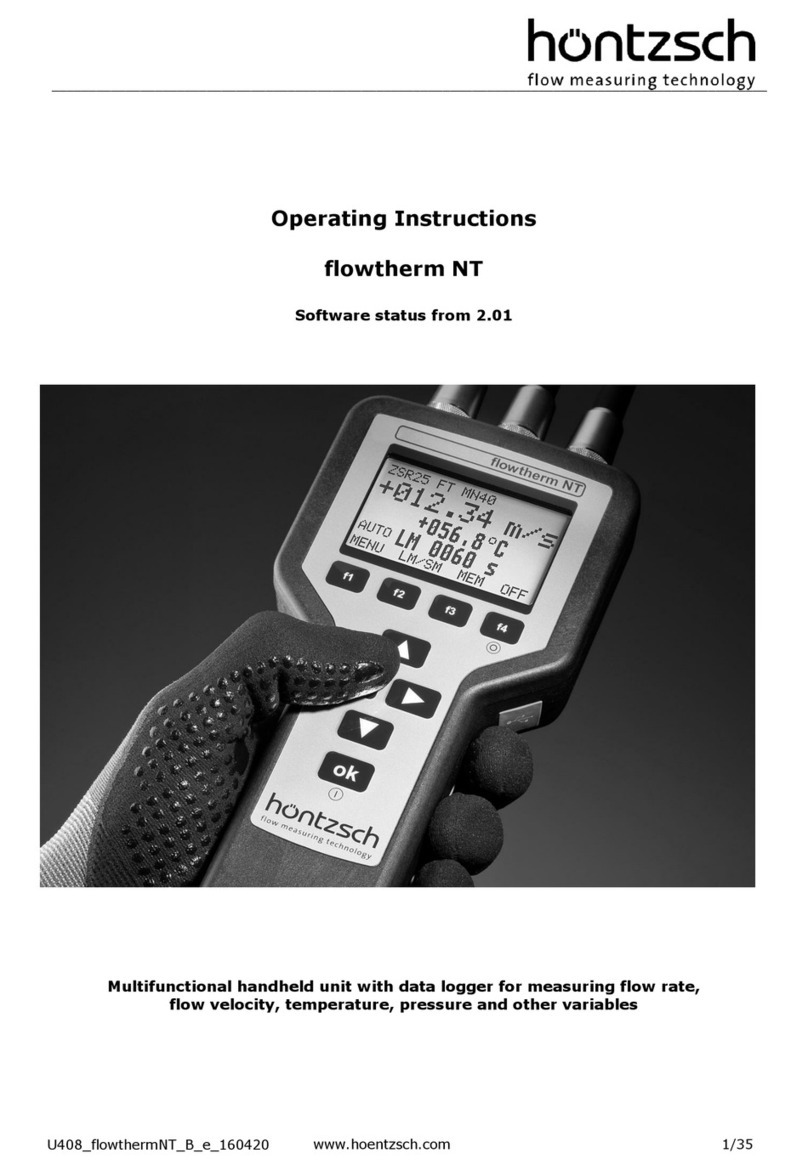
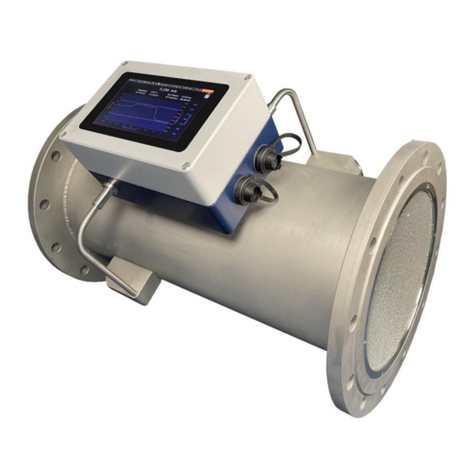
Hontzsch flowtherm Ex User manual

_________________________________________________________________________________________________
______________________________________________________________________________________
U426_flowtherm Ex_B_e_171206 www.hoentzsch.com 1/34
Operating Instructions
flowtherm Ex
Software status from 1.05
Multifunctional handheld unit with data logger for measuring flow rate,
flow velocity, temperature, pressure and other variables
in explosive atmospheres

_________________________________________________________________________________________________
______________________________________________________________________________________
2/34 www.hoentzsch.com U426_flowtherm Ex_B_e_171206
Overview and brief introduction of controls and connections
Please ensure that the correct sensor (FA, VA oder TA) is selected (see under 5.3.19.1)!
Thermal sensors TA, TADi
Always connect just one sensor at a time!
Vane wheel sensors FA(R), FT,
FA(R)Di or vortex sensors VA, VAT, VADi
or temperature sensors Pt100
Analog input 4-20 mA
Analog input 0-10 V
Connector socket cap
Close any connections not in use!
Measured value display
Input channel 1: name/unit
value
Input channel 2: name/unit
value
Input channel 3: name/unit
value
Function keys Designation
Function keys
, , with variable
functions depending on
operation menu
USB connection type 'B'
for connecting to PC or
adapter plug
Switch off
Switch on
Input channel and
status info
Battery compartment
on the rear for 4 Batteries
Mignon (AA)
Arrow keys (measured values
display)
,: shift between
1, 2 und 3 values
, : scroll the 3 values
With display of 1 and 2
values
Holding magnet
For fixing the unit to
metal surfaces

_________________________________________________________________________________________________
______________________________________________________________________________________
U426_flowtherm Ex_B_e_171206 www.hoentzsch.com 3/34
Contents
1General Information ...................................................................................................................4
2Scope of Delivery.......................................................................................................................4
2.1 Description, type plate.......................................................................................................4
3Technical Specifications ..............................................................................................................6
3.1 Operating conditions..........................................................................................................6
3.2 Housing and connection .....................................................................................................6
3.3 Electrical data...................................................................................................................6
3.4 Measurement uncertainty...................................................................................................7
4Initial Operation / Startup ...........................................................................................................7
4.1 Wiring diagram for the 8-pin connector plug .........................................................................7
4.2 Wiring diagrams for the 12-pin connector plug......................................................................8
4.2.1 Analog input 4-20 mA.............................................................................................8
4.2.2 Analog input 4-20 mA.............................................................................................8
4.2.3 Analog input 0-10 V................................................................................................8
5Operation .................................................................................................................................9
5.1 Key functions....................................................................................................................9
5.2 Setup menu after switch on..............................................................................................11
5.3 Parameter settings ..........................................................................................................13
5.3.1 FA - Basic settings................................................................................................13
5.3.2 FA - Measurement settings .................................................................................... 14
5.3.3 FA - Density correction .........................................................................................15
5.3.4 FA- Operating conditions .......................................................................................16
5.3.5 FA –Standard conditions ...................................................................................... 16
5.3.6 FA –Pairs of values ..............................................................................................16
5.3.7 VA –Basic settings...............................................................................................17
5.3.8 VA - Measurement settings.................................................................................... 17
5.3.9 VA –Operating conditions ..................................................................................... 18
5.3.10 VA –Standard conditions ...................................................................................... 18
5.3.11 VA –Pairs of values.............................................................................................. 19
5.3.12 TA –Basic settings ............................................................................................... 19
5.3.13 TA - Measurement settings....................................................................................20
5.3.14 TA –Standard conditions ...................................................................................... 21
5.3.15 TA - Pairs of values .............................................................................................. 21
5.3.16 PT100 - Unit ........................................................................................................21
5.3.17 Analog input ........................................................................................................22
5.3.18 Counter ..............................................................................................................22
5.3.19 Display ...............................................................................................................22
5.3.20 Long-term measurement....................................................................................... 24
5.3.21 Device ................................................................................................................ 26
5.3.22 Factory settings ................................................................................................... 26
5.3.23 Data logger ......................................................................................................... 26
5.3.24 Device status.......................................................................................................27
5.3.25 Profiles ............................................................................................................... 28
5.3.26 Key F3 - LM-Start.................................................................................................28
5.3.27 Key 4 Switch off / OFF (reset)................................................................................28
6Troubleshooting....................................................................................................................... 29
7Replacement Parts ................................................................................................................... 29
8Instruction Manual category 2G handheld unit flowtherm Ex .........................................................30
8.1 Apparatus ......................................................................................................................30
8.2 Safety Precautions .......................................................................................................... 30
8.2.1 General...............................................................................................................30
8.2.2 Use in explosive atmospheres ................................................................................ 30
8.3 Technical Data ................................................................................................................32
8.3.1 Elektrical Data ..................................................................................................... 32
8.4 Installation.....................................................................................................................33
8.5 Maintenance ...................................................................................................................33
9Declaration of conformity handheld unit flowtherm Ex Category 2G................................................ 34

_________________________________________________________________________________________________
______________________________________________________________________________________
4/34 www.hoentzsch.com U426_flowtherm Ex_B_e_171206
1General Information
-Read the Operating Instructions carefully before initial operation.
-Failure to observe these Operating Instructions and technical rules will result in danger to life, risk of un-
jury and damage to material or property.
-In addition, improper use, modifications or damage to the device will result in loss of warranty and liabil-
ity claims.
-Observe general information as well as the safety precautions included in various sections of these
Operating Instructions.
-Use only the dedicated adapter plug for the mains supply.
2Scope of Delivery
-Handheld unit flowtherm Ex
-Operating Instructions and Data Sheet flowtherm Ex, Instruction Manual and Declaration of Conformity
flowtherm Ex
-FA, VA or TA sensor(s) as ordered
-relevant Data Sheet for above
-other sensors such as Pt100, if ordered
-accessories for sensors, e.g. extension rod for FA sensor, if ordered
-CD-ROM with PC software HLOG II and USB cable (optional)
-adapter plug and USB cable (optional)
-various connection and extension cables, connectors (optional)
-carrying case (optional)
Please check that everything listed in the Delivery Note / Technical Data Sheet is included in the delivery.
2.1 Description, type plate
The flowtherm Ex is a multifunctional handheld unit with data logger for measuring and storing flow rate,
flow velocity, temperature, pressure and other variables, insofar as they are measurable / deducible with
connectable sensors:
Outside the explosive atmosphere, this storage can be read out via USB socket.
The device may be installed in explosive atmospheres group IIC (gas) in which the ambient temperature
range of -10°C to +50°C is not exceeded. It could be used up to the temperature range of the tempera-
ture class T4.
Sensors that can be connected (observe section 8):
-vane wheel FA, FAR, FT, FADi, FAR-Di
-vortex VA, VAT, VADi
-thermal TA10, TADi
-temperature Pt100
-2-wire 4-20 mA max. 12 V supply
-3- or 4-wire 4-20 mA output and max. 12 V supply
-3- or 4-wire 0-10 V output and max. 12 V supply

_________________________________________________________________________________________________
______________________________________________________________________________________
U426_flowtherm Ex_B_e_171206 www.hoentzsch.com 5/34
The following type plate is found on the back of the unit:
Description of type plate specifications:
1: Description
see Section 2.1
2: Unit and serial no.
3: Year of production
4: Notified body
5: Marking for use in Ex category 2G
see General Informations Section 1
see Instruction Manual Ex Category 2G Section 8
see Declaration of conformity Section 9
6: EC-type examination certificate
7: Operating conditions
see General Informations Section 1
see Operating conditions Section 3.1
see Safety Precautions Section 8.2
8: USB connection
see Electrical data Section 3.2 und 3.3
see Connector sockets page 2
see Safety Precautions Section 8.2
9: Warnings
see General Informations Section 1
see Technical specifications Section 3
see Safety Precautions Section 8.2
10: Exclusively battery type
see General Informations Section 1
see Elektrical data Section 3.3
see Safety Precautions Section 8.2
1
4
6
7
7
8
9
2
3
5
10

_________________________________________________________________________________________________
______________________________________________________________________________________
6/34 www.hoentzsch.com U426_flowtherm Ex_B_e_171206
3Technical Specifications
3.1 Operating conditions
Ambient temperature of
connection housing in service : -10 ... +50 °C
Type of protection : IP65
: Intrinsic safety (ib) EN 60079-11
3.2 Housing and connection
Type of protection : Intrinsic Safety (ib) EN 60079-11 and IP65 with battery compartment
cover and sensor plug screwed on tightly, connector sockets not in use
firmly capped, and USB connection cover tightly sealed
Material : electrically conductive ABS plastic
External measurements, weight : W/H/L = 96/42/197 mm, approx. 590 g
Connections : 5-pin connector plug for thermal sensors
8-pin connector plug for vane wheel, vortex or temperature sensors
12-pin connector plug for analog inputs or additional sensors
USB for data logger readout, configuration and
external power supply via PC or mains adapter
3.3 Electrical data
Power supply : via 4 alkaline manganese batteries
(exclusively DURACELL Simply MN1500 AA LR6 1.5V)
Open the battery compartment with a screw driver. Always change all 4 batteries at the same time,
checking for correct polarity. To close the compartment press it firmly in the seal (in the direction of the
connector sockets) and screw down tightly.
Work on the device may only be carriedout in non-explosive atmospheres. Please observe Safety Precau-
tions Section 8.2.
Mains supply : via USB connection with PC or adapter plug (permitted only outside ex-
plosive atmospheres); input voltage Um 6 VDC
Supply current : via USB connection not less than 300 mA
Analog input 4-20 mA : for connection of sensor in 2-wire system with 12 V;
allocation of unit, initial value and final value adjustable
Analog input 0-10 V : for connection of sensors with voltage output;
input resistance 1 MOhm
12 V power supply for sensors, (25 mA);
allocation of unit, initial value and final value adjustable

_________________________________________________________________________________________________
______________________________________________________________________________________
U426_flowtherm Ex_B_e_171206 www.hoentzsch.com 7/34
2
8
6 7
4
1
5
3
3.4 Measurement uncertainty
Input FA : +/- 1 Hz
Input VA : +/- 1 Hz
Input TA : +/- (0.7 % of measured value + 0.02 % FS)
Temperature display : +/- 1 Kelvin
Analog input 0-10 V : +/- (0.3 % of measured value + 0.02 % FS)
Analog input 4-20 mA : +/- (0.3 % of measured value + 0.02 % FS)
Input Pt100 : +/- 0.2 Kelvin
All values apply for a set damping rate of 30 seconds during measurement. In addition, the measurement
uncertainty of the utilised sensors must be taken into consideration.
4Initial Operation / Startup
For installation and operation of the system especially in explosive atmospheres category 2G the national
regulations currently in force, the recognised standards of good practice and these Operating Instructions
apply.
Always make sure that the connector sockets not in use are firmly capped, the sensor plug is screwed on
tightly and the USB connection cover is tightly sealed.
4.1 Wiring diagram for the 8-pin connector plug
Electrical connection must be carried out according to the relevant wiring diagram.
Incorrect connection can cause serious damage to the electronics.
Wiring diagram with view of solder contacts:
Pin assignment
Pin 1: v/FA+FAR signal 1 For v/VA signal F
Pin 2: ground G
Pin 3: Pt100
Pin 4: Pt100
Pin 5: Pt100
Pin 6: Pt100
Pin 7: v/FAR signal 2 F
Pin 8: V+
Housing: shield

_________________________________________________________________________________________________
______________________________________________________________________________________
8/34 www.hoentzsch.com U426_flowtherm Ex_B_e_171206
4.2 Wiring diagrams for the 12-pin connector plug
Electrical connection must be carried out according to the relevant wiring diagram..
Incorrect connection can cause serious damage to the electronics.
Wiring diagrams with view of solder contacts:
4.2.1 Analog input 4-20 mA
(2-wire system current
for 12V supply)
A = power supply + (12V)
F= power supply –(GND)
plug shell = shielding
4.2.2 Analog input 4-20 mA
(3 or 4-wire system current
for 12V supply)
A = power supply + (12V)
B = power supply –(GND_D)
F= signal +
H = signal –(GND_A)
plug shell = shielding
4.2.3 Analog input 0-10 V
(3 or 4-wire system voltage
for 12V supply)
A = power supply + (12V)
B = power supply –(GND_D)
G = signal +
H = signal –(GND_A)
plug shell = shielding

_________________________________________________________________________________________________
______________________________________________________________________________________
U426_flowtherm Ex_B_e_171206 www.hoentzsch.com 9/34
5Operation
5.1 Key functions
Switch on: with the key (also symbol)
hold down until text appears in the display.
Switch off: with the key (also symbol)
press the key for 1 second until the display goes off.
Control keys: , and are keys with variable function, identified in the bottom
row of the display depending on user level.
Arrow keys: In measured value display / view after switch on:
during measured value display the arrow keys have the following function:
and : shift the display. Definition whether the values from 1, 2 or 3
input channels are displayed simultaneously. Depending on selection, the
character size of the display value changes.
and : is the display so set that only measured values from 1 or 2
input channels are displayed simultaneously, then these keys can be used for scroll-
ing through the input channels.
In the menus and input boxes:
, , and are control keys for navigating within the various menus
and menu levels.
ok key: In the measured value display / view after switch on:
is a control key for switching the display light on or off.
In the menus and input boxes:
is a control key to select and save.

_________________________________________________________________________________________________
______________________________________________________________________________________
10/34 www.hoentzsch.com U426_flowtherm Ex_B_e_171206
Examples for key functions in the menus:
Menu selection list:
With up or down in the list; the selected element
is highlighted.
With a menu level higher (backwards).
With a menu level lower (forwards) = select.
With select = a menu level lower (forwards).
With return to measured value display.
With switch off.
Parameter value selection window:
With new selection element; the selected element
flashes (here "mn").
With select and save and return to selection list.
With return to measured value display without saving.
With return to selection list without saving.
With switch off.
Parameter value digit (numeric/text) setting:
With change digit; the selected and editable
digit flashes (here "1").
With 1 digit to the left or right respectively.
With select and save and return to selection list.
With return to measured value display without saving.
With return to selection list without saving.
With switch off.

_________________________________________________________________________________________________
______________________________________________________________________________________
U426_flowtherm Ex_B_e_171206 www.hoentzsch.com 11/34
5.2 Setup menu after switch on
Menu
Settings
Sensor
FA input
Basic settings 5.3.1
Type 5.3.1.1
Range 5.3.1.2
Material 5.3.1.3
Directional sensing 5.3.1.4
Measurement settings 5.3.2
Medium 5.3.2.1
Section 5.3.2.2
Profile factor 5.3.2.3
Damping 5.3.2.4
Density correction 5.3.3
Operating conditions 5.3.4
Service temperature 5.3.4.1
Working pressure 5.3.4.2
Standard conditions 5.3.5
Standard temperature 5.3.5.1
Standard pressure 5.3.5.2
Standard density 5.3.5.3
Pairs of values 5.3.6
VA input
Basic settings 5.3.7
Type 5.3.7.1
Measurement settings 5.3.8
Section 5.3.8.1
Profile factor 5.3.8.2
Damping 5.3.8.3
Operating conditions 5.3.9
Service temperature 5.3.9.1
Working pressure 5.3.9.2
Standard conditions 5.3.10
Standard temperature 5.3.10.1
Standard pressure 5.3.10.2
Standard density 5.3.10.3
Pairs of values 5.3.11
TA input
Basic settings 5.3.12
Type 5.3.12.1
Measurement settings 5.3.13
Section 5.3.13.1
Profile factor 5.3.13.2
Pressure 5.3.13.3
Damping 5.3.13.4
Standard conditions 5.3.14
Standard temperature 5.3.14.1
Standard pressure 5.3.14.2
Standard density 5.3.14.3
Pairs of values 5.3.15
Pt100 input
Unit 5.3.16
Analog input 5.3.17

_________________________________________________________________________________________________
______________________________________________________________________________________
12/34 www.hoentzsch.com U426_flowtherm Ex_B_e_171206
Menu
Settings
Counter 5.3.18
Reset 5.3.18.1
Decimals 5.3.18.2
Display 5.3.19
Sensor 5.3.19.1
Rows 5.3.19.2
Row 1 5.3.19.3
Row 2 5.3.19.4
Row 3 5.3.19.5
Long-term measurement 5.3.20
Mode 5.3.20.1
Device 5.3.21
Factory settings 5.3.22
Data logger 5.3.23
Switching on / off 5.3.23.1
View 5.3.23.2
Settings 5.3.23.3
Delete 5.3.23.4
Status 5.3.24
Profiles 5.3.25
Switch off 5.3.27
LM-Start
5.3.26
Logger
Switching on / off 5.3.23.1
View 5.3.23.2
Settings 5.3.23.3
Delete 5.3.23.4
Off/ Reset
5.3.27

_________________________________________________________________________________________________
______________________________________________________________________________________
U426_flowtherm Ex_B_e_171206 www.hoentzsch.com 13/34
5.3 Parameter settings
Settings for vane wheel sensors FA:
5.3.1 FA - Basic settings
Menu -> Settings -> Sensor -> FA input -> Basic settings
The connected vane wheel sensor determines the parameter type, measuring range, material and direc-
tional sensing to be set.
5.3.1.1 Type
Setting the vane wheel type:
This can be determined from the serial no. on the sensor.
Selection: mc = micro - for use in for instance:
cylinder probes with OD 14, 16, 18 mm
measuring tubes with ID 9.7 mm
mn = mini for use in for instance:
cylinder probes with OD 25 mm
measuring tubes with ID 18.2 mm
md = midi for use in for instance:
cylinder probes with OD 30 mm
pairs of values = special calibration characteristic specifically matched to the
measuring task based on up to 30 supporting points. Input or
changing the points, see under 5.3.6
Distinctive feature of sensors with vane wheel types md3 and ms (measuring tube):
These sensors are always supplied with a special calibration characteristic. Therefore, always select pairs
of values. For input or change see (5.3.6) pairs of values.
5.3.1.2 Range
Setting the vane wheel measuring range:
This can be determined from the serial no. on the sensor.
Selection: 20 = measuring range up to 20 m/s
40 = measuring range up to 40 m/s
80 = measuring range up to 80 m/s
120 = measuring range up to 120 m/s
Exceeding the measuring range can cause permanent damage to the vane wheel!
5.3.1.3 Material
Setting the vane wheel sensor material:
This can be determined from the serial no. on the sensor.
Selection: steel = E
aluminium = A
titanium = T
5.3.1.4 Directional sensing
Setting the directional sensing function: such sensors are identified by an "R" in the serial number.
Selection: Y= directional sensing yes, measured value display with prefix
N= directional sensing no, measured value display without prefix

_________________________________________________________________________________________________
______________________________________________________________________________________
14/34 www.hoentzsch.com U426_flowtherm Ex_B_e_171206
5.3.2 FA - Measurement settings
Menu -> Settings -> Sensor -> FA Input -> Measurement settings
The task to be carried out determines the parameter, medium, section and profile factor to be set.
5.3.2.1 Medium
Setting the medium:
Selecting pairs of values in the basic settings (5.3.1.1) has no impact on the measurement.
Selection: G= Gases, the characteristic for air/gases is applied
F= Liquids (Fluids), the characteristic for water/liquids is applied
Use only "GF" sensors (see technical documents) for measuring in liquids; otherwise the sensor can be
permanently damaged!
5.3.2.2 Section
Setting the measuring section for measuring in pipelines for flow rate display:
Selection: Circular = for pipes with circular section
di/mm: enter the ID in mm
Rectangular = for pipes with rectangular section
a/mm: enter the inner surface a in mm
b/mm: enter of the inner surface b in mm
5.3.2.3 Profile factor
The profile factor PF specifies the ratio of mean flow velocity in the measuring section and the flow velocity
measured from the sensor. Requirements are: centric sensor positioning, non-rotational inlet flow and
adequately dimensioned input/output sections. (See also Documents U117 and U205)
Following profile factors are to be set for vane wheel cylinder probes (ZS..) subject to pipe diameter:
Pipe ID
in mm
PF for ZS16 (mc)
PF for ZS18 (mc)
PF for ZS25 (mn) and
ZS30 (md)
40
0.914
0.898
50
0.933
0.916
0.735
60
0.950
0.932
0.760
70
0.964
0.948
0.784
80
0.976
0.962
0.807
90
0.987
0.975
0.829
100
0.994
0.986
0.849
120
1.004
1.004
0.882
170
1.008
1.021
0.938
180
1.008
1.021
0.945
220
1.008
1.021
0.955
...
1.009
1.021
0.960
For measurements in larger free jet as well as larger ducts or measuring tubes PF = 1.000 results in the
local/punctual velocity.
With TABLE a profile factor subject to the vane wheel type (5.3.1.1) and diameter of the measuring
surface (5.3.2.2) is recommended. This value can be verified or also amended before saving. If rectang-
ular is selected, the surface is converted to circular for the proposed value and this value is approximate.
If the sensor is a ZS18 (mc), the value must be amended according to the table above.
PF = 1.000 must always be set for FADi... measuring tubes calibrated with pairs of values!

_________________________________________________________________________________________________
______________________________________________________________________________________
U426_flowtherm Ex_B_e_171206 www.hoentzsch.com 15/34
5.3.2.4 Damping
The damping rate set here affects the measured value display, if FA is selected as sensor in the display
settings (5.3.19.1).
Damping/s: enter the damping time of 01 to 99 seconds
Example 10 seconds: after every second the arithmetical average of the last 10 seconds is displayed.
5.3.3 FA - Density correction
Menu -> Settings -> Sensor -> FA Input -> Density correction
Liquids:
Liquids are virtually density resistant. No density correction needed.
Gases and vapours:
The density of gases and vapours can be strongly modified against pressure and temperature. Such
severe modifications have a minor impact on the measured value of a vane wheel sensor. This impact
manifests itself in a determinable correction value, which is added to or subtracted from the measured
value. The percentaged impact of this correction value is however negligible with average to high velocity
flow. With low and very low values, consideration of the density correction becomes more expediant.
To determine this correction value the measuring range initial value (starting value) of a vane wheel is
examined. The specified starting value in the vane wheel sensor documents arises from a medium density
of 1.204 kg/m³ (calibration conditions). The only slightly deviating actual starting value, even with consid-
erably different working density of the medium (in the actual application) ensures in good approximation
of the following:
actual starting value = specified starting value x root of (density during calibration / working density of
the medium).
The correction value is now the difference between real and specified starting value. The characteristic of
the sensor is displaced by this value.
If the operating density of the medium is greater than the calibration density of 1.204 kg/m³, then the
determined correction value must be deducted from the measured value. If it is less than the calibration
density of 1.204 kg/m³, then the determined correction value must be added to the measured value.
The working medium density is needed to calculate the correction value.
Example:
A ZS25GE-mn40/100/p10 sensor with a specified starting value of 0.5 m/s is used in air at 1.013 bar and
100 °C, that is, with a working medium density of 0.946 kg/m³.
Entered in formula:
actual starting value = 0.5 m/s x root of (1.204 kg/m³ / 0.946 kg/m³) = 0.5 m/s x 1.128
= 0.564 m/s
correction value = 0.564 m/s –0.5 m/s
= 0.064 m/s
With a displayed value of 15.00 m/s (without correction) and with density correction on, the correction
value of 0.064 m/s would be allowed for and a corrected value of 15.06 m/s would be displayed.
Setting:
Selection: N= density correction no
J= density correction yes then enter the density of the sample gas:
W-density/kg/m3: enter the working medium density in kg/m³

_________________________________________________________________________________________________
______________________________________________________________________________________
16/34 www.hoentzsch.com U426_flowtherm Ex_B_e_171206
If the working medium density is not known, it can be determined with the formula:
W-density = P / (R * T)
where P = absolute pressure in Pa, R = specified gas constant in J/(kg*K), T = temperature in K.
Here the specific gas constants of some gases:
sample gas
specific gas constant
in J/(kg*K)
sample gas
specific gas constant
in J/(kg*K)
dry air
287
hydrogen H2
4124
steam H2O
462
methane CH4
518
argon Ar
208
nitrogen N2
297
carbon dioxide CO2
189
oxygen O2
260
carbon monoxide CO
297
propane C3H8
189
helium He
2077
sulphur dioxide SO2
130
5.3.4 FA- Operating conditions
Menu -> Settings -> Sensor -> FA input -> Operating conditions
When choosing the relevant units (see 5.3.19.6) service temperature and working pressure are needed for
calculation purposes. The operating conditions can be entered in this menu or determined with connected
sensor.
5.3.4.1 Service temperature
Measured or entered unit in °C
5.3.4.2 Working pressure
Measured or entered unit in hPa
5.3.5 FA –Standard conditions
Menu -> Settings -> Sensor -> FA input -> Standard conditions
Standard conditions for Höntzsch are 0 °C (32 °F) and 1013 hPa (14.7 psia). Any standard can be set via
the standard temperature and standard pressure parameters.
5.3.5.1 Standard temperature
Input value in °C
5.3.5.2 Standard pressure
Input value in hPa
5.3.5.3 Standard density
Input value in kg/m³ depending on set standard conditions for calculating the mass flow rate.
5.3.6 FA –Pairs of values
Menu -> Settings -> Sensor -> FA Input -> Pairs of values
If pairs of values is selected (see 5.3.1.1), then the values stored here for determining the measured
value are applied as a calibration curve.
Selection: Configuration = enter the quantity of pairs of values (minimum 2, maximum 30) for
processing and display
Pairs of values = display and amend pairs of values.
A pair of values always consists of a velocity value in m/s and a frequency
value in Hz.
The condition being: the pairs of values must be ever increasing, i.e the
next velocity and frequency value must always be greater than the
previous one.

_________________________________________________________________________________________________
______________________________________________________________________________________
U426_flowtherm Ex_B_e_171206 www.hoentzsch.com 17/34
Example for quantity = 03
01:000.50m/s, 00010Hz
02:010.00m/s, 00350Hz
03:040.00m/s, 01770Hz
If the frequency measured value is greater than in the last pair of values, then the velocity value is
calculated. However, this means that the measurement uncertainty increases as this value is then outside
the calibrated range. The measuring range in the serial no. and technical data sheet must not be
exceeded, as this may cause permanent damage to the vane wheel! (for further information refer to
5.3.1.2)
Settings for vortex sensors VA:
5.3.7 VA –Basic settings
Menu -> Settings -> Sensor -> VA Input -> Basic settings
The connected vortex sensor determines the parameter type.
5.3.7.1 Type
Setting the type of vortex sensor:
Refer to the relevant technical documents for selection options.
Selection: KKZ = the calibration number (KKZ) is individually determined for each sensor
and modifies the basic characteristics
KKZ: enter as an 8-digit figure, in which each digit has a 0..9..A..F range
(hexadecimal = 16 possible variables).
The actual KKZ can be found in the technical data sheet, calibration
certificate or directly on the sensor
Pairs of values = special calibration characteristic specifically matched to the measuring task
based on up to 30 supporting points. Entering or amending the points, see
under 5.3.11.
The actual pairs of values are documented in the technical documents.
5.3.8 VA - Measurement settings
Menu -> Settings -> Sensor -> VA Input -> Measurement settings
The measuring task to be carried out determines the parameter, section and profile factor to be set.
5.3.8.1 Section
Setting the measuring section for measuring in pipelines for flow rate display:
Selection: Circular = for pipes with circular section
di/mm: enter the ID in mm
Rectangular = for pipes with rectangular section
a/mm: enter the inner surface a in mm
b/mm: enter the inner surface b in mm
5.3.8.2 Profile factor
The profile factor PF specifies the ratio of mean flow velocity in the measuring section and the flow velocity
measured from the sensor. Requirements are: centric sensor positioning, non-rotational inlet flow and
adequately dimensioned input/output sections. (See also Documents U155 and U206).

_________________________________________________________________________________________________
______________________________________________________________________________________
18/34 www.hoentzsch.com U426_flowtherm Ex_B_e_171206
Following profile factors are to be set for vortex sensors VA40 subject to the pipe diameter:
Pipe ID
in mm
PF for VA40
Pipe ID
in mm
PF for VA40
80
0.719
160
0.808
90
0.729
170
0.819
100
0.738
180
0.830
110
0.750
190
0.839
120
0.761
200
0.842
130
0.773
300
0.845
140
0.784
400
0.850
150
0.796
...
0.860
For measurements in larger free jet as well as larger ducts or measuring tubes PF = 1.000 results in the
local/punctual velocity.
With TABLE a profile factor subject to the set diameter of the measuring surface (5.3.8.1) is recom-
mended. This value can be verified or also amended before saving. With rectangular selected as measur-
ing surface, the surface is converted to circular for the proposed value and this value is approximate.
PF = 1.000 must always be set for VADi… measuring tubes calibrated with pairs of values!
5.3.8.3 Damping
The damping rate set here affects the measured value display, if VA is selected as sensor in the display
settings (see 5.3.19.1).
Damping/s: enter the damping time from 01 to 99 seconds
Example 10 seconds: after every second the arithmetical average from the last 10 seconds is displayed.
5.3.9 VA –Operating conditions
Menu -> Settings -> Sensor -> VA Input -> Operating conditions
When selecting the relevant units (see 5.3.19.6) service temperature and working pressure are needed for
calculation purposes. The operating conditions can be entered in this menu, or determined with connected
sensor.
5.3.9.1 Working temperature
Measured or entered value in °C
5.3.9.2 Working pressure
Measured or entered value in hPa
5.3.10 VA –Standard conditions
Menu -> Settings -> Sensor -> VA Input -> Standard conditions
Standard conditions for Höntzsch are 0 °C (32 °F) and 1013 hPa (14.7 psia). Any standard can be set via
the standard temperature and standard atmospheric pressure parameters.
5.3.10.1 Standard temperature
Input value in °C

_________________________________________________________________________________________________
______________________________________________________________________________________
U426_flowtherm Ex_B_e_171206 www.hoentzsch.com 19/34
5.3.10.2 Standard atmospheric pressure
Input value in hPa
5.3.10.3 Standard density
Input value in kg/m³ depending on set standard conditions for calculating the mass flow rate.
5.3.11 VA –Pairs of values
Menu -> Settings -> Sensor -> VA Input -> Pairs of values
If pairs of values is selected (see 5.3.7.1), then the values stored here for determining the measured
value are applied as a calibration curve.
Selection: Configuration = enter the quantity of pairs of values (minimal 2, maximal 30) for pro-
cessing and display
Pairs of values = display and change of pairs of values.
A pair of values always consists of a velocity value in m/s and a frequency
value in Hz.
The condition being: the pairs of values must be ever increasing, i.e. the
next velocity and frequency value must always be greater than the
previous one.
Example for quantity = 03
01:000.50m/s, 00010Hz
02:010.00m/s, 00350Hz
03:040.00m/s, 01770Hz
If the frequency measured value is greater than in the last pair of values, then the velocity value is
calculated. However, this means that the measurement uncertainty increases as this value is then outside
the calibrated range.
Settings for thermal sensors TA:
5.3.12 TA –Basic settings
Menu -> Settings -> Sensor -> TA Input -> Basic settings
The connected thermal sensor determines the parameter type.
5.3.12.1 Type
Setting the type of thermal sensor:
Refer to the relevant technical documents for selection options.
Selection: KKZ = the calibration number (KKZ) is individually determined for each sensor
and modifies the basic characteristics.
KKZ: enter as a 14-digit figure, in which each digit has a 0..9..A..F range
(hexadecimal = 16 possible variables).
The actual KKZ can be found in the technical data sheet, calibration
certificate or directly on the sensor
Pairs of values = special calibration characteristic specifically matched to the measuring task
based on up to 30 supporting points. Entering or amending the points, see
under 5.3.15.
The actual pairs of values can be found in the technical documents.

_________________________________________________________________________________________________
______________________________________________________________________________________
20/34 www.hoentzsch.com U426_flowtherm Ex_B_e_171206
5.3.13 TA - Measurement settings
Menu -> Settings -> Sensor -> TA Input -> Measurement settings
The task to be carried out determines the parameter, section and profile factor to be set.
5.3.13.1 Section
Setting the measuring section for measuring in pipelines for flow rate display:
Selection: Circular = for pipes with circular section
di/mm: enter the ID in mm
Rectangular = for pipes with rectangular section
a/mm: enter the inner surface a in mm
b/mm: enter the inner surface b in mm
5.3.13.2 Profile factor
The profile factor PF specifies the ratio of mean flow velocity in the measuring section and the flow velocity
measured from the sensor. Requirements are: centric sensor positioning, non-rotational inlet flow and
adequate dimensioned input/output sections. (See also Documents U232 and U234)
Following profile factors are to be set for thermal flow sensors TA10 subject to the pipe diameter:
Pipe ID
in mm
PF for thermal
sensors TA10
25
0,725
27,2
0,740
35,9
0,790
40
0,810
41,8
0,820
50
0,840
...
0,840
For measuring in larger free jet as well as larger ducts or measuring tubes with setting PF = 1.000 the
local/punctual velocity will be displayed.
With TABLE a profile factor subject to the set diameter of the measuring surface (5.3.13.1) is rec-
ommended. This value can be verified or also amended before saving. With rectangular selected as meas-
uring surface, the surface is converted to circular for the proposed value and this value is approximate.
PF = 1.000 must always be set for TADi.. measuring tubes calibrated with pairs of values!
5.3.13.3 Pressure
B Working pressure in hPa as absolute pressure for zero correction.
5.3.13.4 Damping
The damping rate set here affects the measured value display, if TA is selected as sensor in the display
settings (5.3.19.1).
Damping/s: enter the damping time of 01 to 99 seconds
Example 10 seconds: after every second the arithmetical average of the last 10 seconds is displayed.
Table of contents
Other Hontzsch Measuring Instrument manuals