PAGE 5 OF 7 0114 IH-3956
STAIR CLEANING CONTINUED
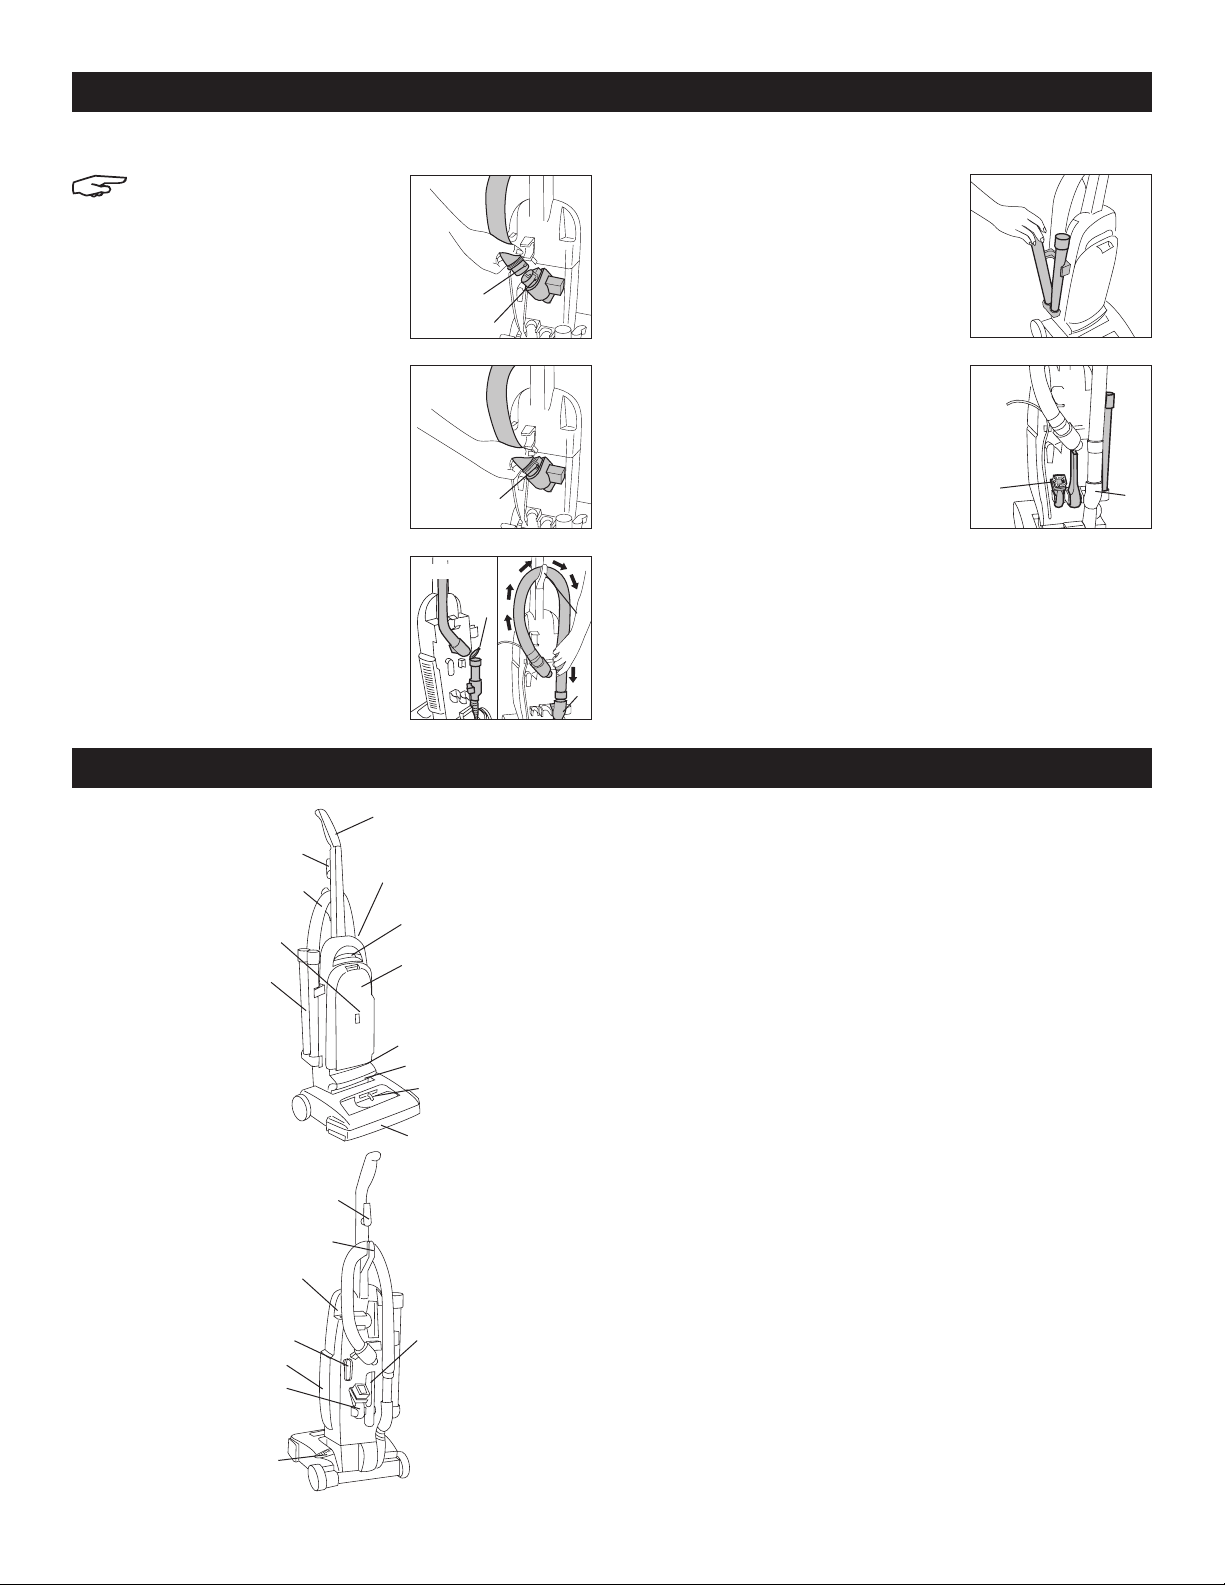
The hose and furniture nozzle can also be used for stair
cleaning. Clean from bottom to top.
CLEANING TOOLS
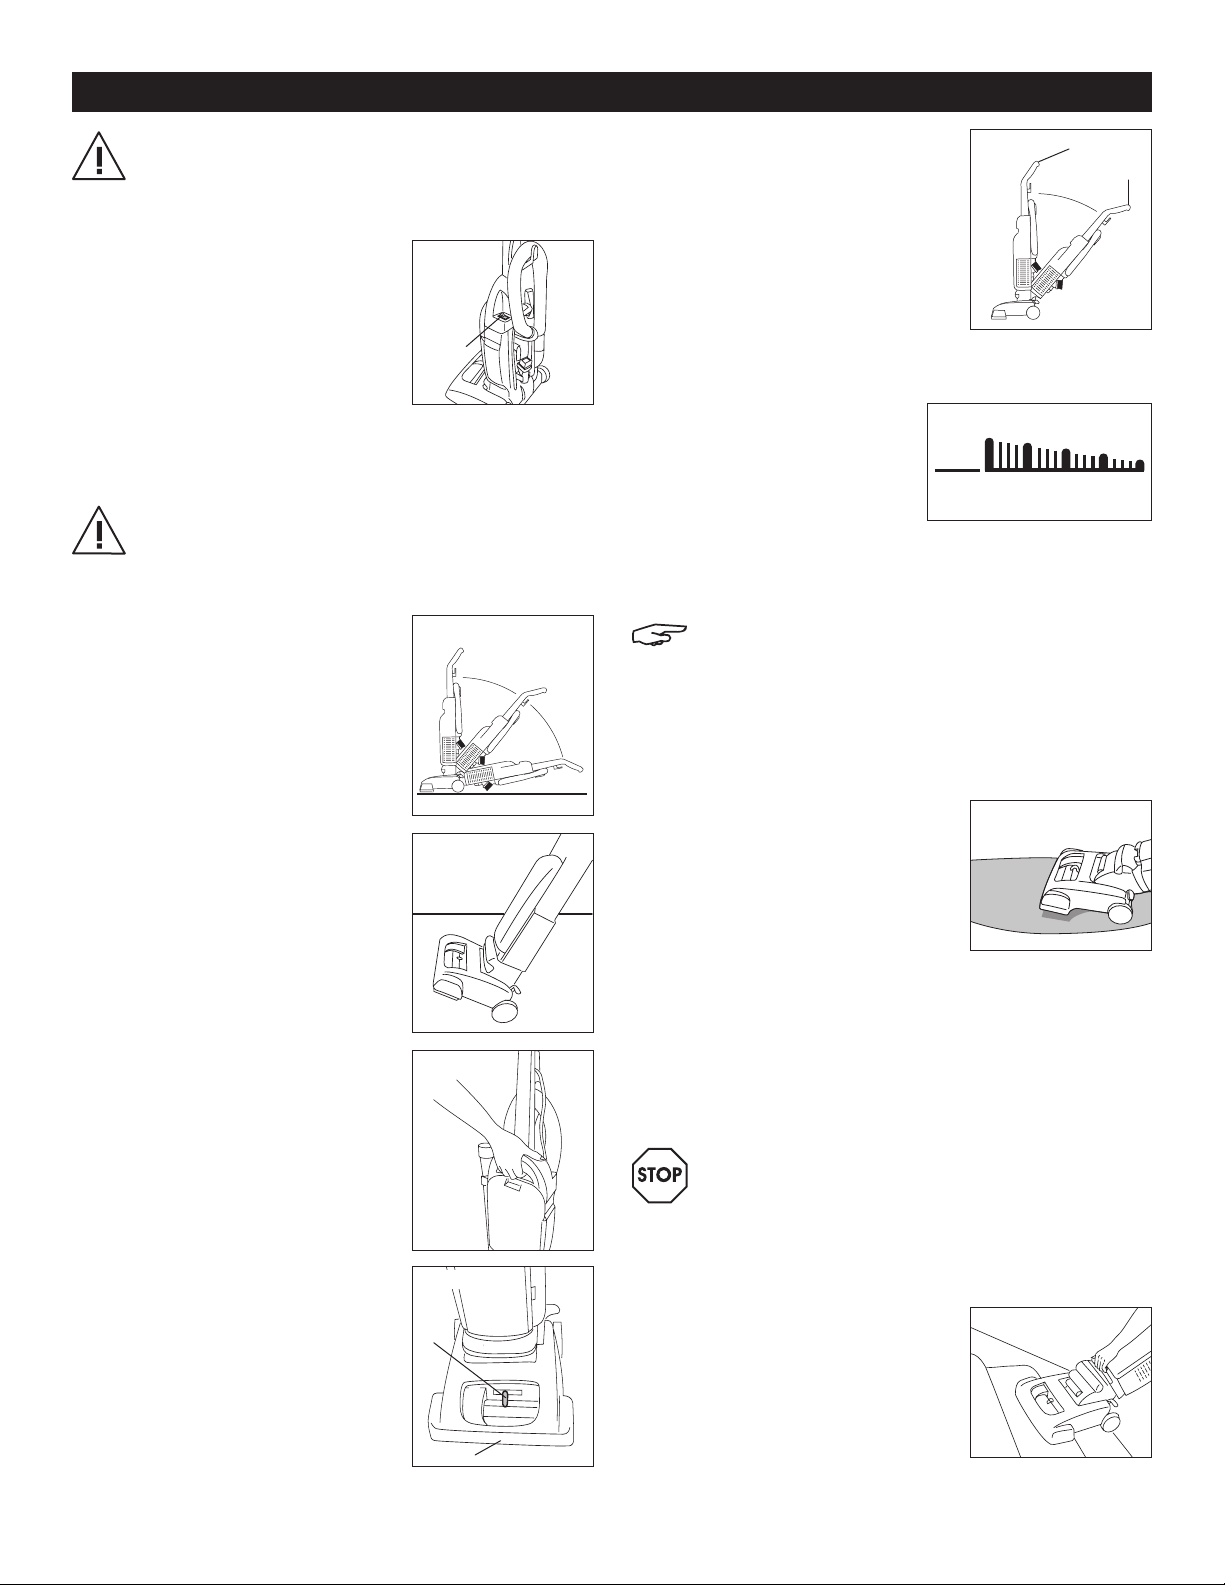
WARNING! Brush roll continues to turn while
product is turned on and handle is in the upright
position. To avoid damage to carpet, rugs and
flooring, avoid tipping vacuum or setting it on
furniture, fringed area rugs or carpeted stairs
during tool use.
REMOVING HOSE
NOTE: When using cleaning tools, vacuum
handle should be in the upright position.
Turn vacuum off before disconnecting and
connecting hose to hose tube.
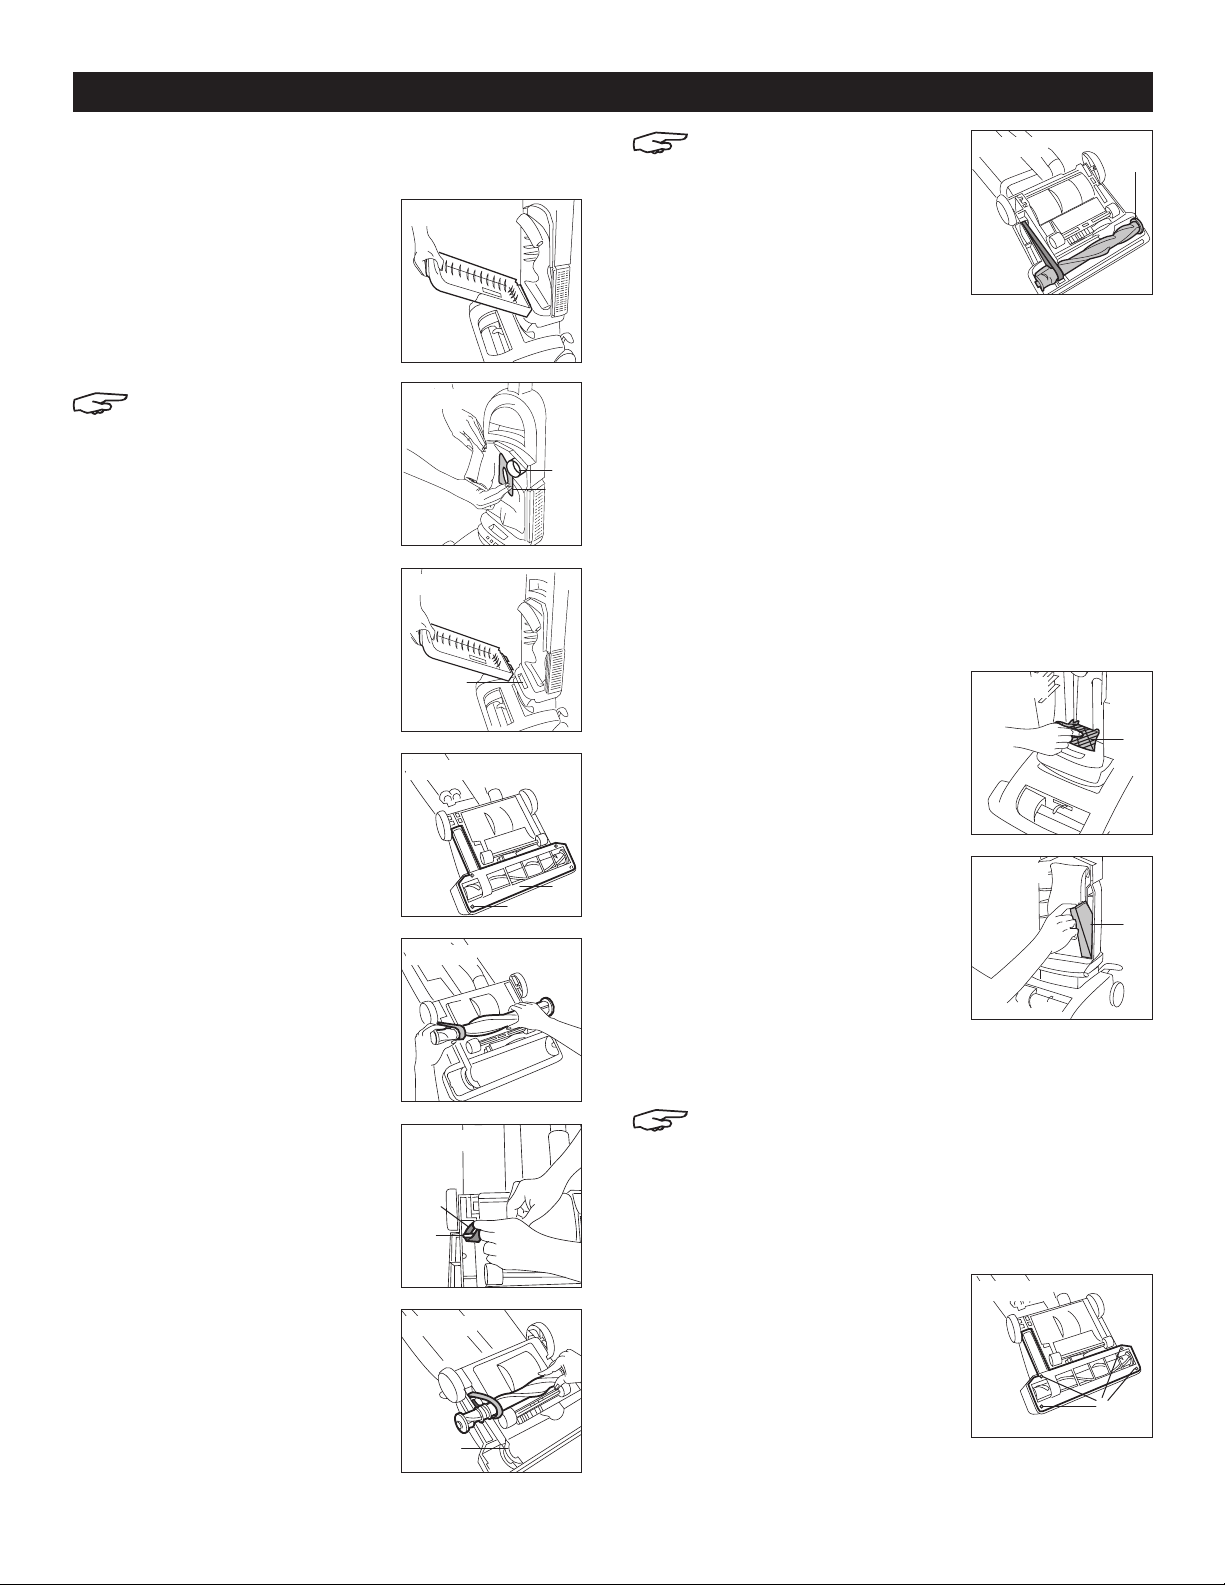
1. Remove hose from hose tube (M).
(See Figure 20)
2. Lower hose tube cover (N).
(See Figure 20)
3. When finished using cleaning
tools, lift cover from hose tube
and reposition hose into tube.
SELECT PROPER TOOL
• Dusting brush (O) may be
used for carved furniture,
table tops, books, lamps,
lighting fixtures, venetian
blinds, baseboards,
shutters, and registers. To
use as a furniture nozzle,
press tab and slide
brushes off. (See Figure 21)
• Furniture nozzle (P) may be used for upholstered
furniture, draperies, mattresses, clothing, automobile
interiors, and carpeted stairs. (See Figure 21)
• Crevice tool (Q) may be used in tight spaces,
corners and along edges in such places as
dresser drawers, upholstered furniture, stairs and
baseboards. (See Figure 21)
• Extension wands are used to give extra length to
your hose. Use them with any of the above tools.
(See Figure 21)
ATTACH WAND AND TOOLS
1. Attach tool or wand to the
hose by pushing it firmly into
the hose. (See Figure 22)
2. Twist wand or tool slightly
to tighten or loosen the
connection.
3. Repeat with other tools.
CLEAN TOOLS AND HOSE
1. To clean hose wipe off dirt with a cloth dampened
in a mild detergent. Rinse with a damp cloth.
2. Wash tools in warm water with a detergent. Rinse
and air dry before using.
CHECK BAG INDICATOR
The indicator (R) will turn red as the
filter bag fills with dirt. (See Figure 23)
Three conditions cause the indicator
to become completely red:
• The bag is full; change the bag .
• Fine materials have been picked
up, clogging the bag pores; change the bag .
• Blockage in the nozzle, hose, tools or at the bag
opening; remove the blockage (See Clearing
Blockages, page 7)
INSTRUCTIONS CONTINUED
MAINTENANCE
Figure 22
Q
P
O
Figure 21
Figure 20
M
N
Figure 23
R
CAUTION! To reduce the risk of injury from
moving parts, unplug before servicing.
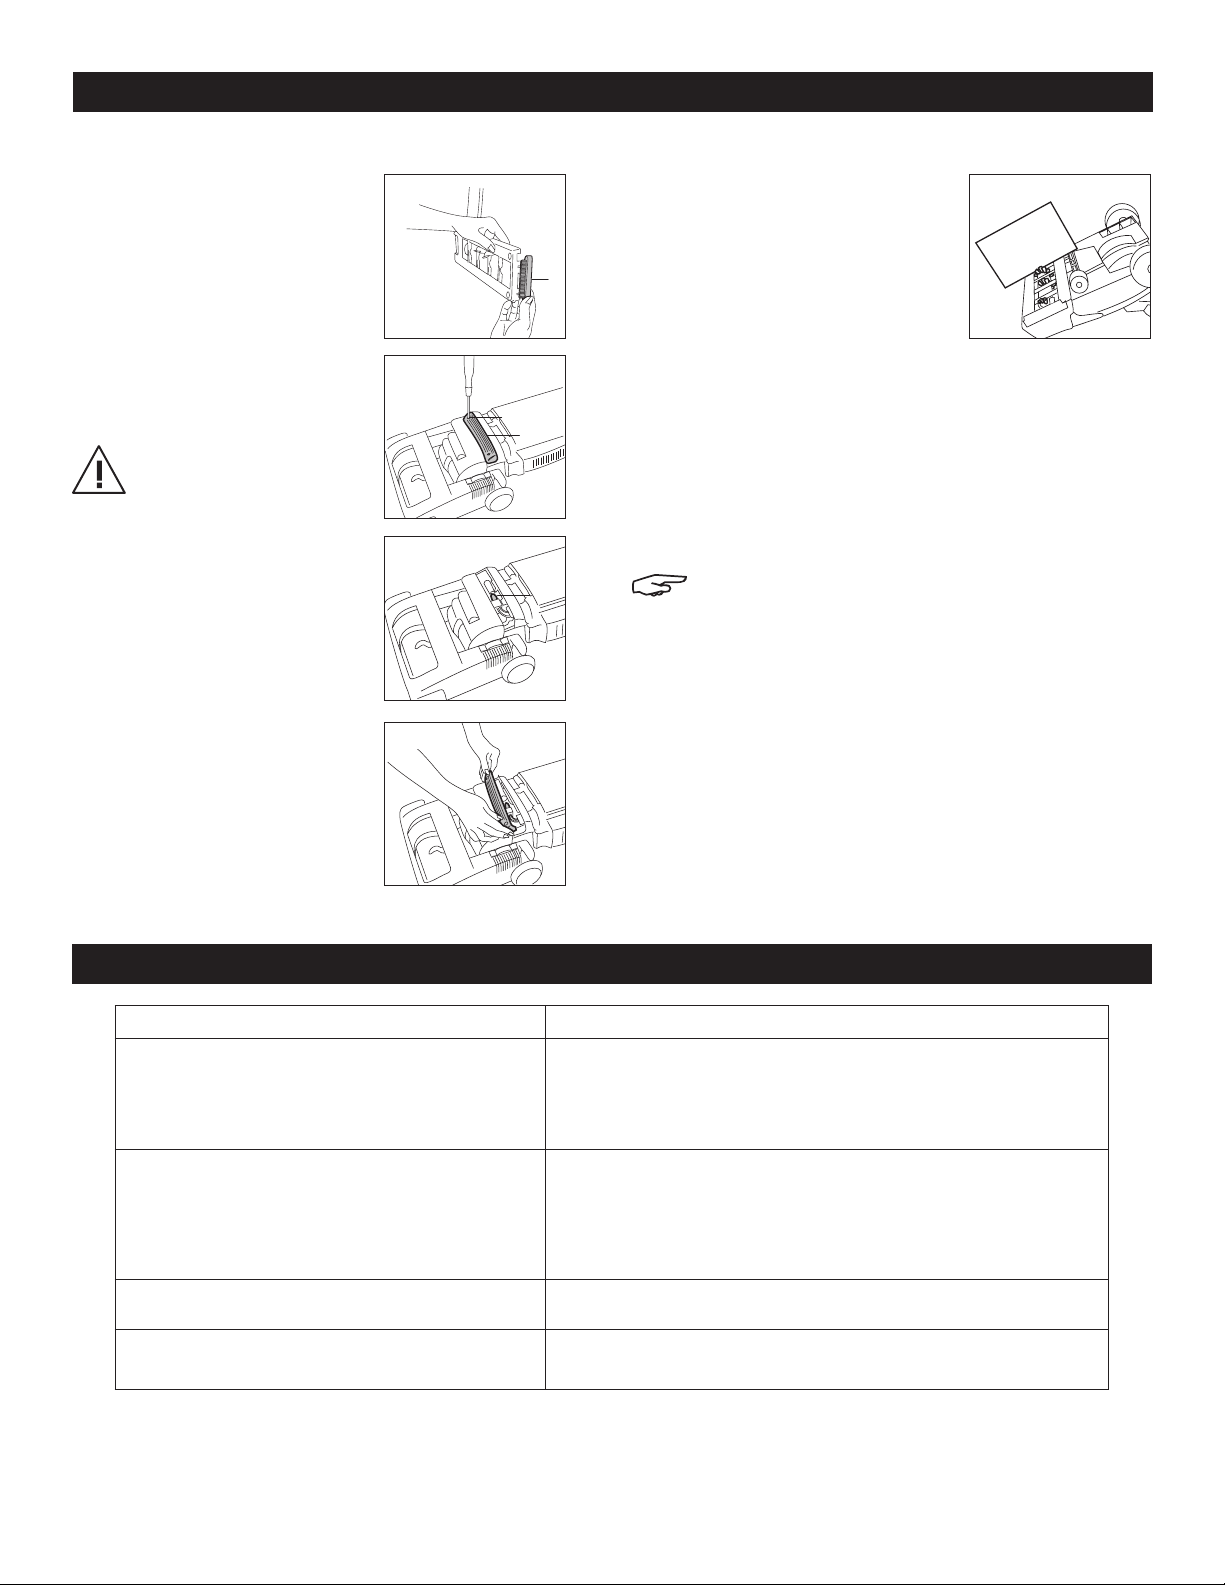
FILTER BAG REPLACEMENT
Change filter bag when dirt reaches the dotted line or
vacuum will not operate effectively.
NOTE: New carpet has loose fibers that fill the filter
bag quickly when vacuumed. This type of debris
does not activate the indicator. If vacuuming new
carpet change the filter bag often.
CAUTION! Fine materials such as face powder
or corn starch may seal the filter bag and
cause it to burst. When vacuuming material of
this nature, change filter bag often.