manuals.online logo
Brands
  1. Home
  2. •
  3. Brands
  4. •
  5. Hoover
  6. •
  7. Vacuum Cleaner
  8. •
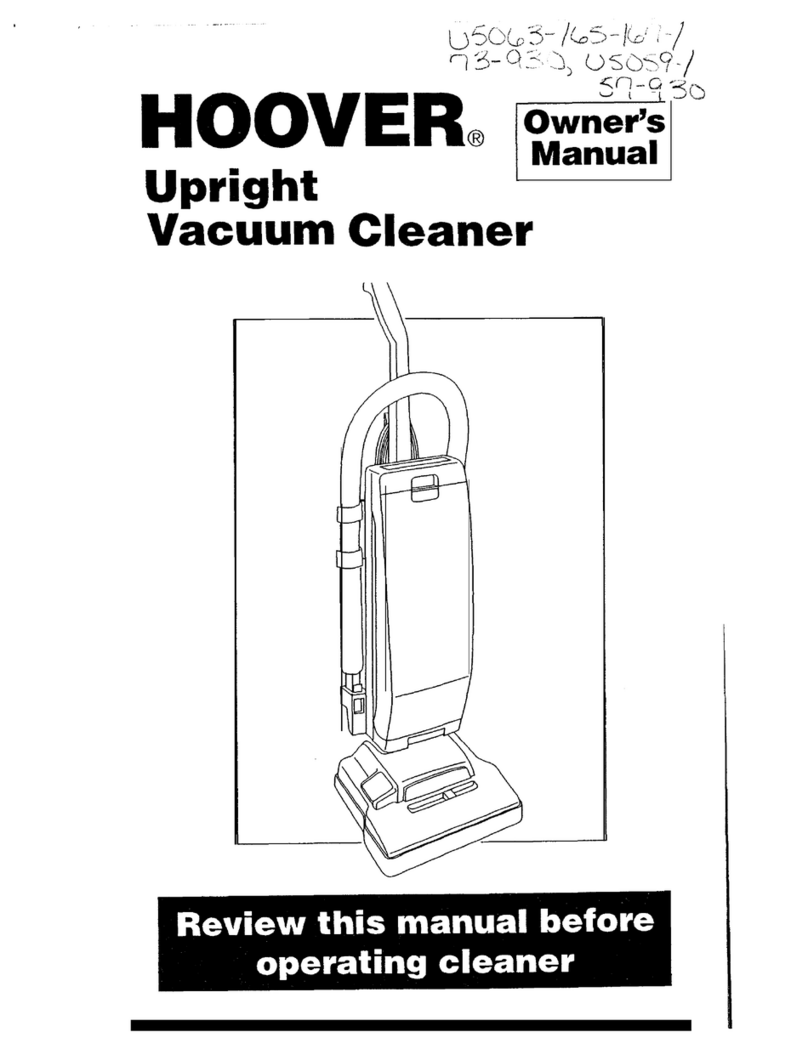
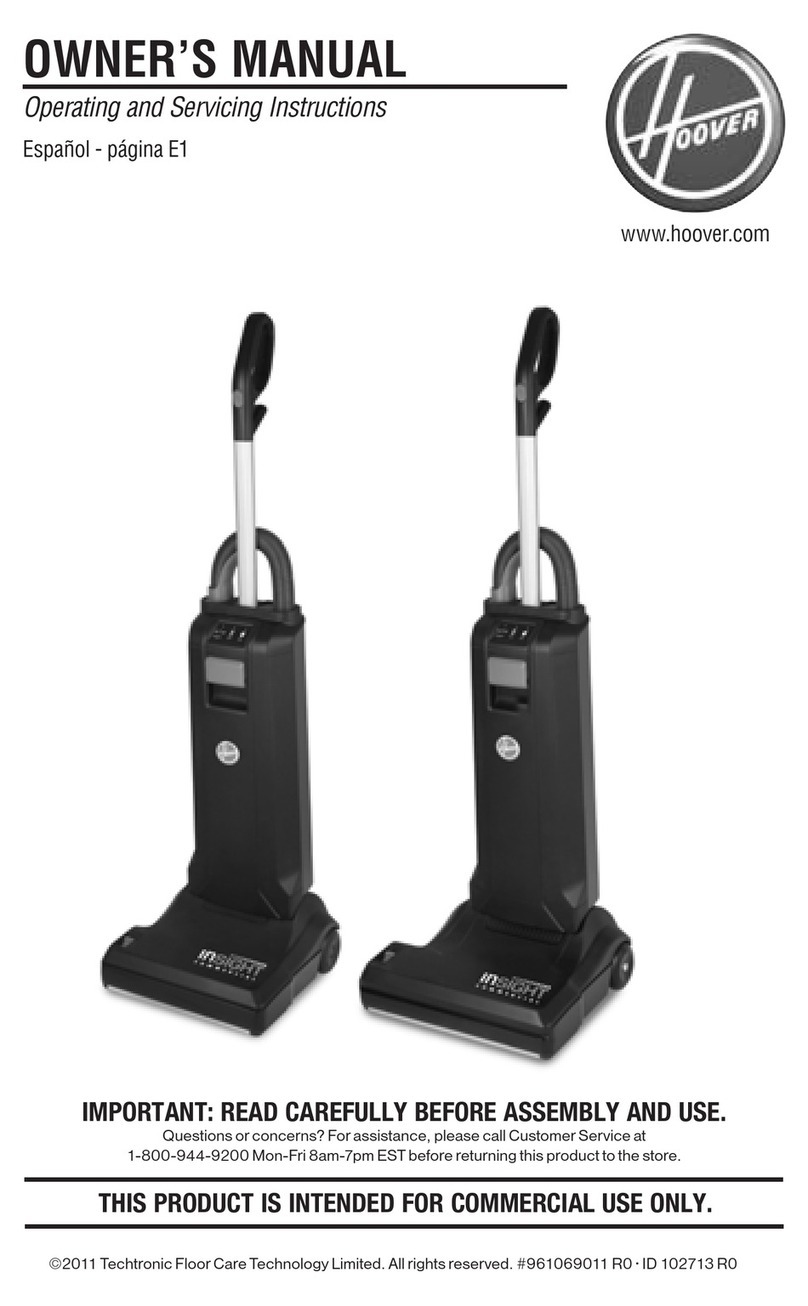
  9. Hoover UH40145B User manual

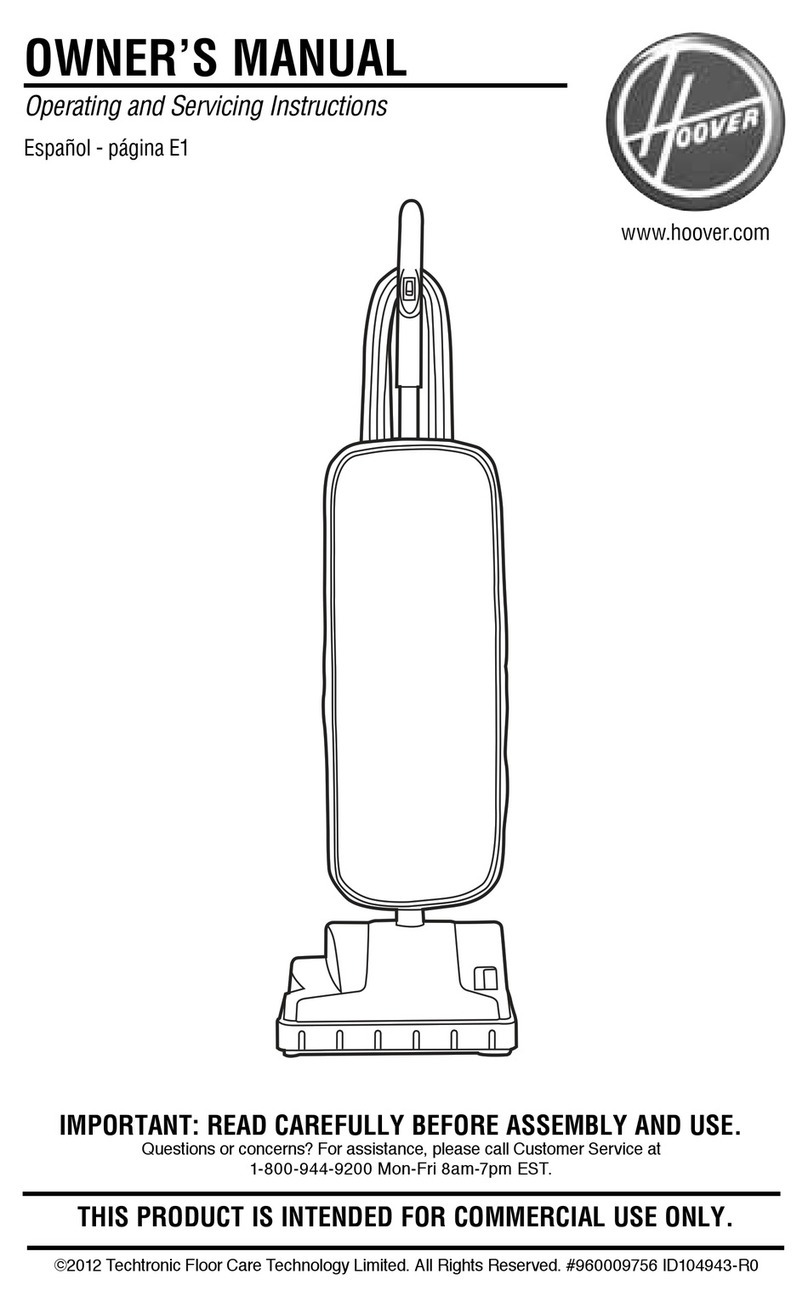
Hoover UH40145B User manual

Owner's
Manual
)perating
snd
Servicing
Instructions
www,hoover.com
Please
review
this
manual
beforeoperating
your
Hoover@
product.
02008
Healthy
Gainlnvestments,
Ltd.All
rights
reserved.
#5651
1C67.
3/08
All manuals and user guides at all-guides.com
all-guides.com
Thank
you
for
choosing
Please
enter
thecompletemodel
and
serial
numbers
in the
spaces
provided.
Model
aHOOVER'
product.
SerialNumber
Hint:Attach
your
sales
receipt
tothis
owner's
manual.
Verification
of date
ofpurchase
mayberequired
forwarrantyservice
ofyour
H00VERproduct.
Besure
to ftlloutandreturn
the
product
registration
cardincluded
withyourcleaner.
Contents
lmportant
Safeguards
.
.
.
Assembling
Cleaner
Carton
Contents.
.
.
How
To
Use
Cleaner
Descriptions
.
..
Embedded
DirtFlNDER"'
Feature
....
CleaningTools
Maintenance
EmptyingDirt
Cup ....,..
Cleaningfilters ...,
Thermal
Protector
Replacing
Headlight
ReplacingBelt .,.....
Replacing
Agitator
Brush
Roll
.
Replacing
Edge
Groomers.
.
ReplacingPower
Hand
Tool
Agitator
Brush
Roll.
Replacing
PowerHandTool
Belt.
.
Lubrication
Authorized
Service
lfYou
Have
a
Problem.
Clearing
Blockages
Parts
ft accessories
mail
orderform
lfyou
need
assistance:
Visit
ourwebsite
at
hoover.com.
Follow
theservice
centerlink
tofind
the
service
outlet
nearest
you
OR
Call1-800-944-9200
for
an
automatedreferral
ofauthorized
service
outlet
locations
(U.S.
only)
0R
Call1-800-263-6376
tospeak
witha
representative
inour
Consumer
Response
Center;Mon-Fri
Bam-7pmEST
Pleasedonot
return
this
product
to
thestore.
This
carpet
cleaneris
intended
forhousehold
use.
Notintended
forcornmercial
usein anyhousehold
orforany
operate
carpet
cleaner
only
atvoltage
specified
on data
plate
Plug
carpet
cleaner
intoaproperlygrounded
outlet.
2
'@*
USTED
Y\t/
llo0vH" lm..
olen*ilrq 0HJllJg,
ffr& h Iill(0tdri{w.q $Dl{r.
Hlch !i illrico
+
I
SerialNumber
..
..
.3
...,,4
.....4
.....5
....
.5
.
..
..6
.....B
.
....9
...
.
,9
.
..
.10
.
.
.
.16
....12
....12
...
.13
....14
,
,..14
....14
...
.15
..
..15
....16
.
...17
..
..18
...
.19
other
commercialpurpose.
onback
of cleaner.
All manuals and user guides at all-guides.com
I
m
porta
nt Safety
I
nstructi
ons
When using an electrical
appliance,
always
follow basic
precautions,includingthe following:
READALL
INSTRUCTIONS
BEFORE
USING
THIS
APPLIANCE
WAR N IN G : ro reducetherisk
of fire,electric
shock,
or injury:
. Do not use
outdoorsor on wet surfaces.
. Closesupervision
isnecessary
when
anyappliance
isused
byornear
children.
Donot
allow
vacuumcleanerto be
usedas
atoy.
. Donotrununattendedatanytime.
. Keep
hair,looseclothing,
fingers,
feetandall
parts
of bodyaway
from
openings,
rotating
agitatorand
othermoving
parts.
r Donotpick
upanything
thatisburning
orsmoking,
suchas
cigarettes,matches,
orhotashes.
o
Donotuseto pick
upflammableorcombustible
materialssuch
as
gasoline
orfinewood
sandingsoruse
in areaswhere
they
maybepresent.
r Alwaysturnoff thisappliance
before
connecting
ordisconnecting
hose'
oUnplugcleaner
beforeconnecting
thepowered
hand
tool'
r Do not usewithout dirt cupor filters
in place.
Empty
cupandclean
filterfrequently
when
pick'ing
upveryfinematerialssuchas
powder.
oUseextracarewhencleaning
on stairs.
r Donotput any
object
intoopenings.
Donotuse
withany
openingblocked;
keepfree
of
dust,
lint,hair,oranything
thatmay
reduceairflow.
. Alwaysdisconnectcord
from electrical
outlet
beforeservicing
the cleaner.
r Alwaysunplugcleaner
whennot in use.
Turnoff all controls
beforeunplugging.
r Donotunplugbypulling
oncord.Tounplug,
grasp
the
plug,notthe
cord.Neverhandle
plug
orappliancewith
wethands.
o
Theuse
of anextensioncord
isnot recommended.
. Donotusewithdamagedcord
orplug.
lf appliance
isnotworking
asit should,hasbeen
dropped,damaged,
left
outdoors,
ordropped
intowater,
takeit to aHooverSalesand
ServiceCenterorAuthorizedHoover
WarrantyService
Dealer
(Depot).
. Donotpull
orcany
bycord,usecordasahandle,closedoor
oncordorpullcordaround
sharpedgesorcomers.
Donotrunappliance
overcord.
Keepcord
away
fromheated
surfaces.
r Usevacuum
cleaneronly
foritsintended
useasdescribed
in the
instructions.Useonly
attachments
recommended
byHoover;
others
may
cause
hazards.
WARNING:
o
This
product
contains
chemicals
knownto theStateof California
to causecancer
and
reproductive
toxicity.
Washhands
after
handling.
r Donotoperatecleaner
in barefeetorwhenwearing
opentoeshoes
orsandals.
. Avoid
picking
up hard,sharp
objects
with thecleaner.
Theymaydamagethe cleaner.
Save
thesenstructions
!
All manuals and user guides at all-guides.com
Assembling
cleaner
Ca
rton
contents
A.Handle
section
B.
Cleaner
body
C.
Hose,
cleaning
tools
and
wands
fpacked
on
cleaner).Shortcrevice
tool onlyavailable
with somemodels.
D.Powered
hand
tool
{some
models)
Remove
a1l
parts
from cartonand
identify
each
itemshown.Makesureall
parts
are
located
beforedisposing
ofpacking.
ll
ld
/t
/\
m
A
/A
(( \\ n
/l ! u n
H n'ttrilrfi
A
t]AU ru
L-J D
T
Disconnect cleaner from electrical outlet.
Remove
cardboard
(A)
andscrews
fromhandle
section.
Discard
cardboard.
Opentool cover
on
cleanerbody
(B).
Remove
powered
handtool
(some
models).
Make
sure
thatthe
switchisintheOFF
position.
Slide
handle
sectiononto
backofhandle.
Push
screwsintoholesonback
ofhandle.
Tightenscrewssecurelywith aPhillips
screwdriver.
Remove
powered
hand
tool (some
models)
fromplastic
bagand
return
it to thetool
storagearea.
Attach
handle
All manuals and user guides at all-guides.com
2.
How
to use
Cleaner
description
Operatecleaner
onlyat voltage
specified
on
data
plate
on bottomof cleaner.
The
assembled
cleaner
willlook
like
the
dra
wing.
1.Handle
2. 0N/0FF switch
3. Tool cover
4. Dusting
brush
5.Powered
handtool'*or Crevicetool-*
(depending
on model)
6.Furniture
nozzle
7.
Dirt cuplatch
B.Dirt cup
1id
9.Dirt cup
10.
Dirt
cuphandle
I 1
. HEPA
cartridge
filter
12.Pre-filter
13.
Final
filter
14.Threeposition
handle
release
pedal:
Step
on lever
to lower
handle
to
operating
orlow positions.
15.Nozzle
control
knob:Slideknobto
correct
settingfor heightof carpetbeing
cleaned.
16.Furnitureguard
17.Headlight
1
B.DirtFlNDER"
display*
1
9. Embedded
DirtFlNDER"*
sensitivitv
switch"
20. Edge
groomers
21
. Hose
22.Hose
rack
23. Cordhooks:
Wrapcord
aroundhooksfor
storage.
The
top hookcanberotated
right or left for easycordrelease.
24, Carrying
handle
25.
Extension
wands
26. Crevice
wand-u:
storesin rear
wand.
"somemodels
only.
This
cleaneris
intended
for household
use.
Not intended
for commercial
usein any
household
or for anyother
commercial
purpose.
Pol
anzed
plug
Toreduce
therisk
of electric
shock,
this
appliance
has
a polarized
plug
(one
bladeis
wider
thantheothe
r). This
plug
will fit in
a polarized
outlet
only
one
way. lf the
plug
doesnot fit fully in the outlet,reverse
the
plug.
lf it stilldoes
not fit, contacta quali-
fied electrician
to install
the proper
outlet.
Do not change
the plug in anyway.
All manuals and user guides at all-guides.com
ON-OFF
switch
Plug
cord
into
electrical
outlet.
Toturn
cleaner
0N,
push
switch
up.
To
turn
cleaner
OFF,
push
switchdown.
T!'r
nsporting Carrying
cleaner cleaner- Handle
positions
The
handle
of
your cleaner
has
three
positions;
upright
forstorage
and
when
using
cleaning
tools;operating
position
for
general
operation
on carpet
and
floors;
1ow
for reaching
underlow furniture.Step
on
handle
release
lever
to lower
handle.
To moveyour
cleanerfrom room
to room,
put handle
in uprightposition,
tilt cleaner
back
on rear
wheels
and
push
forward.
Thecleaner
can
also
be moved
by
using
the carrying
handle.
Embedded
DiTtFINDER'''
feature
(availabte
onsome
modets)
With red
and
green
lights
(n),
the
DirtFlNDER" sys
tem alerts
the user
to areas
of carpet
thatmay
needmore
cleaning
atten-
tion.lt is
able
to
sense
whenlarger
amounts
of dirt
embedded
dirt, are
r.*rl:;licles' especially
To
let
you know that
theDirtFlNDER"
feature
isready,
thered
lightwill come
on
when
thecleaner
isfirst
turnedon.After
a
few seconds,
theredlightwill go off and
the
green
light
will come
on.
Cleaningmay
then
begin.
Thegreen
lightwill remain
on throughout
cleaning,
except
when
thedetector
senses
that a larger
amount
of dirt is
being
picked
up; then
thered
lightwill come
on.
When
thered
lightis
on,
you should
take
additional
cleaning
strokes
in thearea
until
it changes
to green.
o The
redlight
may
seldom
come
on dur-
ing cleaning.
this
means
that
your cleaner
ispicking
up primarily
fine surface
dust
and
lint whichthe system
may not detect,
or that the carpetisgenerally
c1ean.To
increase
the feature's
sensitivity
to dirt, set
the switch(B)
to the "Hl" position.
r At other
times,
the
red
light
may
stay
on
for a considerable
amountof time.
This
means
that the carpet
contains
a high level
of dirt whichis
beingremoved
by the
cleaner.
Todecrease
the
feature's
sensitivity
to dirt,
set
theswitch
to the"REG."
{Regular)
position.
All manuals and user guides at all-guides.com
all-guides.com
Carpetheight
adjustment
The
cleaningof
carpetandrugs
takes
place
at the
nozzle(C).
When
it isneces-
saryto raiseand
lower
the n
ozzle
f
or
variouscarpet
pile
heights,
slidethe
nozzlecontrol knob
(D)
to the desired
settin
g.
Forease
in slidingknob,
upright
position
andtilt
The
nozzle
will not move
position
untilthe cleaner
to the operating
position
place
handle
in the
cleaner
foward
(E).
into the adjusted
handle
is
lowered
(F).
Handle
position
Settings
Formaximum
cleaning
performance,
the fol-
lowing
carpetheight
settingsare
recommended.
. Lowest
setting:for barefloorsand all
typesof carpet
Note:
lf thecleaner
is
difficult
to push,
slide
krrob
to the
next
higher
setting.
. Higher
settings:
forvery deep
pilecarpet
whereeasier
pushing
effort
isdesired,while
maintaining
good
cleaning
performance.
Cleaninglightweight
flexiblerugs
Standon oneend
of rug andmove
cleanertoward
otherendor
edge.
' Beforereaching
edge,
push
down
onhandle.This
will
lift up then
ozzle
(front
of cleaner)
andwill prevent
rug fromclinging
to cleaner.
Continue
to lift up nozzle
sothat when
you have
reached
theedge,
it is
completely
off the
rug.
Move
cleanerbackto startagain,lower
nozzle,
and useonly forward strokes.
Stair
cleaning
Special
edge
groomers
are
pro-
videdon both sides
of thenozzleto
remove
dirt in car-
pet
near
baseboards
and
furniture.
Guideeither
side
of
nozzle
parallel
to
edgeof carpetor
furniture. Usethehoseand
powered
hand
tool (some
models)
or furniture nozzle
for stairclean-
ing. Clean
from bottom to top.
When
usingcleaning
tools,the agitatorwill
continueto rotate.
CAUTION:Toavoid
personal
injury
or unnec-
essary
wear
to carpet,
and
to prevent
the
cleanerfrom falling,
always
place
it at bot-
tom of stairs.
All manuals and user guides at all-guides.com
How
to attachtoolcover
The tool cover
is
designedwith a
"break-
away"
featurewhich
allows
it to snap
free
if it is
pushed
opentoo far.
Toreattach,
align
hingesof cover
with slotson sides
of toolstoragearea.
Push
coverdown to
secure
in place.
Cleaningtools
Tools
allow
for cleaningsurfaces
above
the
floor andfor reachinghard
to clean
areas.
Handle
must
bein the
upright
position
for
tooluse.
CAUTION:Agitator
continuesto rotate
while
cleaner
handle
isin upright
position.
Avoid
tippingcleaner
or setting
it onfurniture,
fringed
area
rugs
or carpeted
stairsduring
tool use.
#Ae
,fi
:l\-A
Attach
wand
andtools
Attach
tool orwandto thehose
(G).
Attach
second
wand
ortool to wand (H)
by
pushing
it firmly ontothewand.
Twist
wand or tool slightlyto tighten or
loosen
the connection.
How
toclean
tools
Toclean
thehose
and
the
powered
hand
tool,
wipe off dirt with a cloth
dampenedin
a milddetergent.
Rinse
with a damp
cloth.
Do not submerge
powered
hand
tool in
water.
Cleaningtoolsmay
bewashed
in warm
water
with a detergent.Rinse
andairdry
before
using.
Select
proper
tool
l. Dusting
brush
maybeused
for carved
furniture,
table
tops,books,
1amps,lighting
fixture
s,venetianblinds,
baseboards,
shutters,
and
registers.
J. Furniture
nozzlemaybe used
for
upholsteredfurniture,
draperies,
mattresses,
clothing,automobileinteriors,
and
carpeted
stairs.
K. Powered
hand
tool"may
beusedfor
upholsteredfurniture,
carpeted
stairsand
hard-to-reach
places.
L. Crevice
tool" maybe used
in tight spaces,
cornersandalong
edges
in such
places
as
dresserdrawers,
upholstered
furniture,
stairs
andbaseboards.
M. Crevice
wand*
canbe used
in tight
spaces,corners
and
alongedgesin such
places
asdresser
drawers,
upholsteredfur-
niture,
stairs,
andbaseboards.
lt canalso
be
used
for extra
reach
with the dusting
brush
and/orextension
wand.
N. Wandsareused
to give
extra
length
to
your hose. Use
themwith any of the above
tools.
n
sonte mode/s
All manuals and user guides at all-guides.com
Extra
reachhose*
Push
0N/0FF
switchto OFF
posi-
tion. Remove
regular
hose
from
cleaner.Align end
of extra
reachhose
with projections
(0)
overslots
{P)
in dirt
duct.
Slidehose
into (P)
andtwist
hoseto
lock
it into place.
(To
detach
hose,
reverse
procedure,)
Attach
wandsor
tools
to theother
endof hose.
.-Available
at addi-
tionalcost
if not
included
with
vour
cleaner.
3.
Maintenance
Familiarize
yourself
with thesehomemain-
tenancetasks
as
proper
useand
careof
your
cleaner
will ensure
continued
cleaning
effectiveness.
Dirt
cup
The
dirt cupassembly
consistsof the
following
parts:
Lid (A)
Dirt Cup(B)
Pre-filter
(C)
HEPACartridge
Filter
(D)
Dirtlnlet 0pening
(E)
Bottom Door
Release
Button (F)
Whilethecleanerisin operation,
the
pre-
filter
screen
will stop
larger
debrisfrom
entering
theHEPA
cartridge
filter chamber.
Thislarger
debris
will beseen
collecting
in
the
left sideof thedirt cup.
TheHEPA
car-
tridgefilter
will collectfineparticles
that
have
passed
throughthe pre-filter
screen.
When
toempty
It is
recommended
thatthedirt cupbe
emptiedbefore
the dirt reaches
thedirt inlet
openingon back
of dirt cup{Fig.
3-1)
or
after every
useif preferred.
CAUTION:
Very
fine materials,
suchasface
powder
or cornstarch,
mayseal
the filter and
causeloss
of suction.When
using
the cleaner
for this type of dust,
emptythe cup and
clean
the filters often.
How
toempty
Disconnect
cleaner
from electrical
outlet.Do
not usecleaner
without dirt cupor filters in
place.
Pushlatch
(F)
to the left to unlock.
Lift cup slightlyandpu11
straight
out to
remove
from cleaner.
Hold
thedirt cup
overtrashrecep-
tacle.
Press
the
dirt
cup
bottom
door
release
button to
empty
dirt cup.
Tap
sideof cup
to remove
debris.
Closethebottom
doorfirmly to
I
atch.
All manuals and user guides at all-guides.com
Slidecupstraight
into cavity.
Bot-
tom of cup will rest
behind
grooves
at
bottom of cleaner
cavity
(G),
Pushlatch(F)
to
theright to lockin
place.
Filter
assembly
TheHEPA
cartridgefilter andpre-filter
are
essentially
self-sheddin
g.
Tapping
theside
of thedirt cup as
described
in "How to empty dirt cup" shouldsuffi-
cientlyremove
dustandfine particles
from
theHEPA
cartridgefilter andpre-filter.
The filter assembly
can
also
be removed
for
additional
cleaning.
How
tocleanfilterassembly
Remove
dirt cupas
described
in "How
to empty dirt cup,"
Lift up the crank
located
at thetop
of thedirt cup on
thelid.
Hold
thedirt cup
over
trash
recep-
tacle.Press
thedirt
cupbottom door
releasebutton to
open
thedirt cup.
Rotate
the crank
until filter is clean.
Close
the bottom
doorfirmly to latch
beforereturning dirt cupto theunit.
Note:
The filter canalso
be removed
from
thedirt cup and
cleaned.Todo so,open
top
lid and
remove
filter andprefilter
assembly.
Hold filter overtrashreceptacle.
Tap
side
of filter against
trash
receptacleto remove
debris.
Return
the filter and
prefilter
assem-
bly backinto the dirt cup.Close
thelid
firmly to latch
it beforereturning
the dirt
cupto unit.
All manuals and user guides at all-guides.com
Secondary
and
final
filters
Cleaning
secondary
filter
Disconnect
cleaner
from electrical
outlet.
The
secondary
filter
(J),
located
behind
the
grill in thebottom of cleaner
cavity,
pro-
tects
themotorfrom dirt particles.
lf thefilter
becomes
dirty,
remove
dirt cup
[Fig.
3-2).
Remove
screw
andpull gri11
out.
Lift out filter.
Hand
washfilter
in cold
water
with mild
detergent,
then airdry.
Reposition
dry filter,
grill and
screw.
Replace
dirt cup.
Should
you want to replace
thisfilter,
ask
for HOOVER
part No.
387G2008.
Cleaning
finalfilter
The
finalfilter
assistsin thefil-
trationprocess
to
return clean
airto
theroom.
Toremove
this
filterwhen it
becomes
dirty,
Reattaching
filter
door
The
filter
door
is
. designed
with a
"break-away"
fea-
ture
whichallows
it to snap
free
if
it is
pushed
open
too far.
Toreattach,
align
hinges
(L)
of cover
with slots
on sides
of
filter
area.
Press
door
back
into p1ace.
open
thedoor
on
the
side
of thecleaner.
Lift outfilter
(K)
and
hand
washit in cold
water
with mild detergent.
Let filter airdry andreposition
it on the
side
of cleaner.
Make
sure
the
white
side
of
the filter faces
outward.
Close
door.
Should
you want to replace
thisfilter,
ask
for HOOVERpart No.
401
10006.
Do not operate
cleaner
without any of the
filters in place.
Check
agitator
shield
Because
your cleanerpicks
up so
well,
we
strongly
recommend
you check for debris
accumulation
under
the agitator
shield
each
timeyou clean
the filters.
Removing
debris
under
theshield
will help
maintainyour
cleaner's
excellent
pick
up
and
suction.
Remove
debris
asfollows:
l. Disconnect
cleaner
from electrical
outlet.
2. Checkfor dirt accumulation
by
removing
bottom
plate
(Fig.3-13),
remov-
ing agitator
(Fig.
3-14),
andlifting agitator
shield
(Fig.
3-16).
3.Remove
any
debris
andreplace
shield,
agitator
and
bottomplate
(Figs.
3-i6 to
3-1B).
All manuals and user guides at all-guides.com
all-guides.com
Headlig
htreplacement
Disconnect
cleaner
from electrical
outlet.
What
to buy
This
cleaner
uses
a I
2 volt,
wed
ge
basetype
912bulb,
Hoover
part No.
27313101.
Removinglens
Disconnectcleaner
from electrical
outlet.
Usinga screwdriver,
remove
thetwo
screwsasshown
and
lift off lens.
Installing
bulb
Pull
oldbulbstraight
out of socket.Push
new
bulb straight
intosocket
until
lockedin place.
Excessiveforce is
not required.
Replacing
lens
Reposition
lens
and
secure
with the two
SCTCWS.
Belt
replacement
Belt
replacement
Thebelton
yourHOOVER
cleanercauses
theagitator
to rotate
and
isimportant
for
the effective
operation
of the cleaner.
The
beltis
located
under
thebottom plate
of the
cleaner
and
shouldbe checked
from timeto
time
to be
sure
it is
in good
condition.
When
to replace
Disconnect
cleaner
from electrical
outlet.
To checkbelt,remove
bottom plate
as
shownin "How to rep1ace."
Replace
beltif
it is
stretched.
cut or
broken.
What
to buy
To assureeffective
operation,
useonly gen-
uine
HOOVER
beltswith your cleaner.
When
purchasing
a new belt,
askfor Hoover
part
No.38528033.
How
to replace
Disconnect
cleaner
from electrical
outlet.
Place
handle
in low
position
andturn
cleaner
overso
bottom side
is
up.
Removethe 4
screws
asshown
with a Phillips
screw
driver.
Lift off bottom
plate
{A).
Removing
belt
Remove
agitator
brushroll
andused
belt.
Discard
used
belt.
Installing
new
belt
With lettering
on
outside
of belt
and
positioned
as
shown
in box
on (D),
slide
new belt overmotor
pulley
(B).
All manuals and user guides at all-guides.com
Replacing
agitatorbrush
roll
lnsert
agitator
throughbelt
and
place
belt
in belt
guide
(C)
on
agitator.
Shouldthe
agitator
shield
(D)
become
dislodged
while
replacing
thebelt
or the agitator,
reposition
it as
shownnoting
the
placement
of its
belt
guide
(E).
Securing
ag
itator
Graspagitator
firmly and
fit it into
position
by firstslid-
ingendoppositethe
belt
into therectan-
gular
slot
(F)
onside
of cleaner.
Pull
othersideof
agitator
(G)
into
p1ace.
Turn agitatormak-
ing surebelt
is
not
pinched
between
agitator
andagita-
tor shield.
Replacing
bottom
plate
Reposition
bottom
plate
and4 Phillips
head
screws.
Tight-
en screws
securelv.
The
agitator
brush
roll
When
toreplace
When
agitator
brushes
areworn,
theagita-
tor should
bereplaced.
To check
condition
of brushes,disconnect
cleanerfrom electrical
outlet,Move edge
of a card
across
bottom
plate
whileturning
agitator.
Tomaintain
cleaningeffectiveness,
replace
agitatorif brushes
do not touch
card.
What
to buy
When purchasing
a new agitator,
ask
for
Hoover
part No.484'14132.
How
to replace
Disconnect
cleaner
from electrical
outlet.
Remove
bottom plate,
belt and agitator
following
directions
in "The
belt"section
beginning
withFig.
3-13.
Discard
o1dagitator.
Continue
following
thedirections
in "The
belt"sectionto reposition
belt,
newagitator
and
bottom
plate.
All manuals and user guides at all-guides.com
The
edge
groomers
When
to replace
Theedge
groom*
ers,
located
onboth
side
s
of thenozzle,
should
be replaced
whenth
ey appear
worn.
Whatto buy
When
purchasing
edge
groomers,
ask
for HOOVER
part
No.
39511018.
How
to replace
Disconnectcleaner
from electrical
outlet.
Removebottom
plate
asdescribed
in "The
belt"sec-
tion (Fig.
3-13).
Installing
groomers
Lift off both old
edge
groomers
andslidenewedge
groomers
intoposi-
tion asshown.
Reposition
bottom
plate
andsecure
with a Phillips
head
SCTCWS.
Poweredhandtool
(some
modelsonly)
Agitatorbrushrollreplacement
Whenagitatorbrushrollbrushesareworn,thebrush
roll
shouldbe
replaced.
AskforHOOVER
partNo.48414'150. How
to replace
l. Remove
tool
from hose
andturn
it sobottom faces
up.Press
the
latch-
es
on either
side
of tool and
remove
bottomplate
(A).
2.Unscrewthetwo Phillips
screws
and
removebeltguard
(B).
brl
H\
-R
)z-ii
._ \ \l
- \\
\\
/ l\
f-="\
}A- /- \
D
3.Remove
a
gita
-
tor
including
end
plates
(C)
anddis-
card.
4.
lnspect
belt
to
ensure
thatit is
in
good
condition.
lf beltis
cracked,
gouged
orbroken,
replaceit (see
fol-
lowing
section).
5.
lnsert
brush
roll
throughbeltand
position
belt
over
gear
teeth(D)
on
brush
roll. 6.
Withcurved
ends
down,
slide
end
plates
(C)
of
brush
roll
into
slots
(E)
ontool.
7.
Replace
belt
guard
(B)
making
surenot to pinch
brush
bristlesin
guard.
Turna
gita
-
tor,making
sureit
rotates
freely.
Replace
and
tighten
SCTCWS.
All manuals and user guides at all-guides.com
B.
Toreplace
bot-
tom plate
{A),
insert
the four tabs
on edge
of bottom
plate
into slots
on
front of tool.
Pivot
bottomplate
downand
snap
closed.
Powered
hand
tool
Belt
replacement
Inspecting
the
belt
The
powered
hand
tool
belt
is
designed
to last
a
long
time
and
is
notnormally
replaced.
However,
if the
beltiscracked,
gouged
orbroken,it should
bereplaced.
Thebeltcan
be
seenthrough
the
top of then
ozzle
orby removing
the
bottom piate
and
beltguard
(Figs.
3-21and
3
-22).
Replacing
belt
Whenreplacing
belt,
askforHOOVER
part
No.38528037.
l. Remove
bottom
plate,
belt
guard
andbrush
roll
as
described
in Figs.
3-21through3-23.
5.
Replace
brush
roll,
belt
guard,
and
bottom nlate
as
described
in Figs.
3-23throuqh
: -26.
2.Grasp
turbine
{E)
and
pull firmly to
rem
ove.
3.Remove
belt
from turbine
pulley
(F).
Replace
with
newbelt.
4.
With flat sides
of turbine
retainers
(G)
pointing
down,
slide
retainers
into
grooves
(H)
in tool
housing
and
snap
into place.
Lu
brication
The
motoris
equipped
with bearings
thatcontainsufficientlubrica-
tion for thelifeof themotor.
The
addition
of lubricant
couldcause
damage.Therefore,
do not addlubricant
to motorbearings.
The
agitatoris
equipped
with two ball
bearingsthat shouldbelubri-
cated
periodically
by aHoover
Salesand
Service
Centeror anAutho-
rized
Hoover
Warranty
ServiceDealer
(Depot).
l5
All manuals and user guides at all-guides.com
Thermal
protector
An internal
thermal
protector
hasbeen 3.
Refer
to "Clearing
blockages"
section.
*^:lyl:l ll:y:r cleanerto
protect
it 4.
when
creaner
isunprussed
andthe
f
rom overheattng' motorcools
for 30 minutes,
thether-
When
the thermal
protector
activates,
the ma1
protector
automaticallyresets
and
cleaner
willstoprunning.
lf this
happens, cleaningmay
continue.
proceed
as
follows: lf thethermal
protector
continues
to
l. Turn
thecleanerOFFanddisconnect
it activateafterfollowing
theabove
steps,
from theelectricaloutlet. yourcleanermayneed
servicing
(see
"Ser-
2.Checkdirt cuppre-filter,
HEPA car- vice"section)'
tridge
filter
andsecondary
and
final
filtersfor dirt accumulation.
Service
Toobtainapproved
HOOVERserviceand lf further
assistanceis
needed,contact
The
genuine
HOOVER
parts,
locate
thenea Hoover
ConsumerResponseCenter,
estHoover
SalesandServiceCenteror Phone:1-800-263-6376.
Authorized
HooverWarranty
Service
Dealer r_^^,' InLanaoa,
conlacl
Hoover
Lanaoa,
tuepoU
Dy: Etobicoke,ontarioMBW
3R9
Phone:
. checking
the
YellowPages
under 1-g00-263-6376.
"Vacuum
cleaners
- Household"
0R
- Alwaysidentify
your
cleanerbythecomplete
o caf
fing1-800-944-9200for
an model
number
when
requesting
informa-
automatedreferral
of authorized tion orordering
parts.
(The
modelnumber
service
out'letlocations
{U.S.
only)0R- appearsonthe bottomof thecleaner.)
. checkingtheService
sectionof Hoover
lnc.,on-line
atwww.hoover.com
Do
not
send
your
cleaner
toHooverlnc.in
Glenwillow
for
service,this
willonly
result
in de1ay.
l6
All manuals and user guides at all-guides.com
all-guides.com
4. lf you
have
a problem
lf a minor
problem
occurs,
it usuallycanbesolved
quite
easily
whenthecauseisfound
by
using
thechecklist
below.
PROBLEM POSSIBLECAUSE POSSIBLE
SOLUTION
Cleanerwon't
run ...........:..1.....:::::.:::,i::1i1.: ..
i.N.i0[..iiiifiif
ffiil$llltptUEg€idiiiii.iiinliii
l;.i
No voltage
in wall
plug
;.tsll11'offi
ifi
ii
ii;inil1.$'e.';.;.0r;.'1;.t'r.i;pp;e1d1;1;111;.
Check
fuse
or breaker
Allow
cleanerto cool
for 30 minutes
(this
will reset
the thermal
protector)
brrearkerr
Thermal
protector
activated
Cleaner
won't
pick
up Replacebrushroll
Agitator
brush
roll
worn
lncorrectcarpet
height
setting
.'Bt'
dick.a.b.e......i..n...,..i.i
i...
.
tl.o.w
..p
a.s.id.d.ei.
HEPA
cartridge
filter
clogged
.p.ie.r..fi.i..t.dil.llcilCI.gig,'eU..,
,,....:.ii,,.,.:,..','i,.,'...',,,',
.
',
Move nozzle
control
knob to lower
setting
CleanHEPAcartridgefilter
by either
tapping
the sideof the dirt cup or
removing
the cartridgefilter
as
described
in the "Filter
assembly"section.
'Ci..e.a'.n..1.u,*e.i.r.imei.,i..a.$..,.deic.n.lu.eA
i i,.,;rp;1i- '
,aS.$,e,ffi.b|V,[,..'5eq1i.O.h.,
:::'
' ':......',:, '.
' :,:':,:
Dirt
cup
not
properly
installed
and
latched Position
dirt
cup
properly
and
lock
latch
(Fis.
3-4).
:'''::j:::::jj:l'':::i:'::::i:r:'j
Efii$.Uine.i..iit.h.a.t..l1n'i,.r.t..'...Qu.$1..t.l.d1..1.i.{..1p.rop.er.|Y,
,,,,,,,,.,.i,
,....
Ensure
that filter
assembly
is
positioned
properlv
(Fiqs.
3-4 to 3-6).
iDiiititii.iiiEu.q1li'{1..n.0tll:P.n.Sli.f
i.o.n.e.d.:,;...,.
ipi.o.p.:g:il.$.,.'..0.t.,..m.i,S'sihg'.'......i'.,.'i,..,,.
|.'i...'.
.
Filter
assemblyn
ot
assembled
properlv
Cleanerhard
to
push ...tvt..o.v.s......q0.e'2t,.H......c.o.n.t'ro.l...,..fr.n..*o*h'.'...t.o,,
a..,,h,ighi*eir,
s'e,tr.
....,
.. :.,:..: ..: rr...r::r,...::..:,:.
:... . ...............: . . : .. :: ,,,.. . .,,,,,,., . ,
Cleaningtools
won'tpick
up Cleaner
handle
notin
upright
position
Blio;$ftialgie.iiiiiiifi;iiiilhibi$iei.i.i:iiiii::.irl.i.i,lriilri.i:i
Ensure
thatcleanerhandleislocked
in
upright
position.
Visible
dirt
leaking
throughfinal
filterFilterassemblynot installed
prop
erly Removefilter
assembly
from dirt cupand
ensurethat
HEPA
cartridgefilter
is
prop-
erlyattachedto pre-filter
screenand
that
entirefilter
assemblyis
properly
reposi-
tioned
inside
dirtcup.
(Figs.
3-1
through
3-6).
Dirtinside
dirt
cup
stopsspinning I
N
orte
.:i',i
l{ebVy.....d.
eblr.i.$..m
a,y
.set,tl
e to.th:e.l
.b
o't-
.,to
m o.fr..
th,e,,.'
riiiirt
c.u.p..,andprle,vent''
the,..d.irt,,,,,
.,fiOrn',i.p,inh,i:nig..,,withib,ut::a.f'Fe.ct.i,.n,g,::tt,,ea;n,in$:'
:.$,e,ifo"-.a.n.C€:::,.,:.T,h,
e,,.,lcl.e.anib,i
:
ca,n,'.sofi,t,inu,e',,...'.
..t.0.,....b'.9.u'$.e.d,'e.Ve.n1,i'f
,..the
d..i.r't
i.S,.,',.n.ot.,:'i.binh.i'niE
iiH.i$WeiViefll.l,..l.n.'.tn.'{;.U..i.*$'....'U..oei$iiii..$toip.li.,i$piiiinin.iin.$,,,..'..'.,l'..
.,05,6
'..th'e.ib:
i.i..a.,..,h.otl.C.ea'b.l..'s
6eci'ea,5.e.,,,of.:.pe.i-
";ffi.an,t.e.,...
Ch[,c.k.,.ih:e.,..1,1te.m,s
u,n,'d,e'i,.,r,:,0tea,he'r
All manuals and user guides at all-guides.com
PROBLEM POSSIBLE
CAUSE POSSIBLESOLUTION
Powered
hand
tool
(some
models)
brushroll
won't
turn
Toomuch
pressure
being
applied
totool Continue
using
toolapplyinglight
pres-
sure.
iBli6iEkiarfiiHi:i:iiiifiiliijiiliuirniilnl:ellllchlalfi
:nlU.'l,l,l
Replace
belt
lllHUlul$rul::lil$tlffi:*iiiii
ifiiiHiidiliiiiiiliilfiiiH:
fileirl:ll$:Ul[ltlillu
llliifiiffili,rlt:,,,,,,.,'',.
Brokenor worn belt
BiolWii:iilfiit$sifi
iie:riiiiii$IIiicsliii0n
Smokylburn
ing
smell
detected Beltbroken
or stretched Replaceagitator
brush
roll
beltas
describedinFigs.
3-13through
3
-23
in
theMaintenance
section.
Clea
ring
blockages
Disconnect
cleanerfrom electrical
outlet.
Low suction
orpick
up maybe due
to a
blockagein thesystem.
Refer
to thefollow-
ing steps
to check
forblockages
continuing
with each
stepuntil the
blockageis
found:
A. lf a blockage
occurs
during
floor
cleaning:
Turncleaner
OFFand
disconnectfrom
electricaloutlet.
1. Checkfullness
of dirt cup and
filter
assembly;empty
cupandclean
filtersif
needed.
Check
dirtduct
2.Removescrews
0n lower
backof cleaner
handle
(A)
and
removelower
dirt duct (B).
3. Clearblockagefrom dirt duct sections.
Checking
under
bottom
plate
4.
Turn
cleaner
OFF
and
unplug,
5. Remove
bot-
tom plate,
beltand
agitator
(see
"The
belt"
section).
Lookinto opening
(C)
for blockages
and
6.Remove
agitatorshield
(see
Fig.
3-16)
and
remove
anyloose
debriswhichmay
have
accumulated
underit.
rem
ove.
B.
lf a blockage
occursduring
tool
use:
Turn
cleanerOFF
anddisconnect
from electrical
outlet.
1.Look
into
hose
endandremove
anyblockage.
2.Check
lower
dirt
duct for blockage
(Fis.
4-l).
C.
lf a block-
age
occursduring
powered
hand
tool
use
{some
models
only):
l. Disconnect
p
oweredh
and tool
from hose.Remove
bottom
p1ate,
belt
guard
and
turbine
as
describedin
Figs.
3-21,
3-22
and3-29.
Remove
anyblock-
agefrom turbine
channel
{D).
Replace
belt
tur-
bine,
brushroll,
beltguard
andbot-
tom plate.
1B
All manuals and user guides at all-guides.com
Parts
and
Accessories
MAIL
ORDER
FORM
Detachthis
sectionand
mailto:
Hoover, 'lnc.
7005
Cochran
Road
. Glenwillow,
0hio
o 44139
Attn:Sales& ServiceCenter
ll0H.ll,;;1,
HEPACartridgeFilter 40|4020| 1$24,ee
Flat
Belt 40201I60 1
IT?qq
SecondaryFtlter 38762008 1qlqq
FinalFilter 401|
0006 ') $
gee
Headlight
Bulb 27313101 $
24e
Extentton
Wand 38534078 $
64e
FurnatureNozzle 3864045 Ktqq
Crevice
Tool
-Short 3867033 $
2ee
Agrtator 484 4t32 $ 21,9e
Crevrce
Wand
-Lonq 386 703
1r Lqq
Dusting
Brush 434 4197 $5,ee
ExtraReach
Hose 43434047 $
31
le
Edqe
Groomer 3951t01B *1qq
PoweredHandTool 49124044 $
35ee
T0TA:1
.
M.E.RC.HA,wDI
S.E t
\
APPI-ICABIE,STATETAX+ $
SFIIFPI
*l,G:
&,I.F{ANL
)l'NG
*$7s0
TOTA
LCOST t
\
+
Shiptoi (please
print
clearly)
Name
Street City State_ Zip
PaymentMethod:
n CheckorM0ney
Order
made
payable
to:
Hoover,Inc,
fl Visa [| Mastercard [l Discover
Number Exp.Date
NameonCard DayPhone(
)-
Signature
(req.)
Replacement
parts
andaccessoryitems
may
be
purchased
from
yourAuthorized
Hoover
Dealet
Leading
Retailers,HooverSales
&
ServiceCenters,on-lineatwww.hoover,com,or
bycompletingthisorderform,
Mail
orders
limitedto
U.S.
residentsonly.lnCanada,
please
call
1-800-263-6376
0Ron-line
at
hoover,ca
Pleaseallow3-4
weeksfordelivery, 19
All manuals and user guides at all-guides.com

Other manuals for UH40145B

1

Other Hoover Vacuum Cleaner manuals

Hoover HC2200D Installation guide

Hoover

Hoover HC2200D Installation guide

Hoover Windtunnel UH70120 User manual

Hoover

Hoover Windtunnel UH70120 User manual

Hoover BF70VS11001 User manual

Hoover

Hoover BF70VS11001 User manual

Hoover FoldAway UH40190 User manual

Hoover

Hoover FoldAway UH40190 User manual

Hoover FloorMate Edge User manual

Hoover

Hoover FloorMate Edge User manual

Hoover FloorMate, SpinScrub Floor Mate Spin Scrub Hard Floor... User manual

Hoover

Hoover FloorMate, SpinScrub Floor Mate Spin Scrub Hard Floor... User manual

Hoover U5268 User manual

Hoover

Hoover U5268 User manual

Hoover SteamJet COMPACT SCM1500 User manual

Hoover

Hoover SteamJet COMPACT SCM1500 User manual

Hoover PRO STAIR User manual

Hoover

Hoover PRO STAIR User manual

Hoover PROFESSIONAL Series User manual

Hoover

Hoover PROFESSIONAL Series User manual

Hoover SMART H4012 User manual

Hoover

Hoover SMART H4012 User manual

Hoover Stick Vacuum User manual

Hoover

Hoover Stick Vacuum User manual

Hoover 7011PH Allergy User manual

Hoover

Hoover 7011PH Allergy User manual

Hoover SteamVac agility User manual

Hoover

Hoover SteamVac agility User manual

Hoover S1420050 User manual

Hoover

Hoover S1420050 User manual

Hoover dog & cat TURBO User manual

Hoover

Hoover dog & cat TURBO User manual

Hoover SA 1110 User manual

Hoover

Hoover SA 1110 User manual

Hoover Widepath TurboPOWER User manual

Hoover

Hoover Widepath TurboPOWER User manual

Hoover SteamVac Dual V User manual

Hoover

Hoover SteamVac Dual V User manual

Hoover Samurai Range User manual

Hoover

Hoover Samurai Range User manual

Hoover Convertible U4123001 User manual

Hoover

Hoover Convertible U4123001 User manual

Hoover Dv16 011 User manual

Hoover

Hoover Dv16 011 User manual

Hoover FloorMate, SpinScrub Floor Mate Spin Scrub Hard Floor... User manual

Hoover

Hoover FloorMate, SpinScrub Floor Mate Spin Scrub Hard Floor... User manual

Hoover RA22AFG User manual

Hoover

Hoover RA22AFG User manual

Popular Vacuum Cleaner manuals by other brands

Flex S 36 manual

Flex

Flex S 36 manual

Jula 604-075 operating instructions

Jula

Jula 604-075 operating instructions

MATSUYAN Vesta G product manual

MATSUYAN

MATSUYAN Vesta G product manual

Lavex 457PRO9GAL owner's manual

Lavex

Lavex 457PRO9GAL owner's manual

Beko VRT 7524 user manual

Beko

Beko VRT 7524 user manual

GearBest VC-S1603 user manual

GearBest

GearBest VC-S1603 user manual

Bissell ReadyCleen 16W5 Series user guide

Bissell

Bissell ReadyCleen 16W5 Series user guide

EWT CS 3 Operator's manual

EWT

EWT CS 3 Operator's manual

Vax C91-MZ SERIES user guide

Vax

Vax C91-MZ SERIES user guide

Clarke Woodworker CDE1000 Operating & maintenance instructions

Clarke

Clarke Woodworker CDE1000 Operating & maintenance instructions

Black & Decker ADV1200 Original instructions

Black & Decker

Black & Decker ADV1200 Original instructions

Powr-Flite Comfort Pro FREEDOM CPF6 Series Operator's manual & parts list

Powr-Flite

Powr-Flite Comfort Pro FREEDOM CPF6 Series Operator's manual & parts list

Daewoo Cyclone Freedom Pro user manual

Daewoo

Daewoo Cyclone Freedom Pro user manual

AR Blue Clean 3170 Original instructions

AR

AR Blue Clean 3170 Original instructions

LG LrV790R specification

LG

LG LrV790R specification

SCS 497AJH Installation, operation and maintenance manual

SCS

SCS 497AJH Installation, operation and maintenance manual

Monzana MZAS120W instructions

Monzana

Monzana MZAS120W instructions

Scarlett SC-082 instruction manual

Scarlett

Scarlett SC-082 instruction manual

manuals.online logo
manuals.online logoBrands
  • About & Mission
  • Contact us
  • Privacy Policy
  • Terms and Conditions

Copyright 2025 Manuals.Online. All Rights Reserved.