Hope Industrial Systems HIS-ML21-CGBC User manual

1
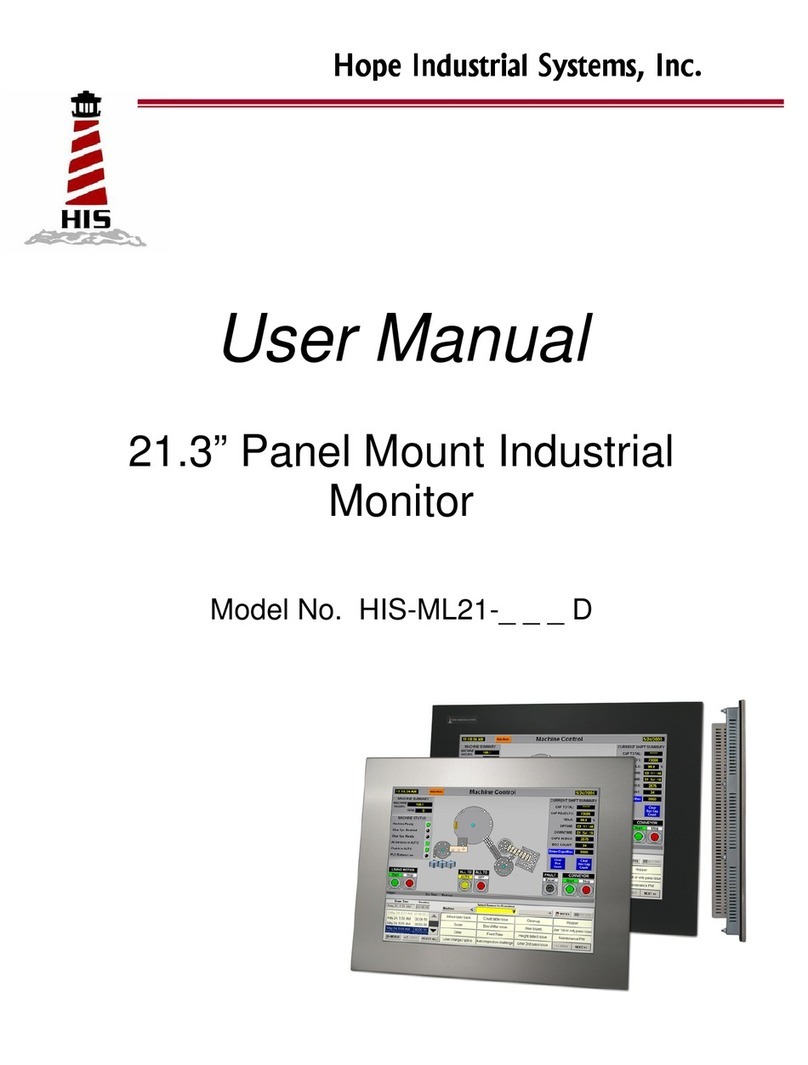
Hope Industrial Systems, Inc.
User Manual
21.3” Panel Mount Industrial
Monitor
Model No. HIS-ML21-CGBC, -CTBC, -SGAC, -STAC

2
TABLE OF CONTENTS
Safety and Regulatory Information .................................................................3
Using the LCD Display....................................................................................4
Setting the Timing Mode............................................................................4
Self-Test Feature Check (STFC)...............................................................5
User Controls.............................................................................................6
Automatic Save..........................................................................................7
Direct Access Features .............................................................................7
OSD Functions ..........................................................................................8
Troubleshooting.......................................................................................17
Display Modes .........................................................................................20
Information for Resistive Touchscreen Monitors ..........................................21
Installation Instructions .................................................................................22
Cleaning........................................................................................................24
Drawings.......................................................................................................25
Specifications................................................................................................27
Warranty Statement......................................................................................31

3
Safety and Regulatory Information
Warning
To prevent fire or shock hazard, do not expose the unit to rain or moisture. Dangerously
high voltages are present inside the unit. Do not disassemble the unit. Refer servicing to
qualified personnel only.
This equipment is not intended for use in critical applications where its failure to operate
would create immediate life threatening circumstances. Applications including, but not
limited to, nuclear reactor control, aerospace navigation systems and life support systems
are not appropriate for this product.
This product is intended to be mounted in a suitable cabinet or other enclosure. The
NEMA 4, 4x or 12 ratings are applicable only when properly installed in a like rated enclo-
sure.
This product is a UL Recognized Component and must be used with a listed computer.
FCC Notice
This equipment has been tested and found to comply with the limits for a Class A digital device,
pursuant to Part 15 of the FCC Rules. These limits are designed to provide reasonable protection
against harmful interference when the equipment is operated in a commercial environment. This
equipment generates uses and can radiate radio frequency energy and, if not installed and used
in accordance with the instruction manual, may cause harmful interference to radio communica-
tions. Operation of this equipment in a residential area is likely to cause harmful interference in
which case the user will be required to correct the interference at his own expense. Any changes
or modifications not expressly approved by the grantee of this device could void the user’s authori-
ty to operate the device.
4
Using the LCD Display
Setting the Timing Mode
Setting the timing mode on the PC is important for maximizing the quality of the screen image and
minimizing eye strain. The timing mode consists of the resolution (example 1600 x 1200) and
refresh rate (or vertical frequency; example 60 Hz). After setting the timing mode, use the con-
trols to adjust the screen image.
For the best picture quality set your LCD display timing mode to: VESA 1600 x 1200 @ 60Hz.
To set the Timing Mode:
1 Set the resolution: Right-click on the Windows desktop > Properties > Settings > set the
resolution.
2 Set the refresh rate: See your graphic card's user guide for instructions.
WARNING: Do not set the graphics card in your computer to exceed the maximum refresh rate of
75Hz; doing so may result in permanent damage to your LCD display.

5
Self-Test Feature Check (STFC)
Your monitor provides a self-test feature that allows you to check whether the monitor is function-
ing properly.
1. Turn off both your computer and the monitor.
2. Unplug the video cable from the back of the computer.
3. Turn on the monitor.
If the monitor is functioning properly, you will see a white box with a large blue oval logo
and an error message “CHECK SIGNAL CABLE.”
This box also appears during normal operation if the video cable becomes disconnected
or damaged.
4. Turn off your monitor and reconnect the video cable; then turn on both your computer and
the monitor.
If your monitor screen remains blank after following the previous procedure, check your video
controller and computer system; your monitor is functioning properly.

6
User Controls
Your LCD monitor allows you to easily adjust the characteristics of the image being displayed. All
of these adjustments are made using the control buttons on the rear of the monitor. While you use
these buttons to adjust the controls, an OSD shows you their numeric values as they change.
Rear Control Buttons and Indicators
Button / Indica-
tor
Functions
LED This light glows green during normal operation, and blinks green
once as the monitor saves your adjustments.
POWER Use this button to turn the monitor on and off. (When the power is
turned on, a message appears in the center of the screen display-
ing the current mode – analog, digital, or video input signal.
MENU Use this button to open the OSD and activate a highlighted menu
item.
+ , - These buttons allow you to highlight and adjust items in the menu.
ENTER Use this button to Exit the active menu or the OSD.
When you push the ENTER button while the OSD is off, the input
source (analog/digital/video/s-video) is alternated.
AUTO Use this button to automatically adjust the display to sync with the
computer’s video signal (analog mode only).
PIP Use this button to turn the PIP (picture-in-picture) screen On/Off.

7
Automatic Save
Whenever you open the OSD and allow an adjustment window to remain active for about 3
seconds without pressing other buttons, the monitor automatically saves any adjustment you have
made. These changes are saved into a user area in the monitor.
The monitor can save adjustments for up to 4 user modes. It has 13 factory preset or preload
modes, one for each signal frequency. If you have made no adjustments, the on screen display
disappears and the monitor does not save anything.
Direct Access Features
Brightness Adjustment
1. With the menu off, push the “+” button to display the brightness adjustment menu.
2. Push the “-“ button again to circle through settings
a. While in Analog/Digital(DVI) mode: Custom > Entertain > Internet > Text
b. While in Video/S-Video mode: Dynamic > Standard > Movie > Custom
Video Mode
1. With the menu off, push the “-“ button to display the video mode adjustment
menu.
2. Push the “-“ button again to circle through settings

8
OSD Functions
Accessing the menu system
1. Push the Menu button to display the main OSD menu.
2. Use the "– , +" buttons to move from one function to another. As you move from one icon
to another, the Function Name changes. See the Table starting on the next page to view
a complete list of all of the functions available for the monitor.
3. Press the Enter button once to activate the highlighted function and then follow the Tool
Tips to select the function and adjust the value.
4. Use "–" and "+" buttons to select the sub-menu, and press the Enter button once to acti-
vate the selected sub-menu.
5. After selecting a function, use the "–" and "+" buttons to make necessary adjustments.
The setting bar moves and the numeric value indicator changes to reflect your adjust-
ments.
NOTE: The numeric value indicator is provided as a point of reference only and has noth-
ing to do with a real measurement.
6. Push the Menu button a couple of times to return to the main menu to select another
function or to exit from the OSD.

9
OSD: Input
Menu
Description
Source List Use to select PC or other external input sources connected to the Monitor.
Use to select the screen of your choice.
1. Analog
2. Digital
3. Video
4. S-Video
Edit Name
Name the input device connected to the input jacks to make your input source
selection easier.
1. Analog
2. Digital
3. Video
4. S-Video

10
OSD: Picture (Analog / Digital : PC)
Menu
Description
MagicBright
MagicBright is a new feature providing the optimum viewing environment de-
pending on the contents of the image you are watching. Currently four different
modes are available: Text, Internet, Entertain and Custom. Each mode has its
own pre-configured brightness value.
You can easily select one of four settings by simply pressing “-“ button.
1. Entertain: High Brightness - For watching motion pictures such as a DVD
or Video CD.
2. Internet: Medium brightness - For working with a mixture of images such
as text and graphics.
3. Text: Medium brightness - For documentations or works involving heavy
text.
4. Custom: Although the values are carefully chosen by our engineers, the
pre-configured values may not be comfortable to your eyes depending on
your taste.
If this is the case, adjust the brightness and contrast by using the OSD
menu.
Custom
You can use the on-screen menus to change the contrast and brightness ac-
cording to personal preference.
1. Contrast: Adjust the Contrast.
2. Brightness: Adjust the Brightness.

11
Menu
Description
Image Lock
Image Lock is used to fine-tune and get the best image by removing noise that
creates unstable images with jitter and shimmer. If satisfactory results are not
obtained using the Fine adjustment, use the Coarse adjustment and then use
Fine again.
Available in Analog Mode Only
1. Coarse: Removes noise such as vertical stripes. Coarse adjustment may
move the screen image area. You may relocate it to the center using the Ho-
rizontal Control menu.
2. Fine: Removes noise such as horizontal stripes. If the noise persists even
after Fine tuning, repeat after adjusting the frequency (clock speed, Hz).
3. Sharpness: Adjusts the Sharpness.
4. H-Position: Adjusts the screen location horizontally.
5.
V-Position: Adjusts the screen location vertically.
Auto Ad-
justment
The values of Fine, Coarse, and position are adjusted automatically. If you
change resolution in the control panel, Auto function will be executed.
Available in Analog Mode Only
PIP Picture
When PIP (Picture In Picture) is on, you can adjust the PIP screen setting.
1. Contrast: Adjusts the Contrast of the PIP window on the screen
2. Brightness: Adjusts the Brightness of the PIP window on the screen.
3. Sharpness: Adjusts the Sharpness of the PIP window on the screen
4. Color: Adjusts the Color of the PIP window on the screen
5. Tint: Adds a natural tone to the PIP window. This function is only available
for DVD titles supporting NTSC. (The broadcasting system is marked with
"NTSC" or "PAL" above the DVD title)

12
OSD: Picture (Digital : Digital DVD)
Menu
Description
Mode
The Monitor has four automatic picture settings ("Dynamic", "Standard", "Movie"
and "Custom") that are preset at the factory. You may also select "Custom"
which automatically recalls your personalized picture settings.
1. Dynamic: Select this mode to view a sharper image than in "Standard"
mode.
2. Standard: Select this mode when the surroundings are bright. This also
provides a sharp image.
3. Movie: Select this mode when the surroundings are dark. This will save
power and reduce eye fatigue.
4. Custom: Select this mode when you want to adjust the image according to
your preferences.
Custom
You can use the on-screen menus to change the contrast and brightness ac-
cording to personal preference.
1. Contrast: Adjust the Contrast.
2. Brightness: Adjust the Brightness.
3. Sharpness: Adjust the Sharpness.
4. Color: Adjust the picture Color.
Size 1. Normal
2. Zoom1
3. Zoom2
4. Wide
OSD: Picture (Video/S-Video)

13
Menu
Description
Mode
The Monitor has four automatic picture settings ("Dynamic", "Standard", "Movie"
and "Custom") that are preset at the factory. You can activate either Dynamic,
Standard, Movie, or Custom. You may also select "Custom" which automatically
recalls your personalized picture settings.
5. Dynamic: Select this mode to view a sharper image than in "Standard" mode.
6. Standard: Select this mode when the surroundings are bright. This also pro-
vides a sharp image.
7. Movie: Select this mode when the surroundings are dark. This will save pow-
er and reduce eye fatigue.
8. Custom: Select this mode when you want to adjust the image according to
your preferences.
Custom
You can use the on-screen menus to change the contrast and brightness accord-
ing to personal preference.
5. Contrast: Adjust the Contrast.
6. Brightness: Adjust the Brightness.
7. Sharpness: Adjust the Sharpness.
8.
Color
: Adjust the picture Color.
Size
5.
Normal
6. Zoom1
7. Zoom2
8.
Wide
Film Mode
The Film Mode feature offers you a theater-quality viewing experience.

14
OSD: MagicColor Pro
Menu
Description
MagicColor
Implements the natural color chroma according to the display screen. Automatical-
ly adjusts to the display screen. Can improve the tones.
1. Off
2. Intelligent: Enhance natural color except skin tone.
3. Full: Displays both natural skin tones and enhanced colors.
4. Demo: Displays the improved image on the left and the original on the right.
Color Tone
Adjusts color tones to the preference of the user.
Analog/Digital(PC) - Cool4 / Cool3 / Cool2 / Cool1 / Normal / Warm1 / Warm2
Digital(Digital DVD)/Video/S-Video - Cool2 / Cool1 / Normal / Warm1 / Warm2
Gamma
Can implement the grayscale gradient to the preference of the user.
Increased Mode number - Displays the full screen more naturally and softer and
sharpens the dark scale.
Decreased Mode number - Displays the full screen sharper and improves the
bright scale.
Available in Analog/Digital(PC) Mode Only
6-Color
6 types: Red, Green, Blue, Cyan, Magenta and Yellow - Can adjust each of them
to the preference of the user.
1. Saturation: Adjusts the color saturation.
2. Hue: Adjusts the color tones.
3. Reset: Returns to the original screen mode.
The 6-Color function is only available when the Color Weakness function is
turned Off.
Color
Weakness
Enables those with color weakness to view the screen as easily as those with
normal vision.
1. Off
2. Custom1
3.
Custom2

15
OSD: PIP (Analog / Digital : PC)
Menu
Description
PIP
Turn the PIP Screen on or off.
1. On
2. Off
Source
Select the input source for the PIP.
Analog / Digital(PC) - Video / S-Video Mode
Size Change the Size of the PIP window.
/ / /
If you select or in Size, Position will not be activated.
Position
Change the Position of the PIP window.
/ / /

16
OSD: Setup
Menu
Description
Language
You can choose one of 11 languages.
Transparency
Changes the opaqueness of the background of the OSD.
1. High
2. Medium
3. Low
4. Opaque
Blue Screen
If no signal is being received or the signal is very weak, a blue screen
automatically replaces the noisy picture background. If you wish to con-
tinue viewing the poor picture, you must set the "Blue screen" mode to
"Off".
Reset
Picture parameters are replaced with the factory default values.
1. Image Reset: Image parameters are replaced with the factory de-
fault values.
Available in Analog Mode Only
2. Color Reset: Color parameters are replaced with the factory default
values.
Available in Analog/Digital(PC) Mode Only

17
Troubleshooting
If you have a problem setting up or using your LCD monitor, you may be able to solve it yourself.
Before contacting customer service, try the suggested actions that are appropriate to your prob-
lem.
Symptom
Checklist
Solution
No images on
the screen, I
cannot turn
on the moni-
tor.
Is the power cord con-
nected properly?
Check the power cord connection and supply.
Can you see "Check
Signal Cable" on the
screen?
(When connecting D-sub cable)
Check the signal cable connection.
(When connecting DVI cable)
If you still see an error message on the screen
when the monitor is connected properly, check to
see if the monitor status is set to analog.
Press 'ENTER' button to have the monitor
double-check the input signal source.
If the power is on, reboot
the computer to see the
initial screen (the login
screen), which can be
seen.
If the initial screen (the login screen) appears,
boot the computer in the applicable mode (safe
mode for Windows ME/XP/2000) and change the
frequency of the video card to a compatible
mode.
Note: If the initial screen (the login screen) does
not appear, contact HIS support.

18
Symptom
Checklist
Solution
Can you see "Not Opti-
mum Mode", "Recom-
mended mode : 1600 X
1200 60Hz" on the
screen?
You can see this message when the signal from
the video card exceeds the maximum resolution
and frequency that the monitor can properly han-
dle.
Adjust the maximum resolution and frequency
that the monitor can handle properly.
If the display exceeds UXGA or 75Hz (In case of
UXGA, 60Hz), a "Not Optimum Mode", "Rec-
ommended mode : 1600 X 1200 60Hz" mes-
sage is displayed.
If the display exceeds 85Hz, the display will work
properly but the "Not Optimum Mode", "Rec-
ommended mode : 1600 X 1200 60Hz" mes-
sage appears for one minute and then disap-
pears.
Please change to the recommended mode during
this one-minute period. (The message is dis-
played again if the system is rebooted.)
There is no image on the
screen, power indicator
on the monitor blinking at
1 second intervals.
The monitor is in PowerSaver mode.
Press any key on the keyboard to activate the
monitor and restore the image on the screen.
If there is still no image, press the 'ENTER' but-
ton.
Then press any key on the keyboard again to
activate the monitor and restore the image on the
screen.
Is the monitor connected
using the DVI cable?
You may get a blank screen if you boot the sys-
tem before you connect the DVI cable, or discon-
nect and then reconnect the DVI cable while the
system is running. Connect the DVI cable then
reboot the system.

19
Symptom
Checklist
Solution
I cannot see
the On Screen
Display.
Have you locked the On
Screen Display (OSD)
Menu to prevent
changes?
Unlock the OSD by pressing the MENU button for
at least 5 seconds.
The screen
shows strange
colors or just
black and
white.
Is the screen displaying
only one color as if look-
ing at the screen through
colored cellophane?
Check the signal cable connection or try using a
different signal cable. Make sure the video card
is fully inserted in it's slot inside the computer.
Have the screen colors
become strange after
running a program or due
to a crash between appli-
cations?
Reboot the computer.
Has the video card been
set properly?
Set the video card by referring to the video card
manual.
The screen
suddenly has
become unba-
lanced.
Have you changed the
video card or the driver?
Adjust screen image position and size using the
OSD.
Have you adjusted the
resolution or frequency
on the monitor?
Adjust the resolution and frequency of the video
card to one of the preset timing modes.
The screen can be unbalanced due to the cycle of the video card signals.
Readjust Position by referring to the OSD.
The screen is
out of focus or
OSD cannot be
adjusted.
Have you adjusted the reso-
lution or frequency on the
monitor?
Adjust the resolution and frequency of the vid-
eo card to a compatible preset timing fre-
quency.
Power Indica-
tor is blinking
but no images
on the screen.
Is the frequency properly
adjusted when checking the
Display Timing on the
menu?
Adjust the frequency properly by referring to
the video card manual and the monitor preset
timing modes.

20
Display Modes
If the signal from the computer system is the same as one of the monitor’s standard signal modes,
the screen is adjusted automatically. If the signal from the computer is not the same as one of the
standard signal modes, the screen may not display properly or it may not display at all. In this
case adjust the mode on the computer system. For the display modes listed below, the screen
image has been optimized during manufacture.
Table: Preset Timing Modes
Display Mode Horizontal
Frequency (kHz) Vertical
Frequency (Hz) Pixel
Clock
(MHz)
Sync
Polarity
(H/V)
IBM, 640 x 350
31.469
70.086
25.175
+/-
IBM, 720 x 400
31.469
70.087
28.322
-/+
IBM, 640 x 480
31.469
59.940
25.175
-/-
VESA, 640 x 480
37.861
72.809
31.500
-/-
VESA, 640 x 480
37.500
75.000
31.500
-/-
MAC, 640 x 480
35.000
66.667
30.240
-/-
MAC, 832 x 624
49.726
74.551
57.284
-/-
VESA, 800 x 600
35.156
56.250
36.000
+/-, +/-
VESA, 800 x 600
37.879
60.317
40.000
+/+
VESA, 800 x 600
48.077
72.188
50.000
+/+
VESA, 800 x 600
46.875
75.000
49.500
+/+
VESA, 1024 x 768
48.363
60.004
65.000
-/-
VESA,1024 x 768
56.476
70.069
75.000
-/-
VESA, 1024 x 768
60.023
75.029
78.700
+/+
VESA, 1280 x 1024
63.981
60.020
108.00
+/+
VESA, 1280 x 1024
79.976
75.025
135.00
+/+
VESA, 1600 x 1200
75.000
60.000
162.00
+/+
This manual suits for next models
2
Table of contents
Other Hope Industrial Systems Monitor manuals

Hope Industrial Systems
Hope Industrial Systems HIS-ML18 User manual

Hope Industrial Systems
Hope Industrial Systems HIS-ML18B User manual

Hope Industrial Systems
Hope Industrial Systems HIS-ML12-SXA User manual

Hope Industrial Systems
Hope Industrial Systems IS-UM17 B Series User manual

Hope Industrial Systems
Hope Industrial Systems HIS-ML22 C Series User manual

Hope Industrial Systems
Hope Industrial Systems HIS-RL17-H Series User manual

Hope Industrial Systems
Hope Industrial Systems HIS-ML21-*** D series User manual