- 6 -
CZ /
SK /
RO /
PL /
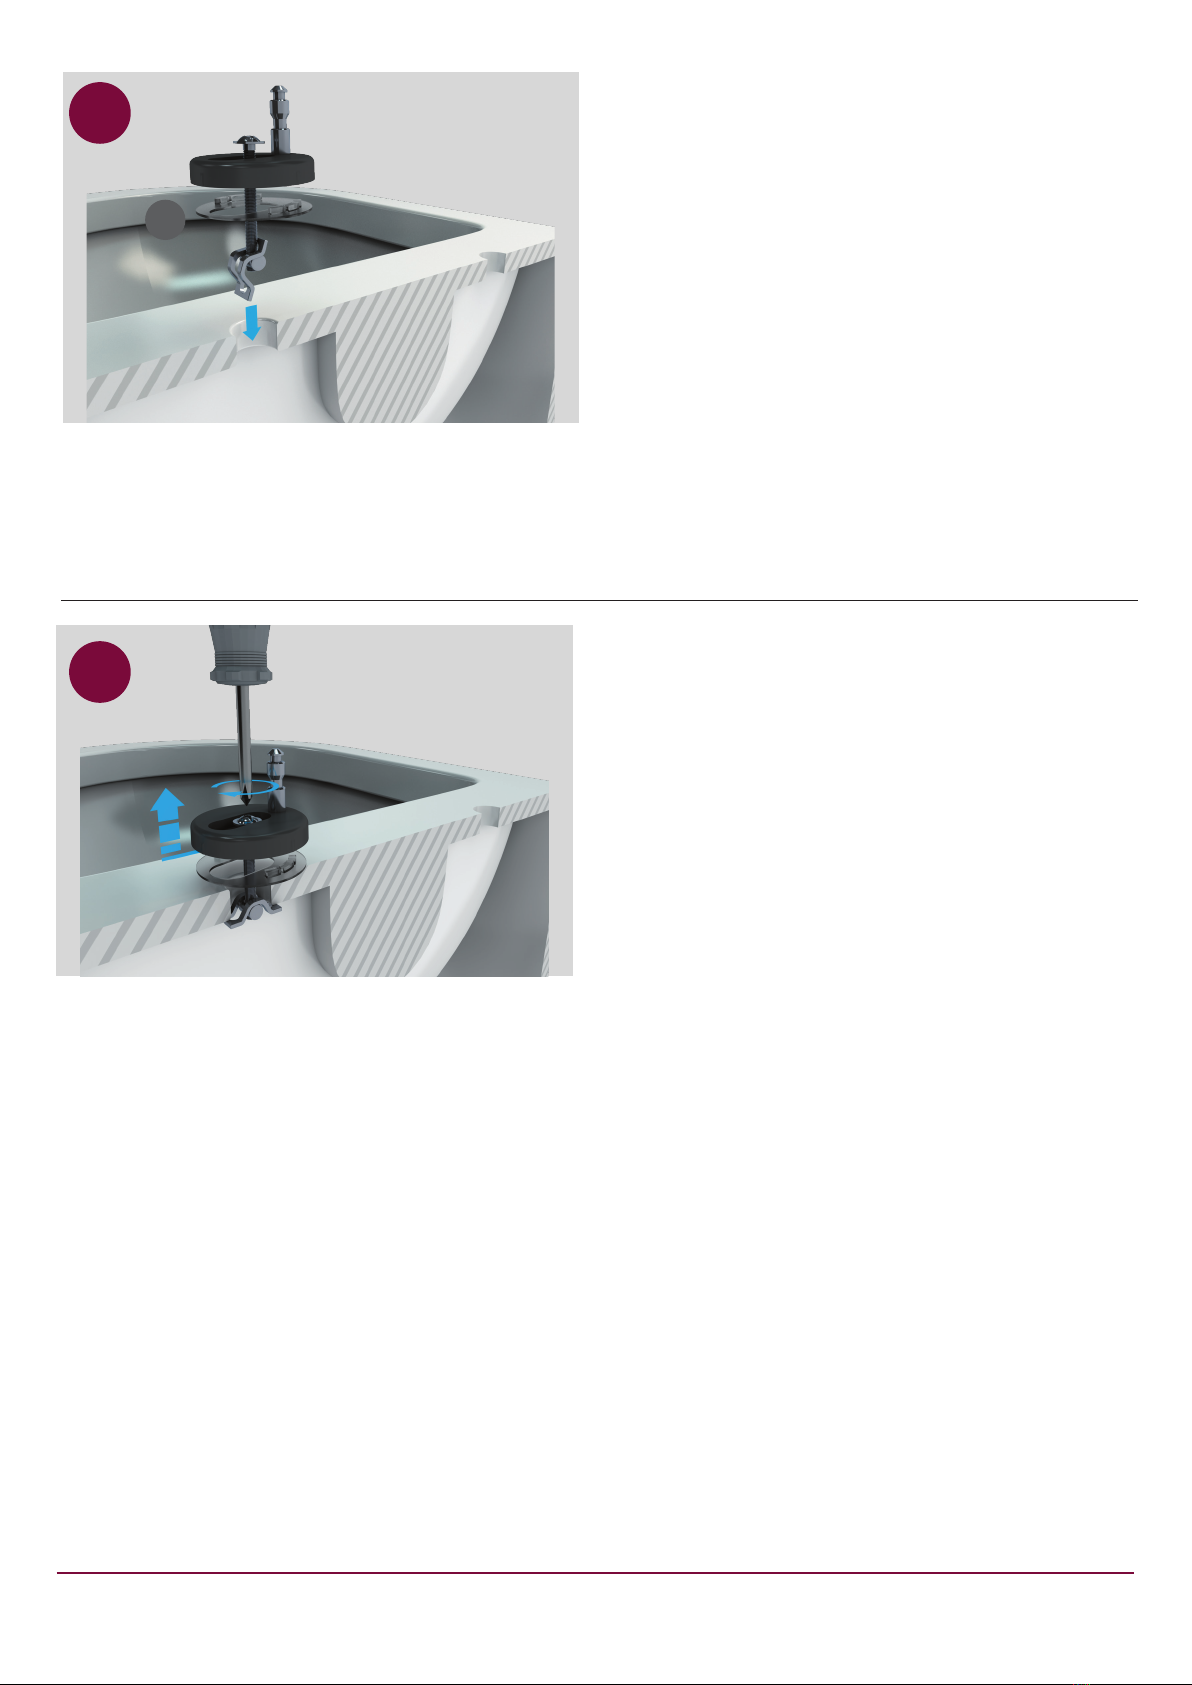
En option : Réglage de la pression de chasse d’eau : Si la
pression de chasse d’eau est trop faible ou trop forte, elle
peut être régulée avec la cloche de l’élément de la paroi
avant. Autre solution : Il est également possible de poser
un réducteur universel de débit d’eau (C) (fourni) pour les
WC sans bride, directement sur le tuyau d’arrivée du WC. Le
montage sur le côté céramique par rapport au WC réduit le
débit de la chasse de 40 % environ, le montage sur le côté
du réservoir de la chasse le réduit de 30 % environ.
Optional: Regolazione della pressione di risciacquo: Se la
pressione di risciacquo è troppo bassa o troppo alta, può
essere regolata sulla campana dell'elemento a parete. In
alternativa, un limitatore di flusso universale (C) (compreso
nella fornitura) per WC senza brida può essere montato
direttamente sul tubo di mandata del WC. L'installazione
sul lato ceramico del WC riduce il flusso di scarico di circa il
40%, l'installazione sul lato della cassetta di circa il 30%.
Optioneel: Instellen van de spoeldruk: Mocht de spoeldruk
te gering of te sterk zijn, dan kan deze aan het bodem-
ventiel van het voorwandelement worden geregeld. Als
alternatief kan ook een universele spoelstroomsmoorklep
(C) (meegeleverd) voor spoelrandloze wc's, direct op de
toevoerbuis van de wc worden gemonteerd. De montage
aan de keramische kant naar de wc verlaagt de spoelstroom
met ca. 40%, de montage aan de kant naar de spoelkast
met ca. 30%.
Valfritt: Inställning av spoltrycket: Om spoltrycket är för
lågt eller för högt, kan det justeras med hjälp av lyftklock-
an i förväggselementet. Alternativt kan också en universell
spolningsflödesbegränsare (C) (ingår i leveransomfånget)
för WC-stolar utan spolkant monteras direkt på WC-sto-
lens inloppsrör. Montering på WC:ns keramiksida reducerar
spolningsflödet med ca 40 %, och montering på sidan av
vattenbehållaren med ca 30 %.
FR /
IT /
NL /
SE /
Možnost: Nastavení tlaku splachování: Pokud by byl tlak
splachování příliš malý nebo příliš velký, lze jej regulovat na
zvedacím zvonu předstěnového prvku. Alternativně lze také
namontovat univerzální omezovač průtoku (C) (je součástí
dodávky) pro WC bez splachovacího kruhu přímo na pří-
vodní trubku WC. Montáž na keramické straně WC snižuje
průtok splachování o cca 40 %, montáž na straně splacho-
vací nádrže o cca 30 %.
Voliteľné: Nastavenie oplachovacieho tlaku: Ak by bol
oplachovací tlak príliš nízky alebo silný, dá sa tento regulo-
vať na zdvíhacom plaváku prvku prednej steny. Alternatívne
k tomu sa dá tiež namontovať univerzálna škrtiaca klapka
oplachovacieho prúdu (C) (je obsahom dodávky) pre WC
bez oplachovacieho okraja, priamo na prítokovú rúrku WC.
Montáž na keramickú stranu k WC znižuje oplachovací prúd
o cca 40%, montáž na bočnú stranu k oplachovacej skrini o
cca 30%.
Opţional: Reglarea presiunii apei de spălare: Dacă presiunea
apei de spălare este prea mică sau prea mare, aceasta poa-
te fi reglată de sifonul cu clopot din instalaţia montată pe
perete. Ca alternativă, se poate monta un reductor universal
de debit de spălare (C) (inclus în pachetul livrat) pentru
toaletele fără margine de spălare direct pe conducta de ali-
mentare a WC-ului. Instalarea la partea ceramică a WC-ului
reduce debitul de spălare cu aproximativ 40%, montarea la
partea laterală a rezervorului cu aproximativ 30%.
Opcjonalnie: Nastawianie ciśnienia spłuczki: W przypadku zbyt
dużego lub zbyt małego ciśnienia spłuczki można go nastawić
na dzwonie do spłukiwania. Jako alternatywę można zamonto-
wać bezpośrednio w spłukującej rurze dolotowej uniwersalny
dławik strumienia spłuczki (C) (w zakresie dostawy) przezna-
czonego do bezkołnierzowych misek WC. Montaż od strony
ceramiki do miski WC redukuje strumień spłuczki o ok. 40%,
natomiast montaż po stronie zbiornika spłuczki - o ok. 30%.
09
B
FR /
IT /
NL /
SE /
CZ /
SK /
RO /
PL /
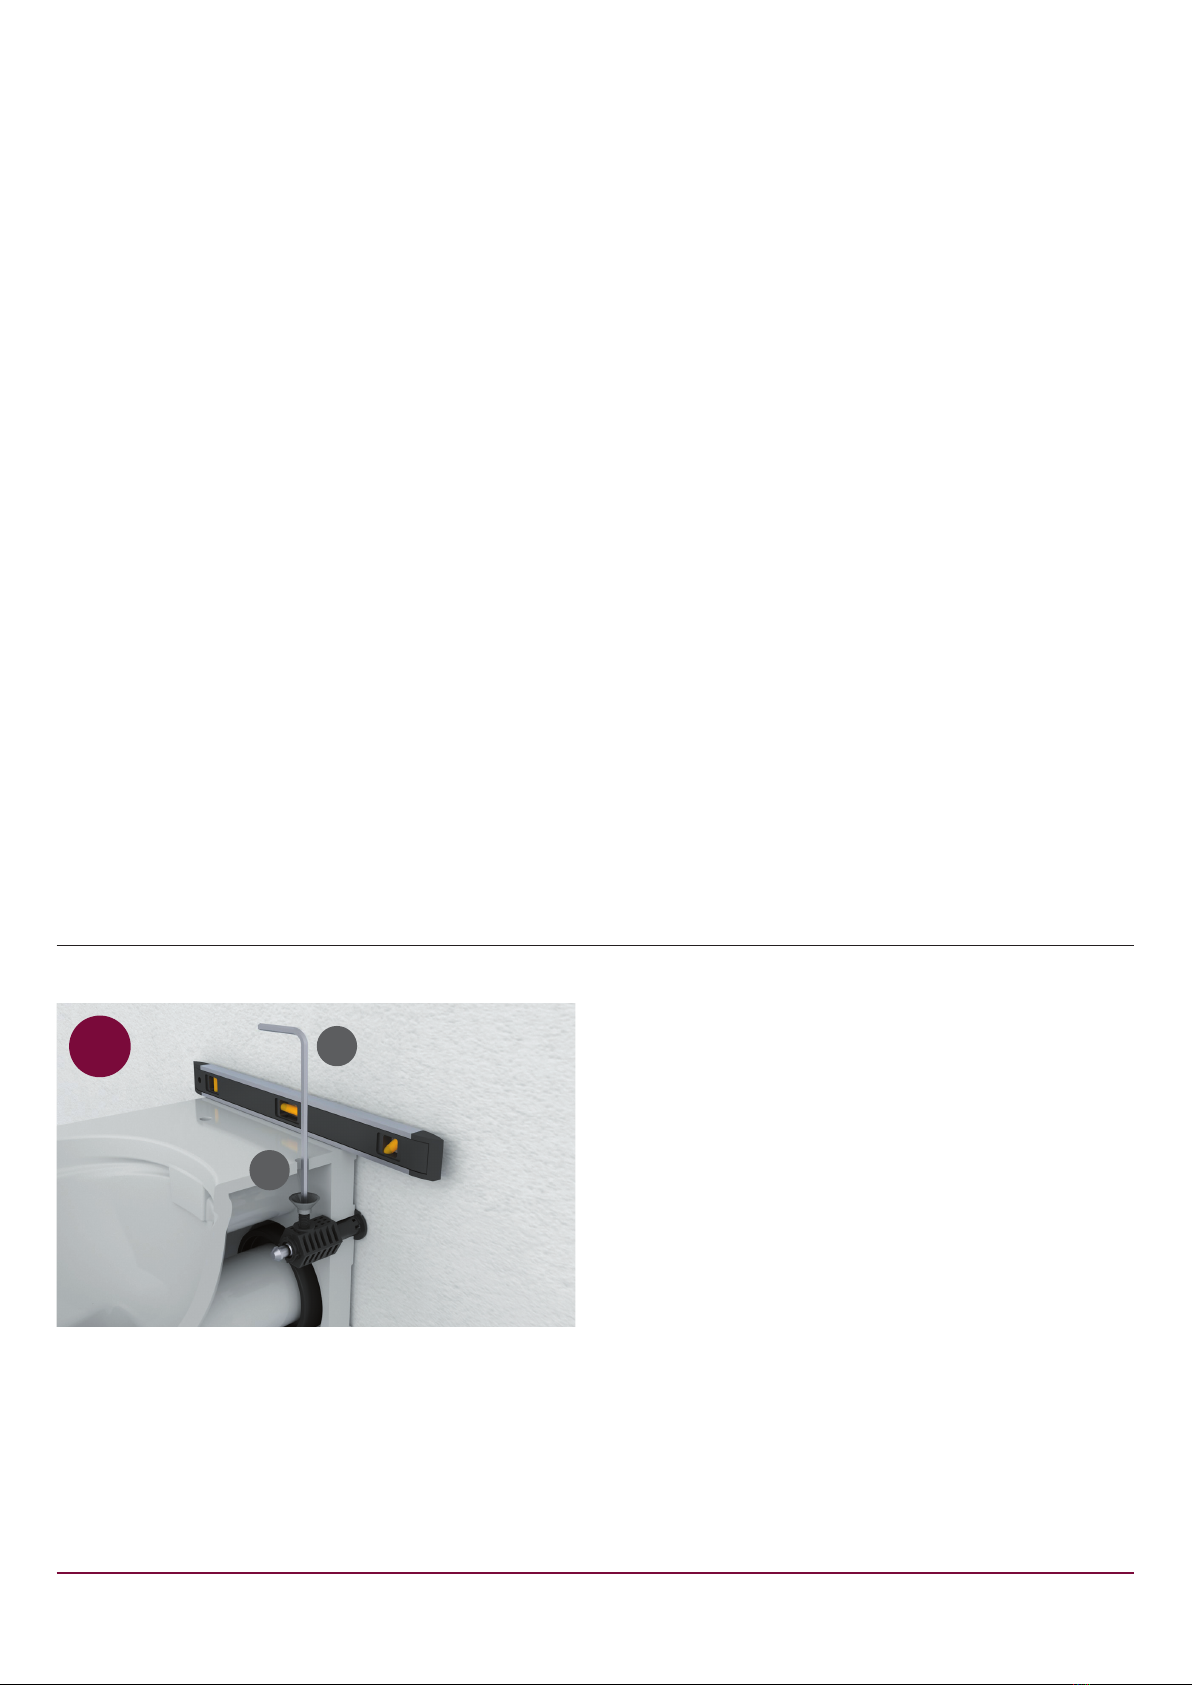
Befestigen Sie die Toilette mit der Madenschraube (2), ver-
wenden Sie hierzu den Inbusschlüssel (B).
Attach the toilet with the grub screw (2); use the Allen key
(B) to do so.
DE /
EN /
Fixez le WC avec la vis sans tête (2), utilisez pour ce faire
la clé Allen (B).
Fissare la toilette con la vite a perno (2) utilizzando l
a chiave a brugola (B).
Bevestig het toilet met het tapeind (2), gebruik hiervoor
de inbussleutel (B).
Sätt fast WC-stolen med ställskruven (2) med hjälp av
en insexnyckel (B).
Upevněte toaletu stavěcím šroubem (2), použijte k t
omu imbusový klíč (B).
Upevniť toaletu závrtnou skrutkou (2), použiť k tomu
inbusový kľúč (B).
Fixaţi toaleta cu şurubul fără cap (2), utilizaţi în acest
scop cheia imbus (B).
Zamocować muszlę przy pomocy wkrętów zabezpieczają-
cych (2) posługując się kluczem imbusowym (B).
2