manuals.online logo
Brands
  1. Home
  2. •
  3. Brands
  4. •
  5. Horstmann
  6. •
  7. Thermostat
  8. •
  9. Horstmann channelplus H37 XL series 2 User manual

Horstmann channelplus H37 XL series 2 User manual

LEAFLET No P82723
ISSUE 1
PPaaggee88
LLCCDDDDIISSPPLLAAYYFFEEAATTUURREESS--AAffuullllyyggrraapphhiiccaallbbaacckk--lliitt
ddiissppllaayywwhhiicchhaalllloowwsstthheeuusseerrtthheebbeessttppoossssiibbllee
iinntteerrffaacceewwiitthhtthheepprrooggrraammmmeettiimmeessaanndd
ffuunnccttiioonnss--
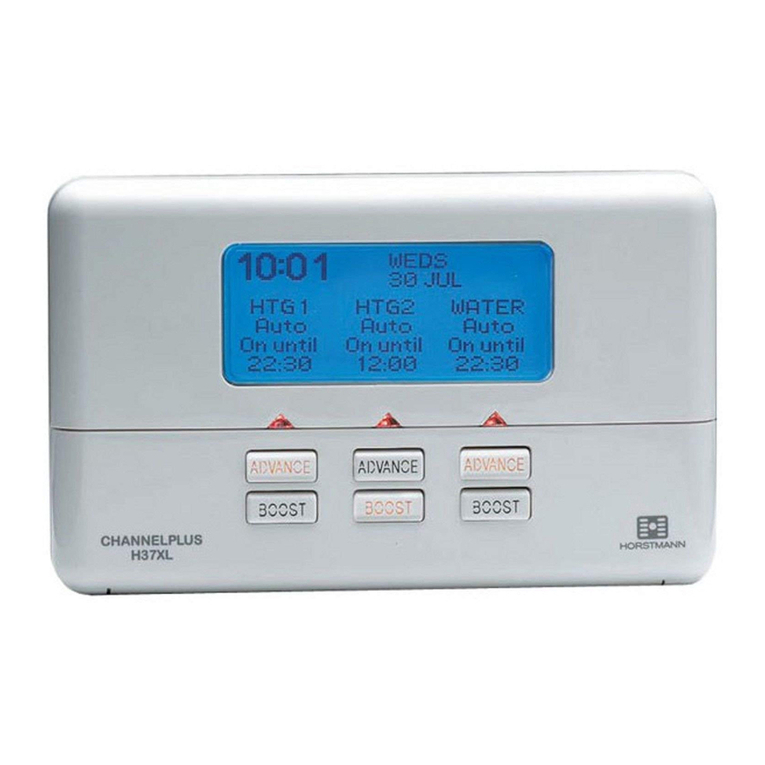
1 Current TIME OF DAY
2 Day of Week
3 Channel Heading
4 Current Channel programme
5 Next Channel switch time
LLEEDDIINNDDIICCAATTOORR--IIlllluummiinnaatteeddbbuuttttoonnssggiivveeaa
vviissuuaallffeeeeddbbaacckkttoouusseerrooppeerraattiioonnss,,aasswweellllaass
iinnddiiccaattiinnggtthheessttaattuussooffaacchhaannnneell..
6 Channel ON indicator
EEAASSYYTTOOUUSSEEPPRROOGGRRAAMMMMEEAANNDDOOVVEERRRRIIDDEEBBUUTTTTOONNSS
--AAmmeennuuddrriivveennddiissppllaayyaannddaapprreesseettcclloocckk//
ccaalleennddeerrmmeeaannsstthhaattpprrooggrraammmmiinnggiissmmaaddee
ssiimmppllee..AAoonneettoouucchhoovveerrrriiddeeffaacciilliittyymmaakkeess
tteemmppoorraarryycchhaannggeessssiimmpplleettoouusseeaannddvviieeww..
7 ADVANCE and ENTER button
8 ADVANCE and PLUS button
9 BOOST and COPY button
10 BOOST and MINUS button
11 Programme Select buttons (Coloured Blue)
12 SET button (Coloured Green)
PPaaggee11
Horstmann Controls Limited
Bristol
BS4 1UP
Email: [email protected].uk
Website: www.horstmann.co.uk
IINNTTRROODDUUCCTTIIOONNPPAAGGEE11
PPRROODDUUCCTTOOVVEERRVVIIEEWWPPAAGGEE11
DDIISSPPLLAAYYIINNFFOORRMMAATTIIOONNPPAAGGEE22
DDEEFFAAUULLTTSSEETTTTIINNGGSSPPAAGGEE22
AADDJJUUSSTTIINNGGTTIIMMEEAANNDDDDAATTEEPPAAGGEE33
AADDJJUUSSTTIINNGGCCLLOOCCKKOOPPTTIIOONNSSPPAAGGEE44
AADDJJUUSSTTIINNGGCCHHAANNNNEELLHHEEAADDIINNGGSSPPAAGGEE44
SSEETTTTIINNGGTTHHEEPPRROOGGRRAAMMMMEETTIIMMEESSPPAAGGEE55
SSEETTTTIINNGGHHOOLLIIDDAAYYMMOODDEEPPAAGGEE66
OOVVEERRRRIIDDEEFFAACCIILLIITTYYPPAAGGEE66
BBOOOOSSTTFFUUNNCCTTIIOONNPPAAGGEE77
AADDVVAANNCCEEFFUUNNCCTTIIOONNPPAAGGEE77
RREESSEETTPPRROOCCEEDDUURREEPPAAGGEE77
GGEENNEERRAALLIINNFFOORRMMAATTIIOONNPPAAGGEE88
IINNDDEEXX
PPRROODDUUCCTTOOVVEERRVVIIEEWW--DDEETTAAIILLSSHHOOWWNNWWIITTHHTTHHEEFFLLAAPPLLOOWWEERREEDD
GGEENNEERRAALLIINNFFOORRMMAATTIIOONN
BBAATTTTEERRYY
SSEERRVVIICCEEAANNDDRREEPPAAIIRR
This programmer is NOT user serviceable. Please do not dismantle the unit. In the unlikely
event of a fault developing please refer to the RESETTING THE PROGRAMMER section of this
user guide located on page 7. If this fails to resolve the problem please contact a local
heating engineer or a qualified electrician. 1122
33
44
55
6677
8899
1100
1111
The programmer is fitted with a non-rechargeable, non-serviceable long life battery,
which will maintain the clock and programmed time settings with the mains supply
disconnected.
THIS RESERVE SHOULD BE SUFFICIENT TO COVER POWER INTERRUPTIONS DURING THE LIFE OF THE
UNIT.
During power interruptions the display will be blank.
CCHHAANNNNEELLPPLLUUSSHH3377XXLLSSEERRIIEESS22
UUSSEERRIINNSSTTRRUUCCTTIIOONNSS
CChhaannnneellPPlluussHH3377XXLLSSeerriieess22TThhrreeeeCChhaannnneellPPrrooggrraammmmeerr
Each independent channel can be set to provide up to three on and off
operations per day on a weekly schedule.
Series 2 ChannelPlus programmers directly replace earlier ChannelPlus
models.
1122
Lower the front flap of the unit. On third
Channel press the ADVANCE(Enter) and
SELECT(Blue) buttons together then release
the buttons and the programmer will return
to the preset factory settings.
ADVANCE
SELECT
BOOST
RESET
The simple instructions contained in this user guide are designed to help with the
programming and operation of the unit. Most of the following instructions require the front
flap to be lowered. Please replace the flap when normal operation is required.
FFRROONNTTCCOOVVEERR
RREESSEETTPPRROOCCEEDDUURREE
PPLLEEAASSEENNOOTTEE;;Using this procedure will restore the ChannelPlus to the original factory
programme settings, the time setting will also default to 11ssttJJaannuuaarryy22000055- See the
Adjusting Time and Date section on page.
Electronic equipment can in some circumstances be affected by electrical interference. If
the display becomes frozen or scrambled; or if you wish to revert back to the
default settings please use the following procedure.
RREESSEETTTTIINNGGTTHHEECCHHAANNNNEELLPPLLUUSSHH3377XXLLSSEERRIIEESS22
DDIISSPPLLAAYYIINNFFOORRMMAATTIIOONN
The ChannelPlus H37XL Series 2 programmer has
a fully graphical, back-lit display. In the normal
run mode the display is divided into three
sections, each section represents a controlled
channel (see diagram 1). The information
displayed will change depending upon the
settings made and which mode you are in.
During different programming modes and/or
setting screens the current time, day/date,
holiday indicator will only appear when
necessary, this is to reduce confusion during
the programming process. This is explained
further in later sections of this guide.
Diagram 1
Time
Day/Date Holiday function
active
Channel/
Zone 1
Status
Channel/
Zone 2
Status
Channel/
Zone 3
Status
AADDJJUUSSTTIINNGGDDEEFFAAUULLTTSSEETTTTIINNGGSS
The ChannelPlus H37XL Series 2 has a number of default settings which are factory preset.
These settings are designed to reduce the need for user intervention upon installation
of the programmer. However it is possible to customise the user display by following the
procedures in the following pages. The factory defaults are illustrated below;
Time displayed in
24Hr clock
Channel heading set to
standard installation i.e
Heating and Hot Water
Time and Calender
are factory set.
TIME AND DATE CLOCK OPTIONS HEADINGS
OPTIONS OPTIONS OPTIONS
The programmer has been pre-set with
the current time and date during
manufacture. No alteration should be
required to the time and date.
However if any modification is required
please refer to the flowchart on page 3.
24 Hour
or
AM /PM
Heating / Water
Zones
Channels
PPaaggee22
AADDVVAANNCCEEFFUUNNCCTTIIOONN--BBRRIINNGGSSFFOORRWWAARRDDTTHHEENNEEXXTTOONNOORROOFFFFOOPPEERRAATTIIOONN
Press ADVANCE button once
to move to the next
ON/OFF time
To cancel the advance press the ADVANCE
button again. This will return the unit to
its normal programme
The Advance facility will allow the user to either bring a channel ‘ON’ which is currently ‘OFF’
or switch channel ’OFF’ which is currently ‘ON’. To indicate the Advance feature being
activated the ‘ADVANCE’ button under the selected channel will stay illuminated until the next
programme switching time, the user display will change to also indicate the status of the
channel and the next switching time.
The chart below illustrates the different options available. As all three channels are totally
independent it is possible to have them all set differently if required.
BBOOOOSSTTFFUUNNCCTTIIOONN--11OORR22HHOOUURRTTEEMMPPOORRAARRYYOOVVEERRRRIIDDEE
Press BOOST button
once for 1 hour of
Hot Water or
Central Heating
Press BOOST button
twice for 2 hours of
Hot Water or
Central Heating
Press BOOST button a third
time to cancel the period
and return to the normal
programme
The Boost facility will allow the user to either activate a channel which is currently ‘OFF’ for
either 1 or 2 hours, or to extend a current period by 1 or 2 hours. To indicate the boost being
activated the ‘BOOST’ button under the selected channel will stay illuminated for the
duration of the boost/extension period. The display will also indicate the extension to the
time visually on the display.
The chart below illustrates the different options available. As all three channels are totally
independent it is possible to have them all set differently.
PPaaggee77
Channel
header
PPaaggee33
AADDJJUUSSTTIINNGGTTIIMMEEAANNDDDDAATTEE--SSEEEENNOOTTEEBBEELLOOWW
With the ChannelPlus H37XL Series 2 programmer operating in the normal running mode it is
possible to alter the functionality of the programme on each individual channel. The options
include; AAuuttoo- Programmer follows all programmed ‘ON’ and ‘OFF’ times.
AAllllddaayy- Channel operates from 1st ‘ON’ time until 3rd ’OFF’, ignoring all switching
times in between. Useful for unexpected times of occupation or to maintain a constant
temperature during an extended period.
OOnn- Channel will be constantly ‘ON’.
OOffff- Channel will be constantly ‘OFF’, ability to turn off heating during summer with
out altering the programme times.
All of the settings above will be permanent, i.e. unaffected by programme times, until
alteration by the user.
The diagram below illustrates how to alter the setting, it assumes that the channel is in the
AUTO mode to begin with. As all three channels are totally independent it is possible to have
them all set differently if necessary.
PPRROOGGRRAAMMMMEEOOVVEERRRRIIDDEEFFAACCIILLIITTIIEESS
SSEETTTTIINNGGTTHHEEHHOOLLIIDDAAYYMMOODDEE
PPaaggee66
Press SELECT once.
Programme goes from
AUTO to ALL DAY
Press SELECT again.
Programme goes from
ALL DAY to ON
Press SELECT again.
Programme goes from
ON to OFF
Press SELECT again.
Programme goes from
OFF to AUTO
Channel will operate
from first ON until last
OFF period
Channel will be
continuously ON
Channel will be
continuously OFF
Programmer will return
to normal ON and OFF
times
The holiday mode can be used to suspend the
program function of the ChannelPlus
programmer, it can be set in advance of your
departure date and for as long a period as
required. The holiday function operates from
mid-day to mid-day, this means it can be
easily set to ensure your home is warm for
your return. When the holiday mode has
been set a smiley face ’☺’ will appear on the
display. When the holiday mode is active oonnllyy
the day / date and smiley face will be
displayed.
PLEASE NOTE; Any alteration to the current
time or date will cancel any Holiday
programme set
SSAAMMPPLLEEDDIISSPPLLAAYYSS
The ChannelPlus H37XL Series 2 programmer has been pre-set with the current time and
date during manufacture. No alteration should be required to the time and date, however if
any modification is required please refer to the flowchart below.
PLEASE NOTE; Any alteration to the current time or date will cancel any Holiday programme
set. It will also cause any Boost or Advance operations to be cancelled.
PPaaggee44
AADDJJUUSSTTIINNGGCCLLOOCCKKOOPPTTIIOONNSS
AADDJJUUSSTTIINNGGCCHHAANNNNEELLHHEEAADDIINNGGSS
SSEETTTTIINNGGTTHHEEPPRROOGGRRAAMMMMEETTIIMMEESS
The programme times have been pre-set as shown in the chart below, if any changes are
required to the programme times please complete the operation as described in the
flowchart below.
MON-FRI
SAT/SUN
1st ON 1st OFF 2nd ON 2nd OFF 3rd ON 3rd OFF
6:30 AAMM8:30 AAMM12:00 PPMM12:00 PPMM4:30 PPMM10:30 PPMM
7:30 AAMM10:30 AAMM12:00 PPMM12:00 PPMM5:00 PPMM11:00 PPMM
DDEEFFAAUULLTTTTIIMMEESSEETTTTIINNGGSS
PPaaggee55
The programmer has been preset to
display the time in 24 hour clock
format, should setting you require
AM/PM then please follow the
flowchart opposite.
The programmer has been preset to
display the channel heading as
‘Heating and Hot Water’, should you
require either the ‘Zone’ or ‘Channel’
options then please follow the
flowchart opposite.
SSAAMMPPLLEEDDIISSPPLLAAYYSS

Other manuals for channelplus H37 XL series 2

1

Other Horstmann Thermostat manuals

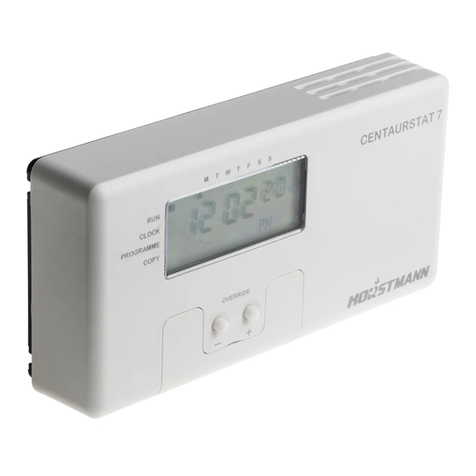
Horstmann CentaurStat 7 User manual

Horstmann

Horstmann CentaurStat 7 User manual

Horstmann HRT4-A Operating instructions

Horstmann

Horstmann HRT4-A Operating instructions

Horstmann HRT4-B Operating instructions

Horstmann

Horstmann HRT4-B Operating instructions

Horstmann ChannelPlus H47XL Series 2 Operation instructions

Horstmann

Horstmann ChannelPlus H47XL Series 2 Operation instructions

Horstmann DRT1 User manual

Horstmann

Horstmann DRT1 User manual

Horstmann HRT3 User manual

Horstmann

Horstmann HRT3 User manual

Horstmann DRT 2 User manual

Horstmann

Horstmann DRT 2 User manual

Horstmann HCT2 User manual

Horstmann

Horstmann HCT2 User manual

Horstmann HRT4-ZW Operating instructions

Horstmann

Horstmann HRT4-ZW Operating instructions

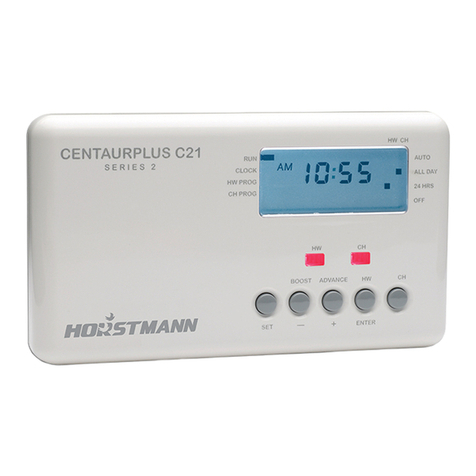
Horstmann CentaurPlus C21 User manual

Horstmann

Horstmann CentaurPlus C21 User manual

Horstmann CENTAURSTAT 1 User manual

Horstmann

Horstmann CENTAURSTAT 1 User manual

Horstmann DRT1 Manual

Horstmann

Horstmann DRT1 Manual

Horstmann C-Stat 11-ZW User manual

Horstmann

Horstmann C-Stat 11-ZW User manual

Horstmann HRT4-ZW Operating instructions

Horstmann

Horstmann HRT4-ZW Operating instructions

Horstmann HRT4-ZW User manual

Horstmann

Horstmann HRT4-ZW User manual

Horstmann 425 Tiara Operation instructions

Horstmann

Horstmann 425 Tiara Operation instructions

Horstmann C-Stat 11-M User manual

Horstmann

Horstmann C-Stat 11-M User manual

Horstmann CentaurPlus C21 Operation instructions

Horstmann

Horstmann CentaurPlus C21 Operation instructions

Horstmann T105NP User manual

Horstmann

Horstmann T105NP User manual

Horstmann Thermostat User manual

Horstmann

Horstmann Thermostat User manual

Horstmann ThermoPlus AS2-RF Operation instructions

Horstmann

Horstmann ThermoPlus AS2-RF Operation instructions

Horstmann CentaurStat 7 User manual

Horstmann

Horstmann CentaurStat 7 User manual

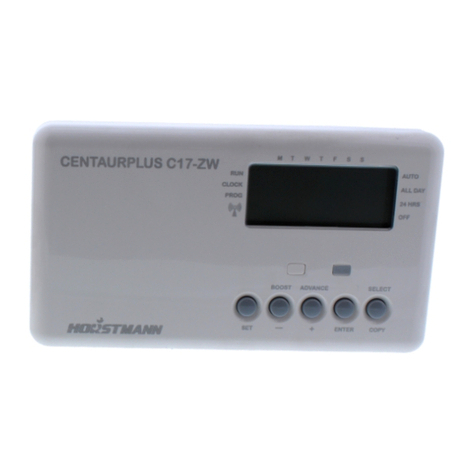
Horstmann CentaurPlus C17-ZW Operation instructions

Horstmann

Horstmann CentaurPlus C17-ZW Operation instructions

Horstmann AS Thermoplus AS1 Operation instructions

Horstmann

Horstmann AS Thermoplus AS1 Operation instructions

Popular Thermostat manuals by other brands

AMX ENV-VST-C installation guide

AMX

AMX ENV-VST-C installation guide

HOTOWELL HTW-MT06 Series Installation and operation manual

HOTOWELL

HOTOWELL HTW-MT06 Series Installation and operation manual

EWELLY EW-181 manual

EWELLY

EWELLY EW-181 manual

Olimpia splendid Bi2 B0772 Instructions for mounting and use

Olimpia splendid

Olimpia splendid Bi2 B0772 Instructions for mounting and use

Siemens RDF600 Series operating instructions

Siemens

Siemens RDF600 Series operating instructions

Lauda PROLINE P 5 C operating instructions

Lauda

Lauda PROLINE P 5 C operating instructions

Honeywell ST9400C user guide

Honeywell

Honeywell ST9400C user guide

PR1 T715 operating instructions

PR1

PR1 T715 operating instructions

Robertshaw 9901i user manual

Robertshaw

Robertshaw 9901i user manual

First ELTHERM AT8 user manual

First

First ELTHERM AT8 user manual

Heltun HE-ZW-THERM-FC1 user manual

Heltun

Heltun HE-ZW-THERM-FC1 user manual

Siemens RDF301 operating instructions

Siemens

Siemens RDF301 operating instructions

SwannOne ZEN-01 quick start guide

SwannOne

SwannOne ZEN-01 quick start guide

Bosch CRC R-1 Installation and operating instructions

Bosch

Bosch CRC R-1 Installation and operating instructions

Bosch FW 100 Installation and operating instructions

Bosch

Bosch FW 100 Installation and operating instructions

Leviton 95A03-TKT installation instructions

Leviton

Leviton 95A03-TKT installation instructions

White Rodgers 1E65-144 Installation and operation instructions

White Rodgers

White Rodgers 1E65-144 Installation and operation instructions

Sinope TH1400WF installation guide

Sinope

Sinope TH1400WF installation guide

manuals.online logo
manuals.online logoBrands
  • About & Mission
  • Contact us
  • Privacy Policy
  • Terms and Conditions

Copyright 2025 Manuals.Online. All Rights Reserved.