Houston Radar Armadillo Tracker User manual

T r a c k e r P a g e 1o f 59
Armadillo®Tracker
Multi-Lane Bidirectional Traffic Statistics
Gathering Device
Installation and User Guide
Rev 2.1, October 24, 2023
Houston Radar Armadillo® Tracker Non-Intrusive Multi-Lane Bidirectional Traffic Statistics Gathering Device

T r a c k e r P a g e 2o f 59
This device complies with part 15 of the FCC Rules. Operation is subject to the following two conditions: (1) this device may not
cause harmful interference, and (2) this device must accept any interference received, including interference that may cause
undesired operation. The device must be located 20 cm or more from persons. The device must not be co-located with other
transmitters.
Changes or modifications not expressly approved by the party responsible for compliance could void the user's authority to
operate the equipment.
Any modification or use other than specified in this manual will strictly void the certification to operate the device.
This product contains a rechargeable Lithium Iron Phosphate battery (LiFePO4). Charging must be performed indoors in a dry
environment only by the provided LiFePO4 battery charger. Do not charge unsupervised or hidden from view. Do not expose the
charger to rain, water, or moisture. Securely cap the connectors on the bottom when installing the unit outdoors.
Battery must be recycled or disposed of properly per local recycling regulations or may be returned to us for recycling.
Do not crush, pierce, or incinerate the product or the battery. Discontinue use immediately if any leaking occurs.
Product contains no user serviceable parts inside. Do not attempt to open or repair. Doing so will void the warranty.
Specifications may change without notice.

T r a c k e r P a g e 3o f 59
Contents
1.0 A Look Inside an Armadillo Tracker Radar.......................................................................5
2.0 Hardware Included With the Armadillo Tracker ..............................................................6
3.0 Preparing the Tracker for Use..............................................................................................7
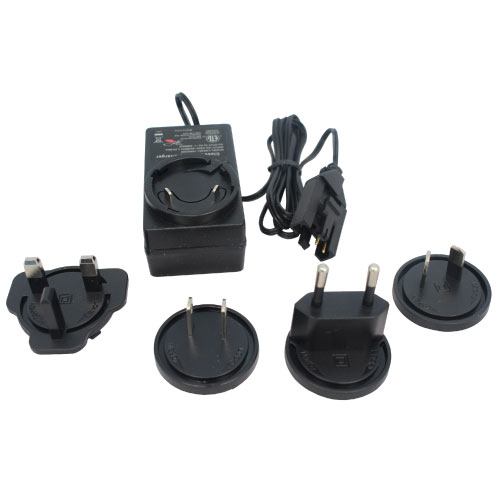
3.1 Fully Charge the Tracker Battery .....................................................................................................7
3.2 Select Installation Location.............................................................................................................8
3.3 Set the Time, Speed Units and data collection Speed Range...........................................................10
4.0 Installation ............................................................................................................................10
4.1 Mounting Position........................................................................................................................10
4.2 Mounting the Tracker...................................................................................................................11
4.3 Aiming the Tracker .......................................................................................................................11
4.4 Power ON and Verify Detection ....................................................................................................12
4.5 Optional Solar Panel.....................................................................................................................13
4.6 Optional Armadillo Booster Pack ..................................................................................................14
5.0 Retrieving Data from the Tracker Using Houston Radar StatsAnalyzer ......................16
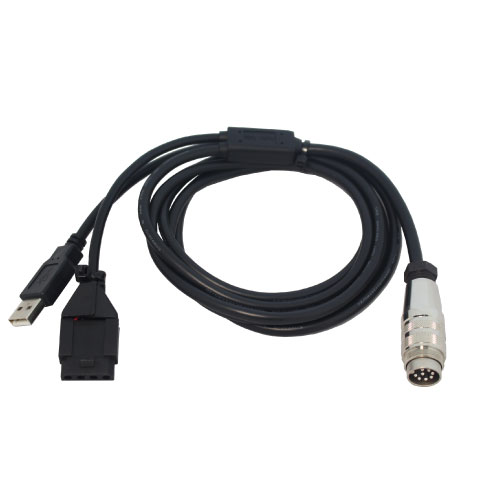
5.1 Wired USB Interface .....................................................................................................................16
5.2 Wireless Bluetooth Interface ........................................................................................................16
5.3 Retrieving Data Using USB or Bluetooth Connection......................................................................17
6.0 Importing Data into Houston Radar StatsAnalyzer to Generate Reports.....................20
6.2 Stats Analyzer Configuration Window...........................................................................................22
6.3 Importing Data into Projects.........................................................................................................23
6.4 Prepare Project for Analysis..........................................................................................................26
6.5 Organizing Data............................................................................................................................28
7.0 Analyzing Data and Generating Reports...........................................................................29
7.1 Date Selection View .....................................................................................................................29
7.2 Manage Imported Data tab...........................................................................................................30
7.3 Lane Configuration tab .................................................................................................................30
7.4 GPS Location Map tab (OPTIONAL) ...............................................................................................31
7.5 Conduct Data Analyses / Generate Reports...................................................................................32
7.6 Navigating StatsAnalyzer’s Reports Window .................................................................................32
7.7 Available Reports in StatsAnalyzer................................................................................................34
7.8 Export and Print Data from StatsAnalyzer .....................................................................................37
8.0 Additional Operations in StatsAnalyzer............................................................................40
8.1 Adjust the Radar Clock..................................................................................................................40
8.2 Adjust Speed Units .......................................................................................................................41

T r a c k e r P a g e 4o f 59
8.3 Enable Bluetooth Pin for Secure Login...........................................................................................42
8.4 Advanced Menu ...........................................................................................................................43
9.0 Application Note: Armadillo Tracker Classification Feature.........................................45
10.0 Using the Houston Radar Smartphone App....................................................................46
10.1 How to Download the Android App.............................................................................................46
10.2 How to Download the iPhone App. .............................................................................................47
......................................................................................................................................................47
10.3 Direction Verification using your smartphone .............................................................................49
10.4 Downloading Data via your Cell Phone........................................................................................50
11.0 Setting up the Cellular Modem.........................................................................................52
11.1 Network Setup ...........................................................................................................................52
11.2 Modem Setup.............................................................................................................................53
11.3 Create Remote Radar Connections Within StatsAnalyzer .............................................................54
12.0 Houston Radar Tetryon™Cloud Server.........................................................................56
12.1 Tetryon Live Charts for Armadillo Tracker, Individual Location.....................................................57
12.2 Tetryon Historical Charts for Armadillo Tracker, Individual Location ............................................58
12.3 Tetryon Historical Charts for Armadillo Tracker, Multiple Locations .............................................59

T r a c k e r P a g e 5o f 59
1.0 A Look Inside an Armadillo Tracker Radar

T r a c k e r P a g e 6o f 59
2.0 Hardware Included With the Armadillo Tracker
9.6V LiFePO4 Fast AC
Charger
Indoor Fast AC
Charger
with worldwide
plugs
900-0045
Y-Cable for Power &
USB Connection
110-0036
Long Range Class 1
Windows Bluetooth
Dongle
110-0020 & 110-0025
Universal Pole-
Mounting Bracket
and Sliding Plate to
Accommodate
Different Mounting
Heights
110-0059
2x Quick-Release
Mounting Clamps

T r a c k e r P a g e 7o f 59
3.0 Preparing the Tracker for Use
Before deploying the Houston Radar’s Armadillo Tracker, one should take care to prepare the radar and installation
site. This chapter will detail the most common steps a user will take to do so properly.
3.1 Fully Charge the Tracker Battery
The Armadillo Tracker features a state-of-the-art Lithium Iron Phosphate (LiFePO4) battery that will allow the unit to
run approximately 2 weeks on a full charge. Additionally, it will retain the charge for many weeks when switched off
and placed on the shelf, thus being ready when needed. Before deployment you must fully charge the battery using
the provided Fast AC Charger for the on-board fuel gauge to work properly.
Connect the provided Fast AC Charger to the black connector on the weatherproof Y-cable provided with the Tracker
and plug the circular connector into its mate on the bottom of the enclosure.
Plug the Fast AC Charger into a 110 to 240V AC wall socket. Ensure that the light on the Fast AC Charger turns on. A
red light means that the battery is charging. A green light means that the battery is fully charged.
The Fast AC Charger is NOT weatherproof. It must only be used indoors and under supervision. Do not charge in
locations which are out of sight. Houston Radar does offer a ruggedized AC charger suitable for use outdoors; please
contact sales@houston-radar.com or support@houston-radar.com for more information.
Fast AC Charger and Y-Cable Connectors

T r a c k e r P a g e 8o f 59
Do not mount on a stop sign
Ok to mount 100+ feet away from stop sign
3.2 Select Installation Location
*Follow this link to watch a short installation YouTube video for the Armadillo Tracker: http://youtu.be/QGLEoxRIM4c
A suitable installation location is one where the traffic flows freely and has at least 100 feet (30m) of unobstructed
road in either direction. Best performance is obtained at locations where traffic volume is not more than 1,200
vehicles/hour but the device will continue to collect data with slightly degraded counting accuracy up to 1,800
vehicles/hour.
Avoid mounting within 100 feet (30m) of congestion points such as stop signs, sharp turns, and traffic signals. Avoid
mounting where trees, branches, or other objects are obstructing the Tracker’s “view”of the traffic.
Mount on the side of a two-lane undivided road to monitor a single direction or both directions.

T r a c k e r P a g e 9o f 59
Mount in the median of a four-lane divided road to measure both directions. Pick a location where the median is no
more than 12 (3.6m) feet wide.
Mounting on the side of a 4-lane divided road will allow the Tracker to capture only the closest two incoming lanes
accurately. Some data will be captured for the far lanes, which should be discarded after being imported for analysis.
To maintain specified counting accuracy, do not install on a road with more than two lanes in the same direction. Data
will be collected but with slightly reduced count accuracy from the 3rd lane.

T r a c k e r P a g e 10 o f 59
3.3 Set the Time, Speed Units and data collection Speed Range
By default, the internal clock of the Tracker is set to US Central Time, the Speed Units are set to Imperial (instead of
Metric and the minimum collection speed set to 12 (mph or km/h). The internal clock, units of measurement and
minimum collection speed should be set to the appropriate values before deployment.
Reference Section 8.1 to adjust the internal clock.
Reference Section 8.2 to adjust the Speed Units and Minimum and Maximum Speeds for data collection.
4.0 Installation
The Armadillo Tracker’s design allows for multiple suitable installation types. The Armadillo Tracker is commonly
mounted on posts and poles for which the user has right-of-way permission such as luminaires and MUTCD (or
equivalent) sign structures.
4.1 Mounting Position
The Tracker should be mounted within 12 feet (3.7m) of the first lane of traffic to be monitored. It is recommended
that the closest lane of traffic to be monitored has vehicles incoming towards the radar (incoming direction). This is a
best practice but not essential. Mounting the Tracker farther than 12 feet (3.7m) from the closest lane will limit the
radar’s counting accuracy for detecting vehicles traveling in the farther lane(s).
The Tracker should be mounted between 6 feet (1.9m) and 12 feet (3.7m) high off the ground. A lower mounting
height will increase the occurrences of occlusion. A higher mounting height may decrease the effective detection
range by creating a higher plane for the detection zone causing vehicles to be missed.
DO NOT mount the Tracker to structures that are not stable such as trees or guy-wires.

T r a c k e r P a g e 11 o f 59
4.2 Mounting the Tracker
Tool needed to install the Tracker: Slotted (flathead) screwdriver or 3/8” socket
Using the provided quick release straps, secure the Tracker to the selected mounting structure, at least 6 feet (1.9m)
high, and no more than 12 feet (3.7m) high. Mount within 12 feet (3.6m) of the first lane of traffic. We recommend
making the incoming direction the closer lane.
To deter theft, the mounting bracket allows the use of a bicycle cable and lock (or similar) to secure it to the pole. You
may also consider sticking an Airtag tracker inside the bracket to track the device in case it is stolen.
4.3 Aiming the Tracker
The Armadillo Tracker has a beam angle of 20-degrees vertical and 60-degrees horizontal, with an effective detection
range of approximately 300 feet (90m). Vehicles must travel through the detection zone at least 80-100 feet (25-30m)
and pass the radar’s mounting location to be accurately logged. The radar logs the vehicle’s maximum speed observed
during this track zone.
When installing on the side of the road, visually aim the Tracker towards the direction of incoming traffic, and inwards
to the middle of the road, choosing a point at least 100 feet (30m) away, and preferably 200 feet (60m) away. Getting
behind the unit and “eyeballing”the pointing is usually sufficient. Unlike other devices on the market, do not point the
Tracker inwards at a 45-degree angle, as this will be too sharp of an angle to allow for proper detection and will
diminish accuracy.
When installing in the median between opposite flowing traffic, do not angle the Tracker towards either side. Aim the
Tracker so its center is parallel to the lanes on either side of the median.
In all mounting locations, use the adjustable sliding plate at the top of the unit to tilt the Tracker down to aim at the
road about 100 feet (30m) in front of the mounting location. Adjust the sliding plate all the way out to tilt the
enclosure down when utilizing a mounting height of 10-12 feet (3-3.7m), about halfway out if mounted 8-9 feet (2.4-
3m) high, and all the way in if mounted lower to the ground.

T r a c k e r P a g e 12 o f 59
4.4 Power ON and Verify Detection
Turn the key switch to the ON position and verify that you hear a single 1 second beep.
●Ten successive beeps indicate that less than 30% battery capacity remains, and battery should be re-charged
before deployment. You can view the exact battery charge level using the App or the Windows Stats Analyzer
program.
If the unit was ordered with and includes the optional built-in GPS option or cellular modem (which includes the
GPS option), the Tracker must be turned on at the install location after being mounted. The GPS module will
only power on to fetch coordinates for the first 10 minutes of operation. The GPS module will power down after
10 minutes to conserve battery power even if coordinates have not been acquired. Please see page 9 of the
Houston Radar Smartphone App User Guide (Armadillo Tracker Operations> Radar Info) to learn how to verify a
GPS signal has been attained.
For the first 10 minutes after powering on, the Tracker will emit a short beep for every vehicle that it logs,
providing verification that the Tracker is properly detecting traffic. This beep will be emitted as each detected
vehicle exits the detection zone. This is usually once the vehicle has reached or passed the radar location in the
incoming direction and far enough away that it is no longer being tracked in the outgoing direction.
●Incoming vehicles will trigger a beep when it approximately passes the Tracker (within +/- 25 feet (8m) of the
unit).
●Most outgoing traffic will trigger a beep within 200-300 feet (60-90m) after crossing the Tracker.
If you do not hear a beep for each vehicle (within the stated accuracy count of the counter), adjust the pointing angle
or mounting height to get a clearer “view” of the traffic. Ensure no obstructions like tree or bush branches, metal signs
etc. in view of the radar’s front cover.
Removal of the Tracker from its installed location is the opposite of installation. Turn the key switch to the OFF
position. Loosen the quick release straps while supporting the Tracker, then remove the straps from around the pole.

T r a c k e r P a g e 13 o f 59
4.5 Optional Solar Panel
The optional solar panel kit will provide year-round autonomy in most locations with the built-in Maximum Power
Point Technology (MPPT) solar charger. In the northern hemisphere, the solar panel must be pointed towards true
south (not magnetic south) and angled based on the latitude of the location. Most smart phones feature a compass
that may be set to point towards true South. The suggested angle from the horizontal is (location latitude + 15°). This
provides maximum power during winter by angling the panel more towards the horizon where the sun is low in the
sky.
Connect the provided solar panel cable to the solar panel circular connector on the bottom of the Tracker enclosure.
The solar panel will charge the battery even with the key switch in the off position.

T r a c k e r P a g e 14 o f 59
4.6 Optional Armadillo Booster Pack
The optional Armadillo Booster Pack will approximately double the Tracker’s run time to 24-28 days (depending on
ambient temperature conditions, modem usage, and other variables) with both batteries fully charged. To charge the
Booster Pack via the provided Fast AC Charger, connect the provided “Y-able” to the Booster Pack. The “Y” charging
cable for the Tracker and the Fast AC Charger are identical for the Armadillo Tracker and the Booster Pack. Either cable
or charger may be used. A dedicated cable and charger are provided with each Booster Pack.
The bi-color LED on the Fast AC Charger indicates the charging state.
▪Red LED indicates battery is charging.
▪Green LED indicates a fully charged battery/end of charge cycle.
The Fast AC Charger is NOT weatherproof. It must only be used indoors and under supervision. Do not charge in
hidden locations which are out of sight.
*The Armadillo Booster Pack Contains a 62WHr Lithium Iron Phosphate Battery. It must be recycled or disposed of
properly per local regulations. Do not crush or incinerate.
To use the Armadillo Booster Pack, attach the Booster Pack to the chosen mounting structure by the same method the
Tracker was secured. Connect the Booster Pack to the Armadillo Tracker’s USB/Charging port using the provided
weatherproof cable as shown.
Finger tighten the connectors completely on both ends. The connector is only waterproof when completely tight.
Mount both units with the connector facing towards the ground to prevent water from seeping in.
Charge Status LED
Armadillo Tracker
Armadillo Booster Pack

T r a c k e r P a g e 15 o f 59
•For best performance (and accurate report of remaining battery life from the Armadillo Tracker fuel gauge) it is
best to completely charge the Armadillo Booster Pack and Armadillo Tracker using the provided Fast AC Charger
before connecting them together.
•The Armadillo Tracker’s battery fuel gauge will decrease slowly with the booster pack connected. The
percentage charge remaining shown is a combined value of the internal battery AND the Booster Pack.
•If a partially charged Booster Pack is connected to a fully charged Armadillo Tracker, the internal battery of the
Tracker will quickly charge the Booster Pack (or vice-versa) until both reach equilibrium.
•If a solar panel is also connected to the optional Solar Connector on the Armadillo Tracker, it will charge both
the internal battery and the Booster Pack.
•The Armadillo Tracker WILL trickle charge via the USB connector.
•The Booster Pack will NOT charge via the USB connector. It will only charge via the Fast AC Charger or if the solar
panel is connected to the solar panel connector on the Tracker (Solar Kit option).
To see a visual history of the Tracker’s charge/discharge status, connect to the Tracker via the Houston Radar
StatsAnalyzer software and then click on the battery icon. A window will open that will track the charge status of the
battery. It will also calculate the rate of charge or discharge of the battery. This is a helpful tool when debugging
charging issues.
The Tracker also logs the battery charge, voltage, and ambient temperature every hour to internal data memory. These
parameters are extracted when you retrieve the traffic statistics data from the Tracker and may be plotted. This will
allow you to ensure that the solar charger is keeping the battery adequately charged.

T r a c k e r P a g e 16 o f 59
5.0 Retrieving Data from the Tracker Using Houston Radar StatsAnalyzer
To view data collected by the Armadillo Tracker, the data must be copied from the radar to compatible software. The
most commonly used software is Houston Radar’s MS Windows based StatsAnalyzer program. The first step in the
retrieval process is connecting to the Tracker using StatsAnalyzer. There are three methods of connection to retrieve
data from the Tracker using StatsAnalyzer: wired USB, wireless Bluetooth, and optional remote cellular. This section
will describe the USB and Bluetooth connections. The optional cellular connection is described in Section X.Y.
Different Microsoft Windows installations have different views and permissions. For assistance within Windows,
please contact Microsoft or your IT support team.
For information on data retrieval using Houston Radar’s Tetryon Cloud Server, please see the Houston Radar Tetryon
Cloud Server User Manual. For information on data retrieval using Houston Radar’s smartphone app, please see the
Houston Radar Smartphone App User Guide.
5.1 Wired USB Interface
1. Connect the provided Y-cable to the weatherproof connector on the bottom of the Tracker enclosure and hand
tighten to secure the connection. Plug the USB connector on the other end into a USB jack on a Microsoft Windows
computer on which StatsAnalyzer is installed.
2. Power on the Tracker. Windows will detect a USB to RS232 converter and install/configure a COM port. If the
computer is connected to the Internet, it will likely automatically install the drivers. Otherwise, download links for the
USB drivers are located on the paperwork included with each device when shipped from the factory.
5.2 Wireless Bluetooth Interface
You must have a Bluetooth adapter on your computer to make a Bluetooth connection. A Class I USB Bluetooth
adapter is provided with the Armadillo Tracker. In Windows, Bluetooth is usually indicated by an icon in the task bar.
We highly recommend using the provided Class I USB Bluetooth adapter even if your computer has a built-in
Bluetooth adapter. Built-in adapters are usually Class II adapters with a 30-foot (10m) range and will only allow a
connection if the computer is very close to the radar. The Tracker includes a high performance long-range Class I
adapter that will perform best when paired with the provided Class I USB adapter.
For a new connection the computer’s and Tracker’s Bluetooth adapters must be paired. If the computer has previously
been connected to the Tracker using Bluetooth, skip to the next section.

T r a c k e r P a g e 17 o f 59
1. Open the Bluetooth interface on the computer by clicking on the Bluetooth icon in the task bar, and then scan
for devices (or click on “Add a device”). All Houston Radar Bluetooth device names start with “HR-BT…“and the
complete and unique name is also printed on the rear of the enclosure.
2. Once the scan locates the appropriate Tracker, right-click the new device icon and select “Pair” to establish the
connection. Windows will then assign a COM port to this paired connection. A pairing key is usually not required
but if it is requested, enter 1234.
Each Tracker must be paired with the computer before a connection in StatsAnalyzer can be established.
The Bluetooth adapter in the Armadillo Tracker is not available to transfer data (even though it’s discoverable and can
be paired) if the Armadillo Tracker is simultaneously connected to a computer over a USB port. The Armadillo
Tracker’s Bluetooth adapter is not affected by being connected to the Fast AC Charger or a dedicated USB charger.
5.3 Retrieving Data Using USB or Bluetooth Connection
Open StatsAnalyzer on the computer connected to the appropriate Tracker.
1. Click “Connect to Radar” from the menu bar at the top of the StatsAnalyzer screen. This will open a new “Connect
To Radar” window.
2. From the drop-down menu in the top left corner of the “Connect to Radar” window, select the appropriate COM
port (identified with “Bluetooth Serial Port”in the name), as assigned by Windows, and then click on “Connect to
Radar”.

T r a c k e r P a g e 18 o f 59
If “Auto Detect Port” is selected from this drop-down menu, StatsAnalyzer will search all available COM ports in
parallel to find a paired or connected radar. Otherwise, the software will only search on the selected port. If the radar
is not detected, it can be advantageous to select the actual port the radar is connected to, as this is the only case
where Windows connection errors are shown to the user. These errors are helpful to deduce the reason for the
connection problems (e.g., if the port is already open or inaccessible).
3. Two successive windows are displayed when the radar is found by StatsAnalyzer. The first indicates which COM port
the radar is attached to and what baud rate is used. The second indicates some details about the connected radar,
such as its firmware version and internal date & time. Click “OK” on each window to proceed.
4. Select “Read Traffic Stats from Radar”, which will open a “Save As” window.

T r a c k e r P a g e 19 o f 59
5. Select the preferred location to save the *.dat file created from reading the Tracker’s data. We recommend using
the default file name created by StatsAnalyzer but you may assign a user-defined file name, then select “Save”.
6. The time it takes to read the Tracker’s data is proportional to the amount of data being read – the more data stored
in the radar, the longer the read process will take. Once the read is complete, a prompt will display to import the data
into a StatsAnalyzer project. Select “Yes” and reference Section 6.3.1 to import data into a new or existing project.
Select “No” to import the data into a new or existing project at a later time.
7. Once the reading of data is complete, it is recommended to select “Erase Radar Data”. Erasing the radar data after
each data retrieval can prevent the duplication of data in future retrieval efforts, and prevent confusion over multiple
data ranges in future project management. Selecting “Erase Radar Data” will generate a new window from which to
confirm the operation by clicking “OK”.
8. After erasing the radar data, select “Disconnect” or close the “Connect to Radar” window.

T r a c k e r P a g e 20 o f 59
6.0 Importing Data into Houston Radar StatsAnalyzer to Generate Reports
Houston Radar’s Windows-based StatsAnalyzer software is used to retrieve and analyze the stored data from Houston
Radar products, generating detailed reports, graphs, and charts.The Houston Radar StatsAnalyzer installer is available
for no extra cost and can be downloaded at: https://houston-radar.com/products/software/stats-analyzer-
configuration-software/
The Houston Radar Advanced StatsAnalyzer User Manual is available on our website using the link above. It can also
be downloaded to a smartphone or tablet by scanning the QR code below.
6.1 StatsAnalyzer Home Screen
Stats Analyzer contains the following navigation panes:
1. Menu Ribbon
2. Open Project List
3. Project Selection Area
The Menu Ribbon is located at the top of the application and organizes the features of the application into a series of
tabs.
The Open Project List contains a list of all open projects and allows the Active Project to be selected.
The Project Selection Area shows the complete list of projects available from this instance of StatsAnalyzer. If you
open a project, this section shows you details of the open project.
The screenshot on the following page shows the various sections. Each command or feature is highlighted with a
number; see below for detailed description for each item.
Other manuals for Armadillo Tracker
1
Table of contents
Popular Data Logger manuals by other brands

UNDATEC
UNDATEC FDL400 manual

GHM
GHM GREISINGER EASYLOG 80IMP Series Installation and operating manual

LogTag Recorders
LogTag Recorders UTREL-16 Product user guide

PCE Health and Fitness
PCE Health and Fitness VR 10 user manual

Elster
Elster EnergyAxis Gatekeeper 2210 installation instructions

Furuno
Furuno VR-3000 installation manual