HP Brio PC 81xx Page 1 of 4
Before You Start
• For your safety, disconnect the power cord and all other
external cables.
Replacing the Cover
1. Rotate the computer so that you are looking at the
front.
2. Pull out the levers on both sides ❶.
3. Pull the cover towards the front of the computer using
the handles pushing against the CD-ROM ❷for lever-
age.
4. Slide the new cover towards the back of the computer.
5. Push in the two levers ❶.
Before You Start
• Remove the computer’s cover as described in Task 1
“Replacing the Cover”.
• Remove the PSU as described in Task 7 “Replacing the
Power Supply”.
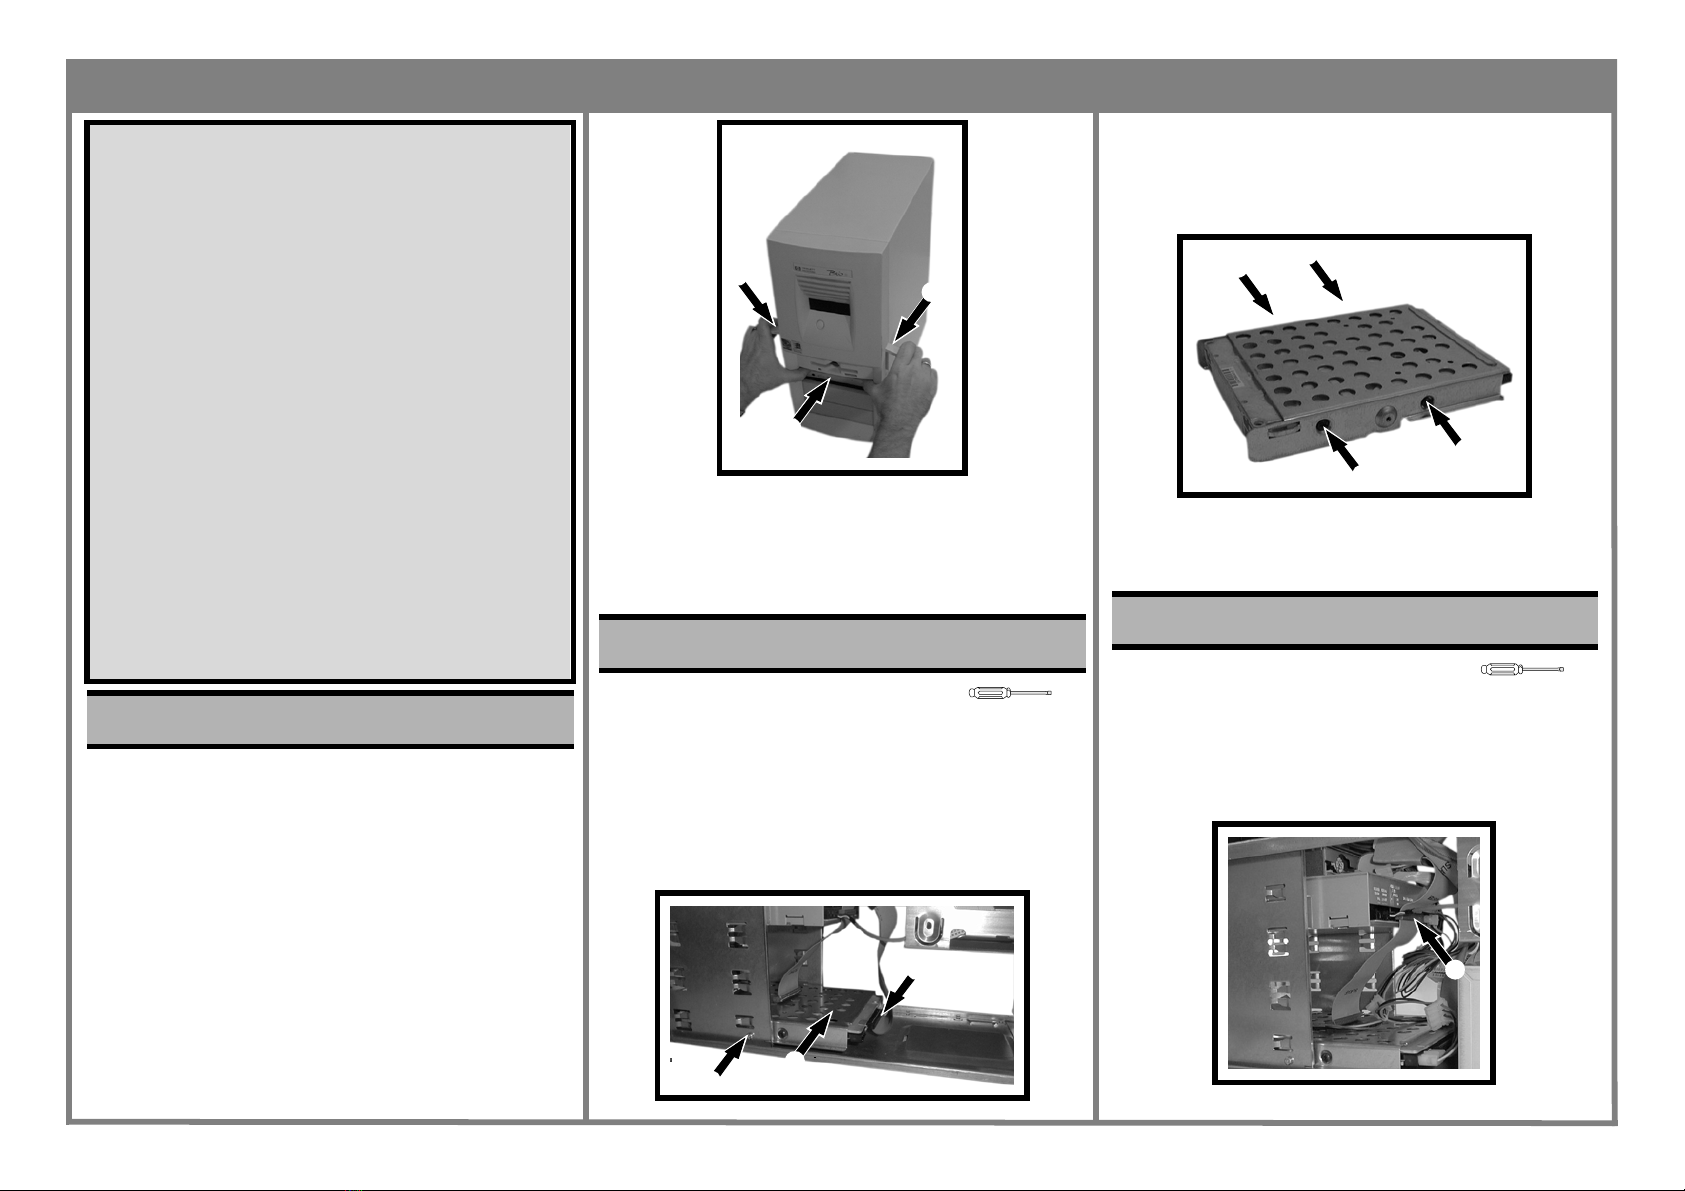
Replacing the Hard Disk
1. Locate the hard drive ❶, remove the cables ❸ and then
the two screws ❷, one on each side of the bay.
2. Slide the hard drive towards the back and then out of
the computer.
3. Remove the four screws ❹and then remove the tray.
4. Fit the tray to the new hard drive and replace the
screws.
5. Place the new hard drive into the bay, replace the two
screws ❸and the cables.
6. Replace the cover.
Before You Start
• Remove the computer’s cover as described in Task 1
“Replacing the Cover”.
Replacing the CD-ROM Drive
1. Locate the CD-ROM drive.
2. Disconnect the three cables ❶.
3. Remove the two screws on the front ❷.
Task 1 Replacing the Cover
Read Me First
Legal, Safety & Regulatory Information
Incorrect installation can cause damage to the PC or peripherals attached to it. Dam-
age due to incorrect installation may void the PC warranty. If you do not feel com-
fortable replacing this part yourself, please contact your local dealer or HP
representative to purchase repair services.
WARNING
AS WITH ANY ELECTRICAL EQUIPMENT IMPROPER HANDLING CAN CAUSE SEVERE
PERSONAL INJURY OR DEATH. CAUTION SHOULD BE USED WHEN WORKING WITH
THIS EQUIPMENT.
When replacing your CD-ROM drive...
To avoid electric shock and damage to your eyes by laser light, do not open the laser
module. The laser module should be serviced by service personnel only. Do not at-
tempt to make any adjustment to the laser unit. Refer to the label on the CD-ROM for
power requirements and wavelength. This product is a class 1 laser product.
When replacing your System Board...
If your old system board contains a lithium battery, do not dispose of it in household
waste. Please return batteries to the shop from which you bought them, to the dealer
from whom you purchased your PC, or to HP, so they can be recycled or disposed of
in a sound way. Returned used batteries will be accepted free of charge.
Caution
Static electricity can damageelectronic components. Turn off all equipment. Don’t let
your clothes touch the service part. To equalize the static electricity, rest the service
partbagon top of the computer while you are removing the servicepart fromthe bag.
Handle this service part as little as possible and with care. Task 2 Replacing the Hard Disk
❷
➊
➊
T-15
❷❶
❸
Task 3 Replacing the CD-ROM Drive
❹❹
❹
❹
T-15
❶


