Table of contents
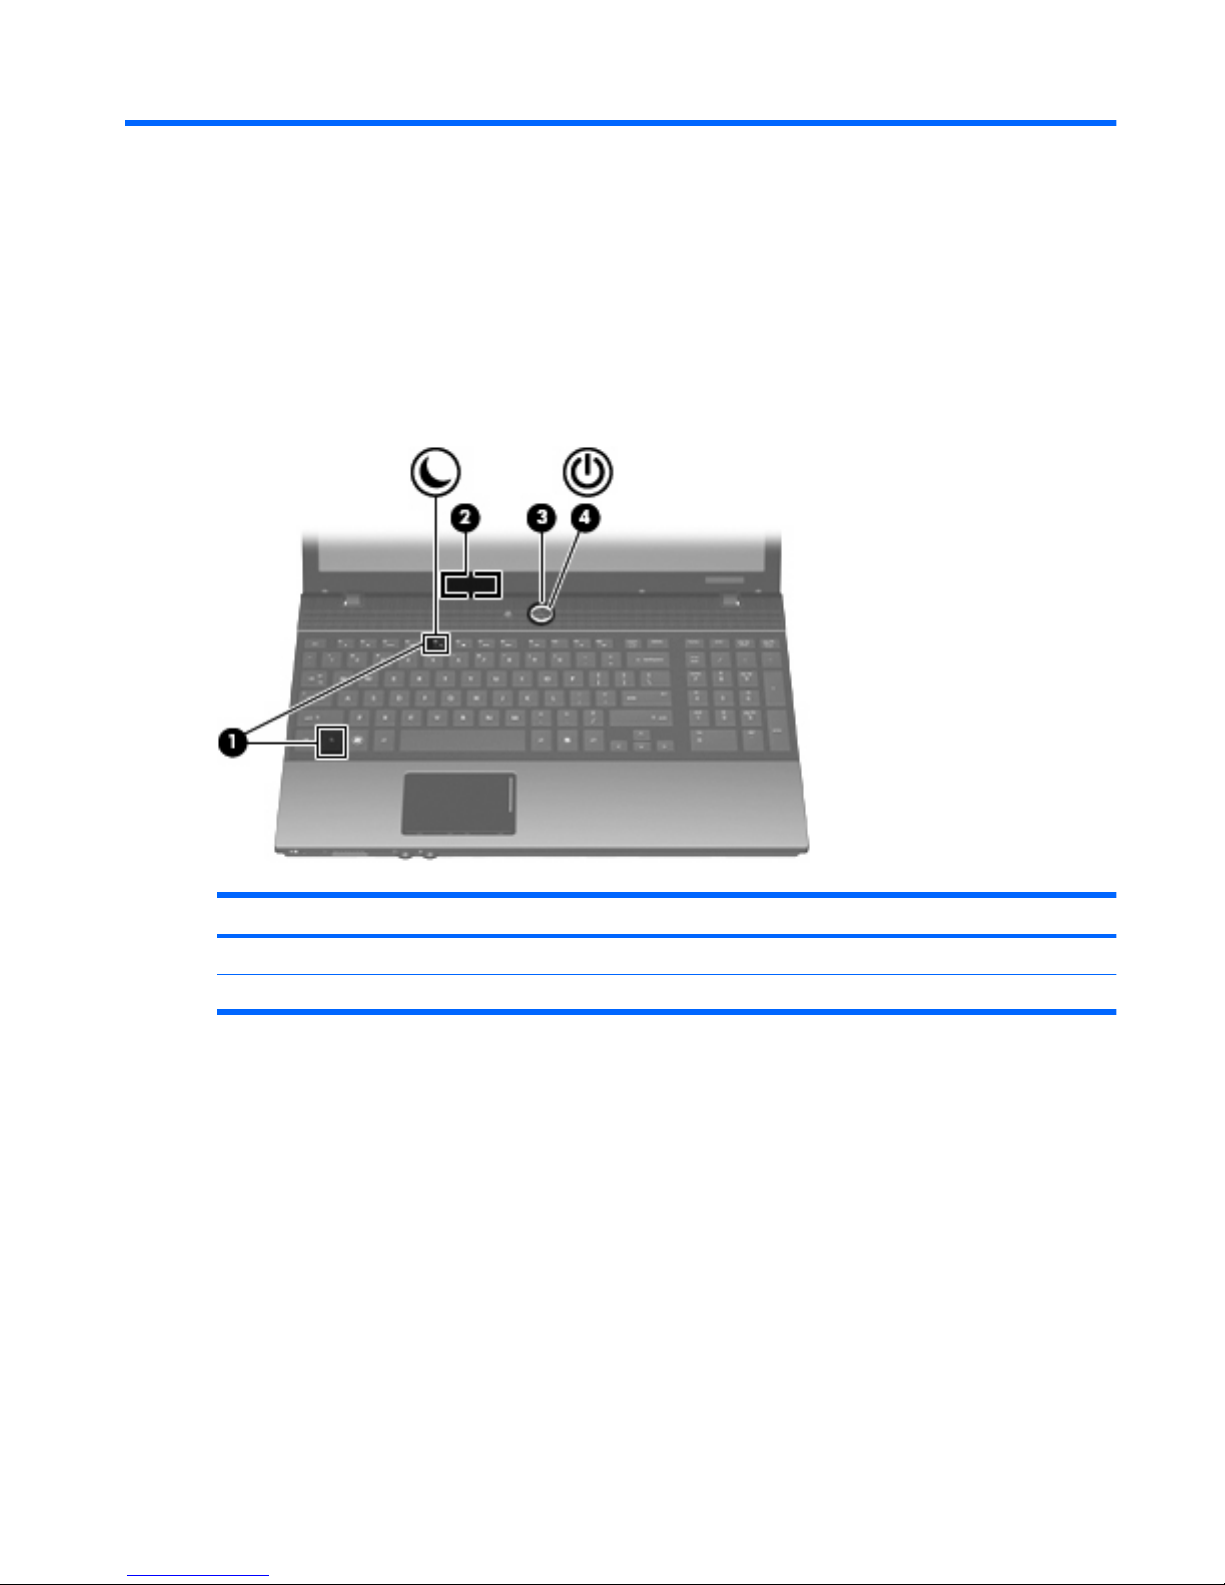
1 Power control and light locations
2 Setting power options
Using power-saving states ................................................................................................................... 3
Initiating and exiting Sleep ................................................................................................... 3
Initiating and exiting Hibernation .......................................................................................... 4
Using the battery meter ........................................................................................................................ 5
Using power plans ................................................................................................................................ 6
Viewing the current power plan ........................................................................................... 6
Selecting a different power plan .......................................................................................... 6
Customizing power plans ..................................................................................................... 6
Setting password protection on wakeup ............................................................................................... 7
3 Using external AC power
Connecting the AC adapter .................................................................................................................. 9
Testing an AC adapter ....................................................................................................................... 10
4 Using battery power
Finding battery information in Help and Support ................................................................................ 12
Displaying the remaining battery charge ............................................................................................ 13
Inserting or removing the battery ........................................................................................................ 14
Charging a battery .............................................................................................................................. 16
Managing low battery levels ............................................................................................................... 17
Identifying low battery levels .............................................................................................. 17
Resolving a low battery level ............................................................................................. 18
Resolving a low battery level when external power is available ........................ 18
Resolving a low battery level when a charged battery is available ................... 18
Resolving a low battery level when no power source is available ..................... 18
Resolving a low battery level when the computer cannot exit Hibernation ....... 18
Calibrating a battery ........................................................................................................................... 19
Step 1: Fully charge the battery ......................................................................................... 19
Step 2: Disable Hibernation and Sleep .............................................................................. 19
Step 3: Discharge the battery ............................................................................................ 20
Step 4: Fully recharge the battery ...................................................................................... 21
Step 5: Reenable Hibernation and Sleep .......................................................................... 21
Conserving battery power .................................................................................................................. 22
Storing a battery ................................................................................................................................. 23
Disposing of a used battery ................................................................................................................ 24
iii