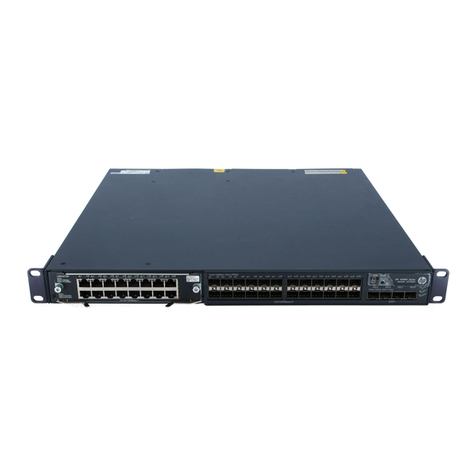
HP 5120 EI Series User manual

HP 5120 EI Switch Series
Layer 2—LAN Switching
Configuration Guide
Part number: 5998-1791
Software version: Release 2220
Document version: 6W100-20130810

Legal and notice information
© Copyright 2013 Hewlett-Packard Development Company, L.P.
No part of this documentation may be reproduced or transmitted in any form or by any means without
prior written consent of Hewlett-Packard Development Company, L.P.
The information contained herein is subject to change without notice.
HEWLETT-PACKARD COMPANY MAKES NO WARRANTY OF ANY KIND WITH REGARD TO THIS
MATERIAL, INCLUDING, BUT NOT LIMITED TO, THE IMPLIED WARRANTIES OF MERCHANTABILITY
AND FITNESS FOR A PARTICULAR PURPOSE. Hewlett-Packard shall not be liable for errors contained
herein or for incidental or consequential damages in connection with the furnishing, performance, or
use of this material.
The only warranties for HP products and services are set forth in the express warranty statements
accompanying such products and services. Nothing herein should be construed as constituting an
additional warranty. HP shall not be liable for technical or editorial errors or omissions contained
herein.

i
Contents
Configuring Ethernet interfaces··································································································································· 1
Ethernet interface naming conventions ···························································································································1
Configuring a combo interface ·······································································································································1
Configuration prerequisites ·····································································································································1
Changing the active port of a combo interface····································································································1
Configuring basic settings of an Ethernet interface·······································································································2
Shutting down an Ethernet interface ·······························································································································3
Setting speed options for auto negotiation on an Ethernet interface ··········································································3
Configuring flow control on an Ethernet interface·········································································································4
Configuring link change suppression on an Ethernet interface····················································································5
Configuring link-down event suppression ··············································································································6
Configuring link-up event suppression ···················································································································6
Configuring loopback testing on an Ethernet interface ································································································6
Configuration restrictions and guidelines ··············································································································7
Configuration procedure ·········································································································································7
Configuring jumbo frame support ···································································································································7
Configuring a port group·················································································································································8
Enabling energy saving functions on an Ethernet interface··························································································8
Enabling auto power-down ·····································································································································8
Configuring storm suppression ········································································································································9
Setting the statistics polling interval······························································································································ 10
Enabling loopback detection on an Ethernet interface ······························································································ 10
Configuration restrictions and guidelines ··········································································································· 11
Configuration procedure ······································································································································ 12
Setting the MDI mode of an Ethernet interface ··········································································································· 12
Enabling bridging on an Ethernet interface ················································································································ 13
Testing the cable connection of an Ethernet interface································································································ 14
Configuring storm control on an Ethernet interface···································································································· 14
Configuration restrictions and guidelines ··········································································································· 15
Configuration procedure ······································································································································ 15
Displaying and maintaining an Ethernet interface ····································································································· 16
Configuring loopback and null interfaces················································································································17
Configuring a loopback interface ································································································································ 17
Introduction to the loopback interface················································································································· 17
Configuration procedure ······································································································································ 17
Configuring a null interface ·········································································································································· 18
Introduction to the null interface··························································································································· 18
Configuration procedure ······································································································································ 18
Displaying and maintaining loopback and null interfaces························································································ 18
Bulk configuring interfaces ········································································································································20
Configuration guidelines ··············································································································································· 20
Configuration procedure··············································································································································· 20
Configuring the MAC address table ························································································································21
Overview········································································································································································· 21
How a MAC address table entry is created······································································································· 21
Types of MAC address table entries ··················································································································· 22
MAC address table-based frame forwarding ···································································································· 22

ii
Configuring static, dynamic, and blackhole MAC address table entries ································································ 22
Configuring a static or dynamic MAC address table entry in system view···················································· 23
Configuring a static or dynamic MAC address table entry in interface view ················································ 23
Configuring a blackhole MAC address entry ···································································································· 23
Disabling MAC address learning································································································································· 23
Disabling global MAC address learning············································································································ 24
Disabling MAC address learning on ports········································································································· 24
Configuring the aging timer for dynamic MAC address entries··············································································· 24
Disabling MAC entry aging timer refresh based on destination MAC address ····················································· 25
Application example············································································································································· 25
Configuring the MAC learning limit on ports·············································································································· 26
Enabling MAC address roaming·································································································································· 27
Enabling MAC address migration log notifying········································································································· 28
Displaying and maintaining MAC address tables ····································································································· 29
MAC address table configuration example ················································································································ 29
Network requirements··········································································································································· 29
Configuration procedure ······································································································································ 30
Configuring MAC Information ··································································································································31
Overview········································································································································································· 31
Introduction to MAC Information ························································································································· 31
How MAC Information works ······························································································································ 31
Enabling MAC Information globally ···························································································································· 31
Enabling MAC Information on an interface ················································································································ 31
Configuring MAC Information mode ··························································································································· 32
Configuring the interval for sending Syslog or trap messages ················································································· 32
Configuring the MAC Information queue length ········································································································ 32
MAC Information configuration example···················································································································· 33
Network requirements··········································································································································· 33
Configuration procedure ······································································································································ 33
Configuring Ethernet link aggregation ·····················································································································34
Overview········································································································································································· 34
Basic concepts ······················································································································································· 34
Aggregating links in static mode························································································································· 37
Aggregating links in dynamic mode ··················································································································· 38
Load-sharing criteria for link aggregation groups ····························································································· 40
Configuration restrictions and guidelines···················································································································· 40
Ethernet link aggregation configuration task list········································································································· 40
Configuring an aggregation group ····························································································································· 41
Configuration guidelines ······································································································································ 41
Configuring a static aggregation group············································································································· 41
Configuring a dynamic aggregation group ······································································································· 42
Configuring an aggregate interface ···························································································································· 43
Configuring the description of an aggregate interface····················································································· 43
Enabling link state traps for an aggregate interface ························································································· 43
Limiting the number of Selected ports for an aggregation group ···································································· 44
Shutting down an aggregate interface ··············································································································· 45
Restoring the default settings for an aggregate interface ················································································· 45
Configuring load sharing for link aggregation groups······························································································ 46
Configuring load-sharing criteria for link aggregation groups ········································································ 46
Enabling local-first load sharing for link aggregation······················································································· 47
Enabling link-aggregation traffic redirection··············································································································· 48
Displaying and maintaining Ethernet link aggregation ····························································································· 49
Ethernet link aggregation configuration examples····································································································· 50

iii
Layer 2 static aggregation configuration example···························································································· 50
Layer 2 dynamic aggregation configuration example······················································································ 52
Configuring port isolation··········································································································································55
Assigning a port to the isolation group ······················································································································· 55
Displaying and maintaining the isolation group ········································································································ 55
Port isolation configuration example···························································································································· 56
Configuring spanning tree protocols ························································································································57
STP ··················································································································································································· 57
STP protocol packets ············································································································································· 57
Basic concepts in STP············································································································································ 58
Calculation process of the STP algorithm ··········································································································· 59
RSTP················································································································································································· 64
PVST················································································································································································· 64
MSTP················································································································································································ 64
STP, RSTP, and PVST limitations ·························································································································· 64
MSTP features ························································································································································ 64
MSTP basic concepts ············································································································································ 65
How MSTP works ·················································································································································· 69
Implementation of MSTP on devices···················································································································· 69
Protocols and standards ················································································································································ 69
Spanning tree configuration task list···························································································································· 70
Configuration restrictions and guidelines ··········································································································· 70
STP configuration task list····································································································································· 70
RSTP configuration task list··································································································································· 71
PVST configuration task list··································································································································· 72
MSTP configuration task list ································································································································· 73
Setting the spanning tree mode···································································································································· 74
Configuring an MST region ·········································································································································· 75
Configuration restrictions and guidelines ··········································································································· 75
Configuration procedure ······································································································································ 75
Configuring the root bridge or a secondary root bridge ·························································································· 76
Configuration restrictions and guidelines ··········································································································· 76
Configuring the current device as the root bridge of a specific spanning tree·············································· 76
Configuring the current device as a secondary root bridge of a specific spanning tree······························ 77
Configuring the device priority····································································································································· 77
Configuring the maximum hops of an MST region ···································································································· 77
Configuring the network diameter of a switched network························································································· 78
Configuring spanning tree timers································································································································· 78
Configuration restrictions and guidelines ··········································································································· 79
Configuration procedure ······································································································································ 79
Configuring the timeout factor ······································································································································ 80
Configuring the maximum port rate····························································································································· 80
Configuring edge ports ················································································································································· 81
Configuration restrictions and guidelines ··········································································································· 81
Configuration procedure ······································································································································ 81
Configuring path costs of ports ···································································································································· 81
Specifying a standard for the device to use when it calculates the default path cost ··································· 82
Configuring path costs of ports···························································································································· 83
Configuration example ········································································································································· 84
Configuring the port priority ········································································································································· 84
Configuring the port link type······································································································································· 85
Configuration restrictions and guidelines ··········································································································· 85
Configuration procedure ······································································································································ 85

iv
Configuring the mode a port uses to recognize/send MSTP packets······································································ 85
Enabling outputting port state transition information·································································································· 86
Enabling the spanning tree feature ······························································································································ 87
Configuration restrictions and guidelines ··········································································································· 87
Enabling the spanning tree feature (in STP/RSTP/MSTP mode) ······································································ 87
Enabling the spanning tree feature (in PVST mode) ·························································································· 87
Performing mCheck························································································································································ 88
Performing mCheck globally································································································································ 88
Performing mCheck in interface view ················································································································· 88
Configuring Digest Snooping ······································································································································· 89
Configuration restrictions and guidelines ··········································································································· 89
Configuration procedure ······································································································································ 89
Digest Snooping configuration example············································································································· 90
Configuring No Agreement Check ······························································································································ 91
Configuration prerequisites ·································································································································· 92
Configuration procedure ······································································································································ 92
No Agreement Check configuration example···································································································· 93
Configuring TC snooping·············································································································································· 93
Configuration restrictions and guidelines ··········································································································· 94
Configuration procedure ······································································································································ 94
Configuring protection functions ·································································································································· 94
Configuration prerequisites ·································································································································· 94
Enabling BPDU guard ··········································································································································· 94
Enabling root guard·············································································································································· 95
Enabling loop guard ············································································································································· 96
Enabling TC-BPDU guard······································································································································ 97
Enabling BPDU drop ············································································································································· 97
Displaying and maintaining the spanning tree··········································································································· 98
Spanning tree configuration examples ························································································································ 98
MSTP configuration example ······························································································································· 98
PVST configuration example ······························································································································102
Configuring BPDU tunneling··································································································································· 106
Overview·······································································································································································106
Background··························································································································································106
BPDU tunneling implementation·························································································································107
Enabling BPDU tunneling ············································································································································108
Configuration prerequisites ································································································································108
Configuration restrictions and guidelines ·········································································································109
Configuration procedure ····································································································································109
Configuring destination multicast MAC address for BPDUs····················································································109
BPDU tunneling configuration examples····················································································································110
BPDU tunneling for STP configuration example ·······························································································110
BPDU tunneling for PVST configuration example·····························································································111
Configuring VLANs················································································································································· 113
Overview·······································································································································································113
VLAN fundamentals·············································································································································113
VLAN types ··························································································································································114
Protocols and standards ·····································································································································115
Configuring basic VLAN settings································································································································115
Configuration restrictions and guidelines ·········································································································115
Configuration procedure ····································································································································115
Configuring basic settings of a VLAN interface ·······································································································116
Configuration procedure ····································································································································116

v
VLAN interface configuration example·············································································································116
Configuring port-based VLANs···································································································································118
Introduction to port-based VLAN ·······················································································································118
Assigning an access port to a VLAN ················································································································119
Assigning a trunk port to a VLAN······················································································································120
Assigning a hybrid port to a VLAN···················································································································121
Port-based VLAN configuration example··········································································································122
Configuring MAC-based VLANs ································································································································124
Introduction to MAC-based VLAN ·····················································································································124
Configuration restrictions and guidelines ·········································································································126
Configuration procedure ····································································································································126
MAC-based VLAN configuration example ·······································································································129
Configuring protocol-based VLANs ···························································································································131
Introduction to protocol-based VLAN ················································································································131
Configuration restrictions and guidelines ·········································································································131
Configuration procedure ····································································································································132
Protocol-based VLAN configuration example···································································································133
Configuring IP subnet-based VLANs ··························································································································135
Configuration procedure ····································································································································135
IP subnet-based VLAN configuration example ·································································································136
Displaying and maintaining VLAN ····························································································································138
Configuring an isolate-user-VLAN·························································································································· 140
Overview·······································································································································································140
Configuration restrictions and guidelines··················································································································141
Configuration procedure·············································································································································141
Displaying and maintaining isolate-user-VLAN·········································································································142
Isolate-user-VLAN configuration example ··················································································································143
Network requirements·········································································································································143
Configuration procedure ····································································································································143
Verifying the configuration·································································································································144
Configuring a voice VLAN ····································································································································· 146
Overview·······································································································································································146
Methods of identifying IP phones ·······························································································································146
OUI addresses ·····················································································································································146
Automatically identifying IP phones through LLDP ···························································································147
Configuring a device to advertise voice VLAN information to IP phones······························································147
How a device advertises voice VLAN information ··························································································147
How a device obtains voice VLAN information·······························································································147
IP phone access methods ············································································································································148
Connecting the host and the IP phone in series·······························································································148
Connecting the IP phone to the device separately ··························································································148
Configuring a voice VLAN on a port·························································································································148
Voice VLAN assignment modes·························································································································148
Security mode and normal mode of voice VLANs···························································································150
Configuration prerequisites ································································································································151
Configuring QoS priority settings for voice traffic on an interface································································151
Configuring a port to operate in automatic voice VLAN assignment mode ·················································152
Configuring a port to operate in manual voice VLAN assignment mode ·····················································153
Enabling LLDP to automatically discover IP phones··································································································154
Configuration prerequisites ································································································································154
Configuration procedure ····································································································································155
Configuring LLDP to advertise a specific voice VLAN······························································································155
Configuration guidelines ····································································································································155

vi
Configuration procedure ····································································································································156
Dynamically advertising server-assigned VLANs through LLDP···············································································157
Overview······························································································································································157
Example for using 802.1X to authenticate IP phones ·····················································································157
Displaying and maintaining voice VLAN ··················································································································157
Voice VLAN configuration examples ·························································································································158
Automatic voice VLAN mode configuration example ·····················································································158
Manual voice VLAN assignment mode configuration example ·····································································160
Configuring GVRP··················································································································································· 162
Overview·······································································································································································162
GARP ····································································································································································162
GVRP·····································································································································································165
Protocols and standards ·····································································································································165
GVRP configuration task list········································································································································165
Configuring GVRP functions········································································································································166
Configuration restrictions and guidelines ·········································································································166
Configuration procedure ····································································································································166
Configuring the GARP timers······································································································································167
Displaying and maintaining GVRP·····························································································································168
GVRP configuration examples ····································································································································168
GVRP normal registration mode configuration example·················································································168
GVRP fixed registration mode configuration example ····················································································170
GVRP forbidden registration mode configuration example············································································171
Configuring QinQ··················································································································································· 174
Overview·······································································································································································174
Background and benefits····································································································································174
How QinQ works················································································································································174
QinQ frame structure ··········································································································································175
Implementations of QinQ ···································································································································176
Modifying the TPID in a VLAN tag····················································································································176
Protocols and standards ·····································································································································177
QinQ configuration task list········································································································································177
Configuring basic QinQ ·············································································································································178
Enabling basic QinQ··········································································································································178
Configuring VLAN transparent transmission ····································································································178
Configuring selective QinQ ········································································································································179
Configuring an outer VLAN tagging policy ·····································································································179
Configuring an inner-outer VLAN 802.1p priority mapping··········································································180
Configuring the TPID value in VLAN tags··················································································································181
QinQ configuration examples ····································································································································181
Basic QinQ configuration example···················································································································181
Selective QinQ configuration example·············································································································184
Configuring LLDP····················································································································································· 187
Overview·······································································································································································187
Background··························································································································································187
Basic concepts ·····················································································································································187
How LLDP works ··················································································································································191
Protocols and standards ·····································································································································192
LLDP configuration task list ··········································································································································192
Performing basic LLDP configuration··························································································································192
Enabling LLDP ······················································································································································192
Setting the LLDP operating mode ·······················································································································193
Setting the LLDP re-initialization delay ··············································································································193

vii
Enabling LLDP polling··········································································································································193
Configuring the advertisable TLVs ·····················································································································194
Configuring the management address and its encoding format····································································194
Setting other LLDP parameters····························································································································195
Setting an encapsulation format for LLDPDUs ··································································································196
Configuring CDP compatibility···································································································································196
Configuration prerequisites ································································································································197
Configuration procedure ····································································································································197
Configuring LLDP trapping ··········································································································································198
Displaying and maintaining LLDP·······························································································································199
LLDP configuration examples ······································································································································199
Basic LLDP configuration example·····················································································································199
CDP-compatible LLDP configuration example···································································································202
Configuring MVRP ·················································································································································· 204
Overview·······································································································································································204
Introduction to MRP ·············································································································································204
MVRP registration modes ···································································································································206
Protocols and standards ·····································································································································207
MVRP configuration task list········································································································································207
Configuration prerequisites·········································································································································207
Enabling MVRP·····························································································································································207
Configuration restrictions and guidelines ·········································································································207
Configuration procedure ····································································································································208
Configuring the MVRP registration mode··················································································································208
Configuring MRP timers···············································································································································209
Enabling GVRP compatibility······································································································································210
Configuration restrictions and guidelines ·········································································································210
Configuration procedure ····································································································································210
Displaying and maintaining MVRP ····························································································································210
Configuration example for MVRP in normal registration mode··············································································211
Network requirements·········································································································································211
Configuration procedure ····································································································································212
Support and other resources ·································································································································· 221
Contacting HP ······························································································································································221
Subscription service ············································································································································221
Related information······················································································································································221
Documents····························································································································································221
Websites·······························································································································································221
Conventions ··································································································································································222
Index ········································································································································································ 224

1
Configuring Ethernet interfaces
Ethernet interface naming conventions
The GE and 10-GE interfaces on the HP 5120 EI switches are named in the format of interface-type
A/B/C, where the following definitions apply:
•A—Represents the ID of the switch in an IRF fabric. If the switch is not assigned to any IRF fabric, A
uses 1.
•B—Represents a slot number on the switch. It uses 0 for fixed interfaces, 1 for interfaces on interface
expansion card 1, and 2 for interfaces on interface expansion card 2.
•C—Represents the number of an interface on a slot.
Configuring a combo interface
A combo interface is a logical interface that comprises one optical (fiber) port and one electrical (copper)
port. The two ports share one forwarding interface, so they cannot work simultaneously. When you
enable one port, the other is automatically disabled.
The fiber combo port and cooper combo port are Ethernet interfaces. They have their own separate
interface views, in which you can activate the fiber or copper combo port and configure other port
attributes such as the interface rate and duplex mode.
Configuration prerequisites
Before you configure a combo interface, complete the following tasks:
•Use the display port combo command to identify the combo interfaces on your switch and identify
the two physical ports that compose each combo interface.
•Use the display interface command to determine, of the two physical ports that compose a combo
interface, which is the fiber combo port and which is the copper combo port. If the current port is
the copper port, the output will include "Media type is twisted pair, Port hardware type is
1000_BASE_T". If the current port is the fiber port, the output will not include the information
mentioned above.
Changing the active port of a combo interface
To change the active port of a double combo interface:
Ste
p
Command
Remarks
1. Enter system view. system-view N/A
2. Enter Ethernet
interface view.
interface interface-type
interface-number N/A

2
Ste
p
Command
Remarks
3. Activate the current
interface. undo shutdown
Optional.
By default, of the two ports that compose a combo
interface, the one with a smaller port ID is active.
Configuring basic settings of an Ethernet interface
You can set an Ethernet interface to operate in one of the following duplex modes:
•Full-duplex mode (full)—Interfaces that operate in this mode can send and receive packets
simultaneously.
•Half-duplex mode (half)—Interfaces that operate in this mode cannot send and receive packets
simultaneously.
•Auto-negotiation mode (auto)—Interfaces that operate in this mode negotiate a duplex mode with
their peers.
You can set the speed of an Ethernet interface or enable it to automatically negotiate a speed with its
peer. For a 100-Mbps or 1000-Mbps Ethernet interface, you can also set speed options for auto
negotiation. The two ends can select a speed only from the available options. For more information, see
"Setting speed options for auto negotiation on an Ethernet interface."
To configure an Ethernet interface:
Ste
p
Command
Remarks
1. Enter system view. system-view N/A
2. Enter Ethernet
interface view.
interface interface-type
interface-number N/A
3. Set the interface
description. description text
Optional.
By default, the description of an interface is in the format
of interface-name Interface. For example,
GigabitEthernet1/0/1 Interface.
4. Set the duplex
mode of the
interface.
duplex { auto | full |
half }
Optional.
By default, the duplex mode is auto for Ethernet
interfaces.
The half keyword is not applicable to Ethernet copper
ports that are configured with a 1000-Mbps port speed
and fiber ports.
5. Set the port speed. speed { 10 | 100 |1000
|auto }
Optional.
By default, an Ethernet interface automatically
negotiates a speed with the peer.
GE (SFP) fiber ports do not support the 10 or 100
keyword. 10-GE fiber ports do not support this
command.
6. Restore the default
settings for the
interface.
default Optional.

3
NOTE:
Make sure that the fiber port speed matches the speed requirement of the inserted transceiver module. For
example, after you insert a 1000-Mbps transceiver module into a fiber port, confi
g
ure the port speed with
the speed 1000 or speed auto command.
Shutting down an Ethernet interface
CAUTION:
Use this feature with caution. After you manually shut down an Ethernet interface, the Ethernet interface
cannot forward packets even if it is physically connected.
You might need to shut down and then bring up an Ethernet interface to activate some configuration
changes, for example, the speed or duplex mode changes.
To shut down an Ethernet interface or a group of Ethernet interfaces:
Ste
p
Command
Remarks
1. Enter system view. system-view N/A
2. Enter Ethernet
interface view or
port group view.
•Enter Ethernet interface view:
interface interface-type
interface-number
•Enter port group view:
port-group manual port-group-name
Use any command.
To shut down an Ethernet interface,
enter Ethernet interface.
To shut down all Ethernet interfaces in
a port group, enter port group view.
3. Shut down the
Ethernet interface
or interfaces.
shutdown By default, Ethernet interfaces are up.
Setting speed options for auto negotiation on an
Ethernet interface
Speed auto negotiation enables an Ethernet interface to negotiate with its peer for the highest speed that
both ends support by default. You can narrow down the speed option list for negotiation.

4
Figure 1 Speed auto negotiation application scenario
As shown in Figure 1, all ports on Switch A are operating in speed auto negotiation mode, with the
highest speed of 1000 Mbps. If the transmission rate of each server in the server cluster is 1000 Mbps,
their total transmission rate will exceed the capability of port GigabitEthernet 1/0/4, the port providing
access to the Internet for the servers.
To avoid congestion on GigabitEthernet 1/0/4, set 100 Mbps as the only option available for speed
negotiation on port GigabitEthernet 1/0/1, GigabitEthernet 1/0/2, and GigabitEthernet 1/0/3. As a
result, the transmission rate on each port connected to a server is limited to 100 Mbps.
To set speed options for auto negotiation on an Ethernet interface:
Ste
p
Command
Remarks
1. Enter system view. system-view N/A
2. Enter Ethernet interface view. interface interface-type interface-number N/A
3. Set speed options for auto negotiation.
speed auto { 10 | 100 | 1000 } * Optional.
NOTE:
•This function is available only for copper GE ports that support speed auto negotiation.
•The speed and speed auto commands supersede each other, and whichever is configured last takes
effect.
Configuring flow control on an Ethernet interface
To avoid packet drops on a link, you can enable flow control at both ends of the link. When traffic
congestion occurs at the receiving end, the receiving end sends a flow control (Pause) frame to ask the
sending end to suspend sending packets.
Flow control is implemented by receiving and sending Pause frames on ports. Flow control can operate
in one of the following modes on an interface:
•TxRx mode (configured by using the flow-control command)—The interface can both send and
receive flow control frames.
GE1/0/3

5
•Rx mode (configured by using the flow-control receive enable command)—The interface can
receive, but not send flow control frames.
As shown in Figure 2, when both Port A and Port B forward packets at the rate of 1000 Mbps, Port C is
congested. To avoid packet loss, enable flow control on Port A and Port B.
Figure 2 Flow control on ports
Configure flow control in TxRx mode on Port B and flow control in Rx mode on Port A:
•When congestion occurs on Port C, Switch B buffers frames. When the amount of buffered frames
exceeds a certain value, Switch B sends a common Pause frame out of Port B to ask Port A to
suspend sending packets. This Pause frame also tells Port A for how long it is expected to pause.
•Upon receiving the common Pause frame from Port B, Port A suspends sending packets to Port B for
a period.
•If congestion persists, Port B keeps sending common Pause frames to Port A until the congestion
condition is removed.
To handle unidirectional traffic congestion on a link, configure the flow-control receive enable command
at one end, and the flow-control command at the other. To enable both ends of the link to handle traffic
congestion, configure the flow-control command at both ends.
To enable flow control on an Ethernet interface:
Step Command Remarks
1. Enter system view. system-view N/A
2. Enter Ethernet interface
view.
interface interface-type
interface-number N/A
3. Enable flow control.
•Enable TxRx flow control:
flow-control
•Enable Rx flow control:
flow-control receive enable
Use either command.
By default, Rx flow control is disabled
on an Ethernet interface.
Configuring link change suppression on an Ethernet
interface
An Ethernet interface has two physical link states: up and down. Each time the physical link of an
interface goes up or comes down, the physical layer reports the change to the upper layers, and the
upper layers handle the change, resulting in increased overhead.
To prevent physical link flapping from affecting system performance, configure link change suppression
to delay the reporting of physical link state changes. When the delay expires, the interface reports any
detected change.
Link change suppression does not suppress administrative up or down events. When you shut down or
bring up an interface by using the shutdown or undo shutdown command, the interface reports the event
to the upper layers immediately.

6
Link-down event suppression enables an interface to suppress link-down events and start a delay timer
each time the physical link goes down. During this delay, the interface does not report the link-down
event, and the display interface brief or display interface command displays the interface state as UP. If
the physical link is still down when the timer expires, the interface reports the link-down event to the upper
layers.
Link-up event suppression enables an interface to suppress link-up events and start a delay timer each
time the physical link goes up. During this delay, the interface does not report the link-up event, and the
display interface brief or display interface command displays the interface state as DOWN. If the
physical link is still up when the timer expires, the interface reports the link-up event to the upper layers.
Configuring link-down event suppression
To enable an Ethernet interface to suppress link-down events:
Ste
p
Command
Remarks
1. Enter system view. system-view N/A
2. Enter Ethernet interface
view.
interface interface-type
interface-number N/A
3. Set a link-down event
suppression interval. link-delay delay-time Link-down event suppression is disabled by
default.
Configuring link-up event suppression
To configure link-up event suppression on an Ethernet interface:
Ste
p
Command
Remarks
1. Enter system view. system-view N/A
2. Enter Ethernet interface
view.
interface interface-type
interface-number N/A
3. Set a link-up event
suppression interval. link-delay delay-time mode up
Link-up event suppression is disabled by
default.
NOTE:
The link-delay mode up command and the link-delay
command supersedes each other, and whichever is
configured last takes effect.
Configuring loopback testing on an Ethernet
interface
If an Ethernet interface does not work correctly, you can enable loopback testing on it to identify the
problem. Loopback testing has the following types:
•Internal loopback testing—Tests all on-chip functions related to Ethernet interfaces.

7
•External loopback testing—Tests hardware of Ethernet interfaces. To perform external loopback
testing on an Ethernet interface, connect a loopback plug to the Ethernet interface. The switch sends
test packets out of the interface, which are expected to loop over the plug and back to the interface.
If the interface fails to receive any test packet, the hardware of the interface is faulty.
An Ethernet interface in a loopback test does not forward data traffic.
Configuration restrictions and guidelines
•On an interface administratively shut down, you can perform neither internal nor external loopback
testing.
•During loopback testing, the Ethernet interface operates in full duplex mode. When you disable
loopback testing, the interface returns to its duplex setting.
•Loopback testing is a one-time operation, and is not recorded in the configuration file.
Configuration procedure
To enable loopback testing on an Ethernet interface:
Ste
p
Command
Remarks
1. Enter system view. system-view N/A
2. Enter Ethernet interface view. interface interface-type
interface-number N/A
3. Enable loopback testing. loopback { external | internal } Optional.
Disabled by default.
Configuring jumbo frame support
An Ethernet interface might receive some frames larger than the standard Ethernet frame size (called
"jumbo frames") during high-throughput data exchanges such as file transfers. Usually, an Ethernet
interface discards jumbo frames. With jumbo frame support enabled, the interface can process frames
larger than the standard Ethernet frame size yet within the specified range.
In interface configuration mode (Ethernet interface view or port group view), you can set the length of
jumbo frames that are allowed to pass through the Ethernet interface.
•If you execute the command in Ethernet interface view, the configuration takes effect only on the
interface.
•If you execute the command in port group view, the configuration takes effect on all ports in the port
group.
To configure jumbo frame support in interface view or port group view:
Ste
p
Command
Remarks
1. Enter system view. system-view N/A
2. Enter Ethernet
interface view.
interface interface-type
interface-number N/A

8
Ste
p
Command
Remarks
3. Configure jumbo
frame support. jumboframe enable [ value ]
By default, the switch allows jumbo frames within
9216 bytes to pass through Ethernet interfaces.
If you set the value argument multiple times, the
latest configuration takes effect.
Configuring a port group
Some interfaces on your switch might use the same set of settings. To configure these interfaces in bulk
rather than one by one, you can assign them to a port group.
You create port groups manually. All settings made for a port group apply to all the member ports of the
group.
Even though the settings are made on the port group, they are saved on each interface basis rather than
on a port group basis. You can only view the settings in the view of each interface by using the display
current-configuration or display this command.
To configure a manual port group:
Ste
p
Command
Remarks
1. Enter system view. system-view N/A
2. Create a manual port
group and enter manual
port group view.
port-group manual
port-group-name N/A
3. Assign Ethernet interfaces
to the manual port group.
Group-member
interface-list
If you use the group-member interface-type
interface-start-number to interface-type
interface-end-number command to add multiple
ports in batch to the specified port group, make
sure that the interface-end-number argument
must be greater than the interface-start-number
argument.
Enabling energy saving functions on an Ethernet
interface
Enabling auto power-down
With the auto power-down function, the system automatically stops supplying power to an interface and
the interface enters the power save mode if the interface is in down state for a certain period of time
(which depends on the chip specifications and is not configurable). When the interface goes up, the
system supplies power to the interface and the interface enters its normal state.
To enable auto power-down:

9
Step Command Remarks
1. Enter system view system-view N/A
2. Enter Ethernet interface view
or port group view.
•Enter Ethernet interface view:
interface interface-type
interface-number
•Enter port group view:
port-group manual
port-group-name
Use either command.
To enable auto power-down on an
Ethernet interface, enter Ethernet
interface view.
To enable auto power-down on a
group of Ethernet interfaces, enter
port group view.
3. Enable auto power-down port auto-power-down Disabled by default.
NOTE:
W
hen you connect an interface enabled with auto power-down to a device, if the link cannot go up
correctly, disable auto power-down on the interface and try again.
Configuring storm suppression
In interface or port group view, you can set the maximum size of broadcast, multicast or unknown unicast
traffic allowed to pass through an interface or each interface in a port group. When the broadcast,
multicast, or unknown unicast traffic on the interface exceeds this threshold, the system discards packets
until the traffic drops below this threshold.
The storm suppression thresholds configured for an Ethernet interface might become invalid if you enable
the storm control function for the interface. For information about the storm control function, see
"Configuring storm control on an Ethernet interface."
To set storm suppression thresholds on one or multiple Ethernet interfaces:
Step Command Remarks
1. Enter system view. system-view N/A
2. Enter Ethernet interface
view or port group view.
•Enter Ethernet interface view:
interface interface-type
interface-number
•Enter port group view:
port-group manual
port-group-name
Use either command.
To configure storm suppression
on an Ethernet interface, enter
Ethernet interface view.
To configure storm suppression
on a group of Ethernet interfaces,
enter port group view.
3. Set the broadcast
suppression threshold ratio.
broadcast-suppression { ratio |pps
max-pps | kbps max-kbps }
Optional.
By default, all broadcast traffic is
allowed to pass through.
4. Set the multicast
suppression threshold ratio.
multicast-suppression { ratio |pps
max-pps | kbps max-kbps }
Optional.
By default, all multicast traffic is
allowed to pass through.
5. Set the unknown unicast
suppression threshold ratio.
unicast-suppression { ratio |pps
max-pps | kbps max-kbps }
Optional.
By default, all unknown unicast
traffic is allowed to pass through.

10
NOTE:
For an Ethernet interface that belongs to a port group, if you set a traffic suppression threshold for the
interface in both Ethernet interface view and port group view, the threshold configured last takes effect.
Setting the statistics polling interval
To set the statistics polling interval globally or on an Ethernet interface:
Ste
p
Command
Remarks
1. Enter system view. system-view N/A
2. Enter Ethernet interface view. interface interface-type
interface-number N/A
3. Set the statistics polling
interval on the Ethernet
interface.
flow-interval interval
Optional.
The default interface statistics
polling interval is 300 seconds.
To display the interface statistics collected in the last polling interval, use the display interface command.
To clear interface statistics, use the reset counters interface command.
Enabling loopback detection on an Ethernet
interface
If a switch receives a packet that it sent, a loop has occurred to the switch. Loops might cause broadcast
storms, which degrade network performance. You can use this feature to detect whether a loop has
occurred.
Depending on whether the receiving interface is the same as the sending interface, loops fall into the
following types:
•Single-port loop—Occurs when an interface receives a packet that it sent out and the receiving
interface is the same as the sending interface, as shown in Figure 3.
•Multi-port loop—Occurs when a switch receives a packet that it sent out but the receiving interface
is not the sending interface. For example, as shown in Figure 4, when Port 2 receives the packet sent
out of Port 1, a loop occurs between Port 1 and Port 2, and Port 2 is the looped port.
Figure 3 Single-port loop

11
Figure 4 Multi-port loop
You can enable loopback detection to detect loops on an interface and, if the interface supports the
loopback-detection action command, configure the protective action to take on the receiving interface
when a loop is detected, for example, to shut down the interface. Depending on whether a protective
action is configured, the switch takes the actions in Table 1 to alleviate the impact of the loop condition.
Table 1 Actions to take upon detection of a loop condition
Port type Actions
No
p
rotective action is confi
g
ured
A
p
rotective action is confi
g
ured
Access port
•Place the receiving interface in controlled mode.
The interface drops the incoming packets and
correctly sends packets.
•Generate traps and log messages.
•Delete all MAC address entries of the interface.
•Perform the configured protective
action.
•Generate traps and log messages.
•Delete all MAC address entries of the
interface.
Hybrid or
trunk port
•Generate traps and log messages.
•If loopback detection control is enabled, place
the receiving interface in controlled mode. The
interface does not receive or send packets.
•Delete all MAC address entries of the interface.
•Generate traps and log messages.
•If loopback detection control is
enabled, take the configured
protective action on the interface.
•Delete all MAC address entries of the
interface.
Configuration restrictions and guidelines
•To use loopback detection on an Ethernet interface, you must enable the function both globally and
on the interface.
•When the multi-port loopback detection function is enabled, the function can also detect single-port
loops.
•To disable loopback detection on all interfaces, run the undo loopback-detection enable command
in system view.
•To enable a hybrid or trunk port to take the administratively specified protective action, you must use
the loopback-detection control enable command on the port.
•When you change the link type of an Ethernet interface by using the port link-type command, the
switch removes the protective action configured on the interface. For more information about the
port link-type command, see Layer 2—LAN Switching Command Reference.
Other manuals for 5120 EI Series
3
This manual suits for next models
2
Table of contents
Other HP Network Router manuals

HP
HP A5830 Series User manual

HP
HP Pavilion 501 Instruction Manual

HP
HP 10500 series User manual

HP
HP FlexNetwork MSR Series User manual

HP
HP MSR20-1X Series User manual

HP
HP 5900 User manual

HP
HP 7000dl Series User manual

HP
HP ISCSI SR2122 User manual

HP
HP ProCurve 7102 User manual

HP
HP MSR1003-8S Installation manual