manuals.online logo
Brands
  1. Home
  2. •
  3. Brands
  4. •
  5. HP
  6. •
  7. Storage
  8. •
  9. HP D2D User manual

HP D2D User manual

EH992-90901
© 2008 Hewlett-Packard Development Company, L.P.
Printed in the EU
www.hp.com
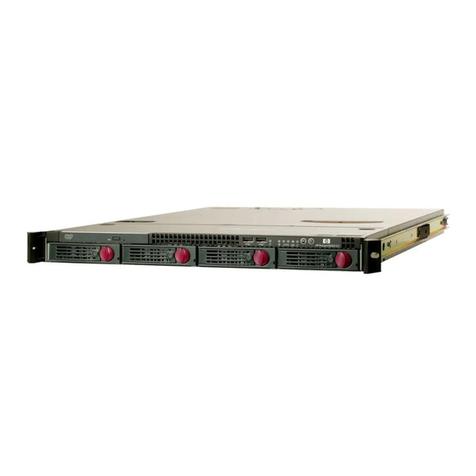
HP StorageWorks D2D
Backup System
1
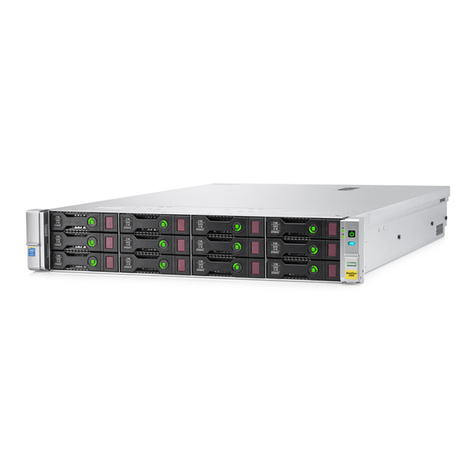
About your HP StorageWorks D2D Backup System
The HP StorageWorks D2D Backup System is a disk-based storage appliance that emulates
up to 24 Ultrium Tape Libraries, which can be used to back up network servers or PCs.
Tape Library emulation type is selected during initial configuration and this determines the
number of cartridge slots and embedded tape drives that may be configured for the device.
The HP D2D Backup System may be configured as an iSCSI or a Fibre Channel device.
When configured as an iSCSI device, the HP D2D Backup System plugs directly into your
network, and presents devices as directly-attached SCSI libraries to host machines. Each
host can see only the backup devices that have been configured for that particular host.
The product also supports Fibre Channel and is supplied with the FC Card pre-installed in
one of the PCI-e slots.
HP 4112 12TB Capacity Upgrade Kit
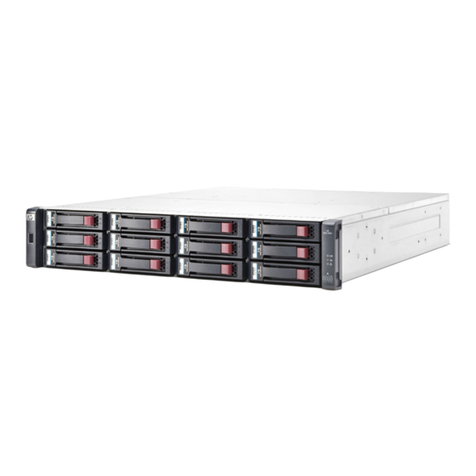
The Capacity Upgrade Kit is an optional 12-disk expansion model. It may be installed at
the same time as the HP D2D Backup System or added later. A license is always required
for the Capacity Upgrade and is included with the kit.
2Install the rack rails and unit(s)
The supplied rail kits allow you to install the HP D2D Backup System and Capacity
Upgrade Kit into square and round hole racks for 1U and 2U servers. If mounting the
server into threaded hole or telco racks, please see www.racksolutions.com to purchase
mounting hardware.
The rail kits consist of:
Important Safety Information
These rails, when installed, form a shelf for the HP D2D or Capacity Upgrade Kit to rest
on. The unit is not attached to the rail by any other means. Use extreme caution when
installing and pulling the unit out from the rack; it can slip and fall, causing damage to the
HP D2D or injury. HP is not responsible for any damage or injury caused by the
mishandling of the HP D2D.
Always refer to the Safety Guide and the User Guide on the HP StorageWorks CD-ROM
for detailed safety information. In particular, be aware of the following warnings.
WARNINGS:
• Ensure that the rack is level and stable before working on the rack.
• Ensure that the rack has anti-tip measures in place.
• Ensure that sufficient personnel are on hand to support the product(s) during the
installation process.
• Always load the rack from the bottom up. Load the heaviest items in the rack first.
1. Position left and right rack rails at the desired 'U' position in the rack (step 1 in Figure 1).
NOTE:
The rails can be adjusted to fit the rack.
2. Secure rack rails to the front and back rack columns using screws (step 2 in Figure 1).
NOTE:
Make sure that the shoulders of the screws fit inside the square or round holes
of the rack
–
Square hole rack:
use larger-sized shoulder screws and pins for mounting.
–
Round hole rack:
use smaller-sized shoulder screws and pins for mounting.
•
Follow the instructions on this poster to connect the hardware. Windows users can
then run the Installation wizard from the HP StorageWorks CD-ROM on each host
machine. Linux and UNIX users should refer to the “Linux and UNIX Configuration
Guide” on the CD-ROM.
• The host is the network server that you wish to back up.
• The host machine on which the Installation wizard is run should have Internet
access for installation to complete successfully.
• The HP D2D Backup System should be connected to Gigabit Ethernet. 100 Base-T
Ethernet will limit performance.
• For more detailed information about installing, configuring and using the HP D2D
Backup System, see the “User Guide” on the HP StorageWorks CD-ROM.
3. Slide the HP D2D into position on the rails.
NOTE:
The label on the top of the HP D2D contains useful identity information, such
as the MAC address and default network name. Make a note of this information
before you install the HP D2D in the rack.
NOTE:
The rear ends of the rails have a CTO bracket that must overlap the chassis
tab in order to secure the unit to the rails.
4. Secure the HP D2D to the rack rails using thumbscrews on the HP D2D front bezel.
5. Secure the HP D2D to the rack Using the holes provided in the rear rack rails, install
tie wraps and route external cable as required.
Capacity Upgrade Kit (optional)
IMPORTANT:
If you have purchased the Capacity Upgrade Kit, it should be installed
directly below or above the HP D2D Backup System.
The rack rails are configured for square-hole racks, but are easily converted for use in a
round-hole rack. To do this remove the standard pins from the front and back ends of
each rail and replace them with the eight round-hole pins (supplied in the bag of
miscellaneous hardware).
1. Secure the front end of the rails to the rack. (Identify the left (L) and right (R) rack rails
by markings stamped into the sheet metal.)
IMPORTANT:
Be sure that the scissor-type locking latches engage the rack fully when
the pins extend through the holes marked with the template.
HP D2D4112 Backup System
(12-disk model)
HP D2D4112 12TB Capacity Upgrade Kit
(12-disk expansion model)
Start here
3Connect the hardware
1.
Always use the supplied power cords to connect the HP D2D Backup System to the
mains power supply. For detailed safety information, see the Safety Guide on the
CD-ROM.
2. Use any CAT-5E network cable (also supplied with the product) to connect the LAN
port(s) to a Gigabit Ethernet network.
There are two LAN ports on the rear of the unit, Port 1 and Port 2; this allows the HP
D2D to be connected to two separate Ethernet networks and used to back up host
devices on both networks. Alternatively, the two network ports may be bonded together
to gain bandwidth and failover benefits when on a single network.
LAN Port 1 (the lower port) must always be connected, even if you are using the FC ports
to back up and restore data to the HP D2D, because the Web Management Interface
requires an Ethernet connection to set up devices.
2. Secure the back end of the rails to the rack.
IMPORTANT:
Be sure that the scissor-type locking latches engage the rack fully when
the pins extend through the holes marked with the template.
3. Slide the Capacity Upgrade Kit into the rack. It should be immediately above or
immediately below the HP D2D.
4. Use the thumbscrews on the front of the chassis to secure it to the rack. (Remove the
small side panels secured with blue tape to access the thumbscrew.)
Connect the hardware continues overleaf
HP D2D Backup System
• Two rack rails (left and right)
• Mounting hardware for square and
round hole racks
• Two tie wraps
Capacity Upgrade Kit (optional)
• Two rack rails (left and right)
• Pins for round-hole rack conversion kit
Figure 1
Back Panel
1Power sockets
2LAN port 1 – always used for data connection
3LAN port 2 – used for data connection only if network configured
for dual port IP addresses
4Management LAN port - do NOT use for data connection
5Suitable for Tape Attach HBA (SAS or SCSI)
6Suitable for RAID 800 controller
7Suitable for Fibre Channel card
C
M
Y
CM
MY
CY
CMY
K
EH992-90901 Archway Eng front.pdf 7/1/09 10:30:14
Blue = Identified
Blue flashing = Active remote management
Off = No active remote management
Amber = Fault condition
Off = No fault condition
6Using your D2D
Backup Software
For backup and restore to the HP D2D Backup System, you need software that supports
HP tape libraries. This will enable you to configure tape rotation schemes to meet your
backup requirements. For example scenarios see the "User Guide" on the HP
StorageWorks CD-ROM.
Always refer to www.hp.com/go/connect, to ensure that you are running supported
software and install any recommended updates.
Data deduplication
The HP D2D incorporates data deduplication technology. Deduplication is applied on a
per library basis. As data is backed up to a library, the HP D2D analyzes the data at
block (not file) level and stores only data that is unique, creating pointers to blocks that
are already stored on that library. (It does not reference data stored on other library
devices.) This is an extremely efficient way of using the available storage space.
Replication
Replication allows users to replicate data from cartridges on one HP D2D to mapped
slots on another HP D2D on a remote site. Once configured (using the simple-to-use
wizard), replication occurs automatically, ensuring data is mirrored on source and target
HP D2Ds. Deduplication ensures that network traffic is minimized.
Licensing
Licensing is used to enable optional product functionality, such as extra disk capacity,
replication or other future features. If you have purchased any of these features, you will
receive the appropriate License Entitlement Certificate with your product. This is a paper
document that contains all the information you need to obtain your unique License To Use
key, which you can then enter into the Web Management Interface.
Tape Library Attach
The HP D2D supports direct attachment of HP tape library devices in order to create
physical copies of cartridges created on the HP D2D system for disaster recovery, archival
or regulatory compliance requirements. The Web Management Interface is used to create
the physical copies and transfer the data either immediately or as a scheduled job on a
regular basis.
7Troubleshooting
Detailed help is available while running the Installation wizard. If you encounter
problems during any of the the installation phases, it will advise you what steps to take.
For more troubleshooting information, refer to the “User Guide” on the HP StorageWorks
CD-ROM. This guide also contains reference information about iSCSI and RAID. If you
cannot resolve problems, contact HP Support at www.hp.com/support.
For the latest information about computer, OS and software compatibility, see
www.hp.com/go/connect or www.hp.com/go/ebs.
4Software installation, discovery and
configuration
There are three stages to to software installation and configuration:
• Install all the required drivers.
• Discover and configure the HP D2D Backup System on the network.
• Create a base configuration to get started (This is not possible, if you are configuring
only FC devices on the HP D2D).
NOTE:
For networks using the IPv4 protocol (most networks), Dynamic (DHCP)
network addressing is enabled by default on the HP D2D. If your network supports
DHCP, all the required network parameters will be set automatically. If your network
uses static IP addressing, you will need to manually assign network settings - IP
address, subnet mask and gateway. Make sure that you have these ready before you
start installation.
If you are on an IPv6-only network, simply enter the MAC address of the HP D2D
into the wizard when requested, which can then be used to find the IP address and
required network parameters automatically. You will find the MAC address on the
label on the top of the unit.
Windows users:
The recommended way to set up your HP D2D Backup System network is to run the
Installation wizard from the HP StorageWorks CD-ROM supplied with your product. The
Installation wizard should be run on all hosts that are to be backed up to the HP D2D
Backup System.
1. Insert the CD-ROM into the host machine and the Installation wizard will auto run. In
most instances the installation completes all three stages detailed above successfully.
For more detailed information about what happens during each stage and about FC
and iSCSI, please refer to the "User Guide" on the HP StorageWorks CD-ROM.
2. Run the Installation wizard on the other hosts that are to be backed up.
Linux and UNIX users:
Download the latest patches for your operating system. For configuration instructions,
please refer to the "Linux and UNIX Configuration Guide” on the HP StorageWorks
CD-ROM.
5Web Management Interface
To run the Web Management Interface:
• From a Windows host server or PC: Use the desktop shortcut created by the Installation
wizard or
• From any machine connected to the network: Enter https: followed by the IPv4 or IPv6
address or name (fully qualified domain name) of the HP D2D Backup System into the
web browser.
The default Sign On is Administrator with a password of Admin. Both names are case
sensitive. (The password can be changed after installation.)
The iSCSI device created during installation will appear to the backup software on your
host server or PC as a locally-attached backup device. This backup device can be seen
only by the host and not by any other devices on the network.
Use the Web Management Interface to:
• Monitor the status and health of the HP D2D Backup System and all configured
backup devices.
• Change the number of cartridge slots or create additional libraries or autoloaders for
a host.
• Manage movement of data to and from a physical Tape Library or Drive attached to
the HP D2D (if one has been installed).
• Create and configure Fibre Channel devices, if required.
• Create slot mappings and configure replication, if required.
To ensure that the HP D2D Backup System is discovered successfully, install it on the same
subnet as the host machine that will access it. Typical installations have the HP D2D
Backup System connected to the same Gigabit network switch as the host machine that is
carrying out the backups in order to gain optimum performance.
Further information about networks
The two physical network ports provide three network configuration modes:
• Single Port Configuration: The HP D2D is connected to one network; only one network
port is used (Port 1).
• Dual Port Configuration: The HP D2D is connected to two different networks. Both
network ports are used.
• High Availability Dual Port Configuration: Both network ports are used, but the two
ports are bound together.
Single port configuration is the default mode, but it may easily be changed during the
software installation, discovery and configuration process or subsequently from the Web
Management Interface. If dual port configuration is required, the networks must be on
different sub-nets.
The High Availability mode is the recommended option, because it provides port failover
and increased bandwidth, but both network ports must be connected to the same switch
and it must support port bonding.
For further information please refer to the “User Guide” on the CD-ROM.
NOTE:
The HP D2D supports the IPv6 protocol, but it is factory-configured to
recognize both IPv4 and IPv6 protocols and use either, for example if the internet
service provider (ISP) uses an IPv4 network. No further user configuration is required.
Connecting to a Fibre Channel SAN
The HP D2D is supplied with the correct FC card pre-installed. However, you must still
connect the HP D2D to an Ethernet network in order to run the Installation Wizard and
use the Web Management Interface, as described over the page.
The main differences to be aware of are:
• The wizard cannot create library devices for you on the HP D2D; you must do that
after installation from the Web Management Interface.
• Devices created on the HP D2D can be accessed by all hosts on the SAN unless you
configure zones on the Fibre Channel Fabric/Switch
Connecting to the Capacity Upgrade Kit (optional)
Install the rail kit and expansion model immediately below or above the HP D2D Backup
System, as described in Section 2.
1. To ensure correct keying, first connect the supplied cable to the IN connector on the
rear of the Capacity Upgrade Kit.
2. Connect the other end of the cable to the port labeled "Port 2E" on the RAID 800
PCI-e card on the rear of the HP D2D Backup System.
3. Use the supplied power cords to connect the Capacity Upgrade Kit to the mains
power supply.
Understanding the LEDs
HP D2D Backup System
Capacity Upgrade Kit (optional)
Power On
1. If you have installed the Capacity Upgrade Kit, power it on first. You may need to hold
down the power on button (on the rear of the unit) for a few seconds.
2. Power on the HP D2D Backup System (the power button is on the front of the unit).
Power Off
To power off your HP D2D Backup System always use the Web Management Interface,
as described in the "User Guide" on the HP StorageWorks CD-ROM.
CAUTION:
If you need to power down the Capcity Upgrade Kit, make sure the HP
D2D Backup System is powered down first. This ensures that the system does not
erroneously mark the drives as failed when to HP D2D Backup System is powered up
again.
To power off the Capacity Upgrade Kit, press the Power On button and wait for the
system power LED to go from green to amber.
NOTE:
When installing/replacing a hot-plug device, it is not necessary to power
down the units.
DescriptionItem
HP D2D beacon LED1
Status
Steady blue identifies the HP D2D in the rack
System health LED2Green = Normal operation
Flashing amber = Degraded condition
Flashing red = Critical condition
LAN port3&4 Off = no network connection or network not
configured
Flashing green = network connection
DescriptionItem
Heartbeat LED1
Status
Green = System activity
Off = No system activity
Fault LED2
UID button/LED3
Power button LED5Off = no power connected
Steady green = power connected, device ready
for use
Steady amber = device switched off or in
hibernation with power connected
Disk beacon LED6Steady blue identifies a specific disk within the
unit.
Disk online/activity LED7Steady green = online, no activity
Flashing green = disk activity
Steady amber = disk failed
Off = no network connection
1IN connector
2Port 2E
3Power connector
1Power On button
Capacity Upgrade Kit
(rear view)
HP D2D Backup System
(front View)
1Power On button
Server
HP StorageWorks D2D
Backup System
LAN
ServerServer
Supplied cable
Ethernet
switch
C
M
Y
CM
MY
CY
CMY
K
EH992-90901 Archway Eng back.pdf 7/1/09 11:31:35

Other manuals for D2D

15

This manual suits for next models

1

Other HP Storage manuals

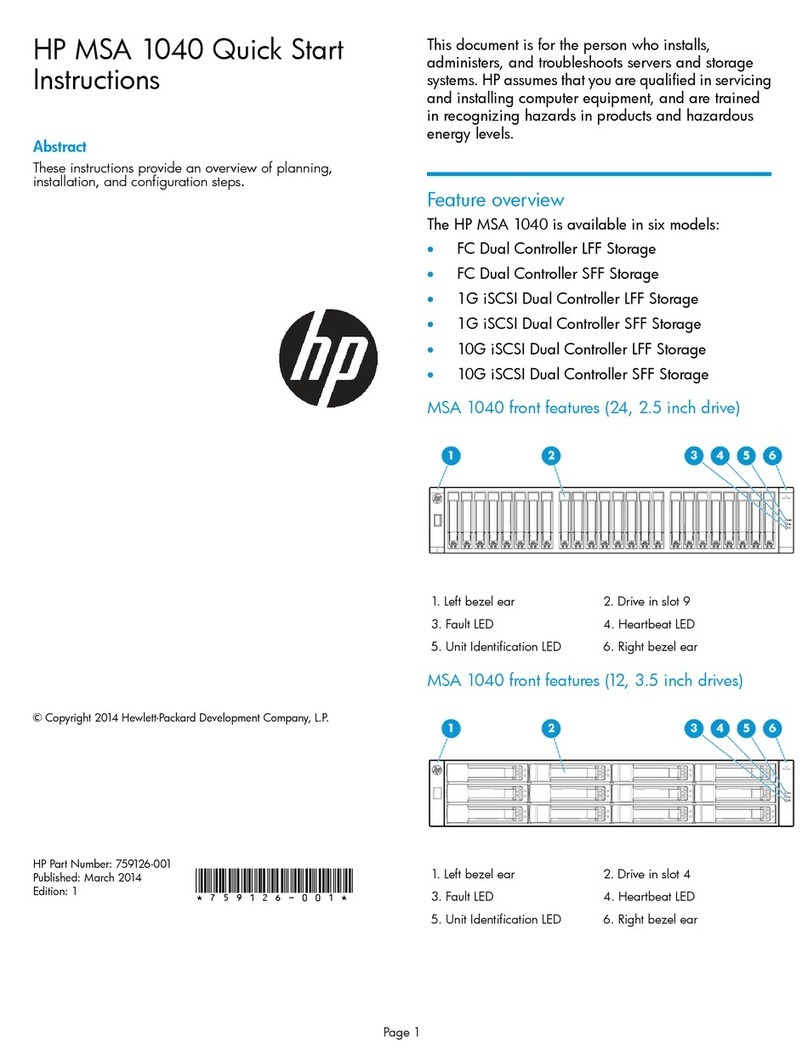
HP MSA 30 User manual

HP

HP MSA 30 User manual

HP StorageWorks P4000 Series User manual

HP

HP StorageWorks P4000 Series User manual

HP StorageWorks XP10000 - Disk Array User manual

HP

HP StorageWorks XP10000 - Disk Array User manual

HP D2200sb Manual

HP

HP D2200sb Manual

HP MSA 2040 Programming manual

HP

HP MSA 2040 Programming manual

HP StorageWorks 400r All-in-One User instructions

HP

HP StorageWorks 400r All-in-One User instructions

HP BAAD0010HBK-NHSN User manual

HP

HP BAAD0010HBK-NHSN User manual

HP StorageWorks Ultrium 1760 User manual

HP

HP StorageWorks Ultrium 1760 User manual

HP OmniBook 2100 User manual

HP

HP OmniBook 2100 User manual

HP StorageWorks MSA 2/8 - SAN Switch User manual

HP

HP StorageWorks MSA 2/8 - SAN Switch User manual

HP Pavilion p6000 - Desktop PC Guide

HP

HP Pavilion p6000 - Desktop PC Guide

HP 3PAR StoreServ 7200 2-node User manual

HP

HP 3PAR StoreServ 7200 2-node User manual

HP StorageWorks XP48 - Disk Array User manual

HP

HP StorageWorks XP48 - Disk Array User manual

HP StorageWorks 4000/6000/8000 - Enterprise Virtual... Instruction Manual

HP

HP StorageWorks 4000/6000/8000 - Enterprise Virtual... Instruction Manual

HP StorageWorks Ultrium 1760 Instruction Manual

HP

HP StorageWorks Ultrium 1760 Instruction Manual

HP StorageWorks 7110 - Virtual Array User manual

HP

HP StorageWorks 7110 - Virtual Array User manual

HP Surestore 160ex - Optical Jukebox User manual

HP

HP Surestore 160ex - Optical Jukebox User manual

HP Colorado 5GB C4354A User manual

HP

HP Colorado 5GB C4354A User manual

HP Storevirtual 4000 Quick reference guide

HP

HP Storevirtual 4000 Quick reference guide

HP StorageWorks 8B - FC Entry Switch User manual

HP

HP StorageWorks 8B - FC Entry Switch User manual

HP Storevirtual 4000 Quick reference guide

HP

HP Storevirtual 4000 Quick reference guide

HP LTO Ultrium Product manual

HP

HP LTO Ultrium Product manual

HP XP20000/XP24000 User manual

HP

HP XP20000/XP24000 User manual

HP 3PAR StoreServ 7200 2-node User manual

HP

HP 3PAR StoreServ 7200 2-node User manual

Popular Storage manuals by other brands

Adata DashDrive HV610 Brochure & specs

Adata

Adata DashDrive HV610 Brochure & specs

Western Digital WDE1MS1200 Specifications

Western Digital

Western Digital WDE1MS1200 Specifications

Western Digital WD Elements Play user manual

Western Digital

Western Digital WD Elements Play user manual

Apricorn Aegis Bio A25-BIO 640GB Specifications

Apricorn

Apricorn Aegis Bio A25-BIO 640GB Specifications

Monument 217 Series Owner's Manual & Installation Instructions

Monument

Monument 217 Series Owner's Manual & Installation Instructions

ASUSTOR AS6404T Quick installation guide

ASUSTOR

ASUSTOR AS6404T Quick installation guide

Weinmann SOMNObutler 2 stationary Description and instructions for use

Weinmann

Weinmann SOMNObutler 2 stationary Description and instructions for use

Western Digital Re EX800M Technical reference manual

Western Digital

Western Digital Re EX800M Technical reference manual

Itian Square One user guide

Itian

Itian Square One user guide

STONEFLY DR365V Setup guide

STONEFLY

STONEFLY DR365V Setup guide

Spectra Logic Spectra nTier300 instructions

Spectra Logic

Spectra Logic Spectra nTier300 instructions

U-Line H-7808 quick start guide

U-Line

U-Line H-7808 quick start guide

Sony PHD-A55 operating instructions

Sony

Sony PHD-A55 operating instructions

SMC Networks NAS02 - annexe 1 user guide

SMC Networks

SMC Networks NAS02 - annexe 1 user guide

morse MORCINCH 4556-P Operator's manual

morse

morse MORCINCH 4556-P Operator's manual

Shugart Kennedy 9600B Operation and maintenance manual

Shugart

Shugart Kennedy 9600B Operation and maintenance manual

ECOSAFE MB18 instruction manual

ECOSAFE

ECOSAFE MB18 instruction manual

IBM ESS 5000 SC Series Hardware guide

IBM

IBM ESS 5000 SC Series Hardware guide

manuals.online logo
manuals.online logoBrands
  • About & Mission
  • Contact us
  • Privacy Policy
  • Terms and Conditions

Copyright 2025 Manuals.Online. All Rights Reserved.