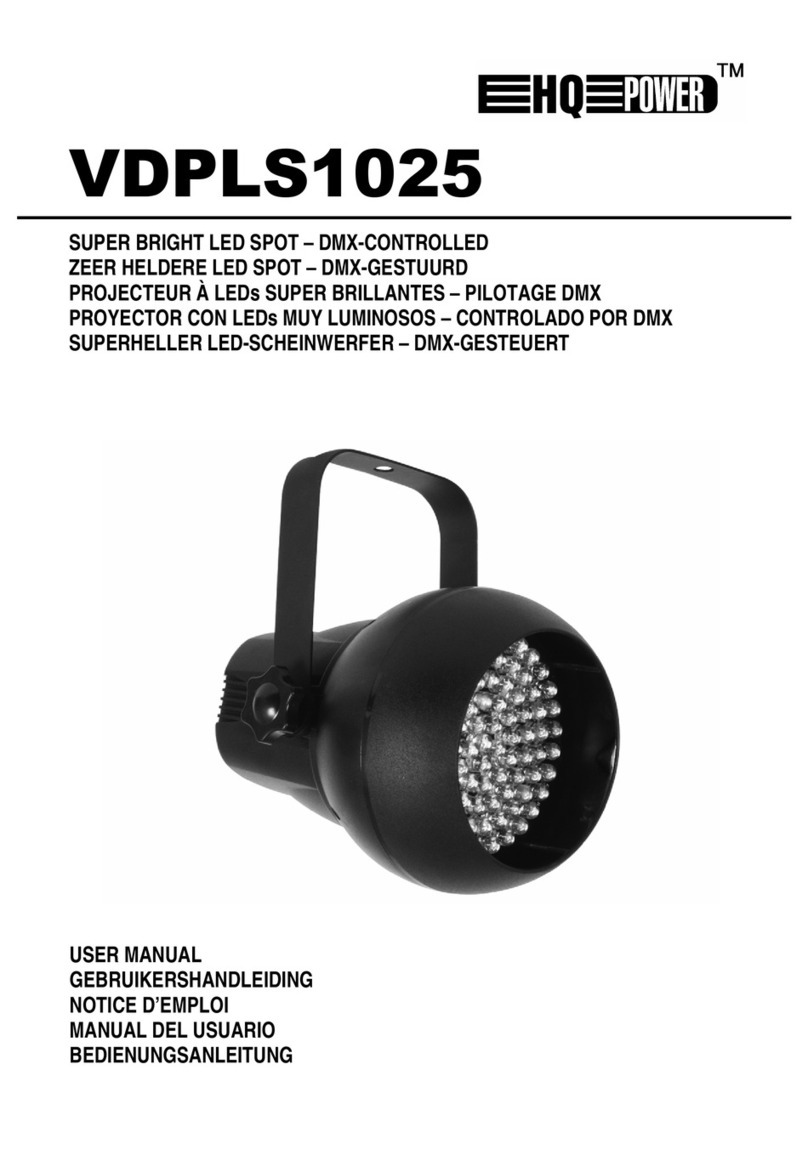
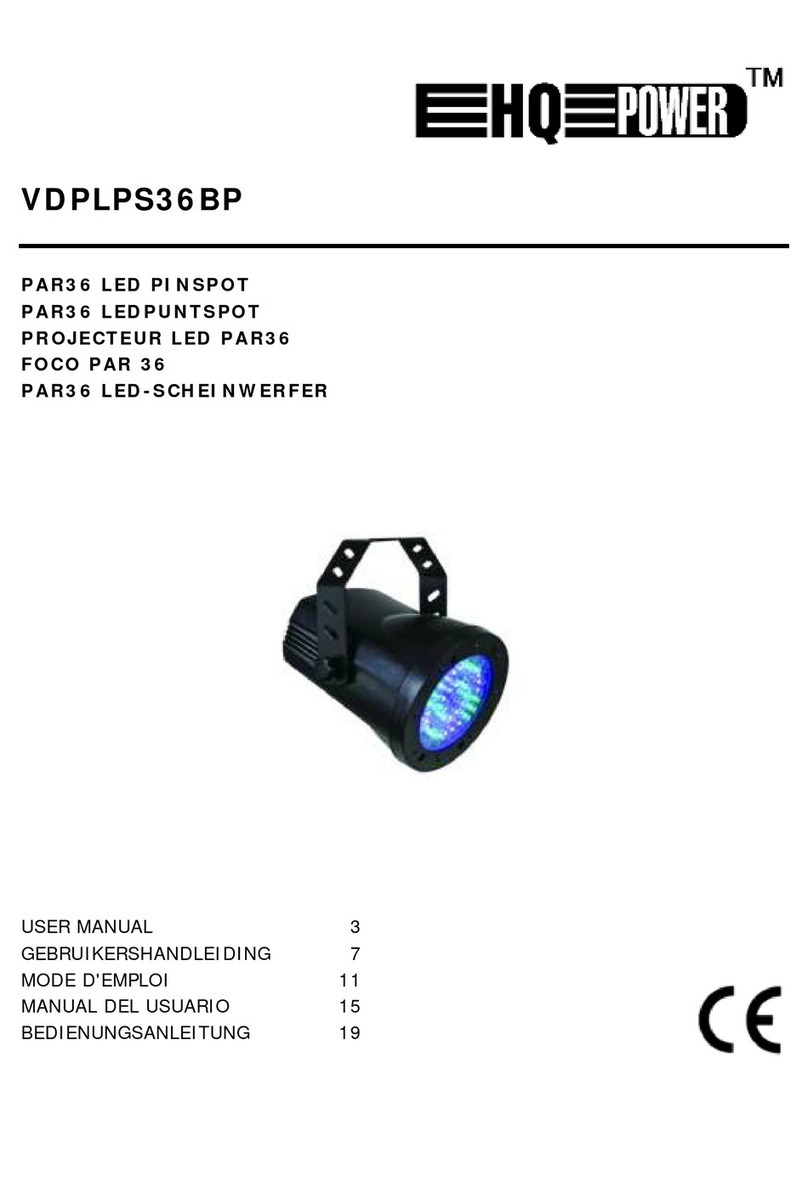
HQ Power VDPLPS36BP User manual

VDPLPS36BP
PAR36 LED PINSPOT
PAR36 LEDPUNTSPOT
PROJECTEUR LED PAR36
FOCO PAR 36
PAR36 LED-SCHEINWERFER
USER MANUAL 3
GEBRUIKERSHANDLEIDING 7
MODE D'EMPLOI 11
MANUAL DEL USUARIO 15
BEDIENUNGSANLEITUNG 19

VDPLPS36BP
V. 05 – 06/09/2013 2 ©Velleman nv
terminator
eindweerstand
résistance de terminaison
terminación
Terminierung
How to turn the controller line from 3-pins into 5-pins (plug and socket).
Controller line van 3-pin naar 5-pin aanpassen (stekker en contact).
Modifier la ligne du contrôleur de 3 broches en 5 broches (fiche et contact).
Modificar la línea del controlador de 3 polos y 5 polos (conector y contacto).
Die Controller-Linie von 3-Pin nach 5-Pin anzupassen (Stecker und Kontakt).

VDPLPS36BP
V. 05 – 06/09/2013 3 ©Velleman nv
USER MANUAL
1. Introduction
To all residents of the European Union
Important environmental information about this product
This symbol on the device or the package indicates that disposal of the device after its lifecycle could
harm the environment. Do not dispose of the unit (or batteries) as unsorted municipal waste; it
should be taken to a specialized company for recycling. This device should be returned to your
distributor or to a local recycling service. Respect the local environmental rules.
If in doubt, contact your local waste disposal authorities.
Thank you for choosing HQPower™! Please read the manual thoroughly before bringing this device into service.
If the device was damaged in transit, don't install or use it and contact your dealer.
2. Safety Instructions
Be very careful during the installation: touching live wires can cause life-threatening
electroshocks.
Always disconnect mains power when device not in use or when servicing or maintenance
activities are performed. Handle the power cord by the plug only.
Indoor use only. Keep this device away from rain, moisture, splashing and dripping liquids.
Never put objects filled with liquids on top of or close to the device.
Keep this device away from children and unauthorized users.
Caution: device heats up during use.
Do not stare directly at the light source, as this may cause
•epileptic seizure in sensitive people
•temporarily loss of sight (flash blindness)
•permanent (irreversible) eye damage.
There are no user-serviceable parts inside the device. Refer to an authorized dealer for service
and/or spare parts.
•Damage caused by disregard of certain guidelines in this manual is not covered by the warranty and the
dealer will not accept responsibility for any ensuing defects or problems.
•A qualified technician should install and service this device.
•Do not switch the device on immediately after it has been exposed to changes in temperature. Protect the
device against damage by leaving it switched off until it has reached room temperature.
•This device falls under protection class I. It is therefore essential that the device be earthed. Have a
qualified person carry out the electric connection.
•Make sure that the available voltage does not exceed the voltage stated in the specifications of this manual.
•Do not crimp the power cord and protect it against damage. Have an authorised dealer replace it if
necessary.
•Disconnect the device from the mains to clean it or when it is not in use. Handle the power cord by the plug
only.
•Shields, lenses or UV screens shall be replaced if they become visibly damaged (e.g. cracks, scratches) to
such extent that their effectiveness is impaired.
•Do not look directly at the light source as sensitive people may go into epileptic seizure if they do.
•Note that damage caused by user modifications to the device is not covered by the warranty.
•Keep the device away from children and unauthorised users.
3. General Guidelines
Refer to the Velleman® Service and Quality Warranty on the last pages of this manual.
•This device is designed for professional use on stage, in discos, theatres, etc. The device should only be
used indoors with an alternating current of max. 230VAC/50Hz.

VDPLPS36BP
V. 05 – 06/09/2013 4 ©Velleman nv
•Lighting effects are not designed for permanent operation: regular operation breaks will prolong their lives.
•Do not shake the device. Avoid brute force when installing or operating the device.
•Select a location where the device is protected against extreme heat (see “Technical Specifications”), dust
and moisture. Respect a minimum distance of 0.5m between the device’s light output and any illuminated
surface.
•Use an appropriate safety cable to fix the device (e.g. VDLSC8).
•Familiarise yourself with the functions of the device before actually using it. Do not allow operation by
unqualified people. Any damage that may occur will most probably be due to unprofessional use of the
device.
•Use the original packaging if the device is to be transported.
•All modifications of the device are forbidden for safety reasons.
4. Features
•PAR36 with 76 LEDs
•DMX-controlled through 4 channels or stand-alone function
•with wall mounting bracket
5. Overview
Refer to the illustrations on page 2 of this manual.
1
Power supply: 230VAC / 50Hz
4
Signal output: XLR connector connected with
next spot.
2
Fuse: 5 x 20mm F1A (order code: FF1N)
5
DMX-address switches: Stand alone function or
DMX setting.
3 Signal input: XLR connector connected
with a DMX512 control panel.
6. Installation
6.1 DMX-512 connections
•Connect the provided XLR cable to the female 3-pin XLR output of your controller and the other side to the
male 3-pin XLR input of the VDPLPS36BP.
•Multiple VDPLPS36BPs can be linked through serial linking.
•The linking cable should be two core, screened cable with XLR input and output connectors. See diagram:
Caution
At the last fixture, the DMX cable has to be terminated with a terminator.
Only use a stereo shielded cable and 3-pin XLR-plugs and connectors in order to connect the controller with the
fixture or one fixture with another.
6.2 Occupation of the XLR-connector
•DMX terminator is recommended for installations where the DMX cable has to run a long distance or is in an
electrically noisy environment (e.g. discos).
•The terminator prevents corruption of the digital control signal by electrical noise.
•The DMX terminator is simply an XLR plug with a 120Ω resistor between pins 2 and 3, which is then
plugged into the XLR output socket of the last device in the chain.
See illustrations on page 2.
6.3 Projector DMX start address selection
•All DMX-controlled devices need a digital start address so that the correct device responds to the signals.
This digital start address is the channel number from which the device starts to “listen” to the DMX
controller. Enter the correct number and read it from the display located on the base of the device.

VDPLPS36BP
V. 05 – 06/09/2013 5 ©Velleman nv
•You can use the same starting address for a whole group of devices or enter an individual one for every
device.
•When all devices have the same address, all the units will “listen” to the control signal on one particular
channel. In other words: changing the settings of one channel will affect all devices simultaneously. If you
set different addresses, each device will “listen” to a separate channel number. Changing the settings of
one channel will only affect the device in question.
•In the case of the 4-channel VDPLPS36BP, you will have to set the start address of the first unit to 1, the
second unit to 5 (1 + 4), the third to 9 (5 + 4), and so on.
7. Operation
7.1 DMX channels
Channel
Function
Channel 1 Dimmer / Strobe
Channel 2
Red
Channel 3 Green
Channel 4
Blue
7.2 Stand alone functions (dip switches)
DMX
dip switch 10 on
DMX on
dip switch 10 off internal programs
Effects
dip switch 9 on
rainbow chase
3 – 8: speed adjust
dip switch 9 + 1 on strobe slow
3 – 8: speed adjust
dip switch 9 + 1 + 2 on
red – blue chase
3 – 8: speed
Fixed colours
dip switch1 on red dim 1
dip switch 2 on red dim 2
dip switch 3 on
red full
dip switch 4 on green dim 1
dip switch 5 on
green dim 2
dip switch 6 on green full
dip switch 7 on blue dim 2
dip switch 8 on
blue full
Combining these settings give mix colours. Example: 3 + 6 + 8 = white.
8. Cleaning and Maintenance
•All screws should be tightened and free of corrosion.
•The housing, the lenses, the mounting supports and the installation location (e.g. ceiling, suspension,
trussing) should not be deformed, modified or tampered with e.g. do not drill extra holes in mounting
supports, do not change the location of the connections …
•Mechanically moving parts must not show any signs of wear and tear.
•The electric power supply cables must not show any damage. Have a qualified technician maintain the
device.
•Disconnect the device from the mains prior to maintenance activities.
•Wipe the device regularly with a moist, lint-free cloth. Do not use alcohol or solvents.
•There are no user-serviceable parts, apart from the lamp and the fuse (see “Installation”).
•Contact your dealer for spare parts if necessary.

VDPLPS36BP
V. 05 – 06/09/2013 6 ©Velleman nv
9. Technical Specifications
power supply 230 VAC / 50 Hz
power consumption
5 W
DMX 4 channels (red, green, blue and dimmer/strobe)
LEDs
40 x red, 18 x green, 18 x blue
beam angle 30°
dimensions Ø 130 mm x 150 mm
weight
800 g
luminous flux 270 lm @ 1m
Use this device with original accessories only. Velleman nv cannot be held responsible in the event
of damage or injury resulting from (incorrect) use of this device.
For more info concerning this product and the latest version of this manual, please visit our website
www.hqpower.eu.
The information in this manual is subject to change without prior notice.
© COPYRIGHT NOTICE
The copyright to this manual is owned by Velleman nv. All worldwide rights reserved. No part of this
manual may be copied, reproduced, translated or reduced to any electronic medium or otherwise without the
prior written consent of the copyright holder.

VDPLPS36BP
V. 05 – 06/09/2013 7 ©Velleman nv
GEBRUIKERSHANDLEIDING
1. Inleiding
Aan alle ingezetenen van de Europese Unie
Belangrijke milieu-informatie betreffende dit product
Dit symbool op het toestel of de verpakking geeft aan dat, als het na zijn levenscyclus wordt
weggeworpen, dit toestel schade kan toebrengen aan het milieu. Gooi dit toestel (en eventuele
batterijen) niet bij het gewone huishoudelijke afval; het moet bij een gespecialiseerd bedrijf
terechtkomen voor recyclage. U moet dit toestel naar uw verdeler of naar een lokaal recyclagepunt
brengen. Respecteer de plaatselijke milieuwetgeving.
Hebt u vragen, contacteer dan de plaatselijke autoriteiten betreffende de verwijdering.
Dank u voor uw aankoop! Lees deze handleiding grondig voor u het toestel in gebruik neemt. Werd het toestel
beschadigd tijdens het transport, installeer het dan niet en raadpleeg uw dealer.
2. Veiligheidsinstructies
Wees voorzichtig bij de installatie: raak geen kabels aan die onder stroom staan, om dodelijke
elektroshocks te vermijden.
Trek de stekker uit het stopcontact (trek niet aan de kabel!) voordat u het toestel reinigt en als
u het niet gebruikt. Houd de voedingskabel altijd vast bij de stekker en niet bij de kabel.
Gebruik het toestel enkel binnenshuis. Bescherm het toestel tegen regen, vochtigheid en
opspattende vloeistoffen. Plaats geen objecten gevuld met vloeistof op of naast het toestel.
Houd dit toestel buiten het bereik van kinderen en onbevoegden.
Opgelet: de behuizing wordt zeer warm tijdens gebruik.
Kijk niet rechtstreeks in de lichtbron, om het volgende te vermijden
•epilepsieaanvallen bij gevoelige personen
•tijdelijke blindheid (flitsblindheid)
•permanente (onherroepelijke) schade aan de ogen.
De gebruiker mag geen onderdelen vervangen. Voor onderhoud en/of reserveonderdelen,
contacteer uw dealer.
•De garantie geldt niet voor schade door het negeren van bepaalde richtlijnen in deze handleiding en uw
dealer zal de verantwoordelijkheid afwijzen voor defecten of problemen die hier rechtstreeks verband mee
houden.
•Laat dit toestel installeren en onderhouden door een geschoolde technicus.
•Het is beter om het toestel niet onmiddellijk in te schakelen nadat het werd blootgesteld aan
temperatuurschommelingen. Om beschadiging te vermijden, moet u wachten tot het toestel
kamertemperatuur heeft bereikt.
•Dit toestel valt onder beschermingsklasse I. Het toestel moet dus geaard zijn. Een geschoolde technicus
moet de elektrische aansluiting uitvoeren.
•De beschikbare netspanning mag niet hoger zijn dan de spanning in de specificaties achteraan de
handleiding.
•De voedingskabel mag niet beschadigd zijn of ingekort worden. Laat uw dealer zo nodig een nieuwe kabel
plaatsen.
•Trek de stekker uit het stopcontact voordat u het toestel reinigt of als u het niet gebruikt. Houd de
voedingskabel altijd vast bij de stekker en niet bij de kabel.
•Vervang filters en lenzen indien ze zichtbaar beschadigd zijn (bv. barsten, krassen) en niet meer gebruikt
kunnen worden.
•Kijk niet rechtstreeks in de lichtbron. De lichtbron kan bij gevoelige mensen leiden tot een aanval van
epilepsie.
•Schade door wijzigingen die de gebruiker heeft aangebracht aan het toestel valt niet onder de garantie.
•Houd dit toestel uit de buurt van kinderen en onbevoegden.

VDPLPS36BP
V. 05 – 06/09/2013 8 ©Velleman nv
3. Algemene richtlijnen
Raadpleeg de Velleman® service- en kwaliteitsgarantie achteraan deze handleiding.
•Dit toestel is ontworpen voor professioneel gebruik op podia, in disco's, enz. U mag dit toestel enkel
binnenshuis gebruiken en aansluiten op een wisselspanning van maximum 230VAC / 50Hz.
•Het toestel is niet ontworpen voor een continue werking: regelmatige onderbrekingen verlengen de
levensduur.
•Schud het toestel niet. Vermijd brute kracht tijdens de installatie of de bediening van het toestel.
•Installeer het toestel weg van extreme temperaturen (zie “Technische specificaties”), vocht en stof. Zorg
voor een minimumafstand van 0.5m tussen de lichtuitgang van het toestel en het belichte oppervlak.
•Maak het toestel vast met een geschikte veiligheidskabel (bvb. VDLSC8).
•Leer eerst de functies van het toestel kennen voor u het gaat gebruiken. Ongeschoolde personen mogen dit
toestel niet gebruiken. Meestal is beschadiging het gevolg van onprofessioneel gebruik van het toestel.
•Gebruik de oorspronkelijke verpakking wanneer u het toestel vervoert.
•Om veiligheidsredenen mag u geen wijzigingen aanbrengen aan het toestel.
4. Eigenschappen
•PAR36 met 76 leds
•DMX-gestuurd via 4 kanalen of standalonefunctie
•met beugel voor muurmontage
5. Omschrijving
Raadpleeg de afbeeldingen op pagina 2 van deze handleiding.
1
Voeding: 230VAC / 50Hz
4
Signaaluitgang: XLR aansluiting met de volgende
spot.
2
Zekering: 5 x 20mm F1A (order code:
FF1N)
5
Schakelaars DMX-adressen: standalone-functie
of DMX-instelling
3
Signaalingang: XLR aansluiting met een
DMX512 controlepaneel
6. Installatie
6.1 DMX-512 verbindingen
•Verbind een XLR-kabel met de XLR-uitgang van uw controller en de XLR-ingang van de VDPLPS36BP.
•U kunt verscheidene VDPLPS36BP's serieel verbinden.
•De verbindingskabel moet een beschermde kabel zijn met dubbele kern en met een XLR in- en
uitgangsaansluiting. Zie afbeelding:
Opgelet
Sluit de DMX-kabel van het laatste toestel af met een terminator.
Gebruik enkel een afgeschermde stereokabel en 3-pin XLR pluggen en aansuitingen om de controller en het
toestel of de toestellen onder elkaar aan te sluiten.
6.2 Bezetting van de XLR-aansluiting
•Een DMX-eindweerstand is aanbevolen als de DMX-kabel vrij lang is of wordt gebruikt in een omgeving met
veel elektrische ruis (bv. een discotheek).
•De eindweerstand voorkomt corruptie van het digitale controlesignaal door elektrische ruis.
•De DMX-eindweerstand is niets meer dan een XLR-stekker met een weerstand van 120 Ω van pin 2 naar 3.
Deze XLR-stekker wordt dan aangesloten op de XLR-uitgang van het laatste toestel in de reeks.
Zie afbeelding op p. 2.

VDPLPS36BP
V. 05 – 06/09/2013 9 ©Velleman nv
6.3 Startadres van de DMX-projector
•Alle DMX-gestuurde toestellen hebben een digitaal startadres nodig, zodat het juiste toestel reageert op de
signalen. Dit digitale startadres is het kanaalnummer van waarop het toestel "luistert" naar het signaal van
de DMX-controller. Geef het correcte nummer in en lees het af van de display onderaan uw toestel.
•U kunt één enkel startadres gebruiken voor een groep toestellen of u kunt per toestel een nieuw startadres
ingeven.
•Wanneer u een enkel startadres instelt, zullen alle toestellen "luisteren" naar hetzelfde kanaal. Met andere
woorden: wanneer u de instellingen voor 1 kanaal verandert, zullen alle toestellen er tegelijk op reageren.
Wanneer u verschillende adressen instelt, dan "luistert" elk toestel naar een ander kanaal. Wanneer u de
instellingen van een kanaal verandert, zal enkel het toestel op dat kanaal reageren.
•In het geval van de 4-kanaals VDPLPS36BP, stel het startadres van het eerste toestel in op 1, van het
tweede op 5 (1 + 4), van het derde toestel op 9 (5 + 4), enz
7. Gebruik
7.1 DMX-kanalen
Channel
Functie
Kanaal 1 Dimmer / Stroboscoop
Kanaal 2
Rood
Kanaal 3 Groen
Kanaal 4 Blauw
7.2 Standalone-functies (DIP-schakelaars)
DMX
DIP-schakelaar 10 in ON-positie
DMX is ingeschakeld
DIP-schakelaar 10 in OFF-positie interne programma's
Effecten
DIP-schakelaar 9 in ON-positie regenboog chase
3 – 8: snelheidsregeling
DIP-schakelaar 9 + 1 in ON-positie
stroboscoop traag
3 – 8: snelheidsregeling
DIP-schakelaar 9 + 1 + 2 in ON-positie
rood - blauwe chase
3 – 8: snelheid
Vaste kleuren
DIP-schakelaar 1 in ON-positie
dimmer 1 rood
DIP-schakelaar 2 in ON-positie dimmer 2 rood
DIP-schakelaar 3 in ON-positie rood
DIP-schakelaar 4 in ON-positie
dimmer 1 groen
DIP-schakelaar 5 in ON-positie
dimmer 2 groen
DIP-schakelaar 6 in ON-positie groen
DIP-schakelaar 7 in ON-positie
dimmer 2 blauw
DIP-schakelaar 8 in ON-positie blauw
Een combinatie van deze instellingen resulteert in een kleurmenging. Voorbeeld: 3 + 6 + 8 = wit
8. Reiniging en onderhoud
•Alle gebruikte schroeven moeten goed zijn aangespannen en mogen geen sporen van roest vertonen.
•De behuizing, de lenzen, de montagebeugels en de montageplaats (bv. het plafond of het gebinte) mogen
niet vervormd zijn of aangepast worden (geen extra gaten in montagebeugels boren, aansluitingen niet
verplaatsen, enz.).
•Mechanisch bewegende delen mogen geen sporen van slijtage vertonen en mogen niet onregelmatig
bewegen.

VDPLPS36BP
V. 05 – 06/09/2013 10 ©Velleman nv
•De voedingskabels mogen niet beschadigd zijn. Laat het toestel onderhouden door een geschoolde
technicus.
•Ontkoppel het toestel van het lichtnet voor u aan onderhoudswerkzaamheden begint.
•Maak het toestel geregeld schoon met een vochtige, niet pluizende doek. Gebruik geen alcohol of
oplosmiddelen.
•Er zijn geen door de gebruiker vervangbare onderdelen in dit toestel, behalve de lamp en de zekering (zie
“Installatie”).
•Bestel eventuele reserveonderdelen bij uw plaatselijke verdeler.
9. Technische specificaties
voeding
230 VAC / 50 Hz
verbruik 5 W
DMX
4 kanalen (rood, groen, blauw en dimmer/stroboscoop)
leds 40 x rood, 18 x groen, 18 x blauw
stralingshoek 30°
afmetingen
Ø 130 mm x 150 mm
gewicht 800 g
lichtstroom
270 lm @ 1m
Gebruik dit toestel enkel met originele accessoires. Velleman nv is niet aansprakelijk voor schade of
kwetsuren bij (verkeerd) gebruik van dit toestel.
Voor meer informatie over dit product en de laatste versie van deze handleiding, zie
www.hqpower.eu.
De informatie in deze handleiding kan te allen tijde worden gewijzigd zonder voorafgaande
kennisgeving.
© AUTEURSRECHT
Velleman nv heeft het auteursrecht voor deze handleiding. Alle wereldwijde rechten voorbehouden.
Het is niet toegestaan om deze handleiding of gedeelten ervan over te nemen, te kopiëren, te vertalen, te
bewerken en op te slaan op een elektronisch medium zonder voorafgaande schriftelijke toestemming van de
rechthebbende.

VDPLPS36BP
V. 05 – 06/09/2013 11 ©Velleman nv
MODE D'EMPLOI
1. Introduction
Aux résidents de l'Union européenne
Informations environnementales importantes concernant ce produit
Ce symbole sur l'appareil ou l'emballage indique que l’élimination d’un appareil en fin de vie peut
polluer l'environnement. Ne pas jeter un appareil électrique ou électronique (et des piles éventuelles)
parmi les déchets municipaux non sujets au tri sélectif ; une déchèterie traitera l’appareil en question.
Renvoyer les équipements usagés à votre fournisseur ou à un service de recyclage local. Il convient
de respecter la réglementation locale relative à la protection de l’environnement.
En cas de questions, contacter les autorités locales pour élimination.
Nous vous remercions de votre achat ! Lire attentivement le présent mode d'emploi avant la mise en service de
l'appareil. Si l’appareil a été endommagé pendant le transport, ne pas l’installer et consulter votre revendeur.
2. Consignes de sécurité
Être prudent lors de l'installation
: toucher un câble sous tension peut causer des électrochocs
mortels.
Toujours débrancher l’appareil s’il n’est pas utilisé et avant le nettoyage ou l'entretien. Tirer
sur la fiche pour débrancher l'appareil ; non pas sur le câble.
Utiliser cet appareil uniquement à l'intérieur. Protéger de la pluie, de l’humidité et des
projections d’eau. Ne jamais placer d’objet contenant un liquide sur l’appareil.
Garder l'appareil hors de la portée des enfants et des personnes non autorisées.
Attention : l'appareil chauffe pendant l’usage.
Ne pas regarder directement dans la source lumineuse, afin d'éviter les risques
•de crise d’épilepsie chez les personnes sujettes
•d’aveuglement temporaire (aveuglement par éclair)
•d’endommagement permanent (irréversible) de l’œil.
Il n’y a aucune pièce réparable par l’utilisateur dans l'appareil. Commander des pièces de
rechange éventuelles chez votre revendeur.
•La garantie ne s’applique pas aux dommages survenus en négligeant certaines directives de cette notice et
votre revendeur déclinera toute responsabilité pour les problèmes et les défauts qui en résultent.
•Confier l’installation et l’entretien à un technicien qualifié.
•Ne pas brancher immédiatement l’appareil après exposition à des variations de température. Afin d’éviter
des dommages, attendre jusqu’à ce que l’appareil ait atteint la température ambiante avant de l’utiliser.
•Cet appareil ressort à la classe de protection I. ce qui implique que l’appareil doit être mis à la terre. Un
technicien qualifié doit établir la connexion électrique.
•La tension réseau ne peut pas dépasser la tension mentionnée dans les spécifications à la fin de cette
notice.
•Le câble d’alimentation ne peut pas être replissé ou endommagé. Demander à votre revendeur de le
remplacer si nécessaire.
•Déconnecter l'appareil avant de le nettoyer ou lorsqu'il n'est pas utilisé. Tirer sur la fiche pour débrancher
l'appareil ; non pas sur le câble.
•Remplacez filtres et objectifs lorsqu’ils sont visiblement endommagés (p.ex. fissures, rayures) au point
qu’ils ne sont plus utilisables.
•Ne regardez pas directement la source lumineuse comme ceci peut entraîner des crises d'épilepsie chez
certains gens.
•Les dommages occasionnés par des modifications par le client ne tombent pas sous la garantie.
•Garder l'appareil hors de la portée des enfants et des personnes non autorisées.

VDPLPS36BP
V. 05 – 06/09/2013 12 ©Velleman nv
3. Directives générales
Se référer à la garantie de service et de qualité Velleman® en fin de notice.
•Cet appareil a été développé pour usage professionnel dans des discothèques, des théâtres, etc. Employez
cet appareil à l'intérieur et branchez-le à une source de courant CA de max. 230VCA / 50Hz.
•L'appareil ne convient pas un fonctionnement : des pauses régulières prolongeront la durée de vie.
•Éviter de secouer l'appareil. Eviter d'exercer une force excessive et traiter l'appareil avec circonspection
pendant l'installation ou l’opération.
•Choisissez un endroit où l’appareil est protégé contre la poussière, l’humidité, le soleil direct et des
températures extrêmes. Respecter une distance minimum de 0,5 m entre la sortie lumière de l’appareil et
la surface illuminée.
•Utiliser un câble de sécurité approprié pour fixer l'appareil (p. ex. VDLSC8).
•Se familiariser avec le fonctionnement avant l’emploi. Seules des personnes qualifiées sont autorisées à
utiliser cet appareil. La plupart des dégâts sont causés par un usage non professionnel de l'appareil.
•Transporter l’appareil dans son emballage originel.
•Il est interdit de modifier l'appareil pour des raisons de sécurité.
4. Caractéristiques
•PAR36 à 76 LED
•pilotage DMX sur 4 canaux ou fonction autonome
•avec support pour installation murale
5. Description
Se référer aux illustrations en page 2 de ce mode d'emploi.
1
Alimentation: 230 VCA / 50 Hz
4
Sortie du signal: connecteur XLR relié au
projecteur qui suit.
2
Fusible: 5 x 20mm F1A (réf.: FF1N)
5
Commutateurs des adresses DMX: Fonction
autonome ou configuration DMX.
3
Entrée du signal: connecteur XLR relié à
un panneau de contrôle DMX512
6. Installation
6.1 Connexions DMX-512
•Connectez la sortie XLR femelle 3 broches de votre contrôleur avec l’entrée XLR mâle 3 broches de votre
VDPLPS36BP à l’aide du câble XLR inclus.
•Plusieurs VDPLPS36BP peuvent être connectés en série.
•Utilisez un câble blindé à double fil conducteur avec des connecteurs XLR d’entrée et de sortie. Voir schéma
:
Attention
Terminez le câble DMX du dernier appareil avec une terminaison.
N’utilisez qu’un câble stéréo blindé, des fiches et des connecteurs XLR à 3 broches pour relier le contrôleur à
l’appareil ou pour relier un appareil à l’autre.
6.2 Occupation de la connexion XLR
•Une résistance de terminaison DMX est à recommander si le câble DMX doit couvrir une grande distance ou
s’il est utilisé dans un environnement avec beaucoup de bruit électrique (p. ex. une discothèque).
•La résistance de terminaison prévient la corruption du signal de contrôle numérique par le bruit électrique.
•La terminaison n’est rien d’autre qu’une fiche XLR munie d’une résistance de 120Ω de broche 2 vers broche
3
Voir illustration page 2.

VDPLPS36BP
V. 05 – 06/09/2013 13 ©Velleman nv
6.3 Adresse de départ du projecteur DMX
•Tous les appareils pilotés par un signal DMX demandent une adresse de départ DMX pour assurer que les
appareils corrects réagissent sur les signaux de contrôle. Cette adresse de départ numérique indique le
numéro de canal sur lequel l’appareil “écoute” le contrôleur DMX. Déterminez cette adresse avec les
interrupteurs DIP au bas de l’appareil.
•Vous avez le choix entre une seule adresse de départ pour toute une série d’appareils ou une adresse de
départ par appareil.
•Dans le cas d’une seule adresse, tous les appareils “écouteront” les mêmes signaux, sur un seul canal. En
d'autres termes : tous les appareils seront donc influencés en changeant les réglages d’un seul canal. Avec
des adresses de départ individuelles, chaque appareil “écoutera” son propre canal. Par conséquent, un
ajustement des réglages d’un canal n’influence que l'appareil sur ce canal.
•Dans le cas du VDPLPS36BP à 4 canaux, l’adresse de départ du premier appareil est 1. Le deuxième
appareil doit être 5 (4 + 1), le troisième 9 (5 + 4) etc.
7. Fonctionnement
7.1 canaux DMX
Channel
Fonction
Canal 1 Variateur / Stroboscope
Canal 2
Rouge
Canal 3 Vert
Canal 4 Bleu
7.2 Fonctions autonomes (interrupteurs DIP)
DMX
interrupteur DIP 10 en position ON DMX est activé
interrupteur DIP 10 en position OFF
programmes internes
Effets
interrupteur DIP 9 en position ON chase arc-en-ciel
3 – 8: réglage de la vitesse
interrupteur DIP 9 + 1 en position ON
stroboscope lent
3 – 8: réglage de la vitesse
interrupteur DIP 9 + 1 + 2 en position
ON
chase rouge - bleu
3 – 8: vitesse
Couleurs statiques
interrupteur DIP 1 en position ON
variateur 1 rouge
interrupteur DIP 2 en position ON variateur 2 rouge
interrupteur DIP 3 en position ON
rouge
interrupteur DIP 4 en position ON variateur 1 vert
interrupteur DIP 5 en position ON variateur 2 vert
interrupteur DIP 6 en position ON vert
interrupteur DIP 7 en position ON
variateur 2 bleu
interrupteur DIP 8 en position ON bleu
La combinaison de ces réglages donne un mélange de couleurs. Exemple : 3 + 6 + 8= blanc.
8. Nettoyage et entretien
•Serrer les écrous et les vis et vérifier qu’ils ne rouillent pas.
•Le boîtier, les lentilles, les supports de montage et la construction portante ne peuvent pas être déformés,
adaptés ou bricolés p. ex. ne pas forer des trous additionnels dans un support, ne pas déplacer les
connexions, etc.
•Les parties mécaniques mobiles ne peuvent pas être usées ou bouger de manière irrégulière.

VDPLPS36BP
V. 05 – 06/09/2013 14 ©Velleman nv
•Les câbles d'alimentation électriques ne peuvent pas être endommagés. Un technicien qualifié doit réviser
l’appareil.
•Débrancher l’appareil avant de le nettoyer.
•Essuyer régulièrement l’appareil avec un chiffon humide non pelucheux. Éviter l’usage d’alcool et de
solvants.
•Il n’y a pas de parties maintenables par l’utilisateur, sauf la lampe et le fusible (voir "Installation”).
•Commander des pièces de rechange éventuelles chez votre revendeur.
9. Spécifications techniques
alimentation
230 VCA 50/60 Hz
consommation 5 W
DMX
4 canaux (rouge, vert, bleu et graduateur/stroboscope)
LEDs
40 x rouge, 18 x vert, 18 x bleu
angle de rayonnement 30°
dimensions
Ø 130 mm x 150 mm
poids
800 g
flux lumineux 270 lm @ 1m
N’employer cet appareil qu’avec des accessoires d’origine. La SA Velleman ne peut, dans la mesure
conforme au droit applicable être tenue responsable des dommages ou lésions (directs ou indirects)
pouvant résulter de l’utilisation de cet appareil.
Pour plus d’information concernant cet article et la dernière version de cette notice, visiter notre
site web www.hqpower.eu.
Toutes les informations présentées dans cette notice peuvent être modifiées sans notification
préalable.
© DROITS D’AUTEUR
SA Velleman est l’ayant droit des droits d’auteur pour cette notice. Tous droits mondiaux réservés.
Toute reproduction, traduction, copie ou diffusion, intégrale ou partielle, du contenu de cette notice par quelque
procédé ou sur tout support électronique que ce soit est interdite sans l’accord préalable écrit de l’ayant droit.

VDPLPS36BP
V. 05 – 06/09/2013 15 ©Velleman nv
MANUAL DEL USUARIO
1. Introducción
A los ciudadanos de la Unión Europea
Importantes informaciones sobre el medio ambiente concerniente a este producto
Este símbolo en este aparato o el embalaje indica que, si tira las muestras inservibles, podrían dañar
el medio ambiente. No tire este aparato (ni las pilas, si las hubiera) en la basura doméstica; debe ir a
una empresa especializada en reciclaje. Devuelva este aparato a su distribuidor o a la unidad de
reciclaje local. Respete las leyes locales en relación con el medio ambiente.
Si tiene dudas, contacte con las autoridades locales para residuos.
¡Gracias por elegir HQPower™! Lea atentamente las instrucciones del manual antes de usar el aparato. Si ha
sufrido algún daño en el transporte no lo instale y póngase en contacto con su distribuidor.
2. Instrucciones de seguridad
Cuidado durante la instalación: puede sufrir una peligrosa descarga eléctrica al tocar un cable
conectado a la red eléctrica
Desconecte siempre el aparato de la red eléctrica si no va a usarlo durante un largo período de
tiempo y antes de su limpieza o mantenimiento. Tire siempre del enchufe para desconectar el
cable de red, nunca del propio cable.
Utilice el aparato sólo en interiores. No exponga este equipo a lluvia, humedad ni a ningún
tipo de salpicadura o goteo. Nunca ponga un objeto con líquido en el aparato.
Mantenga el aparato lejos del alcance de personas no capacitadas y niños.
Cuidado: el aparato se calienta durante el uso.
No mire directamente a la fuente de luz porque esto podría causar
•un ataque epiléptico en personas sensibles
•pérdida temporal de la vista (por deslumbramiento)
•daños irreversibles en los ojos.
El usuario no habrá de efectuar el mantenimiento de ninguna pieza. Contacte con su
distribuidor si necesita piezas de recambio.
•Los daños causados por descuido de las instrucciones de seguridad de este manual invalidarán su garantía
y su distribuidor no será responsable de ningún daño u otros problemas resultantes.
•La instalación y el mantenimiento deben ser realizados por un técnico cualificado.
•No conecte el aparato si ha estado expuesto a grandes cambios de temperatura. Espere hasta que el
aparato llegue a la temperatura ambiente.
•Este aparato pertenece a la clase de protección I. Por lo tanto, es esencial que el aparato esté puesto a
tierra. La conexión eléctrica debe llevarla a cabo un técnico cualificado.
•Asegúrese de que la tensión de red no sea mayor que la tensión indicada en las especificaciones.
•No aplaste el cable de alimentación y protéjalo contra posibles daños. Si es necesario, pida a su distribuidor
reemplazar el cable de alimentación.
•Desconecte siempre el aparato si no va a usarlo durante un largo período de tiempo o antes de limpiarlo.
Tire siempre del enchufe para desconectar el cable de red, nunca del propio cable.
•Reemplace los filtros y las ópticas si están dañados visiblemente (p.ej. grietas, rayas) y ya no es posible
utilizarlos.
•No mire directamente a la fuente de luz. Esto puede causar un ataque epiléptico.
•Los daños causados por modificaciones no autorizadas, no están cubiertos por la garantía.
•Mantenga el aparato lejos del alcance de personas no capacitadas y niños.
3. Normas generales
Véase la Garantía de servicio y calidad Velleman® al final de este manual del usuario.

VDPLPS36BP
V. 05 – 06/09/2013 16 ©Velleman nv
•Este aparato ha sido diseñado para uso profesional en una discoteca, un teatro, etc. El aparato sólo está
permitido para el uso en interiores con una fuente de corriente CA de máx. 230 VCA / 50 Hz.
•No ha sido diseñado para un uso ininterrumpido. Introduzca frecuentemente una pausa para prolongar la
vida del aparato.
•No agite el aparato. Evite usar excesiva fuerza durante la instalación y el uso.
•Seleccione un lugar de montaje donde el aparato no esté expuesto a polvo, humedad y calor extremo
(vease Especificaciones). Respete una distancia de mín. 0.5m entre la salida de luz y el área iluminada.
•Fije el aparato con un cable de seguridad adecuado (p.ej. VDLSC8).
•Familiarícese con el funcionamiento del aparato antes de utilizarlo. Sólo personas cualificadas pueden
manejar este aparato. La mayoría de los daños son causados por un uso inadecuado.
•Transporte el aparato en su embalaje original.
•Por razones de seguridad, las modificaciones no autorizadas del aparato están prohibidas.
4. Características
•PAR36 con 76 LEDs
•controlador DMX en 4 canales o función autónoma
•con soporte para el montaje mural
5. Descripción
Véase las figuras en la página 2 de este manual del usuario.
1
Alimentación: 230VAC / 50Hz
4
Salida de la señal: conector XLR conectado a un
proyector que sigue
2
Fusible: 5 x 20mm F1A (ref.: FF1N)
5
Conmutadores de las direcciones DMX: Función
autónoma o configuración DMX.
3
Entrada de la señal: conector XLR
conectado a un panel de control DMX512.
6. Instalación
6.1 Conexiones DMX-512
•Conecte la salida XLR hembra de 3 polos a la entrada XLR macho, 3 polos del VDPLPS36BP con el cable XLR
(incluido).
•Es posible conectar varios VDPLPS36BP en serie.
•Utilice un cable blindado de doble hilo conductor con conectores XLR de entrada y salida. Véase la figura:
Advertencia
Termine el cable DMX del último aparato con una terminación.
Utilice sólo el cable estéreo blindado, conexiones y conectores XLR de 3 polos para conectar el controlador al
aparato o para conectar un aparato al otro.
6.2 Ocupación de la conexión XLR
•Se recomienda una terminación si el cable DMX debe cubrir una gran distancia o si se usa en un medio
ambiente con mucho ruido eléctrico (ej. una discoteca).
•La terminación impide que el ruido eléctrico corrompa la señal de control numérico.
•La terminación DMX no es más que un conector XLR con una resistencia de 120Ω de polo 2 a polo 3. Este
conector XLR está conectado a la salida XLR del último aparato de la serie.
Vea las ilustraciones en la página 2.
6.3 Seleccionar la dirección inicial DMX
•Si se usa una señal DMX, cada aparato tiene su propia dirección inicial DMX para asegurar que los aparatos
reaccionen a las señales de control correctas. Esta dirección inicial digital es el primer canal en el cual el

VDPLPS36BP
V. 05 – 06/09/2013 17 ©Velleman nv
aparato reaccionará a las señales DMX del controlador DMX. Determine esta dirección con los interruptores
DIP de la parte trasero del aparato.
•Es posible elegir entre una sola direccióninicial para toda una serie de aparatos o una direccióninicial por
aparato.
•Con una sola dirección inicial para una serie de aparatos, todos los aparatos reaccionarán
sincronizadamente a la misma señal. Por lo tanto, cambiar los ajustes de un solo canal afecta a los ajustes
de todos los canales. Con varias direcciones iniciales, cada aparato reaccionará independientemente. Por lo
tanto, cambiar los ajustes de un solo canal sólo afecta al canal en cuestión.
•En el caso del VDPLPS36BP de 4 canales, la dirección inicial del primer aparato es 1. Introduzca 5 (4 + 1)
para el segundo aparato, introduzca 9 (5 + 4) para el tercer aparato, etc.
7. Funcionamiento
7.1 canales DMX
Canal
Función
Canal 1 Dimmer / Estroboscopio
Canal 2
Rojo
Canal 3 Verde
Canal 4
Azul
7.2 Funciones autónomas (interruptores DIP)
DMX
interruptor DIP 10 activado
DMX activado
interruptor DIP 10 desactivado
programos internos
Efectos
interruptor DIP 9 activado
chase arco iris
3 – 8: ajuste de la velocidad
interruptor DIP 9 + 1 activado
estroboscopio lento
3 – 8: ajuste de la velocidad
interruptor DIP 9 + 1 + 2 activado
chase rojo-azul
3 – 8: velocidad
Colores fijos
interruptor DIP 1 activado dim 1 rojo
interruptor DIP 2 activado dim 2 rojo
interruptor DIP 3 activado
rojo
interruptor DIP 4 activado dim 1 verde
interruptor DIP 5 activado
dim 2 verde
interruptor DIP 6 activado verde
interruptor DIP 7 activado dim 2 azul
interruptor DIP 8 activado
azul
La combinación de estos ajustes resulta en una mezcla de colores. Ejemplo: 3 + 6 + 8 = blanco.
8. Limpieza y mantenimiento
•Apriete bien las tuercas y los tornillos y verifique que no hay señales de oxidación.
•No modifique la caja, los soportes y las ópticas p.ej. no taladre agujeros adicionales en un soporte o no
modifique las conexiones, etc.
•Las partes móviles no pueden mostrar ningún rastro de desgaste y deben estar bien equilibradas.
•No dañe los cables de alimentación. El mantenimiento debe ser realizado por un técnico cualificado.
•Desconecte el aparato de toda fuente antes de limpiarlo.
•Limpie el aparato regularmente con un paño húmedo sin pelusas. No utilice alcohol ni disolventes.
•Sólo se pueden reemplazar las lámparas y los fusibles (véase "Instalación”).
•Contacte con su distribuidor si necesita piezas de recambio.

VDPLPS36BP
V. 05 – 06/09/2013 18 ©Velleman nv
9. Especificaciones
alimentación 230 VAC / 50 Hz
consumo
5 W
DMX (rojo, verde, azul y dimmer/estroboscopio)
LEDs
40 x rojo, 18 x verde, 18 x azul
ángulo del haz 30°
dimensiones Ø 130 mm x 150 mm
peso
800 g
flujo luminoso 270 lm @ 1m
Utilice este aparato sólo con los accesorios originales. Velleman NV no será responsable de daños ni
lesiones causados por un uso (indebido) de este aparato.
Para más información sobre este producto y la versión más reciente de este manual del usuario,
visite nuestra página www.hqpower.eu.
Se pueden modificar las especificaciones y el contenido de este manual sin previo aviso.
© DERECHOS DE AUTOR
Velleman NV dispone de los derechos de autor para este manual del usuario. Todos los derechos
mundiales reservados. Está estrictamente prohibido reproducir, traducir, copiar, editar y guardar este
manual del usuario o partes de ello sin previo permiso escrito del derecho habiente.

VDPLPS36BP
V. 05 – 06/09/2013 19 ©Velleman nv
BEDIENUNGSANLEITUNG
1. Einführung
An alle Einwohner der Europäischen Union
Wichtige Umweltinformationen über dieses Produkt
Dieses Symbol auf dem Produkt oder der Verpackung zeigt an, dass die Entsorgung dieses Produktes
nach seinem Lebenszyklus der Umwelt Schaden zufügen kann. Entsorgen Sie die Einheit (oder
verwendeten Batterien) nicht als unsortiertes Hausmüll; die Einheit oder verwendeten Batterien
müssen von einer spezialisierten Firma zwecks Recycling entsorgt werden. Diese Einheit muss an den
Händler oder ein örtliches Recycling-Unternehmen retourniert werden. Respektieren Sie die örtlichen
Umweltvorschriften.
Falls Zweifel bestehen, wenden Sie sich für Entsorgungsrichtlinien an Ihre örtliche Behörde.
Vielen Dank, dass Sie sich für HQPower™ entschieden haben! Lesen Sie diese Bedienungsanleitung vor
Inbetriebnahme sorgfältig durch. Überprüfen Sie, ob Transportschäden vorliegen. Sollte dies der Fall sein,
verwenden Sie das Gerät nicht und wenden Sie sich an Ihren Händler.
2. Sicherheitshinweise
Seien Sie während der Installation des Gerätes sehr vorsichtig: das Berühren von unter
Spannung stehenden Leitungen könnte zu lebensgefährlichen elektrischen Schlägen führen.
Trennen Sie das Gerät bei Nichtbenutzung und vor jeder Reinigung vom Netz. Fassen Sie dazu
den Netzstecker an der Grifffläche an und ziehen Sie nie an der Netzleitung.
Verwenden Sie das Gerät nur im Innenbereich. Schützen Sie das Gerät vor Regen und
Feuchte. Setzen Sie das Gerät keiner Flüssigkeit wie z.B. Tropf- oder Spritzwasser, aus. Stellen
Sie keine mit Flüssigkeit befüllten Gegenstände auf das Gerät.
Halten Sie Kinder und Unbefugte vom Gerät fern.
Achtung: Berühren Sie das Gehäuse während des Betriebs nicht, denn das Gehäuse heizt auf.
Blicken Sie nicht direkt in die Lichtquelle, um Folgendes zu vermeiden
•epileptische Anfälle bei empfindlichen Menschen
•kurzzeitige Sehstörungen (Blitze)
•permanente und unwiderrufliche Augenschäden
Es gibt keine zu wartenden Teile. Bestellen Sie eventuelle Ersatzteile bei Ihrem Fachhändler.
•Bei Schäden, die durch Nichtbeachtung der Bedienungsanleitung verursacht werden, erlischt der
Garantieanspruch. Für daraus resultierende Folgeschäden übernimmt der Hersteller keine Haftung.
•Lassen Sie dieses Gerät von einem Fachmann installieren und warten.
•Das Gerät bei Temperaturschwankungen nicht sofort einschalten. Schützen Sie das Gerät vor
Beschädigung, indem Sie es ausgeschaltet lassen bis es die Zimmertemperatur erreicht hat.
•Der Aufbau des Gerätes entspricht der Schutzklasse I. Gemäß den Vorschriften muss das Gerät geerdet
sein. Der elektrische Anschluss darf nur von einer Fachkraft durchgeführt werden.
•Vergewissern Sie sich, dass die anzuschließende Netzspannung nicht höher ist als die Netzspannung
beschrieben in dieser Bedienungsanleitung.
•Achten Sie darauf, dass die Netzleitung nicht gequetscht werden kann. Bei Beschädigungen soll eine
Fachkraft das Kabel ersetzen.
•Trennen Sie das Gerät bei Nichtbenutzung und vor jeder Reinigung vom Netz. Fassen Sie dazu den
Netzstecker an der Grifffläche an und ziehen Sie nie an der Netzleitung.
•Ersetzen Sie Filter und Objektive wenn diese sichtbar beschädigt sind (z.B. Risse, Kratzer) und nicht mehr
verwendet werden können.
•Blicken Sie niemals direkt in die Lichtquelle da bei empfindlichen Menschen epileptische Anfälle ausgelöst
werden können.
•Bei Schäden verursacht durch eigenmächtige Änderungen erlischt der Garantieanspruch.
•Halten Sie Kinder und Unbefugte vom Gerät fern.

VDPLPS36BP
V. 05 – 06/09/2013 20 ©Velleman nv
3. Allgemeine Richtlinien
Siehe Velleman® Service- und Qualitätsgarantie am Ende dieser Bedienungsanleitung.
•Dieses Gerät wurde für den professionellen Einsatz auf Bühnen, in Discotheken, Theatern, usw. entworfen.
Verwenden Sie das Gerät nur in Innenräumen und mit einer Wechselspannung von max. 230 VAC/50 Hz.
•Das Gerät eignet sich nicht für permanenten Betrieb: eine regelmäßige Pause verlängert die Lebensdauer.
•Vermeiden Sie Erschütterungen. Vermeiden Sie rohe Gewalt während der Installation und Bedienung des
Gerätes.
•Achten Sie bei der Wahl des Installationsortes darauf, dass das Gerät keinem Staub, keiner Feuchtigkeit
und extremen Temperaturen ausgesetzt wird (sehe Technische Daten). Beachten Sie eine minimale
Entfernung von 0,5 m zwischen der Lichtausbeute und irgendeiner beleuchteten Fläche.
•Sichern Sie die Montage mit einem geeigneten Sicherheitsfangseil (z.B. VDLSC8).
•Nehmen Sie das Gerät erst in Betrieb, nachdem Sie sich mit seinen Funktionen vertraut gemacht haben.
Lassen Sie das Gerät nicht von Personen bedienen, die sich nicht mit dem Gerät auskennen. Meist ist die
Beschädigung des Gerätes das Ergebnis von unfachmännischer Bedienung.
•Verwenden Sie die Originalverpackung, wenn das Gerät transportiert werden soll.
•Eigenmächtige Veränderungen sind aus Sicherheitsgründen verboten.
4. Eigenschaften
•PAR36 mit 76 LEDs
•DMX-gesteuert über 4 Kanäle oder Stand-Alone-Funktion
•mit Wandhalterung
5. Beschreibung
Siehe Abbildungen, Seite 2 dieser Bedienungsanleitung.
1 Stromversorgung: 230 VAC / 50 Hz 4
Signalausgang: XLR-Anschluss mit dem
folgenden Punktstrahler.
2
Sicherung: 5 x 20mm F1A
(Artikelnummer: FF1N)
5
Schalter DMX-Adressen: Standalone-Funktion
oder DMX-Einstellung.
3
Signaleingang: XLR-Anschluss mit einem
DMX512-Bedienfeld.
6. Installation
6.1 DMX-512-Anschlüsse
•Verbinden Sie ein XLR-Kabel mit dem XLR-Ausgang Ihres Steuergerätes und dem XLR-Eingang des
VDPLPS36BP.
•Sie können verschiedene VDPLPS36BPs seriell verbinden.
•Das Verbindungskabel muss ein geschütztes Kabel mit einem doppelten Kern und mit einem XLR Ein- und
Ausganganschluss sein. Siehe Abbildung:
Achtung
Schließen Sie das DMX-Kabel des letzten Gerätes mit einem Abschlusswiderstand ab.
Verwenden Sie nur ein abgeschirmtes Stereokabel und 3-polige XLR-Anschlüsse um das Steuergerät und das
Gerät oder die Geräte miteinander zu verbinden.
6.2 Belegung des XLR-Anschlusses
•Ein DMX-Abschlusswiderstand ist empfehlenswert für Installationen, bei denen das DMX-Kabel lang ist oder
in einer Umgebung mit vielem elektrischem Rauschen (z.B. Discos).
•Der Abschlusswiderstand verhindert Störung des digitalen Steuersignals durch elektrisches Rauschen.
Other manuals for VDPLPS36BP
2
Table of contents
Languages:
Other HQ Power Spotlight manuals
Popular Spotlight manuals by other brands

Stoane Lighting
Stoane Lighting ZTA.50 Installation and maintenance instructions

HP LIGHT SYSTEM
HP LIGHT SYSTEM 55300 instruction manual

Black & Decker
Black & Decker 1 user manual

brennenstuhl
brennenstuhl LED spotlight Premium City SV5405 PIR IP44 Installation and operating instructions

EuroLite
EuroLite Sky Beam user manual

Stocker
Stocker Solarjet 0500 instruction manual