Web Operations/Web 操作
Logging In to the Web Client/ 登录 Web 客户端
1
2
3
1
2
3
Open Internet Explorer, enter an IPC IP address,IP address can be set automatically via DHCP, or a static
IP address can be set manually (192.168.0.120 by default) and press Enter.
在Internet Explorer地址栏里输入摄像机的IP地址,IP地址默认通过DHCP自动获取,也可以手动进行设置(默认为
192.168.0.120),按“Enter”键。
Enter the user name and password. The default user name and password are admin and HuaWei123
respectively.
输入用户名和密码。默认用户名为管理员用户“admin”,默认密码为“HuaWei123”。
Click Login.
单击“登录”。
• Supported browsers: Internet Explorer 8-11, Google Chrome 32 and later versions, and Mozilla Firefox 35-
51. Google Chrome 45 and later versions require installation of Internet Explorer Tab plug-in.
支持的浏览器:Internet Explorer 8~11、Google Chrome 32及以上版本、Mozilla Firefox 35-51版本。其中
Google Chrome 45及以上版本需安装Internet Explorer Tab插件。
• For security reasons, change the password after logging in to the system as the admin user for the first time.
首次使用admin用户登录时,请务必修改密码,以免造成安全隐患。
• When using HTTPS to access a camera, you must enable TLS 1.1 or TLS 1.2. Otherwise, the camera web page
cannot be displayed.
使用HTTPS协议访问摄像机时需要启用TLS 1.1或TLS 1.2,否则无法打开摄像机web页面。
• Please open the web browser on your PC as the administrator.
请使用PC的管理员身份打开浏览器。
NOTE/ 说明
Log in to the web client as the administrator.
以管理员用户登录 Web 客户端。
Choose Settings > Network > Platform Connection.
选择“高级配置 > 网络 > 平台对接参数”。
Set the platform connection parameters as planned.
根据规划的数据配置平台对接参数。
For detail about how to set platform connection parameters, see Configuration Guide.
平台对接参数的具体配置方式请参见《配置指南》。
Setting Platform Connection Parameters/ 配置平台对接参数
Setting Basic Network Parameters/ 配置基本网络参数
Log in to the web client as the administrator.
以管理员用户登录 Web 客户端。
Choose Settings > Network.
选择“高级配置 > 网络”。
Set the network parameters as planned.
根据规划的数据配置基本网络参数。
For detail about how to set basic network parameters, see Configuration Guide.
基本网络参数的具体配置方式请参见《配置指南》。
1
2
3
The default coding protocol of IPCs is H.265. Verify that the connected surveillance platform supports
H.265. Otherwise, see the Conguration Guide to modify the coding protocol of IPCs.
摄像机出厂默认编码协议为H.265,请务必确认所对接的监控平台是否支持H.265编码协议,否则请参见《配置指
南》修改摄像机编码协议。
NOTE/ 说明
Adjusting the Lens/ 调整镜头
After the installation is complete, access the web page to initialize the lens and focus the camera. In the
PTZ control area, click to initialize the lens.
安装完成后,登录Web页面,需要做镜头初始化和聚焦。在预览页面右边栏的PTZ选项中,点击 按钮完成镜头
初始化。
After the lens initialization, click to focus the camera in one push.
初始化完成后,点击 按钮完成一键聚焦。
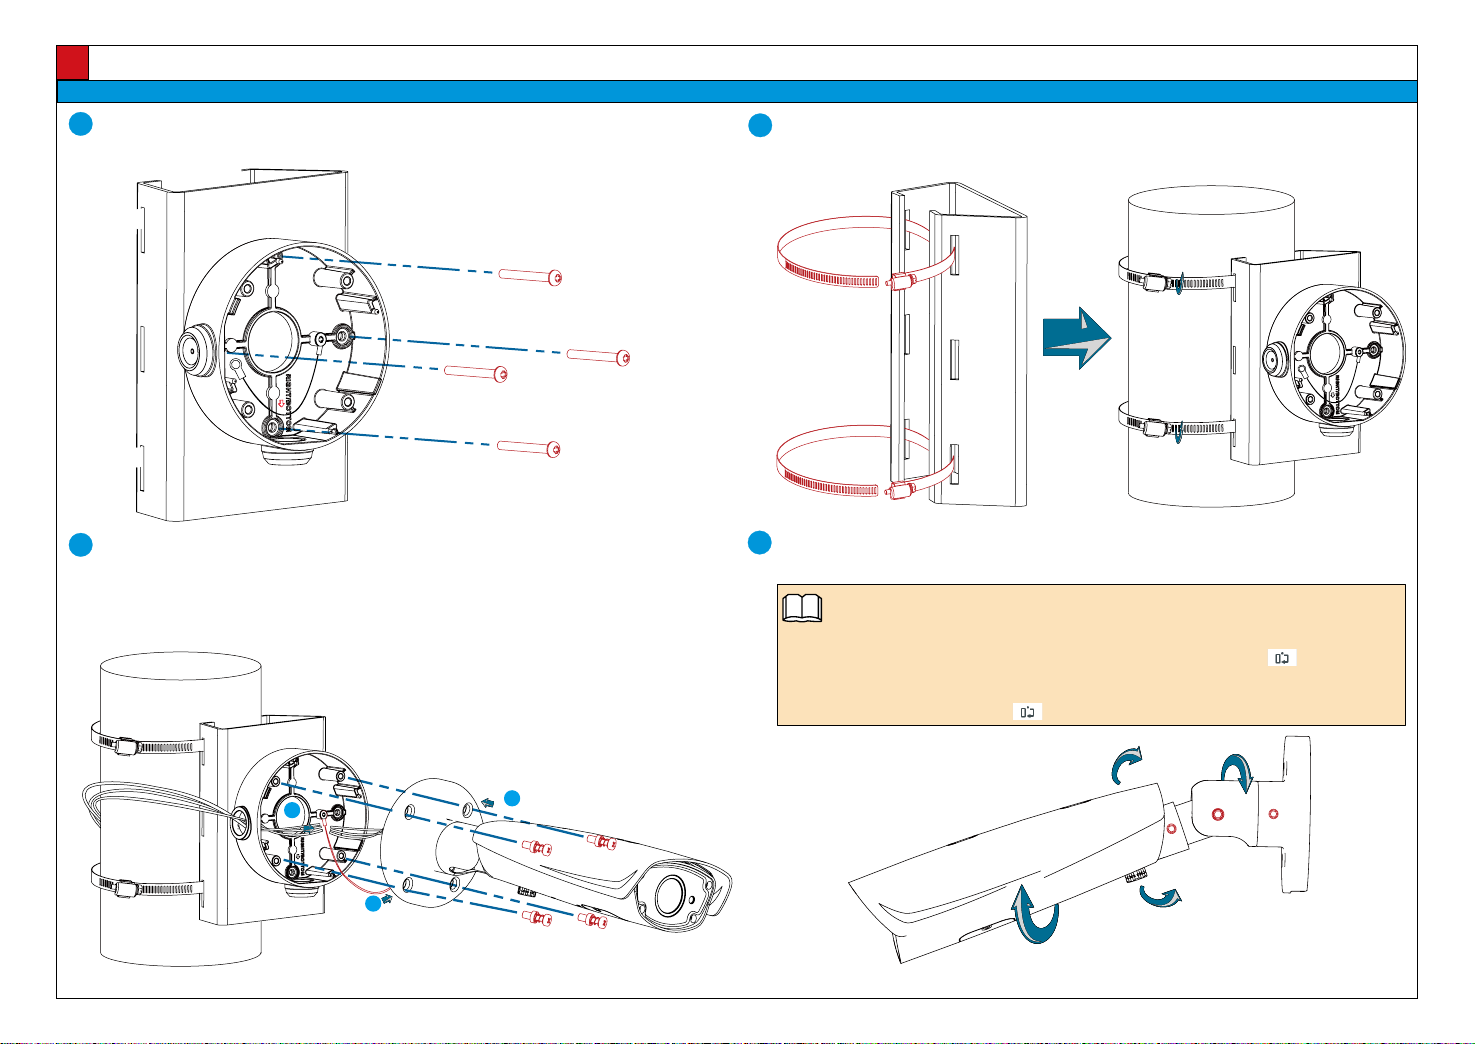
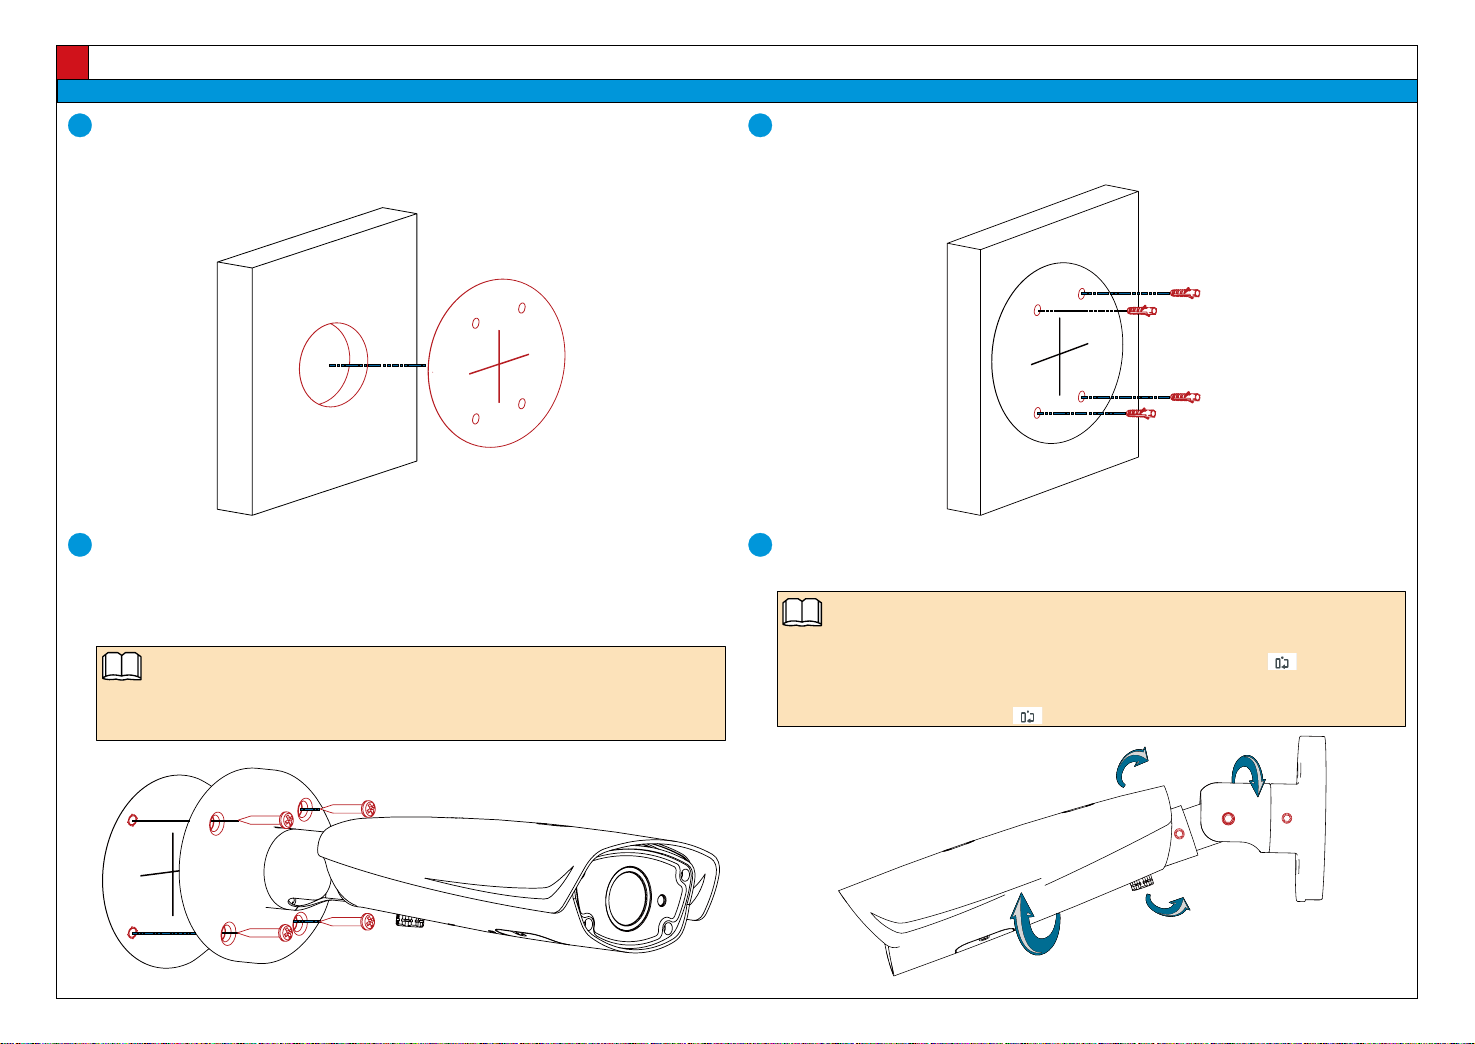
1
2
Install the Device/ 设备安装
Parameter
参数名
Description
参数解释
Platform IP
平台IP
IP address of the platform server. This parameter is mandatory.
监控平台所在服务器的IP地址。必须设置。
Port number
端口号
Port number of the platform server. This patameter is mandatory.
监控平台所在服务器的端口号。必须设置。
Device ID
设备ID
Unique ID that the video surveillance platform allocates to the camera. The value of this parameter
must be the same as the first 20 digits in the device ID (the value of Code on the IVS platform)
configured on the video surveillance platform. If they are different, the camera will fail to connect
the video surveillance platform.
监控平台分配给前端设备的唯一标识。必须与平台配置的设备ID(在IVS平台中,该参数名为编码)的前20位保
持一致,以免造成对接失败。
Login name
登录名
User name used to register the camera with the video surveillance platform. The value of this
parameter is in the login name@domain name format. The login name indicates the device ID. The
domain name consists of 10 digits.
用于注册到监控平台。格式为:登录名@域名。登录名为设备ID,域名为自定义10位数字。
Password
密码
Password used to register the camera with the video surveillance platform. The value of this parameter
must be the same as the registration password configured on the video surveillance platform.
设备注册到平台时的注册密码。必须和监控平台中的注册密码保持一致。
Server code
服务器编码
GB/T 28181 server code that consists of 20 self-defined digits.
GB/T 28181服务器编码。自定义输入20位数字。
Parameter
参数名
Description
参数解释
IP address
assignment
method
获取IP方式
• Automatic: The system automatically configures the IP address, subnet mask, gateway IP address,
and DNS.
自动获取IP地址:系统将自动配置IP地址、子网掩码、网关地址和DNS。
• Manual: You need to manually set the IP address, subnet mask, gateway IP address, and DNS.
使用下面的IP地址:需要用户手动配置IP地址、子网掩码、网关地址和DNS。
IP address
IP地址
• IP addresses starting with 127 are not valid. You must enter an IP address starting with another
value from 1 to 223.
以127开头的IP地址无效,请输入介于1和223之间的其它数值。
• If the camera is passively registered with the platform using the ONVIF, GENETEC or SDK, only the IP
address needs to be configured.
通过ONVIF、GENETEC和SDK被动注册时,仅需要配置IP地址即可。
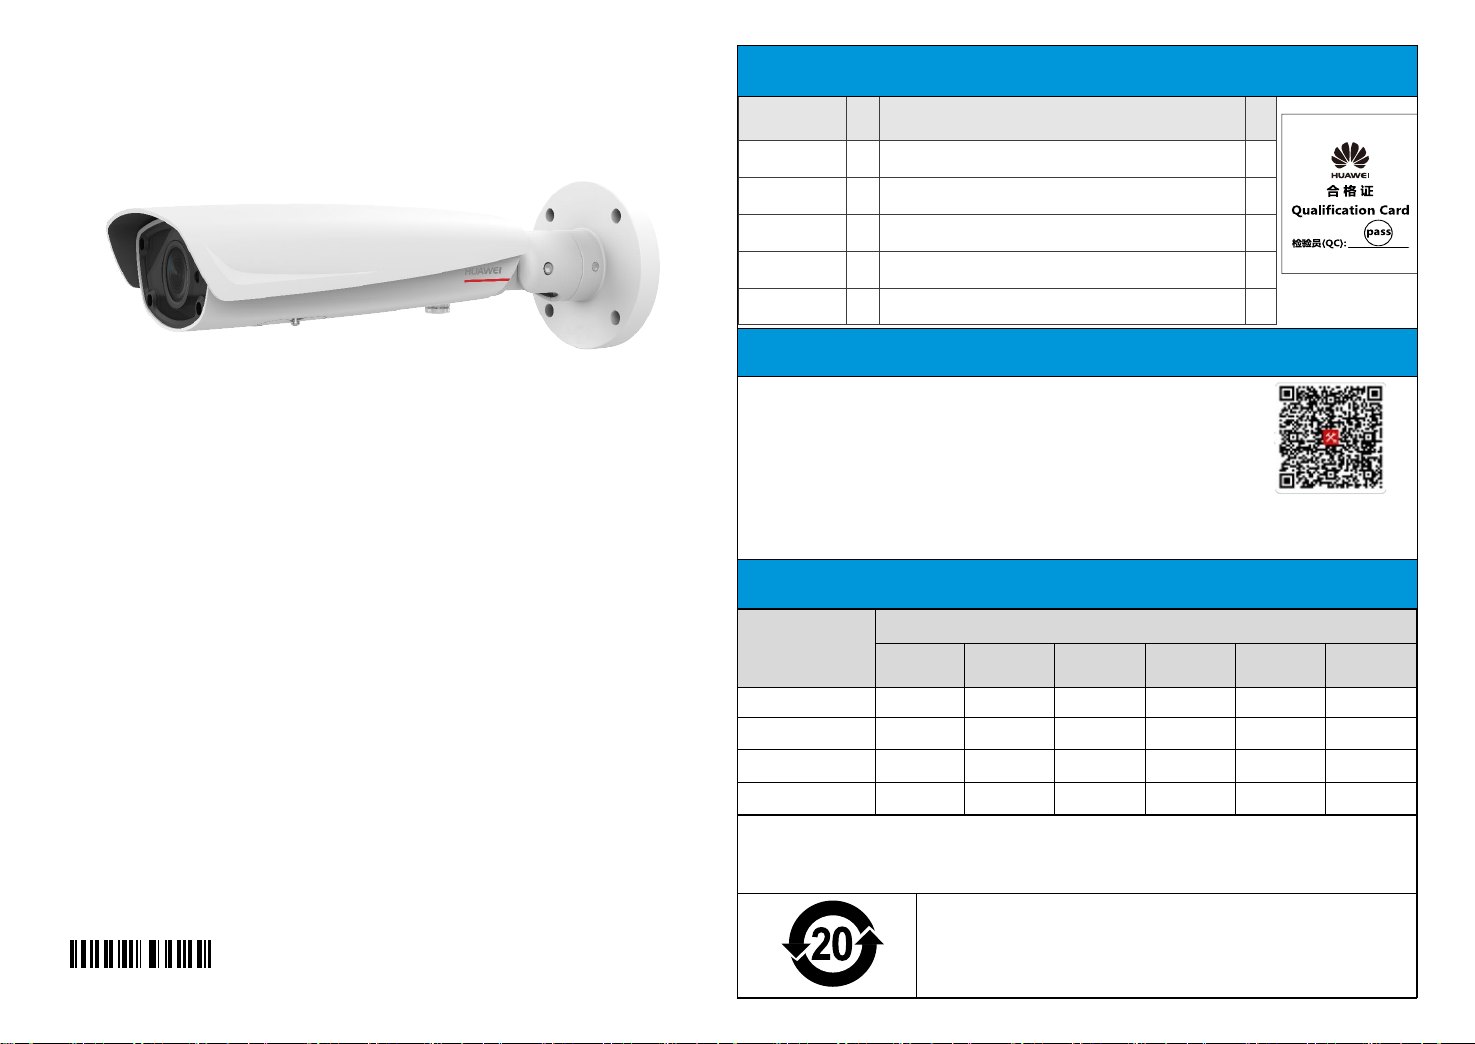
IP address/IP 地址
Data Plan/ 数据规划
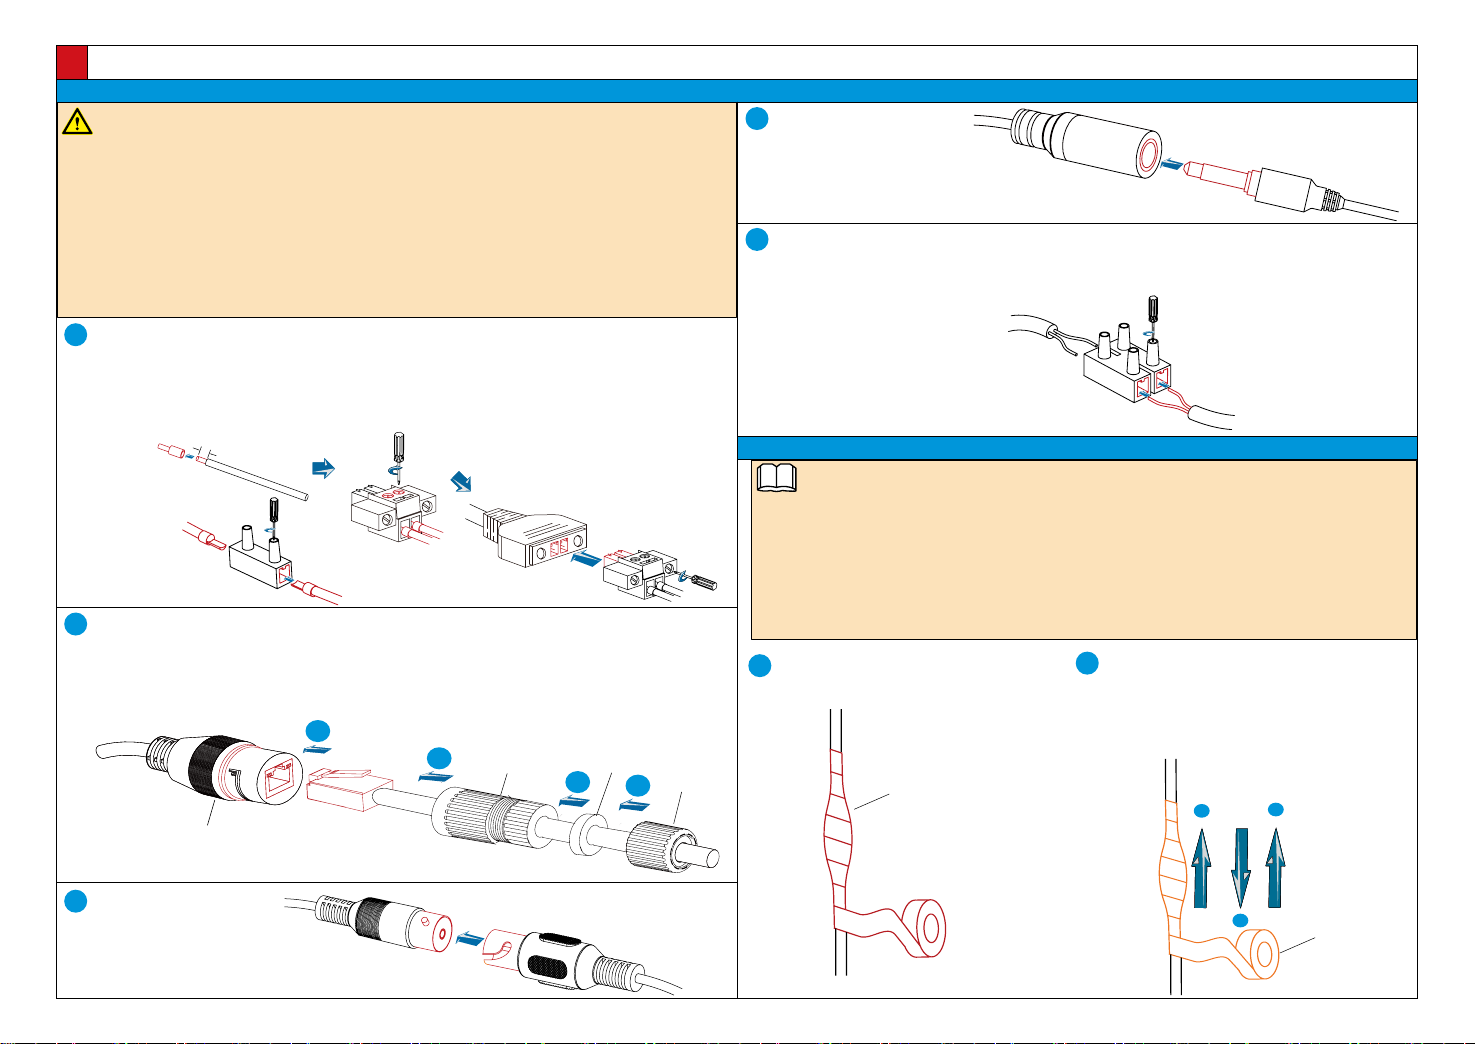
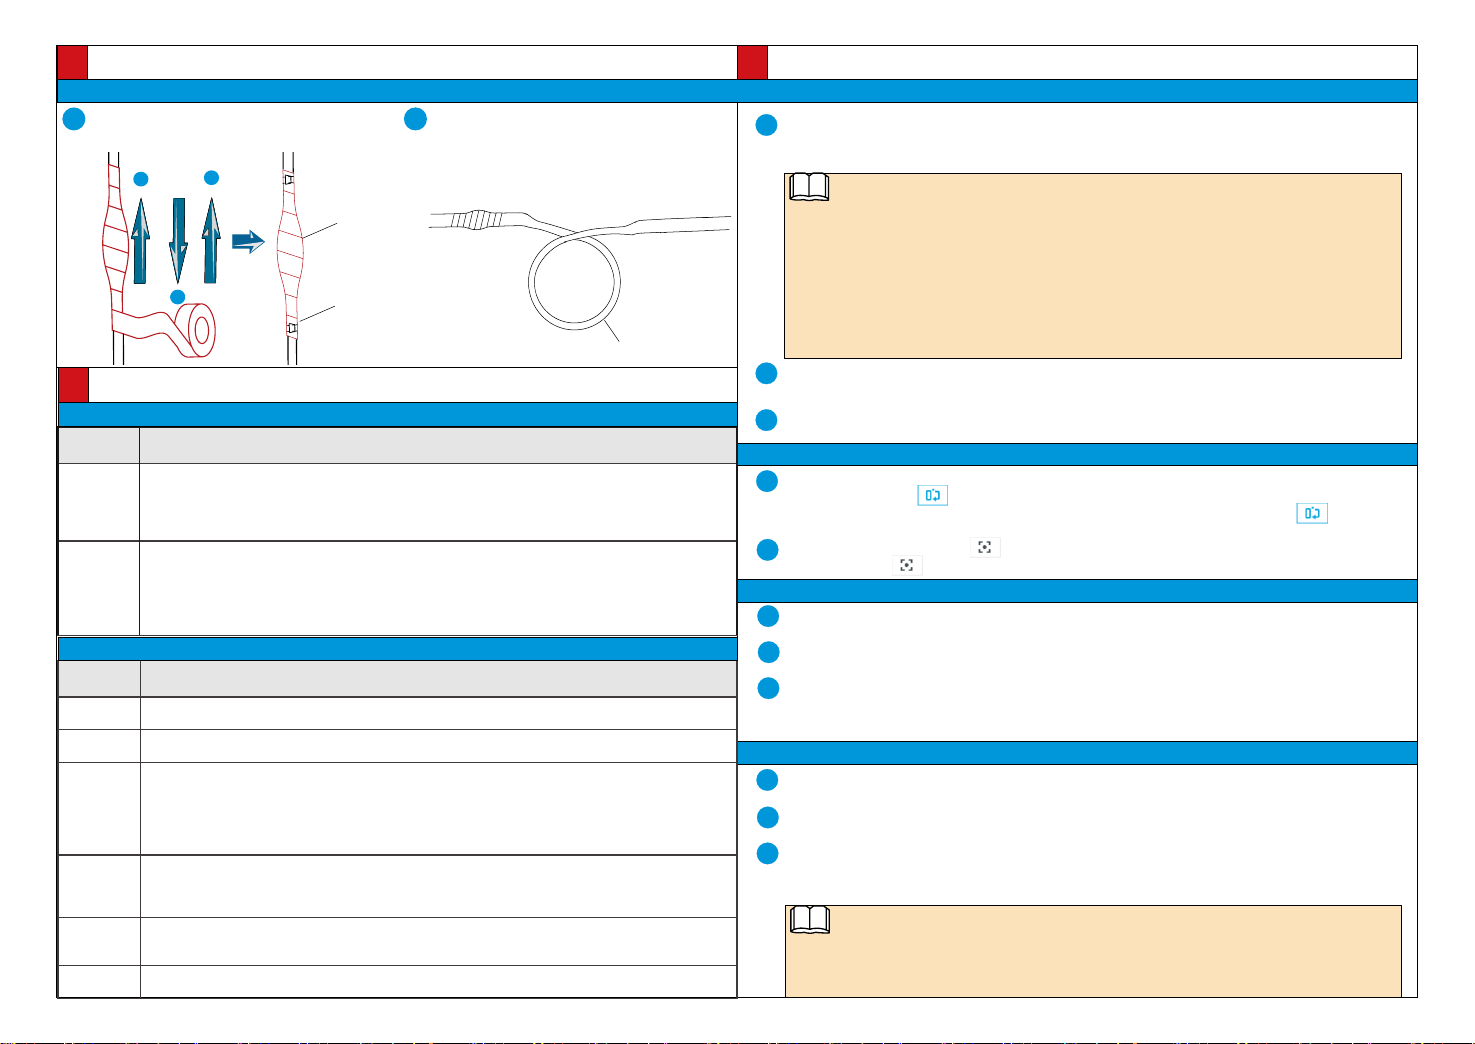
F Waterproofing and Insulation/ 防水绝缘处理
Apply three layers of insulation tape. Then, use
cable ties to secure the both ends.
用绝缘胶带缠绕三层。最后用扎线带绑扎上下两端。
Cover the rest of the cabling in a conduit or with
protective waterproof rubber tape. Make a drip loop
as shown below to create an artificial lowest point of
the cable.
使用防护皮管或者防水胶带,包住线缆其他部分,并制作
滴水弯。滴水弯呈倒 Ω 型,形成线缆的最低点。
Insulation tape
绝缘胶带
Cable tie
扎线带
Drip loop
滴水弯
34
GB/T 28181