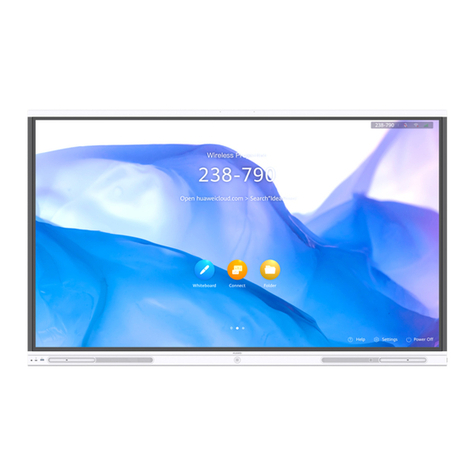
Huawei IdeaHub Board Edu Series User manual

Contents
User Guide
Describes OPS common settings and how to use the OPS.
Easily master skills of using the OPS
01 OPS Network Configuration
03 Software Installation
02 Basic Configuration
Download via a Browser
Download via a USB Flash Drive
04 Content Sharing
Content Sharing Using a USB Flash Drive
PC Projection in Wired Mode
05 Application Annotation
09 FAQs
06 Writing on the Whiteboard
07 External Devices
08 Mode Switching
Connecting External Devices to the OPS
Connecting External Devices to the Large Screen

OPS Network Configuration 01 OPS Network Configuration
01
The OPS supports wired and wireless network connection modes.
OPS and Large Screen Share the Wired Network
Connection over a Cable
When the OPS and large screen share a wired network, the OPS, without
connecting to a network cable, can directly use the wired network of the large
screen. If the OPS and the large screen are on different networks, the OPS must be
connected to a network cable.
You do not need to connect a network cable to the OPS. You only need to set
network parameters to connect the OPS to the network of the large screen.
If a DHCP server has been configured on the network, the OPS automatically
obtains a dynamic IP address after being inserted into the large screen. No other
configuration is required.
If no DHCP server is configured on the network, you need to manually configure
the static IP address and default gateway address of the OPS-WAN NIC. If a DNS
server is deployed on the network, configure the DNS server address.
For details about how to configure the DNS server address, see the
OPS User's
Manual
delivered with the product.
Note
OPS and Large Screen Use Different Networks
An independent network cable needs to be inserted into the OPS and network
parameters need to be configured.
If a DHCP server has been configured on the network, the OPS automatically
obtains a dynamic IP address after the network cable is properly connected. No
other configuration is required.
If no DHCP server is configured on the network, you need to manually configure
the static IP address and default gateway address of the OPS-WAN NIC. If a DNS
server is deployed on the network, configure the DNS server address.
Connection Using a Wireless Network
The wireless networks of the OPS and large screen cannot be shared. If wireless
access is used, configure the wireless networks of the OPS and large screen
separately.
The OPS is pre-installed with the Windows 10 Enterprise LTSC or IoT operating
system before delivery. After the OPS is installed, the Windows operating system
is automatically activated after being powered on and connected to the
network.
If the OPS Windows operating system is not activated due to a network
exception or network verification failure, tap and choose Settings > Update
and security > Activate.
If a message such as "we can't activate Windows on this device..." is displayed
during the activation of the OPS Windows operating system, tap
troubleshooting to try again when the network is connected. The OS will
automatically be activated based on the preset key.
Note

02 Software Installation
03 03 Software Installation
Configure how to invoke the soft keyboard.
Basic Configuration
On the Windows interface, you can search for and download the software
using a browser or insert a USB flash drive to install the software.
In the lower left corner of the Windows interface, tap , choose Settings >
Device >Input >Touch keyboard, and enable Show the touch keyboard when
not in tablet mode and there's no keyboard attached toggle.
Using the Soft Keyboard
On the Windows interface, open the browser, search for the software name, and
download and install the software.
Download via a Browser
Before downloading the software, ensure that the device is connected to the
Internet.
Note
Download via a USB Flash Drive
1Insert a USB device, for example, a USB flash drive, in the lower left corner of
the large screen.
2Open This PC,open the downloaded installation package in the USB flash
drive, copy the package to the Windows disk, and install the software.

Content Sharing 04 Content Sharing
04
On the Windows interface, two methods can be used to share content: insert
a USB device in the lower left corner of the large screen; use an HDMI cable
to connect to the large screen.
PC Projection in Wired Mode
Use an HDMI cable to connect the computer to the large screen, and project the
content from the computer to the large screen. The functions of the two HDMI
ports in the figure are the same. You can select either of them for connection.
1
2
Type-B-to-Type-A cable
HDMI cable
HDMI
Insert a USB device, for example, a USB flash drive, in the lower left corner of
the large screen.
Open This PC and open the file in the USB flash drive to share it.
Content Sharing Using a USB Flash Drive
You can use a USB Type-B-to-USB Type-A cable to connect to the large screen
and reversely control the computer desktop. For example, you can perform
clicking, dragging, or double-clicking operations.
Note

05 Writing on the Whiteboard
06 06 Writing on the Whiteboard
On the Windows interface, you can open an application, add annotations to
the key content on the application page, and save and take away the
annotations.
Application Annotation
The Android mode supports the native whiteboard application. You can
create a whiteboard or open a historical whiteboard by scanning the QR code
or locally.
After adding annotations, you can tap Save or Finish to save the annotations
on the current page.
2
Open an application and tap Annotation on the Toolbar at the bottom of the
large screen to add annotations.
1
Tap on the home screen to access the whiteboard.
•Tap Finish. The annotated page is saved only in Pages. You need
to tap Save again.
•Tap Save. Select a save mode to save the page or take it away.
Press the HOME button on the large screen to access the Android home screen.
2
1
The following operations are supported:
•Creating a whiteboard
•Opening a historical whiteboard
•Setting the background color of the whiteboard
•Writing with stroke effects
•Co-authoring
•Clearing all by one click

External Devices 07 External Devices
07
In the Windows operating system, external devices can be connected in the
following ways: 1. Connect external microphones, speakers, and cameras to
the OPS. 2. Connect external microphones, speakers, and cameras to the
large screen.
The OPS can connect to an external microphone (such as the echo suppression
pickup OS-8130D of ELITE-AUDIO). The microphone is connected to the MIC-IN
port of the OPS, which is plug-and-play.
You can simply connect an external speaker to the LINE-OUT port of the OPS for
plug-and-play experience.
Connecting External Devices to the OPS
Echo occurs when the external microphone is used with the built-in speaker of
the large screen. It is recommended that the external microphone and speaker
be used at the same time.
Note
External Microphone
External Speaker
You can simply connect an external camera (for example, Camera 200 Cloud) to the
USB 3.0 port of the OPS for plug-and-play experience.
External Camera
Connecting External Devices to the Large Screen
The USB port and audio and video ports of the large screen can connect to external
audio and video devices in both Android and Windows modes. The following table
lists the capabilities and methods of connecting external devices to a large-screen
port in Windows:
Port
Suppo
rted
or Not
Configuration Mode Remarks
USB Yes
Disable Automatic
Switchover for USB
Port and set Mode
to Windows mode.
•In Android mode, choose Settings
>Advanced >USB Port >Mode
and select Windows mode.
•The USB port of the large screen
supports external USB audio and
video input and audio output.
VIDEO
INPUT Yes N/A
Presentation input port, which can be
connected to a device such as a computer
but cannot be connected to an external
camera.
When an external USB device (keyboard or mouse) is connected to the large
screen, set USB Port to Automatic Switchover. After the configuration, the USB
port mode automatically switches with the current system and the USB device is
automatically re-connected. Configuration method: Choose Settings > Advanced
> USB Port > Automatic Switchover in the lower right corner of the home
screen.
Note

Method 1: Press the HOME button to access
the Android home screen.
Method 2: Tap the home screen icon to
access the Android home screen.
Switching Mode 08 Mode Switching
08
The large screen supports Android mode and Windows mode. You can access
the Windows interface in both modes. The Windows app screen in Android
mode is displayed on the large screen by default.
Android Mode
There are two methods to access the Android home screen from the Windows
app interface.
Method 1: Press the HOME button of the large screen to access the Android
home screen.
Method 2: Choose > to access the Android home screen.
Note
In Android mode, the native projection and whiteboard applications are supported.
After the large-screen startup configuration is complete as prompted by the wizard,
the Windows app screen in Android mode is displayed by default after the large
screen is initialized or restarted.
You can return to the Windows app interface from the home screen in either of
the following ways:
Method 1: Tap in the lower left corner of the home screen to access
Windows applications.
Method 2: Tap on both sides of the device, and then tap to access
Windows applications.
In Windows mode, the large screen works in the same way as a computer. In this
case, you can access the Windows operating system directly. After the large screen
is set to the Windows mode, the system enters the Windows mode by default when
the large screen is started or restarted.
To switch to the Windows mode in Android mode, choose Settings > Advanced >
Switch to Windows in the lower right corner of the home screen, tap , and
tap OK.
Windows Mode
Note
In Windows mode, you can swipe from the left edge of the screen to the right
to display the settings page. Tap Advanced and then tap Switch to Android. It
also supports brightness and sound adjustment, intelligent tracking mode
switching, power-off, and restart.

FAQs 09 FAQs
09
1. What Can I Do If There Is Obvious
Communication Delay on the Large Screen As the
Receive End?
The delay may be caused by the network jitter. To solve the problem, choose We
Monitor as your output device on the large screen.
In Windows mode, tap and hold the speaker icon in the lower right corner of the
screen, and choose Open Sound settings >Sound >We Monitor.
Press the POWER BUTTON button on the OPS to shut down the OPS.
1
2. How Do I Restore the OPS to Factory Settings?
The OPS module supports factory setting restoration by pressing the RECOVER
button.
Press and hold the RECOVER button on the OPS, and then press the POWER
BUTTON button on the OPS. Release the RECOVER button when the Ghost
screen is displayed. Then the system starts resetting.
2
Table of contents
Other Huawei Monitor manuals

Huawei
Huawei IdeaHub Board Edu User manual

Huawei
Huawei SSNB-24 User manual

Huawei
Huawei SSN-CBA User manual

Huawei
Huawei HSN-CAA User manual

Huawei
Huawei ZQE-CAA User manual

Huawei
Huawei XWU-CAA User manual

Huawei
Huawei SSN-24BZ User manual

Huawei
Huawei AD80HW User manual

Huawei
Huawei MateView SSN-CAA User manual

Huawei
Huawei Display 23.8 User manual

Huawei
Huawei Huawei MateView GT User manual

Huawei
Huawei AD80HW User manual

Huawei
Huawei SSN-24 User manual

Huawei
Huawei AD80 User manual

Huawei
Huawei SSN-24 User manual

Huawei
Huawei Huawei MateView GT User manual

Huawei
Huawei HSN-CAA/HSN-CBA User manual

Huawei
Huawei XWU-CBA User manual

Huawei
Huawei AD80HW User manual