HUBBELL LIGHTING KIM LIGHTING WARP9 WP9L User manual
Other HUBBELL LIGHTING Outdoor Light manuals

HUBBELL LIGHTING
HUBBELL LIGHTING Kim Lighting B30-LED Series User manual

HUBBELL LIGHTING
HUBBELL LIGHTING KIM LIGHTING VRB1 User manual

HUBBELL LIGHTING
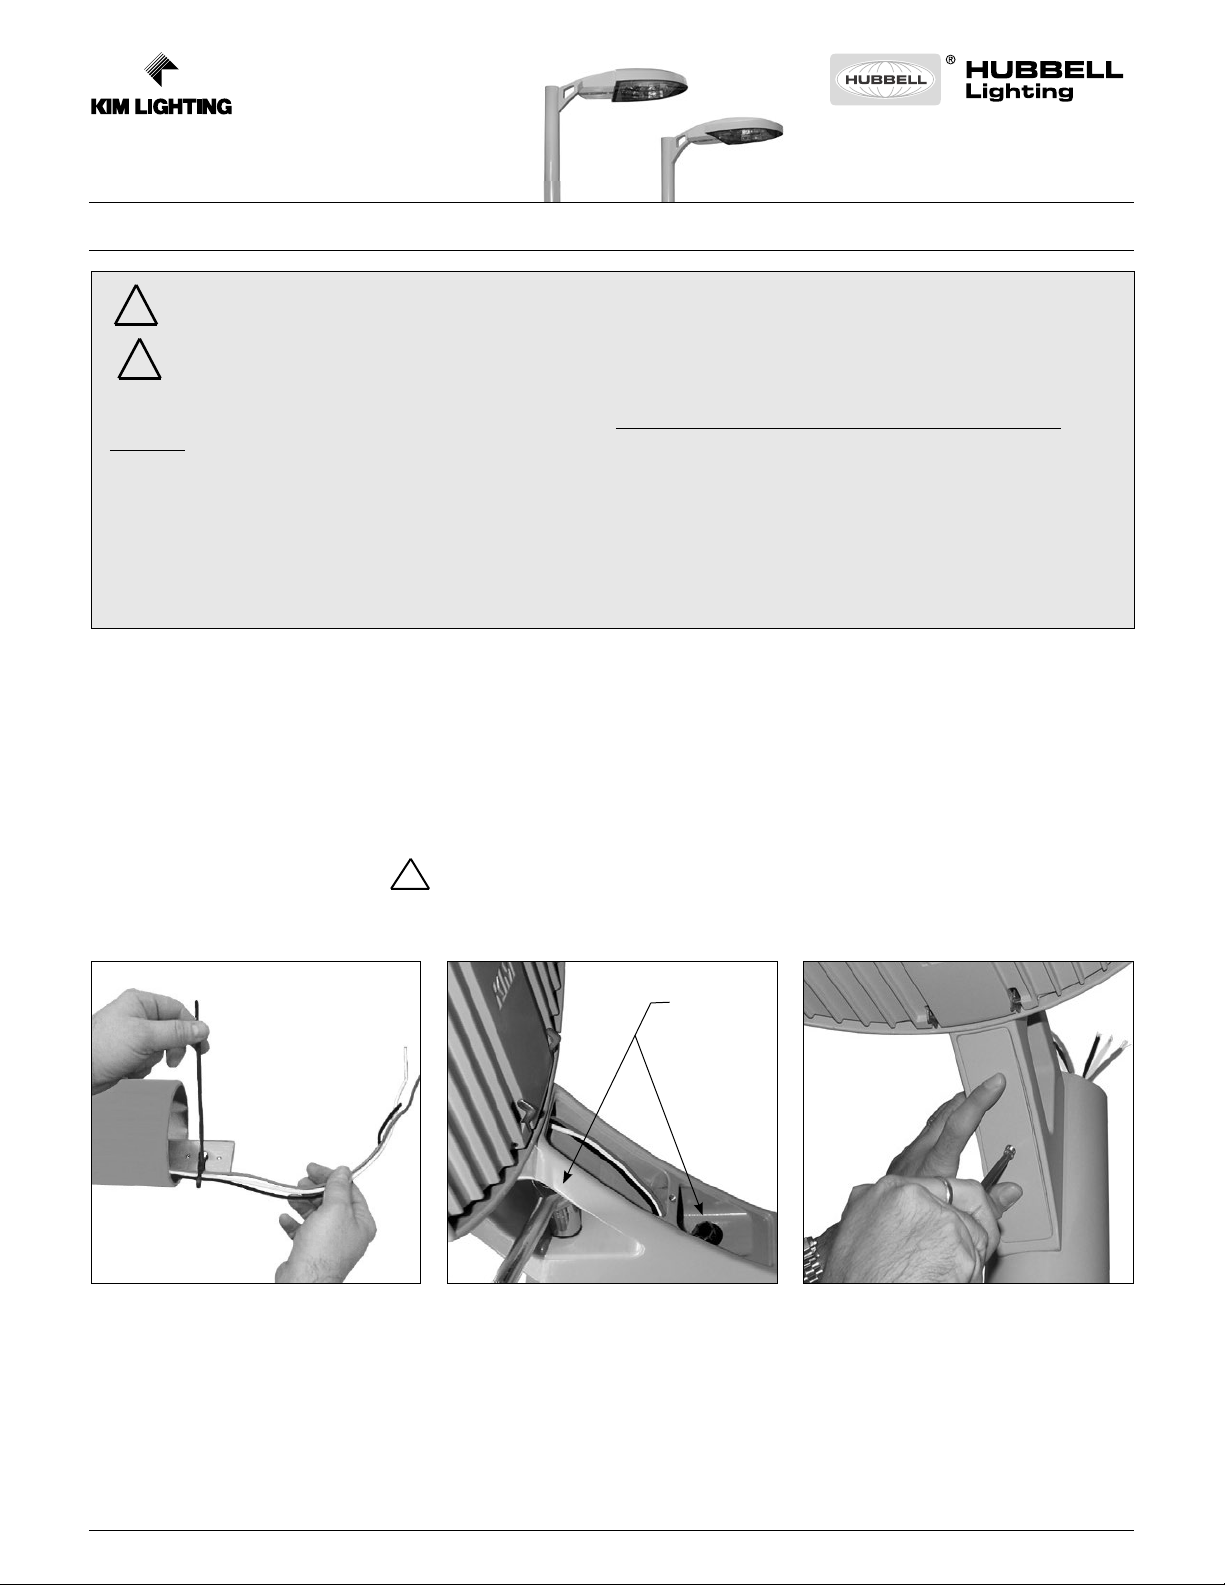
HUBBELL LIGHTING KIM LIGHTING B30 Series Installation and operating instructions

HUBBELL LIGHTING
HUBBELL LIGHTING RWL1 User manual

HUBBELL LIGHTING
HUBBELL LIGHTING MATRIX Series User manual

HUBBELL LIGHTING
HUBBELL LIGHTING KIM LIGHTING Kim Pavilion User manual

HUBBELL LIGHTING
HUBBELL LIGHTING Architectural Area Lighting EPA-T User manual

HUBBELL LIGHTING
HUBBELL LIGHTING KIM LIGHTING KLV206 User manual
Popular Outdoor Light manuals by other brands

Kichler Lighting
Kichler Lighting HELEN 37536 instructions

Thorn
Thorn OXANE L installation instructions

esotec
esotec Solar Globe Light multicolor 20 operating instructions

mitzi
mitzi HL200201 ELLIS Assembly and mounting instructions

HEPER
HEPER TILA S AFX 3 Module Installation & maintenance instructions

Designplan
Designplan TRON 180 installation instructions


BEGA
BEGA 84 253 Installation and technical information

HEPER
HEPER LW8034.003-US Installation & maintenance instructions

HEPER
HEPER MINIMO Installation & maintenance instructions

LIGMAN
LIGMAN BAMBOO 3 installation manual

Maretti
Maretti TUBE CUBE WALL 14.4998.04 quick start guide

Maxim Lighting
Maxim Lighting Carriage House VX 40428WGOB installation instructions