*DETERMINE BEST LOCATION BEFORE SECURING RACK. CONSIDER SUNROOFS, MOONROOFS AND TRUNK.
*OVERTIGHTENING OF THE STRAPS CAN CAUSE DAMAGE TO THE HULL. IT SHOULD BE SECURE BUT NOT
COMPRESS THE EXTERIOR OF THE HULL.
3
STEP 3: As you tighten the Nylock nut, you should feel the bolt threading through the nut
on your fingertip. Continue to keep upward pressure on both the wrench and the nut/bolt to
keep the wrench from slipping. Once you are confident both bolts are tight, place the end cap
on, and repeat the process on the other end.
STEP 4: You’re now ready to mount the rack onto the roof rack of your vehicle*! Begin by
spacing your roof rack as wide as possible, front to back. The wider spaced the roof rack is, the
less force a sudden gust will have on the rack. (See Fig.4).
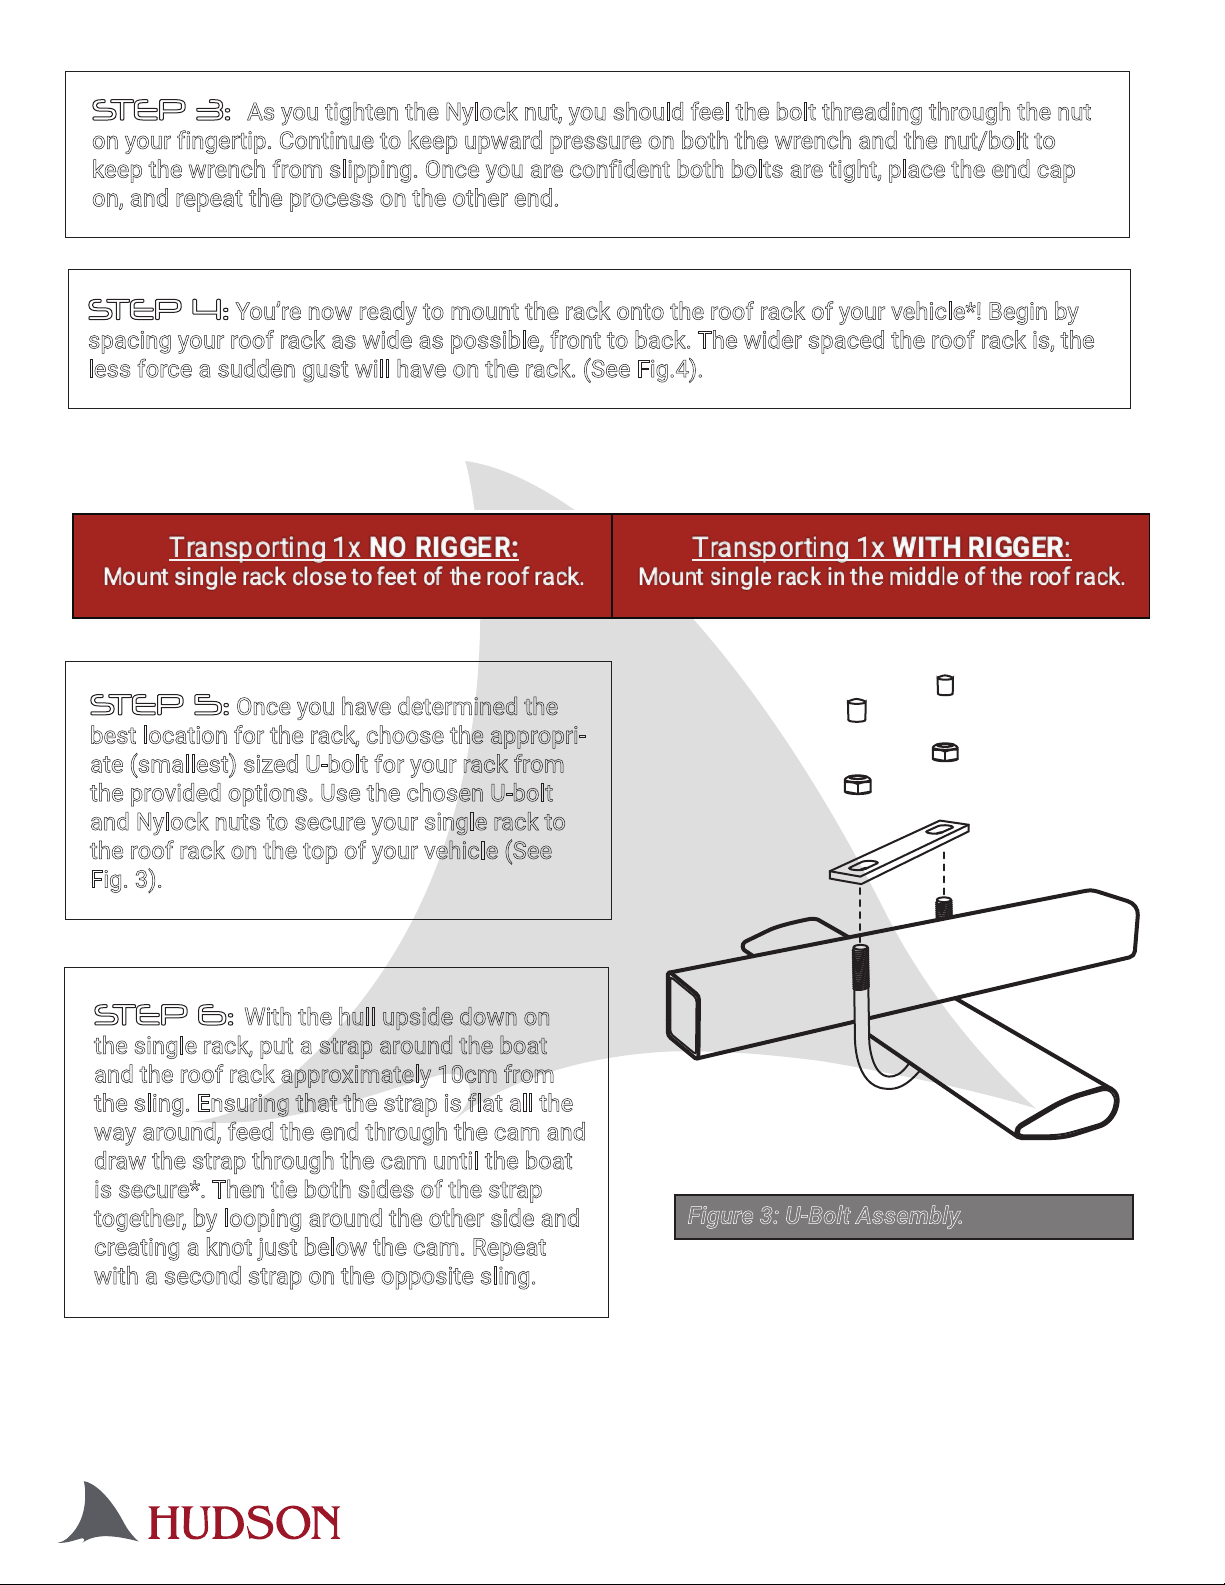
STEP 5: Once you have determined the
best location for the rack, choose the appropri-
ate (smallest) sized U-bolt for your rack from
the provided options. Use the chosen U-bolt
and Nylock nuts to secure your single rack to
the roof rack on the top of your vehicle (See
Fig. 3).
Figure 3: U-Bolt Assembly.
STEP 6: With the hull upside down on
the single rack, put a strap around the boat
and the roof rack approximately 10cm from
the sling. Ensuring that the strap is flat all the
way around, feed the end through the cam and
draw the strap through the cam until the boat
is secure*. Then tie both sides of the strap
together, by looping around the other side and
creating a knot just below the cam. Repeat
with a second strap on the opposite sling.