manuals.online logo
Brands
  1. Home
  2. •
  3. Brands
  4. •
  5. Hudson
  6. •
  7. Paint Sprayer
  8. •
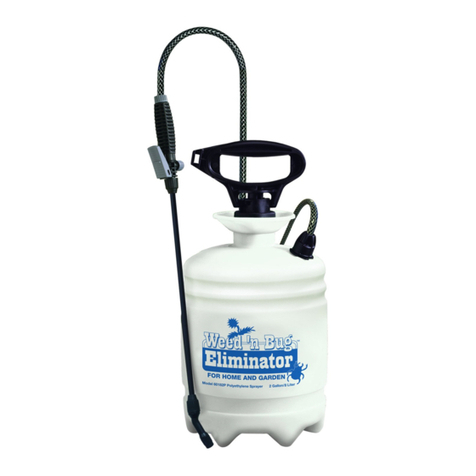
  9. Hudson Weed 'n Bug Eliminator User manual

Hudson Weed 'n Bug Eliminator User manual

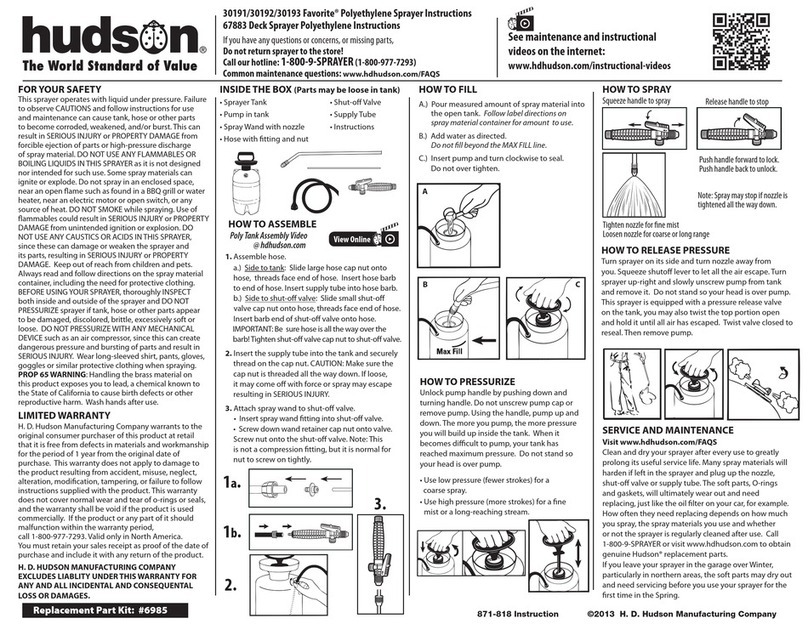
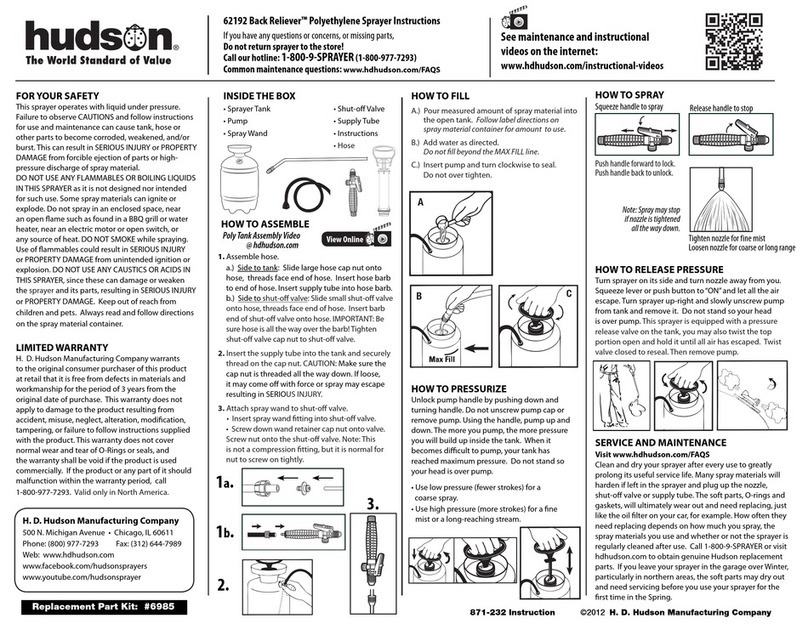
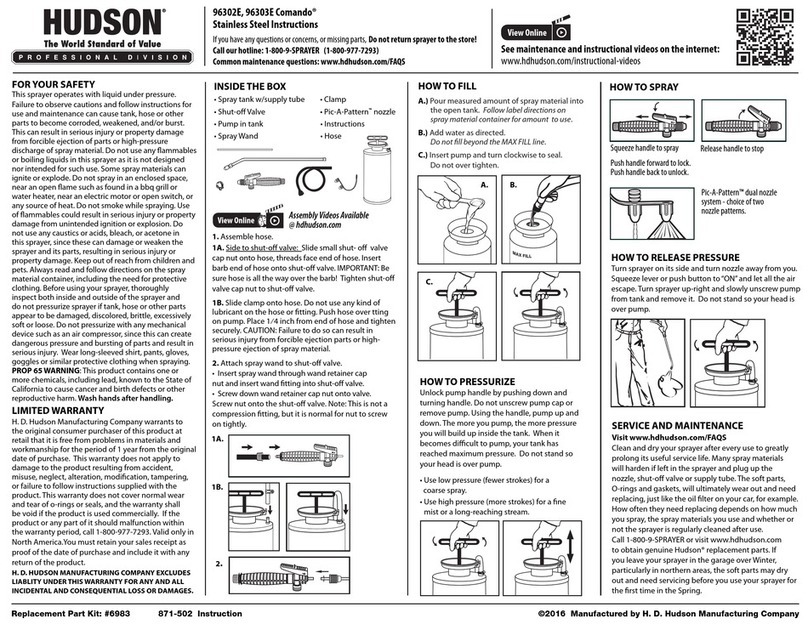
This sprayer operates with liquid under pressure. Failure to observe CAUTIONS and follow instructions for use and maintenance can cause tank, hose or other parts to
become corroded, weakened and/or burst. This can result in SERIOUS INJURY or PROPERTY DAMAGE from forcible ejection of parts or high pressure discharge of spray material.
DO NOT USE ANY FLAMMABLES IN THIS SPRAYER as it is not designed nor intended for such use. Some spray materials can ignite or explode. Do not spray in an
enclosed space, near an open flame such as found in a BBQ grill or water heater, near an electric motor or open switch, or any source of heat. DO NOT SMOKE while spraying.
Use of flammables could result in SERIOUS INJURY or PROPERTY DAMAGE from unintended ignition or explosion.
DO NOT USE ANY CAUSTICS OR ACIDS IN THIS SPRAYER,since these can damage or weaken the sprayer and its parts, resulting in SERIOUS INJURY or PROPERTY
DAMAGE from unintended discharge.
• Before using any pesticide or any other spray material in your sprayer, READ THE LABEL ON THE SPRAY MATERIAL CONTAINER AND FOLLOW EXACTLY ITS INSTRUCTIONS
FOR MIXING AND USE INCLUDING THE NEED FOR PROTECTIVE CLOTHING. Some spray materials are dangerous and should not be used in this sprayer as they can damage
the sprayer or its parts, or may be harmful to the user. This could result in SERIOUS BODILY INJURY or PROPERTY DAMAGE.
• BEFORE USING YOUR SPRAYER, thoroughly INSPECT both inside and outside of sprayer. Be sure the hose is securely attached to the tank and on/off valve, and that the spray
wand and nozzle are all attached and not damaged. A loosely connected hose, on/off valve, spray wand or nozzle can come off when sprayer is under pressure and cause
SERIOUS INJURY or PROPERTY DAMAGE.
• DO NOT PRESSURIZE sprayer if tank, hose or other parts appear to be damaged, discolored, brittle, excessively soft or loose.
• DO NOT PUMP or use sprayer with head or body over pump as pressure in sprayer can forcibly eject pump if it is not properly locked in place, and this can cause SERIOUS
INJURY by striking the user.
• DO NOT use hot or boiling liquids in sprayer since this may weaken or damage tank, pump or hose.
• DO NOT PRESSURIZE WITH ANY MECHANICAL DEVICE such as an air compressor, since this can create dangerous pressure and bursting of parts and result in SERIOUS
INJURY.
• Wear a long-sleeved shirt, pants, gloves, goggles or similar protective clothing when spraying.
• Do not leave residue or spray material in sprayer after use. It may harden and clog the sprayer or its parts.
• Empty, clean and drain sprayer tank and hose after each use according to directions.
• Do not smoke or eat while mixing spray materials or spraying, and wash up afterwards.
• Use only Hudson replacement parts when servicing your sprayer. Other parts may not fit properly or may be weakened by spray materials and fail under pressure, resulting in
SERIOUS INJURY from forcible ejection of parts or unexpected high pressure discharge of spray material.
•WARNING: Keep sprayer and all spray materials away from children and pets.
1Before you assemble and use your sprayer, read the following
safety information. It is helpful and important!
• Immediately after each use, even if you stop spraying for just a few minutes.
• Before removing pump, hose, spray wand or nozzle. (Removing any part while sprayer is under pressure will result in high pressure
discharge, and can cause SERIOUS INJURY.)
• Before trying to unclog nozzle, spray wand, on/off valve or hose.
• Before servicing sprayer in any way.
• When sprayer is left in the sun or other warm place.
WARNING: Make sure you RELEASE ALL OF THE PRESSURE in the sprayer…
CAUTION!
Thank you for purchasing this Hudson sprayer. Like any quality tool, it should be used and
maintained properly. Here is important safety information and easy-to-follow instructions
that will make using your sprayer easier and more effective.
Please do not return sprayer to retailer. If you have a problem or question, call our 24-hour
consumer help line: 1-800-9-SPRAYER (1-800-977-7293)
HUDSON LIMITED WARRANTY
DURATION OF THIS WARRANTY:
Stain-Preserve-Seal™ (SPS), Weed “n Bug Eliminator™, 1 YEAR • Leader®, Farm & Garden™: 2 YEARS • Bugwiser®, Pumpless™, Preferred, Yard & Garden, Yard Bird®:
5 YEARS • Premium™, Classic™, Classic Plus™: 10 YEARS
H.D. Hudson Manufacturing Company warrants to the original consumer purchaser of this product at retail that it is free from problems in materials and workmanship for the
period specified above from the original date of purchase. This warranty does not apply to damage to the product resulting from accident, misuse, neglect, alteration,
modification, tampering, or failure to follow instructions supplied with the product. This warranty does not cover normal wear and tear of o-rings or seals, and, except for
Tek, Comando, Constructo.Industro and ULV sprayers and the Granule Applicator, the warranty shall be void if the product is used commercially.
If the product or any party of it should malfunction within the warranty period, telephone our CUSTOMER SERVICE DEPARTMENT at 1-800977-7293 for fast service. We will,
at our option, repair or replace any problem parts free of charge. We retain the option of requiring the prepaid return of the product, along with proof of purchase, to H.D.
Hudson Manufacturing Company, 200 West 2nd Street, Hastings, MN 55033.
This warranty is valid only in North America.
You must retain your sales receipt as proof of the date of purchase and include it with any return of the product.
ANY IMPLIED WARRANTIES, INCLUDING ANY IMPLIED WARRANTY OF MERCHANTABILITY OR FITNESS FOR CONSUMER USE, ARE LIMITED TO 1 YEAR. H.D. HUDSON
MANUFACTURING COMPANY EXCLUDES LIABILITY UNDER THIS WARRANTY FOR ANY AND ALL INCIDENTAL AND CONSEQUENTIAL LOSS OR DAMAGES.
Some states do not allow limitations on how long an implied warranty lasts or the exclusion or limitation of incidental or consequential loss or damages, so these limitations
or exclusions may not apply to you.
This warranty gives you specific legal rights, and you may also have other rights which vary from state to state.
DANGER!
2c. Attach spray wand to
on/off valve.
NOTE: Squeeze handle
for easier threading.
2Here’s how to assemble your sprayer:
Check carton for:
• Sprayer tank with pump (A)
• Hose assembly with on/off valve (B)
• Plastic bag that contains:
• Spray wand with nozzle (C)
• Supply tube (D)
• Instructions (E)
If any part is missing, please call 1-800-9-SPRAYER to order a replacement. The line is open 24 hours daily.
2a. Insert supply tube into open end of hose.
2b. Insert the supply tube into the tank and
securely thread on the cap nut. CAUTION:
Make sure the cap nut is threaded all the way
down. If loose, it may come off with force or
spray may escape resulting in SERIOUS
INJURY.
For sprayers with a poly control valve/wand
combination: Follow steps 2a and 2b, then:
• Insert hose into non-threaded end of handle and push
all the way through the handle.
• Push hose onto end of on/off control.
Important: Be sure it is all the way over the barb!
• Screw handle on to the on/off valve. Note:
This is not a compression fitting, but it is normal for it to
screw on tightly.
Before filling, be sure to read, understand and follow exactly the label instructions on spray material container!
NOTE:
Do not try to remove pump
by unscrewing pump cap.
Doing so will cause pump
cylinder to stay inside the
tank and you will not be
able to fill it.
Max Fill
Thissprayeroperateswithliquid under pressure. Failureto observeCAUTIONSandfollowinstructions for
useandmaintenancecanc ausetank,hoseorother partsto becomecorroded, weakenedand/orb urst.Thiscan result
inSERIOUSINJURYorpropertydamagefromforcible ejection of partsorhighpressuredischargeofspraymaterial.
DONOTUSEANYFLAMMABLESin this sprayer asit is not designednorintendedfor suchuse. Some
spraymaterialscanigniteor explode. Donot spray inan enclosedspace, near a nopenflamesuchasfoundinaBBQ
grillor waterheater, nearan electric motororopenswitch, or any sourceofheat.DONOTSMOKEwhilespraying.
Useof flammablescould result inSERIOUSINJURYor PROPERTYDAMAGEfromunintendedignitionor explosion.
DONOTUSEANYCAUSTICSORACIDSin thissprayer, sincethese candamageor weakenthesprayer
anditsparts,resultingin SERIOUSINJURYorPROPERTYDAMAGEfromunintendeddischarge.
•Beforeusinganypesticideor anyother spray material in your sprayer, READTHELABELONTHESPRAYMATE-
RIALC
ONTAINERANDFOLLOWEXACTLYITSINSTRUCTIONSFORMIXINGANDUSEINCLUDINGTHENEED
FORPROTECTIVECLOTHING.Somespraymaterials aredangerousandshould notbeusedinthissprayerasthey
candamagethesprayerorits parts, or may beharmful tothe user.This could result inSERIOUSBODILYINJURY
orPROPERTYDAMAGE.
•BEFOREUSINGYOURSPRAYER,thoroughlyINSPECTbothinsideandoutsideofsprayer.Besurethehoseis
securelyattachedtothetankand on/off valve, andthatthe spraywandandnozzle are all attachedandnotdamaged.
Alooselyconnectedhose, on/off valve, spray wand ornozzle cancomeoff whensprayer isunder pressureandc ause
SERIOUSINJURYorPROPERTYDAMAGE.
•DONOTPRESSURIZEsprayerif tank, hoseor other partsappeartobe damaged, discolored,brittle,excessively
softor loose.
• DONOTPUMPoruse sprayer with headorbodyoverpumpaspressurein sprayercanforcibly ejectpumpif it is
notproperlylockedinplace, andthiscancauseSERIOUSINJURYbystrikingthe user.
•DONOTusehot or boilingliquidsin sprayer since this mayweaken or damagetank, pumpor hose.
•DONOTPRESSURIZEWITHANYMECHANICALDEVICEsuchasanair compressor, sincethiscancreate dan-
gerouspressureandburstingofparts andresult inSERIOUSINJURY
.
•Wearalong-sleevedshirt, pants, gloves, gogglesor similar protectiveclothingwhenspraying.
•Donot leaveresidueor spray material in sprayer after use. It mayhardenandclogthe sprayeror its parts.
• Empty, cleananddrain sprayertank and hoseaftereachuseaccording to directions.
•Donotsmokeoreatwhile mixingspraymaterialsor spraying,andwashupafterwards.
•UseonlyHudsonreplacement partswhenservicing your sprayer.Other parts may not fit properly or maybeweak-
enedbyspray materials and fail under pressure, resultingin SERIOUSINJURYfrom forcible ejectionof parts oru nex-
pectedhighpressure dischargeof spray material.
•WARNING:Keepsprayerandall spray materials away fromchildrenandpets.
DANGER!
CAUTION!
1
Beforeyou assemble anduseyour sprayer, readthe
followingsafety information. It ishelpful and important!
WARNING:MakesureyouRELEASEALLOFTHEPRESSUREinthesprayer...
T
h
a
n
k
y
o
u
fo
r
pu
r
c
h
a
s
i
n
g
t
h
i
s
H
u
d
s
o
n
s
p
r
a
y
e
r
.
L
i
k
e
a
n
y
q
u
a
l
i
t
y
t
o
o
l
,
i
t
s
h
o
u
l
d
b
e
u
s
e
d
a
n
d
m
a
i
n
t
a
i
n
e
d
p
r
o
p
erl
y
.
H
e
r
e
i
s
i
m
p
o
r
t
a
n
t
s
a
f
e
t
y
i
n
f
o
r
m
a
t
i
o
n
a
n
d
e
a
s
y
-
t
o
-
f
o
l
l
o
w
i
n
s
t
r
u
c
t
i
o
n
s
t
h
a
t
w
i
l
l
m
a
k
e
u
s
i
n
g
y
o
u
r
s
p
r
a
y
e
r
e
a
s
i
e
r
a
n
d
m
o
r
e
e
f
f
e
c
t
i
v
e
.
Pleasedonotreturnsprayer to retailer. If youhaveaproblemorquestion, call
our24-hourconsumerhelpline:1-800-9-SPRAYER(1-800-977-7293)
•Immediatelyaftereach use,even ifyoustopsprayingfor justa fewminutes.
•Beforeremovingpump, hose, spraywandor nozzle.
(Removinganypartwhile sprayeris underpressure will result in
highpressuredischarge,andcancauseSERIOUSINJURY
.)
• Beforetryingto unclognozzle,spray wand,on/off valve orhose.
• Beforeservicingsprayerinanyway.
•Whensprayerisleftin thesunorother warmplace.
B
A
C
D
E
3Here’s how to fill your sprayer:
3a. With pump handle all the way down and in the locked
position (A), turn to left (B) and lift out the pump (C).
3b. Pour measured amount of spray
material into the open tank.
Follow label directions on
spray material container for
amount to use.
3c. • Add water as directed.
• Don’t fill beyond the MAX FILL line.
• Replace pump and turn into place, turning only hard
enough to seal.
AB C
2a 2c
2b
2d
3a
3b
3c
3c
NOTE:
• Use low pressure (fewer strokes) for a
coarse spray.
• Use high pressure (more strokes) for a fine
mist or a long-reaching stream.
NOTE: If you tighten the nozzle all the way down, the spray may stop completely.
6a. Turn sprayer upside down and turn
nozzle away from you. Squeeze
lever or push button to on and let
all the air escape.
6b. Turn sprayer up-right and slowly
unscrew pump from tank and
remove it. Do not stand so head
is over pump.
6c. If your sprayer is equipped with a
pressure release on the tank, you
may lift the top portion and hold it
until all air has escaped. Then
remove pump.
WARNING: Always release pressure before trying to service sprayer in any way or before removing or
disconnecting nozzle, spray wand, valve, hose or any other part!
4Here’s how to pressurize (pump up) your sprayer:
5Here’s how to spray:
6Here’s how to release the pressure in your sprayer:
4a. Unlock pump handle by pushing down and
turning handle. Do not unscrew pump cap
or remove pump.
4b. Using the handle, pump up and down. The more you pump, the more
pressure you will build up inside the tank. When it becomes difficult to
pump, your tank has reached maximum pressure. Do not stand
so head is over pump.
+
+
5a. For sprayers with metal Roto Valve™.
Squeeze handle to spray Release handle to stop
5b. Adjust the nozzle.
Tighten nozzle
for fine mist
Loosen nozzle for
coarse or long range
5c. For sprayers with poly valve.
Push button to spray Pull back button to stop
5d. Select a cone or fan pattern nozzle.
Tighten nozzle
for fine mist
Loosen nozzle for
coarse or long range
NOTE: If you own a Hudson Pumpless™ sprayer,
please see page 6 for instructions on how to
pressurize with hose.
CONE
STOP
SPRAY
FAN
4a
5a
5b 5b
5d
5d
5a 5c
4b
6b 6c
6a
Important
TIPS
and
Information
A. Clean and dry your sprayer after every use to greatly prolong its useful service life. Many spray materials
will harden if left in the sprayer and plug up the nozzle, shut-off valve or supply tube.
B. The soft parts—O-rings and gaskets—will ultimately wear out and need replacing, just like the oil filter on
your car, for example. How often they need replacing depends on how much you spray, the spray materials
you use and whether or not the sprayer is regularly cleaned after use.
C. If you leave your sprayer in the garage over Winter, particularly in northern areas, the soft parts may dry out
and need servicing before you use your sprayer for the first time in the Spring.
WARNING!
7a. Clean your sprayer each time you finish using it to help keep it trouble-free.
1. When finished with job, spray away all the material in your sprayer or empty it into original spray material container.
2. Remove pump and add some clean water and a few drops of liquid dish washing soap.
3. Replace pump and shake tank to mix soap and water.
4. Pressurize and spray out soapy solution.
5. Release any pressure remaining and remove pump.
6. Remove hose and supply tube by unscrewing connection at tank. (No tools required.)
7. Turn tank upside down and let dry.
8. Holding hose and spray wand up, open on/off valve and let wand and hose drain.
TIP: Back-flush your wand, hose and supply tube with garden hose for maximum cleansing.
7b. If you have trouble pumping up your sprayer or if liquid gets inside pump:
A. Plunger Assembly/Pump Handle D. Cylinder Assembly
B. Pump Cap E. Plunger Cup
C. Cylinder Gasket F. Pump Cylinder Check Valve
To open pump assembly:
Unscrew pump cap (B) and pull out plunger assembly (A) from cylinder (D).
If the pump leaks at the tank opening:
Clean or replace the cylinder gasket (C).
If pumping doesn’t pressurize your sprayer:
Lubricate the plunger cup (E) with petroleum jelly or replace. (You may need to do this if
you do not use your sprayer for a prolonged time, especially over winter).
If pump won’t pressurize and/or liquid gets into the pump:
Clean or replace the pump cylinder check valve (F).
Maintenance Kit.
A maintenance kit containing your sprayer’s soft parts is available from your dealer.
It is our Model #6985. If you prefer, you may order one by calling 1-800-9-SPRAYER.
The line is open 24 hours daily.
NOTE: If you own a Hudson Weed ‘n Bug Eliminator™, Eliminator™, Rose & Garden™ or Flower &
Garden™ sprayer, please see page 6 for instructions on how to disassemble the pump in your sprayer.
7Here’s how to service and maintain your sprayer:
A
B
C
D
E
F
Make sure all of the pressure in your sprayer is released according to instructions in item 6 before
cleaning or servicing your sprayer in any way or before removing any part of it!
12 5 67
8
34
7b
If there is a leak between nozzle and spray wand:
Release pressure, unscrew nozzle and clean or replace O-ring on the end of the wand.
If nozzle becomes clogged:
Release pressure, unscrew nozzle and clean nozzle orifice and ports at end of wand with a tooth pick
or soft brush. (DO NOT use wire as this may damage nozzle.) Flush with water and replace.
TIP: If nozzle, valve or other parts seem clogged, remove the hose and supply tube and while holding on-off valve open, flush
the entire discharge line with water from your garden hose. If your sprayer continually clogs, dirt or debris may have gotten
into the tank. If so, empty the contents of the tank into a bucket and then clean the hose and discharge line. Put a piece
of cheesecloth over the tank opening before replacing the liquid in order to strain it when you pour the contents of the bucket
back into the sprayer.
7c. If you have a leak at hose connection or if nothing but air comes out of nozzle:
Removing hose and supply tube.
Release pressure! Unscrew the cap nut (no tools required) and lift hose and supply tube out.
If sprayer leaks at hose connection:
Clean and tighten cap nut or replace the O-ring inside the cap nut.
If you pump up the sprayer and nothing but air comes out of the nozzle:
The supply tube has become loose. Release pressure in tank. Remove the cap nut and hose, and
re-insert the supply tube into the hose and then reassemble to tank.
NOTE: The cap nut can be hand-tightened. No tools required.
7d. If on/off control valve leaks or spray won’t shut off:
CAUTION! Make sure pressure is released BEFORE removing cap nut.
Always make sure cap nut is securely tightened onto tank before pressurizing.
CAUTION! Make sure pressure is released BEFORE removing hose from valve or spray wand from valve.
Make sure hose, wand and valve connections are tight before pressurizing.
7e. If the nozzle leaks or becomes clogged:
CAUTION! Make sure pressure is released BEFORE removing nozzle.
Make sure nozzle is securely threaded back onto spray wand before pressurizing sprayer.
If there is a leak between control valve and
wand or if spray will not shut off:
Clean or replace O-rings on wand
and valve.
If little or no spray is coming out of nozzle:
Clean the ports in the valve with a tooth pick and
flush with water from the hose.
A If your control valve is leaking here:
Remove handle and check for loose or damaged hose. If hose is
damaged remove and cut off bad part and replace over barb.
B If control valve is leaking here or it won’t shut off:
Replace the control valve and wand. If store does not have parts,
please call 1-800-9-SPRAYER and ask for part #149-428.
AB
O-ring
Maintenance Kit.
A maintenance kit containing your sprayer’s soft parts is available from your dealer.
It is our Model #6985. If you prefer, you may order one by calling 1-800-9-SPRAYER.
The line is open 24 hours daily.
O RING
“O”-ring
Valve port
7c
7d 7d
7e
Pump maintenance instructions for owners of Weed ‘n Bug Eliminator™,
Eliminator™, Rose & Garden™ and Flower & Garden™ sprayers. How to Pressurize
by Pumpless
Method
1. Seal the
pump. Run
water thru
garden hose
to remove
excess air. Thread connector
onto hose.
2. Push connector onto red
adapter on
tank. Turn
on water
and fill to
“MAX FILL” line on tank; shut
water off. Pull back collar on the
coupler to remove it from the
sprayer. The air trapped inside
the tank has been compressed
by the water and you are ready
to spray. NOTE: If you release
the pressure before using all
the spray material, use the
conventional method to
repressurize sprayer.
HUDSON
1-800-9-SPRAYER (1-800-977-7293)
Consumer care line open 24 hours daily!
• Order parts.
• Warranty service.
• Questions about assembling or using your sprayer.
www.hdhudson.com
Visit us on the worldwide web!
• Complete catalog of Hudson sprayers and dusters.
• Helpful spraying and gardening information.
• Downloadable parts descriptions and diagrams.
H. D. Hudson Manufacturing Company
500 N. Michigan Avenue
Chicago, IL 60611-3769
NOTE: Please do not ship your sprayer or parts to our office in Chicago unless you are specifically
requested to do so! Unsolicited returns to Hudson will not be accepted or acknowledged.
Instead, phone 1-800-9-SPRAYER (1-800-977-7293) for assistance.
1. Lift up (extend) plunger handle and rod from cylinder.
2. Lay pump on flat surface and hold securely.
3. Insert small screwdriver into slot in cylinder.
4. Push in and carefully push up to disengage locking
tabs on collar. Do not use excessive force. Collar does
not pop out. Work both slots. Pull up on plunger
handle. Plunger will pull out and separate from
cylinder if locking tabs on collar are disengaged.
©2000 HDH Mfg. Co. All rights reserved. (00340) 871200
8Here’s where to get additional help and information:
TO:
8a
Por favor no devuelva el aspersor al detallista. Si tiene cualquier problema
o una pregunta, llame a nuestro servicio
al cliente (24 horas) al : 1- 800 - 9 - SPRAYER (1 - 800 - 977- 7293).
S.V.P. ne pas retourner le pulvérisateur chez le détaillant. Si vous avez quelque problème
ou une question, contactez notre service d’assistance
à la clientèle (24 hres) : 1- 800 - 9 - SPRAYER (1-800-977-7293).
Please do not return sprayer to retailer. If you have a problem or question,
call our 24-hour consumer help line: 1-800-9-SPRAYER (1-800-977-7293).
Visit our web site: www.hdhudson.com
871200

This manual suits for next models

15

Other Hudson Paint Sprayer manuals

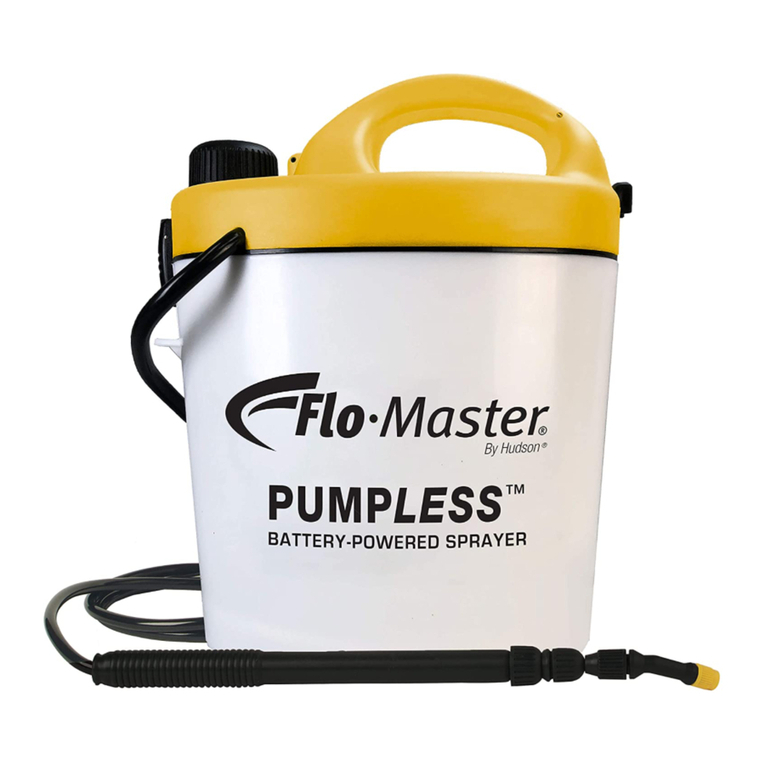
Hudson Bleach Solutions 90011 User manual

Hudson

Hudson Bleach Solutions 90011 User manual

Hudson Back Reliever 62192 User manual

Hudson

Hudson Back Reliever 62192 User manual

Hudson Super Sprayer 90162 User manual

Hudson

Hudson Super Sprayer 90162 User manual

Hudson 93475 User manual

Hudson

Hudson 93475 User manual

Hudson Classic Plus User manual

Hudson

Hudson Classic Plus User manual

Hudson 2204 User manual

Hudson

Hudson 2204 User manual

Hudson 18539 User manual

Hudson

Hudson 18539 User manual

Hudson 93475 User manual

Hudson

Hudson 93475 User manual

Hudson Bak-Pak 13194 Instruction sheet

Hudson

Hudson Bak-Pak 13194 Instruction sheet

Hudson Flo-Master 5BPL User manual

Hudson

Hudson Flo-Master 5BPL User manual

Hudson Favorite 30191 User manual

Hudson

Hudson Favorite 30191 User manual

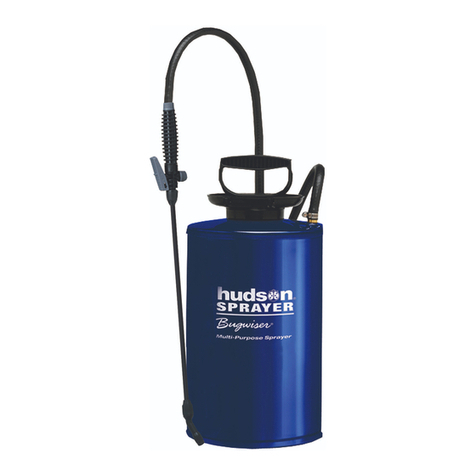
Hudson Bugwiser 62061 User manual

Hudson

Hudson Bugwiser 62061 User manual

Hudson Leader 60181 User manual

Hudson

Hudson Leader 60181 User manual

Hudson Flo-Master 13581L/5BPL User manual

Hudson

Hudson Flo-Master 13581L/5BPL User manual

Hudson XP-60 User manual

Hudson

Hudson XP-60 User manual

Hudson Neverpump Bak-Pak 13854 User manual

Hudson

Hudson Neverpump Bak-Pak 13854 User manual

Hudson Farm Tough 90182FT User manual

Hudson

Hudson Farm Tough 90182FT User manual

Hudson 90181 Constructo User manual

Hudson

Hudson 90181 Constructo User manual

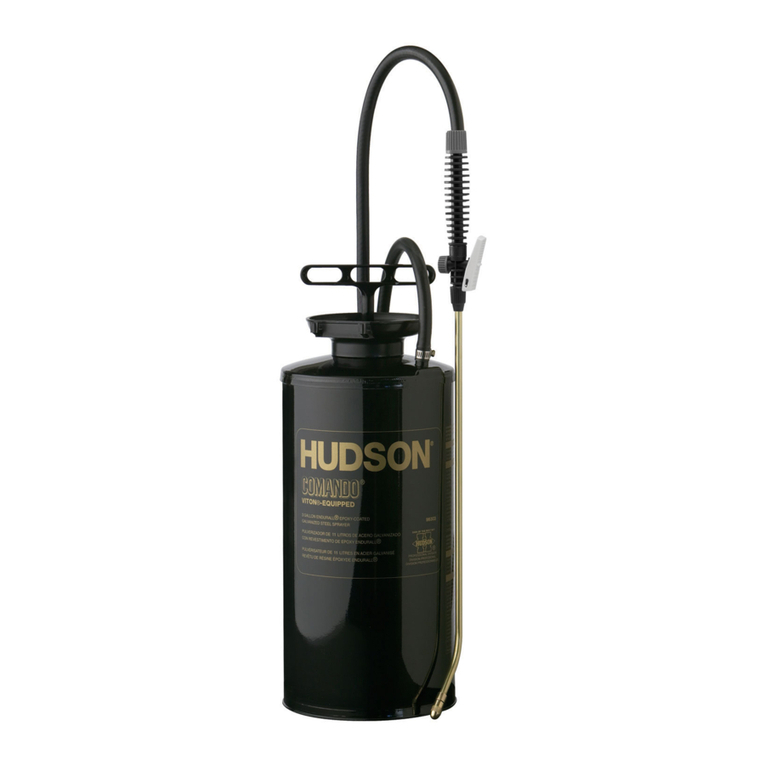
Hudson Comando 96302E User manual

Hudson

Hudson Comando 96302E User manual

Hudson SP0 User manual

Hudson

Hudson SP0 User manual

Hudson 60182P User manual

Hudson

Hudson 60182P User manual

Hudson 13581 User manual

Hudson

Hudson 13581 User manual

Popular Paint Sprayer manuals by other brands

ICD OPACI-COAT-300 Application guide

ICD

ICD OPACI-COAT-300 Application guide

Graco FieldLazer 248942 Operation manual

Graco

Graco FieldLazer 248942 Operation manual

Graco 259079 Operation manuals

Graco

Graco 259079 Operation manuals

Anest Iwata MSG-200B instruction manual

Anest Iwata

Anest Iwata MSG-200B instruction manual

Sealey POWER PRODUCTS SG139.V2 instructions

Sealey

Sealey POWER PRODUCTS SG139.V2 instructions

Birchmeier Vario-Matic 1 P operating manual

Birchmeier

Birchmeier Vario-Matic 1 P operating manual

Berthoud VERMOREL 3000 ELECTRIC instructions

Berthoud

Berthoud VERMOREL 3000 ELECTRIC instructions

WAGNER FLEXIO 4300 owner's manual

WAGNER

WAGNER FLEXIO 4300 owner's manual

WAGNER W 575 FLEXIO manual

WAGNER

WAGNER W 575 FLEXIO manual

Fimco LSS-280-E owner's manual

Fimco

Fimco LSS-280-E owner's manual

WAGNER COLORCATALOG 2006 ENGLISH manual

WAGNER

WAGNER COLORCATALOG 2006 ENGLISH manual

Graco 970161 Instructions-parts list

Graco

Graco 970161 Instructions-parts list

Krautzberger KS 5 operating instructions

Krautzberger

Krautzberger KS 5 operating instructions

Tomahawk TMD14 Operation manual

Tomahawk

Tomahawk TMD14 Operation manual

NEO TOOLS 14-220 manual

NEO TOOLS

NEO TOOLS 14-220 manual

C.A. Technologies Jaguar SLP Product information

C.A. Technologies

C.A. Technologies Jaguar SLP Product information

Gloria FoamMaster FM10 flex Instructions for use

Gloria

Gloria FoamMaster FM10 flex Instructions for use

Graco GTX 257030 Operation manual

Graco

Graco GTX 257030 Operation manual

manuals.online logo
manuals.online logoBrands
  • About & Mission
  • Contact us
  • Privacy Policy
  • Terms and Conditions

Copyright 2025 Manuals.Online. All Rights Reserved.