5
WARNINGS - continued
demonstrate the capability and skill to handle the vehicle and operate its controls to avoid falls or
collisions. It is the responsibility of the adult to educate the child and determine if they are capable
of operating the vehicle safely and that safe practices are used when using the vehicle.
• Operators shall adhere to all recommendations and instructions, as well as comply with all
laws and ordinances:
• Units without headlights shall be operated only with adequate daylight conditions of
visibility;
• Owners are encouraged to highlight (for conspicuous) using lighting, reectors, and for low-
riding units, signal ags on exible poles.
• Persons with the following conditions shall be cautioned not to operate the unit:
• Those with heart conditions;
• Pregnant women;
• Persons with head, back, or neck ailments, or prior surgeries to those areas of the body;
• Persons with any mental or physical conditions that may make them susceptible to injury or
impair their physical dexterity or mental capabilities to recognize, understand, and perform
all of the safety instructions and to be able to assume the hazards inherent in unit use.
• Operators shall always use appropriate protective clothing and equipment, including but not
limited to a helmet, with appropriate certication. Proper shoes required.
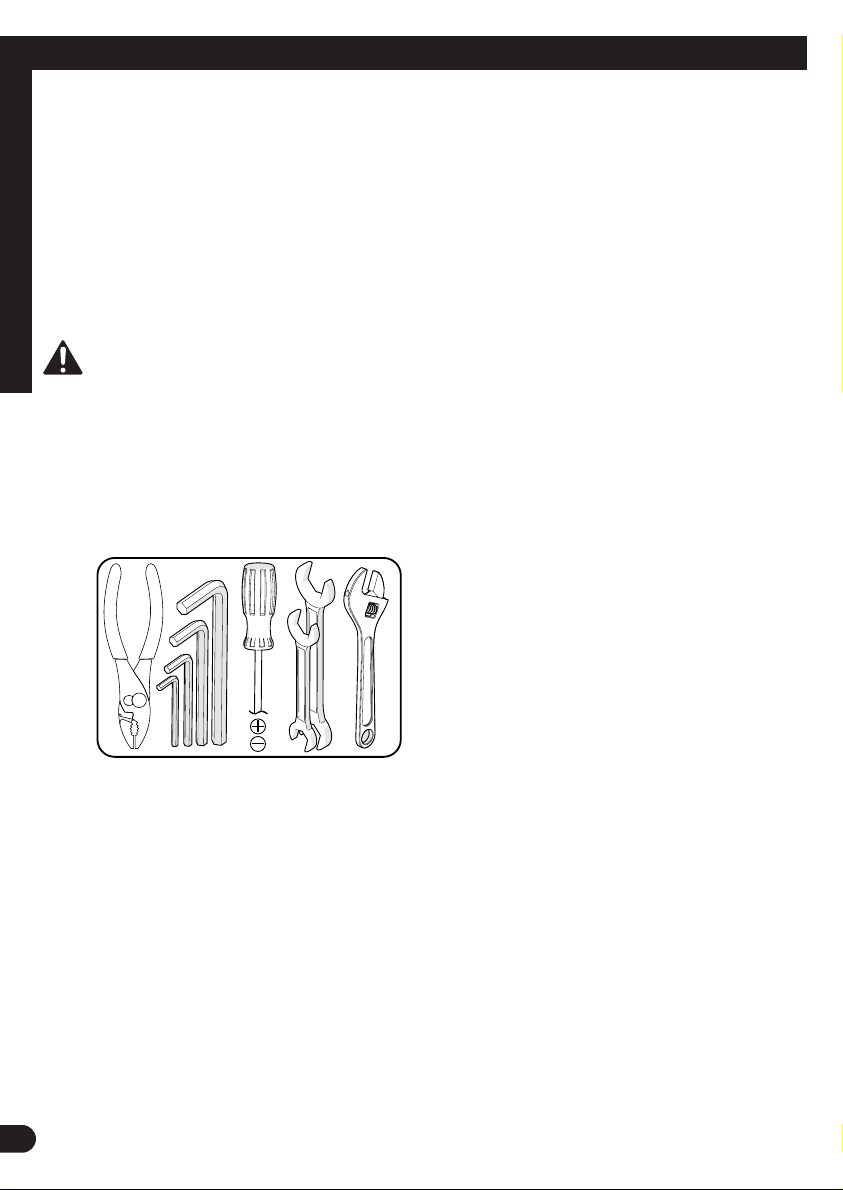
• Components shall be maintained and repaired in accordance with this manual and use only
authorized replacement parts with installation performed by dealers or other skilled persons.
• Avoid sharp bumps, drainage grates, and sudden surface changes.
• Avoid streets and surfaces with water, sand, gravel, dirt, leaves, and other debris. Wet weather
impairs traction, braking, and visibility.
Additional Safety Warnings:
• It is the responsibility of the adult to educate the child and determine if they are capable of
operating the vehicle safely.
• Before using the vehicle the child must understand the controls and safety issues. They must also
demonstrate the capability and skill to handle the vehicle and operate its controls to avoid falls or
collisions.
• After complete assembly, remove and dispose of all protective material and poly bags. Keep poly
bags away from child. Be sure to remove all packaging materials and parts from underneath the
vehicle body.
• Ensure child uses common sense and safe practices when using the vehicle.
• An adult must unfold and fold this product (as equipped).
• This vehicle is intended for recreational & entertainment USE ONLY. Should ONLY be used in areas
designated as such.
ALWAYS WEAR YOUR HELMET WHEN
RIDING THIS PRODUCT!
Always read the user manual that comes with your helmet to make sure it is tted and attached
properly to the wearer’s head according to the tting instructions described in the user manual.
Lithium-Ion Battery & charger Warnings:
The following safety hazards may result in serious
injury or death to the user of the vehicle:
• Battery Charger for Indoor use only. Use of a battery or charger other than the supplied
rechargeable battery and charger may cause a re or explosion. Only use the supplied
rechargeable battery (or lead-acid or lithium suitable replacement) and charger with the
vehicle.
• Using the rechargeable battery and charger for any other product may result in
overheating, re or explosion. Never use the rechargeable battery and charger with
another product.
• Explosive gases are created during charging. Charge the battery in a well ventilated area.
• Do not charge the battery near heat or ammable materials.
• All large lithium batteries are a potential re risk and should be charged in a safe place,
preferably in the middle of a garage oor.
• Never charge a lithium battery unsupervised.
• Only an adult who has read and understands the safety warnings should handle, charge or
recharge of the battery.
• Contact between the positive and negative terminals may result in re or explosion. Avoid
direct contact between the terminals. Picking up the battery by the wires or charger can
cause damage to the battery and may result in a re. Always pick up the battery by its case
or handles.
• Battery must be handled by adults only. Liquids on the battery may cause re or electric
shock. Always keep all liquids away from the battery and keep the battery dry.
• Contact or exposure to battery leakage may cause serious injury. If contact or exposure
occurs immediately call your physician. If the chemical is on the skin or in the eyes, ush
with cool water for 15 minutes. If the chemical was swallowed, immediately give the per-
son water or milk. Do not give water or milk if the patient is vomiting or has a decreased
level of alertness. Do not induce vomiting.
• Battery Posts, terminals and related accessories contain lead and lead compounds (acid),
chemicals known to cause cancer, reproductive harm and are toxic and corrosive. Never
open the battery.
• Tampering or modifying the electric circuit system may case a shock, re or explosion and
permanently damage the system. Exposed wiring and circuitry in the charger may cause
electric shock. Always keep the charger housing closed.
• Non-rechargeable batteries are not to be recharged.
• Batteries are to be inserted with the correct polarity.
• The supply terminals are not to be short-circuited.
• Batteries are only to be charged by adults.
• The battery chargers used with the product are to be regularly examined for damage to
the cord, plug, enclosure and other parts, and in the event of such damage, they must not
be used until the damage has been repaired.