Team Magic M8ER User guide


Thank you for choosing the Team Magic M8ER. The M8ER includes a large selection of the important specialty parts when compared to
the previous versions. Before you start building your new M8ER, we suggest you read though the instruction manual first. Be sure to
check all assembly and performance tips before you start. We hope you enjoy the building processes.
General Building Tips:
Read the instruction manual before building.
Clear a work area and try to work on a light color towel to avoid missing dropped parts.
Don't over-tighten fasteners. Many assembly problems are caused by over-tightening screws or nuts. Don't use too large a grip. Please go slowly and
feel the resistance build. Just snug it up.
When it doesn't fit, please double check. If an assembly is not going together correctly, then either there really is a bad fit (e.g. a part is damaged or
defective) or a mistake in assembly. Always re-read the instructions when there are any problems. If you cannot figure out what's wrong, always ask
dealer, distributor or Team Magic. Don't use force beyond what the instructions call for.
Using the right tools makes assembly much easier. The instructions below finely indicate you what tools to get to make things easier. We don't want to
scare you by saying that all these tools are required, but you will have a easier time if you have them. Borrow them from a friend to check if necessary.
The assembly is arranged so that you will open the bag and finish that bag before you go on to the next bag. Sometimes, you will have parts
remaining at the end of a bag. These will become part of the following bags.
A Good Dealer Is Extremely Important!!
A good hobby dealer can help you with most assembly problems you might encounter. This is the main reason why you should buy your kits from a
good dealer rather than from the cheapest dealer. Bring your problematic parts to the dealer and, most likely, you'll walk away soon thereafter with
the problem solved. If you think that you really don't have the mechanical skills to complete the assembly, you may pay your dealer to finish the job for
you.
1
Included tools
Cross Wrench
(7, 8, 10, 12 & 17mm)
#116025
Shock End Cap Tool (2)
#560194
Cross Wrench
(4mm, 5mm, 5.5mm & 7mm)
#116043
!Thank you for purchasing the M8ER. To drive the car, you will need to check the following procedures.
TM Black HC Flare Nut
Wrench(2.6, 3.5, 4.5 & 6mm)
#117101
4.5
3.5
2.6
6
Required tools and equipments
CaliperTongue and Groove Pliers
2
Hobby Knife
(Warning!! This knife cuts
nylon parts and fingers with
equal ease. Be careful.)
1
TM Black HC Nut Driver
5.5mm (for 3mm nut)
#117010
TM Black HC Nut Driver
6mm (for 3.5mm nut)
#117014
TM Black HC Hex Wrench
Metric Size 3.0mm
#117002-4M
(Please always buy these items in model shops)
Needlenose Pliers
TM Black HC Hex Wrench
Metric Size 2.5mm
#117002-3M
Body Scissors
(for body cutting)
#116006
TM Black HC Hex Wrench
Metric Size 1.5mm
#117002-1M
TM Black
HC Body Reamer
(0~18mm)
#117030
TM Black HC Carb Tuning
Slotted Screw Driver (4mm)
#117023
AA Alkaline Or Rechargeable
Batteries For Transmitter, 8pcs
TM Black HC Hex Wrench
Metric Size 2.0mm
#117002-2M
Instant Adhesive
Double Sided Tape

Cool Items ( It would be good to have these items with the M8 )
TM Transmitter
Bag (Black)
#119206
www.teammagic.com.tw
Team
TM Cap(Orange)
#119235
4
H.A.R.D. Tool Bag (10 Slots)
#H9001
H.A.R.D. Magellan Series
1/8 Off Road Car Bag
#H8911
H.A.R.D. Neck Strap
#H9010
H.A.R.D. 14 Gauge King
Core Silicone Wire (90cm)
#H6701
TM New Formula 8 (F8)
Car Bag (for 1/8 cars)
#119220
TM Moisture-Wicking
T Shirt (Black)
#119234
Helpful Items (suggested)
3
TM 1/8 Setup Board
(500x480mm)
#116052
1/8 Buggy Cambertoe
Setup Gauge
#H7105
10
10
0
55
Support Blocks for Buggy
Setup Gauge (25~30mm)
#H7113
H.A.R.D. Maintenance
Standing Box
#H9201
2
30mm
26mm
27mm
01 Antenna & tires assembly
Antenna Assembly
Operating procedure
5
Battery installation OFF
ON
Caution: make sure ESC is turned off before connecting the battery
Tires installation:
use cross wrench
to assemble it.
‧ Input voltage: 7.2V~14.8V DC Ni-Cd / Ni-Mh /
Lipo battery
‧ Turn off the ESC before you connect the plugs.
‧ Do not use white plastic plug due to the
voltage problem, please use ultra plug
(T plug) for the safety concern.

Transmitter batteries instullation
02
AM T-02
26.995MHz
B
B. Turn on the power
A. Install 8pcs AA batteries
to the HARD transmitter.
A
03 Connect the plugs & turn on the ESC.
OFF
ON
04 Turn the steering trim to the center.
AM T-02
26.995MHz
Transmitter operation.
05
AM T-02
26.995MHz
Press the throttle trigger to moving forward
the vehicle
Push forward the throttle trigger to brake and
reverse the vehicle
Turn the steering wheel right to
turn the front tires go right.
Turn the steering wheel left to
turn the front tires go left.
3

06 Temperature cautions.
07 ESC operating instructions.
The temp of
motor < 90 C
The temp of
batteries < 60 C
1. Install the ESC according to the diagram shown below; Switch on the transmitter, Switch on the ESC
power
2. Lift the car with the 4 wheels un-touching. Adjust & make sure the throttle forward direction
coincides with the ESC forward direction.
3. Right after turn on the power of the ESC, it will denote a series sound indicating the ESC is starting
work. It will then auto-setting the throttle Neutral denoted by LED2 in which fast inter-flashing with
yellow & red light. While succeed in setting neutral, It will then denoted by another confirmation
sound & the LED2 will slowly inter-flash with yellow & red light. If it is failed setting neutral, there will
be no any confirmation sound. Please re-do & re-check the system again starting from step1 of this
instruction. This ESC is applicable to the transmitter with the setting of 1/2 throttle & 1/2
brake/reverse.
4. Slowly push the throttle trigger forwards, the LED2 will be slowly flashing in red light. The flashing
speed shouldbe proportional to the extent of the throttle acceleration. At the full speed, the LED2
will be in solid red light. If the throttle forward direction does not coincide with the ESC forward
direction, the light color will be in yellow not red.Change the throttle reversing switch of the
transmitter will correct the non-coincidence problem.
5. Motor rotating direction - Slowly apply throttle to check if the motor is rotating in the correct
direction you desired.
To reverse the direction of the motor, switch any two of the motor wire
connections. Note : Do not reverse the battery wire connections! Reversing the battery polarity will
permanently damage the ESC.
6. 1stly, trial running starting with a small gear motor for 2~3 minutes, measure the temperatures of
both Esc & motor. If both temperatures are close with each other, they are at good match. The
gear ratio can then be properly adjusted to optimum according to the features of the courses.
However, It’ s very important to always keep both temperatures under 100 ° c, while adjusting the
gear ratio. Otherwise the demagnetization of the motor will
happen, the motor efficiency will drop dramatically & the temperature will also raise up very
quickly. Most
battery power is now wasted on heat nothing on motor efficiency.
7. It’s ok to replace a higher gear ratio or a higher KV motor while the temperature of the ESC is under
80 °c. But it
should be done according to para 6 described, from small to bigger. Unless the kv value of the
original motor is
very low enough, It should replace a motor with lower kv value when the input battery voltage is
changed to a
higher level. The ESC will be burnt if the motor doesn’ t be properly changed while input voltage is
changed. See
example below on the current changed inside motor while input voltage is changed;
Input 7.2V, inner resitance 0.18Ω --- 40A (V/R=I 7.2/0.18=40)
Input11.1V inner resistance 0.18Ω --- 61.6A (V/R=I 11.1/0.18=61.6)
8. Driving forward
Pull throttle trigger forward, the car will be in hard start mode, with very fast initial start, none delay
acceleration, using the
minimum time to reach the full speed from still. Perfectly respond to the signal of the instantly
acceleration. The braking
will be actuated by reversing throttle direction while driving forwards. Interval or spot braking can
always be
controlled perfectly while driving forwards.
9. Driving backwards
By reversing the throttle direction when car is in still. the car will be driving backwards. The braking
will be actuated by reversing throttle direction while driving backwards. By reversing throttle
direction during driving backwards, it will get only a brief braking action & then reverse to drive
forwards instantly. The speed of driving backwards will be responded proportionally to the throttle
input.
10. Warning
Once the battery pack is connected, handle the model with extreme care, make sure you are
clear of all rotating parts.
Connect the batter
y pack just before drive and disconnect it immediately after termination.
Always make sure you are connecting the ESC to a proper power source that has the correct
voltage & polarity.
Incorrect voltages or reversed polarity will damage the ESC.
BATTERY
BATTERY
Power Plug
Motor Wires
Cooling Fan Power Socket
LED2
Receiver Wire
Power Switch
LED1
4

Top view
01
02
Right view
03
Left view
Attaching stickers
6
5

6
560266
560266
560266
560321
560265
560321
561202
560191
560191
560191
560193
560191
560192
560192
560192
560193
560193
560321
560169
560266
1508160
560323
560102
560103
560102
560323
560323
560323
560323
560322
560323
560323
560323
560103
560102
150816 O
560266
560266
560266
560266
560266
560266
560266
560266
560266
560266
560266
560266
560266
560266
560266
560266
560266
560266
560169
560169
560103
560266
560169
560169
560169
560102
150816O
560169
560103
560267
150816O
560169
560321
560321
560200(Front)
560268(Rear)
560190(Front)
560269(Rear)
560270(Front)
560271(Rear)
126304S
126304S
126304S
126304S
560324
Front / Rear Diff
Certer Diff
560204
560204
560204
560204
560204
560204
560204
560204
126310BU
560102

7
560240
561007
561007
123516BU
123510C
561007
123516BU
123510
561007
126306S
111147F
560321
126306S
560147
560242
123525BU
111007ST
560243
126320BU
123516BU
123516BU
560264
130101
126310
560264
560264
126404S
560149
560262
560507
560244
126303S
560116
123518
123518
560120
560120
560120
123510C
123510
560147
123522
111162
560248
560248
560248
123510
560228
560120
560120
560150
123518
123518
560120
560120
560228
560138
111147F
560248
560248
560152
560152 560157
126412S
126316
560247 115001BK
126312S
115001BK
115001BK
560247
560247
150816O
130102
560123
116229
111007ST
123522
560221
111162
126308BU
560123
126505S
560212
150816O
560120
150816O
560322
560147
123510
561007

8
126308BU
126308BU
560313
560313
126310BU
126310BU
111007ST
126412EN
126412EN
560312
126310
123510C
H6809
560311
123516BU
560173
560109
111118
560173
560120
560173
126306S
123508C 123525BU
560120
126308
150816O
560322
111147F
560110
560321
560120
560120
560254
560244
126404S
560109
560112
126303S
560117
123518 123518
560262
560261
560260
560212
126312S
126412S
560258
560258
560130
123522
111007ST
126410C
126410C
560320
560320
560129
150816O
130102
560123
126505S
560123
116229
560221
560257
560256
560168
560168
560255
126316BU
560319
560319
111007ST
115027BK
560168
130101
150610
560173
126312BU
126414BU
126414BU
126312BU
560313
H6813
560252
130108
111007ST
560168
126316
126318BU
560319
115027BK
126301
126318BU
126318BU
111007ST
560257 560320
560135
150610
560256
150610
560256
123518
126314
126303S
560253
111007ST
115001BK
115001BK
560259
560129
123514
560253
116153C
111007ST
123518
560260
560260
560260
560112
560116
123510
123518
123514
150816O
561321
560256
111007ST 111007ST
150307
150307
560255
150610
130108
150307
560168
116133-5C

560245
H6812
560316
560318
560317
126404S
123510C
123510C
560315
560315
152010
152010
126308C
560245
560293
560293
560293
560293
H6811
126310BU 126310BU
126314BU
560178
560314
560292
560292
111007F
560137
560318
126416
126310
111007F
126306BU
126308SE
126308SE
126310BU
126310
126310
126310
126310
126310
126416
126416
126416
126416
126310
126310
126310
126310
126412
126412
9

PARTS
1
560102
560103
560109
560110
560112
560116
560117
560120
560123
560129
560130
560137
560147
560149
560150
560152
560157
560168
560169
560173
560175
560178
560190
560191
560192
560193
560200
560204
560212
560221
560240
560242
560243
560244
560245
560247
560248
560252
560253
560254
560255
560256
560257
560258
560259
560260
560262
560264
560265
560266
560267
560268
560269
560270
560271
560292
560293
560311
560312
560313
560314
560315
Diff Case Set
Differential Case Gasket (4)
Front Upper Arm Mount (L & R)
Hard Coated 7075 Aluminum Front Shock Tower
Front Gear Box (1 set)
Hard Anodized Aluminum Anti-Roll Bar Ball Stud (4)
Front Anti-Roll Bar 2.4mm
Hinge Pin Nylon Cap & Adjuster Set
Aluminum Wheel Adapter, Pin & Nut (2)
ST Steel 3.5x41.5mm Hinge Pin (for Front Upper/Outside Lower) (2)
ST Steel 4x68.8mm Hinge Pin (for Front Lower) (2)
3mm 7075 Aluminum Chassis
Rear Gear Box (1 set)
Rear Anti-Roll Bar 2.8mm
7075 Aluminum Rear Lower Front (1 & 2 Anti-Squat Degree) Hinge Pin Plate
Rear Hub Carrier & Mud Sweeper (1 pair)
ST Steel 3.5x43.5mm Hinge Pin (for Rear Outside Lower) (2)
Servo Saver Set
ST Steel Center Differential Outdrive (2)
Servo Saver Holder & Front Cushion Stiffener Set
Receiver Battery Pack Box
Servo Arm (Futaba) (2)
ST Steel 4x55.4mm Shock Shaft (2)
Shock Piston 1.5mm x 2 (2)
Shock O-Ring & Washer (4pcs/each)
Shock End Cap Set (2)
Hard Coated Shock Body 47mm (2)
Shock Spring Holder & Spacer Set (2)
Neo-Front Universal Joint 128.8mm (2)
Mounted Tire (2)
Buggy Rear Wing
Rear Alum. 7075 Shock Tower
Rear Body Mount
ST Steel Small Bevel Gear Outdrive (2)
Hard Coated Alum. 7075 Center Drive Shaft (2)
Rear Lower Flying Wing Arm (2)
Rear Upper Linkage Set (2)
Front Body Mount
Front Upper Flying Wing Arm (nylon part only) (2)
Front Shock Tower Stiffener
One Piece Alum. 7075 Steering Linkage Set
Steering Rod Nylon Ball End & Steel Ball Set
Steel Servo Saver Post Set
Front Lower Flying Wing Arm (2)
Alum. 7075 Front Lower Rear Hinge Pin Plate
Front Lower Hinge Pin Nylon Cap & Adjuster Set
Front & Rear Nylon Bumper
Alum. 7075 Rear Chassis Stiffener Set
Aluminum Shock Cap (2)
Differential Bevel Gear Set (for 1 diff)
46T Main Gear
Hard Coated Rear Shock Body (2)
ST Steel 4x65.4mm Shock Shaft (2)
Front 18x66mm Shock Spring (2) White
Rear 18x86mm Shock Spring (2) White
Transponder Mount (Hex Post Included) (for M8JS.JR)
Servo Mount Set (for M8JS.JR)
Battery Holder
Velcro Battery Straps (2)
Reveiver Box and ESC Holder
Upper Servo Mount
Center Differential Mount
560316
560317
560318
560319
560320
560321
560322
560323
560324
560507
561007
561202
H6809
H6811
H6812
H6813
111007F
111007ST
111118
111147F
111162
115001BK
115027BK
116133-5C
116153C
116229
123508C
123510
123510C
123514
123516BU
123518
123518C
123522
123525BU
126303S
126306BU
126308
126308BU
126308SE
126310
126310BU
126312S
126314
126314BU
126316
126316BU
126318BU
126320BU
126404S
126410C
126412S
126412EN
126414BU
126416
126505S
130102
130108
150307
150610
150816O
152010
Motor Mount
11T Pinion Gear
Chassis Guard & Stiffener (1 pair)
Alum. 7075 Front Chassis Stiffener Rod Set
Steering Block (1 pair)
Shock Ball End, Spring Cap & Hardware Set (2)
Bevel Gear Set 43T & 13T
Steel F/R Differential Outdrive (1 pair)
Body
7075 Aluminum Rear Lower Rear (2.5 & 3.5 Toe Degree) Hinge Pin Plate
Neo-Rear Wing Mount & Holding Set
Neo-Shock Bladder (4)
HR163JE 2 Channel AM Receiver 27MHz w/o Crystal
H.A.R.D. HS3306 Steering Servo
H.A.R.D. Z5 Brushless Motor
H.A.R.D. P-MAX ESC (w/reverse)
3mm Flat Locknut (10)
3mm Steel Locknut (10)
R5 R-clip (10)
3.5mm Steel Flat Nut (6)
3.5mm Alum. Flat Head Washer (6)
Ball End & Steel Ball (6) BLACK
Ball End & 5.8mm Single Flanged Steel Ball (6) Black
3x35mm CR Adjustable Rod (2)
5x30mm CR Adjustable Rod (2)
2.5x16.8mm PIN(10)
3.5x8mm Steel Cap Screw (6)
3.5x10mm Steel FH Screw (6)
3.5x10mm Steel Cap Screw (6)
3.5x14mm Steel FH Screw (6)
3.5x16mm Steel BH Screw (6)
3.5x18mm Steel FH Screw (6)
3.5x18mm Steel Cap Screw (6)
3.5x22mm Steel FH Screw (6)
3.5x25mm Steel BH Screw (6)
3x3mm Set Screw (6)
3x6mm Steel Button Head Screw (6)
3x8mm Steel F.H. Screw (6)
3x8mm Steel Button Head Screw (6)
3x8mm Steel Flat Round Servo Mount Screw (6)
3x10mm Steel F.H. Screw (6)
3x10mm Button Head Screw (6)
3x12mm Set Screw (6)
3x14mm Steel FH Screw (6)
3x14mm Button Head Screw (6)
3x16mm Steel F.H. Screw (6)
3X16mm BH Screw(10)
3X18mm BH Screw(10)
3X20mm BH Screw(10)
4x4mm Set Screw (6)
4x10mm Steel Cap Screw (6)
4x12mm Set Screw (6)
4mm Steel Flat Round Engine Mount Screw (6)
4X14mm BH Screw(10)
4x16mm Steel FH Screw (6)
5x5mm Set Screw (6)
8.1x12x0.2mm Shim (10)
6.05x9.5x0.5 mm Shim(10)
3x7x3mm Bearing (2)
6x10x3mm Bearing (2)
8x16x5mm Dust-Resistant Bearing (4) Orange
O-Ring P5(10)
Parts List
10

6091560915 MADE IN TAIWAN
Made in Taiwan61195
Team Magic Model Industrial Co.Ltd.
No,185-2, 38th Road, Taichung Industrial Park, Taichung, Taiwan 407
TEL: 886-4-23552606 FAX: 886-4-23552946
E-mail: [email protected]
www.teammagic.com.tw
Cautions !!
To prevent any serious personal injury or damage to property, please be responsible when operating this radio controlled car.
Team Magic and its distributors have no control over damage resulting from shipping, improper construction or improper usage.
Team Magic accepts no responsibility for damages resulting from the use of improper building equipment and operations. By
the act of assembling or operating this product, the user accepts all liability. If the buyer is not prepared to accept this liability,
then he/she should return this product in a new, unassembled and unused condition to the place of purchase.
This is not a toy. It is a high speed r/c car for persons age 15 and older.
Choose the right place to drive your r/c model
Don't run on streets or highways. This could cause serious accidents.
Don't run r/c cars near people or animals.
Don't run in the house. There is a high risk of fire.
Don't run nearby hospitals or schools. Loud noises may disturb others.
Always inspect your model before operation
Always make sure that no one else is using the same frequency when you are using
Always make sure your transmitter and batteries are fully charged to avoid losing control of the model.
Based on continuous product development, the up-to-date specifications of the kit may vary. We reserve all rights to change
any specification without prior notice.
Table of contents
Other Team Magic Motorized Toy Car manuals
Team Magic
Team Magic E4JSII User guide

Team Magic
Team Magic E6 Monster Truck Trooper II User manual
Team Magic
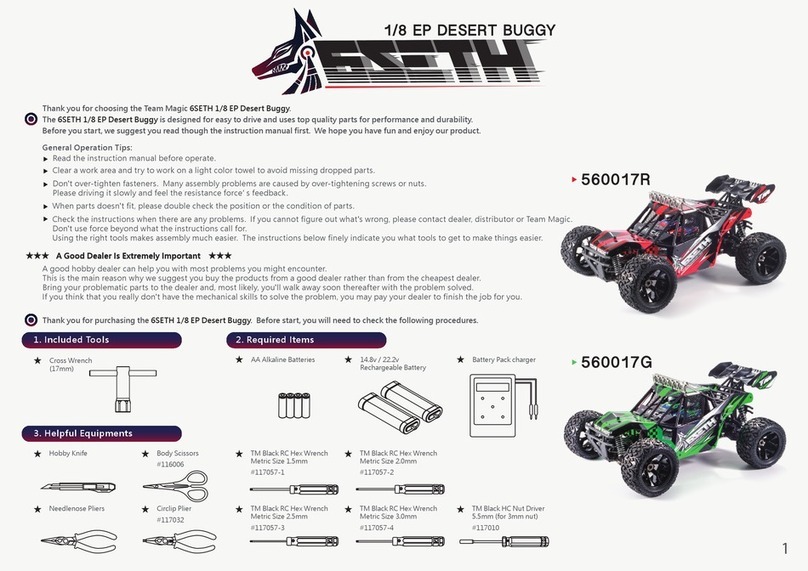
Team Magic 6SETH User manual

Team Magic
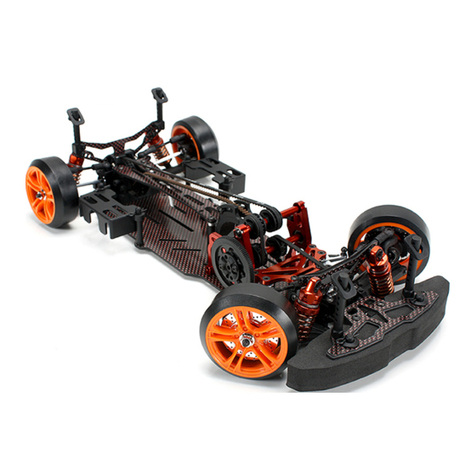
Team Magic E5 User manual
Team Magic
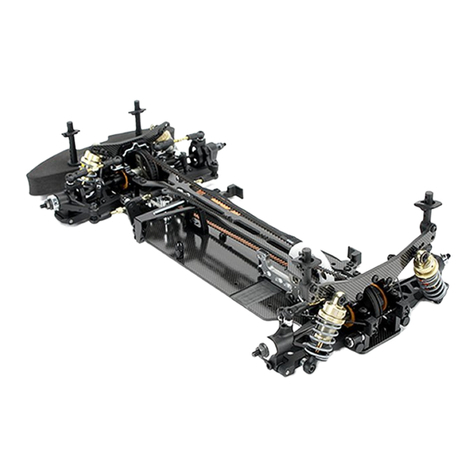
Team Magic E4D User guide
Team Magic
Team Magic E4RSII User guide

Team Magic
Team Magic B8RS User guide
Team Magic
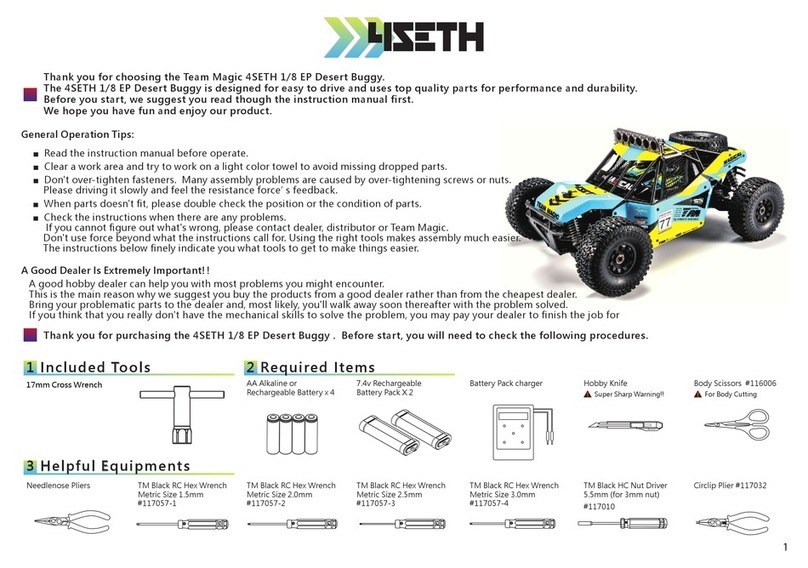
Team Magic 4SETH User manual

Team Magic
Team Magic E4RSII User manual
Team Magic
Team Magic E4DMF Pro User manual
