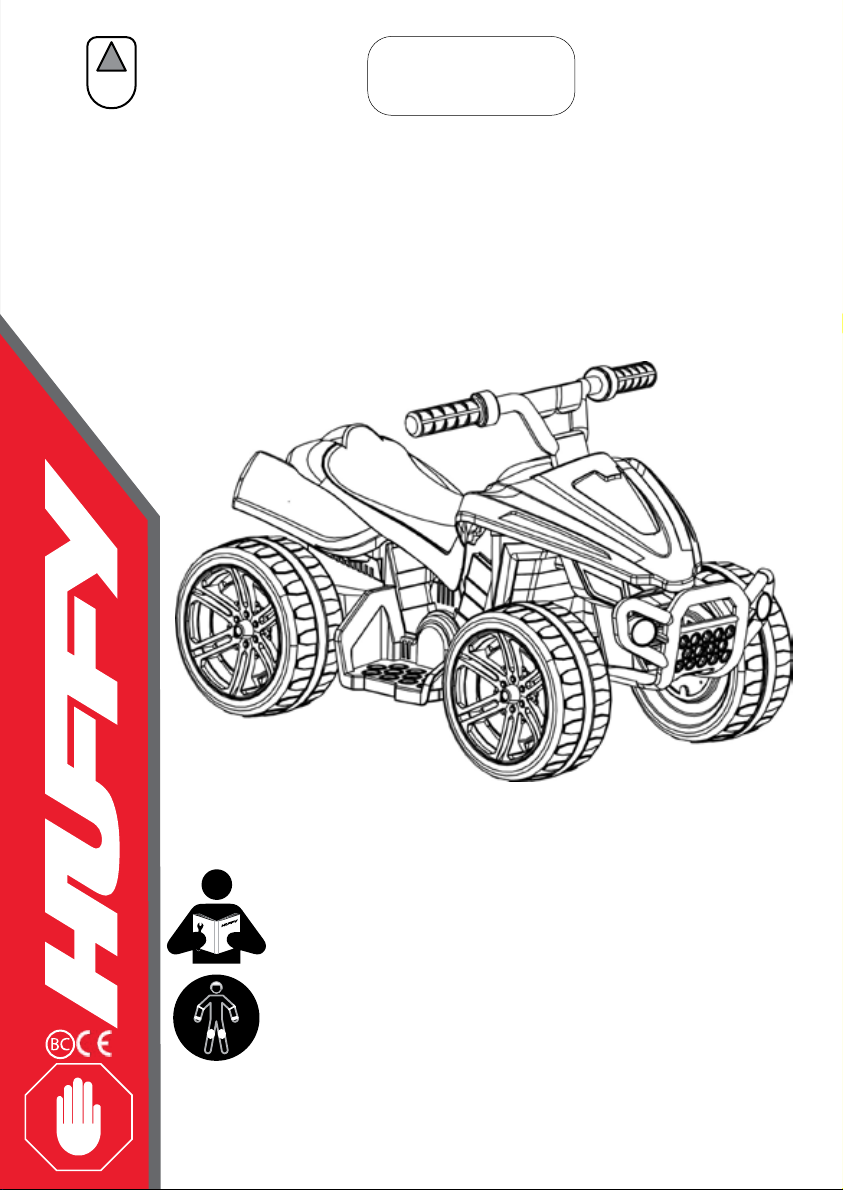
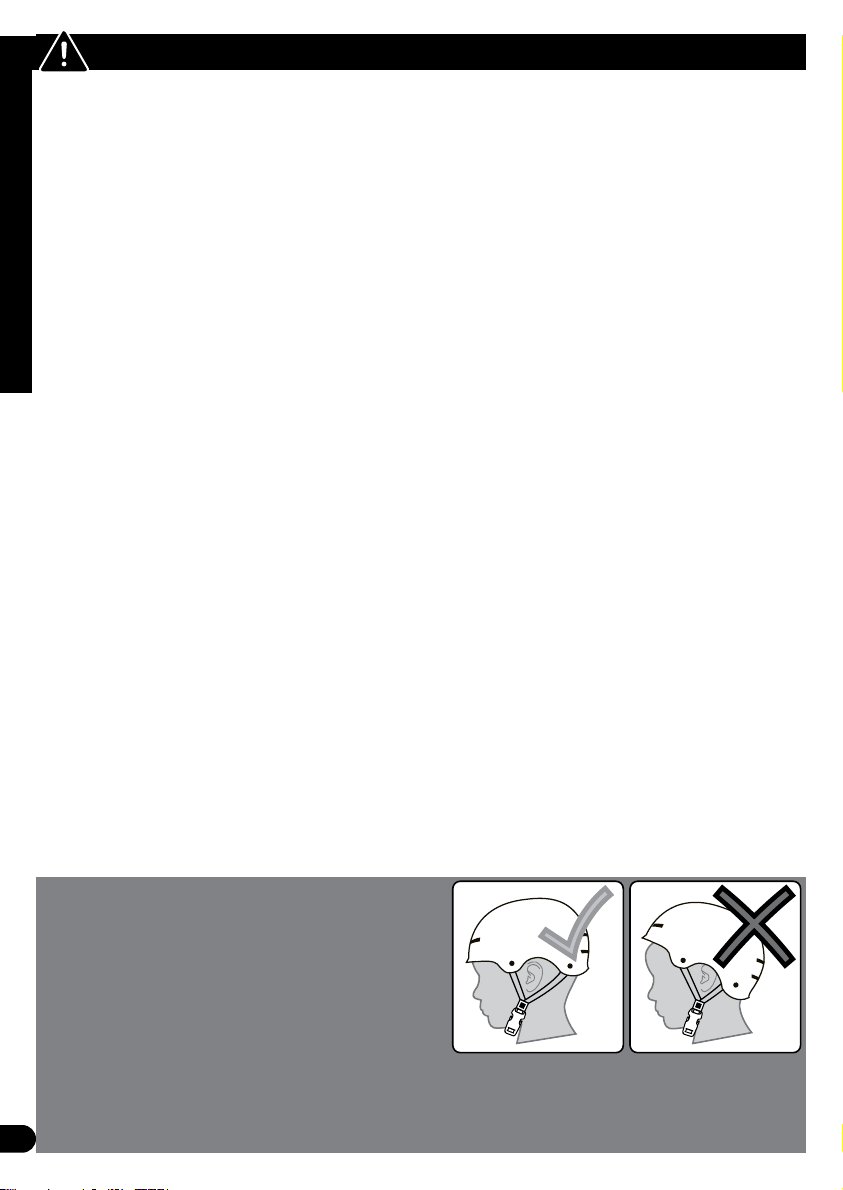
manuals.online logo
Brands
  1. Home
  2. •
  3. Brands
  4. •
  5. Huffy
  6. •
  7. Motorized Toy Car
  8. •
  9. Huffy True Timber User manual

Huffy True Timber User manual

© Copyright Huffy Corporation 2021
Date Code Label
Here
This manual contains important safety, assembly, operation
and maintenance information.
Please read and fully understand this manual before
operation.
Save this manual for future reference.
Always wear approved helmet and safety equipment when
using this product.
See back page for Customer Service Information
EN
Owner’s Manual
for
Battery Ride On
H-ERO-Quad EN 03-23-21 m0779
2
Owner’s Manual Index
Safety and Warnings ...........................................................................................2-6
Parts and Assembly...............................................................................................7-9
Operation and Charging Battery....................................................... 10-12
Maintenance Repair and Service........................................................ 13-15
• General Info, Battery Storage, Replacement and Disposal
Troubleshooting .................................................................................................... 16-17
Warranty .............................................................................................................................19
Back Cover:
• Return and Service Contact information
• Registration QR Code Link
• Assembly QR Code Link
WARNING - TO AVOID SERIOUS INJURY:
• The user must be 1.5-3 years
• Not for children with a body mass of more than 45 lb (20 kg)
• Never allow more than 1riders
IMPORTANT! Before using the unit for the rst time the battery needs to
be charged for at least 8to 12 hours - no more than 20 hours. Only an adult
who has read and understands the safety warnings should handle, charge
or recharge of the battery (see Operation section).
This product meets ASTM F963 and CPSIA requirements for electric vehicles.
CAUTION:Wheels may leave marks on some types of ooring or surfaces. Use
with supervision.
3
To avoid serious injury or death follow these safety rules and guidelines:
• Adult assembly required. Choking hazard to children under the age of 3 years - contains
small parts. Keep small children away when assembling. Keep poly bags away from child.
• After complete assembly, remove and dispose of all protective material and poly bags. Be
sure to remove all packaging materials and parts from underneath the vehicle body.
• To reduce the risk of injury, continuous adult supervision is required while using the
vehicle.
• It is the responsibility of the adult to educate the child and determine if they are capable of
operating the vehicle safely.
• Ensure child uses common sense and safe practices when using the vehicle.
• Before using the vehicle the child must understand the controls and safety issues. They
must also demonstrate the capability and skill to handle the vehicle and operate its con-
trols to avoid falls or collisions.
• Protective Equipment must be worn: Always wear safety equipment such as a helmet
that meets CPSC (or equivalent standard for your country) with chinstrap securely fas-
tened, knee pads, elbow pads, wrist guards, gloves and shoes.
• If equipped, child should always use properly and securely attached Seat Belt.
• SEATED MODELS: Always sit in the seat when using the vehicle. Do not stand on side
boards. Do not stand on or in vehicle while moving.
• FOOT/FENDER BRAKE MODELS: Fender can become hot after use. Do Not touch with
hand.
• MODELS WITH NO BRAKES: Motor friction will gradually stop the unit.
• Self-locking nuts and other self-locking xings may lose their effectiveness when reused.
• Body parts such as hands, legs, hair and clothing can get caught in moving parts. Never
place a body part near a moving part or wear loose clothing while using the vehicle.
• Do not use the vehicle in an unsafe manner or at an unsafe speed. Examples include
but are not limited to:
• Always use vehicle in a safe, secure environment on at, smooth paved surfaces only.
• Never use in roadways, near motor vehicles, on or near steep inclines or steps, swim-
ming pools or other bodies of water.
• Do not pull or push the vehicle with another vehicle or similar device.
• Do not tow anything behind the vehicle.
• Do not drive into xed objects, which may cause the wheels to spin, causing the motor
to overheat.
• Never use near streets, water, swimming pools, hills, steps, drop-offs, sloped surfaces or
driveways, wet areas, ammable vapors, in alleys, at night or in the dark.
• Do not use the vehicle in unsafe conditions such as snow, rain, loose dirt, mud sand or
ne gravel. This may result in unexpected action such as tip over and skidding. Using the
Here are basic, common sense safe riding practices you should read aloud to your child
and anyone who may use the vehicle.
It is the responsibility of the adult to educate the child, determine if they are t to
operate the vehicle, and supervise use.
WARNING - TO AVOID SERIOUS INJURY:
Warnings and Safety
4
ALWAYS WEAR
YOUR HELMET
WHEN RIDING THIS
PRODUCT!
Always read the user manual that comes with your helmet to make sure it is tted and at-
tached properly to the wearer’s head according to the tting instructions described in the
user manual.
vehicle in loose dirt, mud, sand, or ne gravel may damage the electronics and gear box
inside the vehicle.
• Do not overload the vehicle. Do not drive in very hot weather, components may over-
heat. Do not allow water or other liquids to come in contact with the battery or other
electric components.
• Obey all local traffic and scooter riding laws and regulations.
• Do not tamper with the electrical system. Doing so may create a short, causing the fuse to
trip or other damage including re.
• RISK OF FIRE. Do not bypass fuse. Replace only with original size and type.
• There are additional hazards of using the vehicle in areas other than private grounds.
• Only use authorised replacement parts.
• Before each ride, check that the steering system is correctly adjusted and that all connec-
tion components are rmly secured and not broken
• Refer to the Assembly Manual for the correct techniques for use and for braking
• While using the product, keep hands and ngers away from wheels and other moving
parts to avoid danger of pinching or entrapment.
• If wheels or bearings are worn and do not spin freely, replace with original equipment.
WARNING - TO AVOID SERIOUS INJURY:
Warnings and Safety
5
ALWAYS WEAR
YOUR HELMET
WHEN RIDING THIS
PRODUCT!
Always read the user manual that comes with your helmet to make sure it is tted and at-
tached properly to the wearer’s head according to the tting instructions described in the
user manual.
vehicle in loose dirt, mud, sand, or ne gravel may damage the electronics and gear box
inside the vehicle.
• Do not overload the vehicle. Do not drive in very hot weather, components may over-
heat. Do not allow water or other liquids to come in contact with the battery or other
electric components.
• Obey all local traffic and scooter riding laws and regulations.
• Do not tamper with the electrical system. Doing so may create a short, causing the fuse to
trip or other damage including re.
• RISK OF FIRE. Do not bypass fuse. Replace only with original size and type.
• There are additional hazards of using the vehicle in areas other than private grounds.
• Only use authorised replacement parts.
• Before each ride, check that the steering system is correctly adjusted and that all connec-
tion components are rmly secured and not broken
• Refer to the Assembly Manual for the correct techniques for use and for braking
• While using the product, keep hands and ngers away from wheels and other moving
parts to avoid danger of pinching or entrapment.
• If wheels or bearings are worn and do not spin freely, replace with original equipment.
WARNING - TO AVOID SERIOUS INJURY:
BATTERY & CHARGER WARNINGS:
The following safety hazards may result in
serious injury or death to the user of the
vehicle:
• Battery Charger is NOT to be used by Children.
• Rechargeable battery is only to be charged by adults.
• Battery Charger for Indoor use only.
• Use of a battery or charger other than the supplied rechargeable battery and charger
may cause a re or explosion. Only use the supplied rechargeable battery (or lead-acid or
lithium suitable replacement) and charger with the vehicle.
• Using the rechargeable battery and charger for any other product may result in over-
heating, re or explosion. Never use the rechargeable battery and charger with another
product.
• Explosive gases are created during charging. Charge the battery in a well ventilated area.
Do not charge the battery near heat or ammable materials.
• Contact between the positive and negative terminals may result in re or explosion. Avoid
direct contact between the terminals. Picking up the battery by the wires or charger can
cause damage to the battery and may result in a re. Always pick up the battery by its case
or handles.
• Battery must be handled by adults only. Liquids on the battery may cause re or electric
shock. Always keep all liquids away from the battery and keep the battery dry.
• Contact or exposure to battery leakage (lead acid) may cause serious injury. If contact or
exposure occurs immediately call your physician. If the chemical is on the skin or in the
eyes, ush with cool water for 15 minutes. If the chemical was swallowed, immediately
give the person water or milk. Do not give water or milk if the patient is vomiting or has
a decreased level of alertness. Do not induce vomiting.
• Battery Posts, terminals and related accessories contain lead and lead compounds (acid),
chemicals known to cause cancer, reproductive harm and are toxic and corrosive. Never
open the battery.
• Tampering or modifying the electric circuit system may case a shock, re or explosion and
permanently damage the system. Exposed wiring and circuitry in the charger may cause
electric shock. Always keep the charger housing closed.
• Non-rechargeable batteries are not to be recharged
• Batteries are to be inserted with the correct polarity
• The supply terminals are not to be short-circuited
• The battery chargers used with the toy are to be regularly examined for damage to the
cord, plug, enclosure and other parts, and in the event of such damage, they must not be
used until the damage has been repaired.
• Do not mix old and new batteries.
• Do not mix alkaline, standard (Carbon-Zinc) or rechargeable batteries.
• Non-Drive rechargeable batteries are to be removed from the unit before being charged.
Warnings and Safety
6
CAUTION: Changes or modications to this unit not expressly approved by the party
responsible for compliance could void the user’s authority to operate the equipment.
This device or charger/adapter complies with Part 15 of the FCC Rules. Operation is subject
to the following two conditions: (1) this device may not cause harmful interference (2)
this device must accept any interference received, including interference that may cause
undesired operation.
NOTE: This equipment has been tested and found to comply with the limits for a Class B
digital device, pursuant to Part 15 of the FCC Rules. These limits are designed to provide
reasonable protection against harmful interference in a residential installation. This
equipment generates, uses and can radiate radio frequency energy and, if not installed
and used in accordance with the instructions, may cause harmful interference to radio
communications.
However, there is no guarantee that interference will not occur in a particular installation. If
this equipment does cause harmful interference to radio or television reception, which can
be determined by turning the equipment off and on, the user is encouraged to try to correct
the interference by one or more of the following measures: Reorient or relocate the receiving
antenna; Increase the separation between the equipment and receiver; Connect the
equipment into an outlet on a circuit different from that to which the receiver is connected;
Consult the dealer or an experienced radio/TV technician for help.
Radio Frequency Information (if applicable)
ACCESSORY BATTERY WARNINGS:
• Do not mix old and new batteries.
• Do not mix alkaline, standard (Carbon-Zinc) or rechargeable batteries.
• Battery replacement is to be conducted by an adult.
• Dispose of batteries properly. Do not dispose of batteries in re, batteries may explode or
leak. Check local regulations for proper battery disposal.
• Non-rechargeable batteries are not to be recharged.
• Different types of batteries or new and used batteries are not to be mixed.
• Only batteries of the same or equivalent type as recommended are to be used.
• Batteries are to be inserted with the correct polarity.
• Keep the unit from getting wet.
• The battery supply terminals are not to be short-circuited.
• Rechargeable batteries are to be removed from the unit before being charged.
• Rechargeable battery is only to be charged by adults.
• When installing new batteries, look for dangers such as damage, heat, liquid leakage etc.
• Remove batteries when product is not used for long periods of time.
Warnings and Safety
7
Introduction to Assembly
THIS OWNER’S MANUAL IS MADE FOR SEVERAL DIFFERENT BICYCLES:
• Some illustrations may vary slightly from the actual product.
• Follow instructions completely.
• If the bicycle has any parts that are not described in this manual, look for separate “Special
Instructions” that are supplied with the bicycle.
• Models may have different accessory items such as bags, baskets, reectors, cup holders,
racks, etc.
• All features, components and accessories are not included on all models.
• Use the Index page to locate specic sections of this manual.
• Please read through this entire manual before beginning assembly or maintenance.
• If you are not condent with assembling this unit, refer to a local bike shop.
WARNING: Keep small parts away from children during assembly.
NOTE: All of the directions (right, left, front, rear, etc.) in this manual are as seen by the rider
while seated on the bicycle.
Do not dispose of the carton and packaging until you complete the assembly of the bicycle.
This can prevent accidentally discarding parts of the bicycle.
Tools Recommended
(Metric)
Introduction
8
Parts Assembly
Parts Assembly
NOTE: Some Parts Shown are assembled
on both sides of vehicle
Tools Required
Screwdriver(not included)
Pliers(not included)
Hammer(not included)
Spanner(not included)
1Vehicle body12Handlebar1
3Bumper14M10 Washer1
5M8 Nut16M3.5X12 Screw3
1
2
3
4
5
6
6
6
7
9
Parts Assembly
Parts Assembly
# Description # Description
1Vehicle Body 5M8 Nut (x1)
2Handlebar 6M3.5 x 12 Screw (x3)
3Bumper 7Charger
4M10 Washer (x1)
10
Assembly
Assembly
A
C
E
D
B
E
INSTALL HANDLEBAR:
• Position Handlebar as shown and insert J-Bar Adown into body hole.
• Firmly connect Power Plug Band insert extra wire down into body hole making sure no
wires are pinched or bound up.
• Proceed to next steps.
WITH UNIT ON IT’S SIDE:
• Make sure J-Bar end Cts into Steering Bar hole D.
• Install Washer and Locknut Eon end of J-Bar.
• Tighten fully and securely.
• Make sure Handlebar turns wheels evenly and smoothly.
11
A
A
B
BM3.5x12 Screw
Bumper
Assembly
Assembly
ATTACH POWER CONNECTOR TO BATTERY:
• If installed, remove Seat and Seat Screw.
• Attach Power Connector Armly and completely to battery Connector B.
• Re-install Seat and Screw.
INSTALL FRONT BUMPER:
• With unit up-side-down, position Front Bumper Aas shown to line up mounting holes.
• Install Screws Bevenly and securely.
12
IMPORTANT! Before using the unit for the rst time the battery needs to
be charged for at least 8to 12 hours - no more than 20 hours. Once battery
is depleted, recharge for 8to 12 hours - no more than 20 hours.
Charging the Drive Battery:
IMPORTANT!
Check the drive battery and charger (supply
cord, connector) for wear and damage
before charging. Do not charge the battery if
damage has occurred. Only replace with the
same type and voltage rechargeable battery
and charger supplied by the manufacturer.
• Only use the rechargeable battery (or
equivalent replacement) and charger sup-
plied with your vehicle.
• Always turn power off and charge battery
after riding.
• The drive battery should be charged when
depleted, or if not used regularly, once a
month. Failure to charge the battery as
directed will cause permanent damage to
the battery and will void the warranty.
STEPS:
1. Ensure power is OFF.
2. Locate Charging Port A.
3. Plug Charger plug into unit Charging
Port.
4. Plug Charger into Wall outlet B.
5. When battery is fully charged, un-
plug charger from the wall outlet and
disconnect from charger port.
NOTE: The charger may feel warm during
the charging. If excessively hot, unplug and
replace.
NOTE: This product has charging protection:
When charging, drive functions are turned
OFF.
Operation
Operation
WARNING:Read and understand ALL warnings in front of this manual before
using this product! Make sure child fully understands how to operate vehicle.
IMPORTANT!
Always stop vehicle
when changing the
speed or direction to
avoid damage the
gear box and motor.
(1) Press the Forward button to go forward.
(2) To stop, release the button. The unit will gradually stop using motor friction.
Circuit
diagram
13
IMPORTANT! Before using the unit for the rst time the battery needs to
be charged for at least 8to 12 hours - no more than 20 hours. Once battery
is depleted, recharge for 8to 12 hours - no more than 20 hours.
Charging the Drive Battery:
IMPORTANT!
Check the drive battery and charger (supply
cord, connector) for wear and damage
before charging. Do not charge the battery if
damage has occurred. Only replace with the
same type and voltage rechargeable battery
and charger supplied by the manufacturer.
• Only use the rechargeable battery (or
equivalent replacement) and charger sup-
plied with your vehicle.
• Always turn power off and charge battery
after riding.
• The drive battery should be charged when
depleted, or if not used regularly, once a
month. Failure to charge the battery as
directed will cause permanent damage to
the battery and will void the warranty.
STEPS:
1. Ensure power is OFF.
2. Locate Charging Port A.
3. Plug Charger plug into unit Charging
Port.
4. Plug Charger into Wall outlet B.
5. When battery is fully charged, un-
plug charger from the wall outlet and
disconnect from charger port.
NOTE: The charger may feel warm during
the charging. If excessively hot, unplug and
replace.
NOTE: This product has charging protection:
When charging, drive functions are turned
OFF.
Maintenance
A
A
AB
14
Maintenance Repair and Service
GENERAL: The vehicle should be checked
for damage, missing or badly worn parts
before each use. If any part of the product
does not operate properly – discontinue use.
• Check the tightness of the fasteners before
each use. Replace any fasteners that are dam-
aged.
• Inspect the product frequently. Failure to in-
spect the product and to make repairs or ad-
justments, as necessary, can result in injury to
the rider or to others. Make sure all parts are
correctly assembled and adjusted as written
in this manual and any“Special Instructions”.
• Immediately replace any damaged, missing,
or badly worn parts.
• Make sure all fasteners are correctly tightened
as written in this manual and any“Special
Instructions”. Parts that are not tight enough
can be lost or operate poorly. Over tight-
ened parts can be damaged. Make sure any
replacement fasteners are the correct size and
type.
• Check the tightness of the wheels:
NOTE: If the drive wheel is not tight, it will not
engage the gears and the vehicle will not run.
• Ensure the battery bracket is securely in place
before use.
• Store the vehicle indoors. Keep it away from
sources of heat, such as stoves and heaters.
• Keep the product clean and free of dirt, dust
and water. This will prolong the useful life of
the product.
• Clean the vehicle with a soft, dry cloth. To
restore shine to plastic parts, use a non-wax
furniture polish. Do not use automotive wax,
abrasive cleaners or wash the vehicle with
soap and water.
NOTE:
If the instructions in this manual or any
“Special Instructions” are not sufficient for
you, please contact customer service.
CAUTION: Self-locking nuts and other self-
locking devices may lose their effectiveness
when re-used.
Battery Storage and Disposal
The drive battery should be charged when
depleted, or if not used regularly, once a
month. Failure to charge the battery as
directed will cause permanent damage to the
battery and will void the warranty.
Follow these guidelines if the battery is
removed:
• Do not store battery in extreme hot or cold
temperatures.
• Wipe the battery clean with a dry cloth prior
to storage. Wash cloth separate from other
clothes.
BATTERY DISPOSAL:
• The sealed lead-acid battery must be recycled
or disposed of in an environmentally sound
manner.
• Do not dispose of battery in a re. The bat-
tery may explode or leak acid.
• Do not dispose of the battery in household
trash. The incineration, land lling or mixing
of sealed lead-acid batteries with household
trash is prohibited by law.
• Return an exhausted battery to a federal or
state approved lead-acid battery recycler,
such as a local seller of automotive batteries
(check local battery disposal regulations).
Maintenance
Battery Storage and Disposal
The drive battery should be charged when
depleted, or if not used regularly, once a
month. Failure to charge the battery as
directed will cause permanent damage to the
battery and will void the warranty.
Follow these guidelines if the battery is
removed:
• Do not store battery in extreme hot or cold
temperatures.
• Wipe the battery clean with a dry cloth
prior to storage. Wash cloth separate from
other clothes.
BATTERY DISPOSAL:
• The sealed lead-acid battery must be re-
cycled or disposed of in an environmentally
sound manner.
• Do not dispose of battery in a re. The bat-
tery may explode or leak acid.
• Do not dispose of the battery in house-
hold trash. The incineration, land lling or
mixing of sealed lead-acid batteries with
household trash is prohibited by law.
• Return an exhausted battery to a federal or
state approved lead-acid battery recycler,
such as a local seller of automotive bat-
teries (check local battery disposal regula-
tions).
15
FOLLOW THESE STEPS IF THE BATTERY NEEDS TO BE REPLACED:
NOTE: Batteries are installed, mounted and wired differently depending on model. Make
a simple drawing on paper (or take pictures) how your battery is installed and how Red
and Black wires are connected.
1. Remove seat screws and seat (varies depending on model).
2. Remove any clamps and Battery Covers.
3. Disconnect wires.
4. Carefully lift out the Battery.
• Depending on the condition of the battery (i.e.: leakage) you may want to wear
protective rubber gloves before removal.
• Do not lift the battery by its connectors or cables.
5. Place the dead batteries in a plastic bag.
6. Install replacement battery(s) in same position and orientation as originals.
7. Re-connect all wires in
original positions.
8. Re-install Battery Covers
and hold-down clamps and
screws.
WARNING:
Ensure no wires are pinched or
bound up.
9. Re-Install seat and screws.
Drive Battery Replacement
Maintenance Repair and Service
GENERAL: The vehicle should be checked
for damage, missing or badly worn parts
before each use. If any part of the product
does not operate properly – discontinue use.
• Check the tightness of the fasteners before
each use. Replace any fasteners that are dam-
aged.
• Inspect the product frequently. Failure to in-
spect the product and to make repairs or ad-
justments, as necessary, can result in injury to
the rider or to others. Make sure all parts are
correctly assembled and adjusted as written
in this manual and any“Special Instructions”.
• Immediately replace any damaged, missing,
or badly worn parts.
• Make sure all fasteners are correctly tightened
as written in this manual and any“Special
Instructions”. Parts that are not tight enough
can be lost or operate poorly. Over tight-
ened parts can be damaged. Make sure any
replacement fasteners are the correct size and
type.
• Check the tightness of the wheels:
NOTE: If the drive wheel is not tight, it will not
engage the gears and the vehicle will not run.
• Ensure the battery bracket is securely in place
before use.
• Store the vehicle indoors. Keep it away from
sources of heat, such as stoves and heaters.
• Keep the product clean and free of dirt, dust
and water. This will prolong the useful life of
the product.
• Clean the vehicle with a soft, dry cloth. To
restore shine to plastic parts, use a non-wax
furniture polish. Do not use automotive wax,
abrasive cleaners or wash the vehicle with
soap and water.
NOTE:
If the instructions in this manual or any
“Special Instructions” are not sufficient for
you, please contact customer service.
CAUTION: Self-locking nuts and other self-
locking devices may lose their effectiveness
when re-used.
Battery Storage and Disposal
The drive battery should be charged when
depleted, or if not used regularly, once a
month. Failure to charge the battery as
directed will cause permanent damage to the
battery and will void the warranty.
Follow these guidelines if the battery is
removed:
• Do not store battery in extreme hot or cold
temperatures.
• Wipe the battery clean with a dry cloth prior
to storage. Wash cloth separate from other
clothes.
BATTERY DISPOSAL:
• The sealed lead-acid battery must be recycled
or disposed of in an environmentally sound
manner.
• Do not dispose of battery in a re. The bat-
tery may explode or leak acid.
• Do not dispose of the battery in household
trash. The incineration, land lling or mixing
of sealed lead-acid batteries with household
trash is prohibited by law.
• Return an exhausted battery to a federal or
state approved lead-acid battery recycler,
such as a local seller of automotive batteries
(check local battery disposal regulations).
Maintenance
Battery Storage and Disposal
The drive battery should be charged when
depleted, or if not used regularly, once a
month. Failure to charge the battery as
directed will cause permanent damage to the
battery and will void the warranty.
Follow these guidelines if the battery is
removed:
• Do not store battery in extreme hot or cold
temperatures.
• Wipe the battery clean with a dry cloth
prior to storage. Wash cloth separate from
other clothes.
BATTERY DISPOSAL:
• The sealed lead-acid battery must be re-
cycled or disposed of in an environmentally
sound manner.
• Do not dispose of battery in a re. The bat-
tery may explode or leak acid.
• Do not dispose of the battery in house-
hold trash. The incineration, land lling or
mixing of sealed lead-acid batteries with
household trash is prohibited by law.
• Return an exhausted battery to a federal or
state approved lead-acid battery recycler,
such as a local seller of automotive bat-
teries (check local battery disposal regula-
tions).
13
2
PARTS:
1. Wires/Terminals
2. Clamp and Screws
3. Thermal Fuse
16
Battery Fuse
Drive Motor Battery
Only an adult who has read and understands the safety warnings should handle, charge or
recharge the battery. Failure to comply with all safety warnings may result in serious injury
or death.
Battery Re-charge Interval and Time
IMPORTANT!
Check the drive battery and charger (supply cord, connector) for wear and damage before
charging. Do not charge the battery if damage has occurred. Only replace with the same
type and voltage rechargeable battery and charger supplied by the manufacturer.
• Only use the rechargeable battery (or equivalent replacement) and charger supplied with
your vehicle.
• Before rst use, charge battery 8 to 12 hours - never longer than 20 hours.
• Once battery is depleted, recharge for 8 to 12 hours - never longer than 20 hours.
• Do not short circuit the battery: Do NOT connect red and black wires together or connect
positive and negative terminals on the battery together.
• When battery is fully charged, un-plug charger from the wall outlet and disconnect from
charger port.
The drive battery should be charged when depleted, or if not used regularly, once a month.
Failure to charge the battery as directed will cause permanent damage to the battery and
will void the warranty.
The drive motor circuit features a thermal fuse that will automatically trip and cut all power
to the vehicle if the motor, electric system or battery is overloaded. The fuse will reset and
power will be restored after a short time. If the thermal fuse trips repeatedly during normal
use, the vehicle may need repair.
WARNING:DO NOT BYPASS THE FUSE - RISK OF FIRE. This may overload
and damage the electrical system.
Maintenance
17
Troubleshooting Guide
Problem Possible Cause Solution
Vehicle does not
run when switch is
activated
Battery wires not connected
or are loose
Connect battery wires according to
assembly instructions,
Check that the battery connectors are rmly
plugged into each other. If wires are loose
around the motor call Customer Service.
Battery low on power Recharge battery (see Battery: Recharge
interval and time)
Battery Charger still plugged
in
Unplug Battery Charger from unit and wall
Thermal fuse has tripped Let Fuse reset
Battery is dead Replace battery (see Battery: Replacement
and Disposal)
Electrical system or motor is
damaged
Call Customer Service.
Vehicle does not run
very long or runs slug-
gishly
Battery is undercharged. Check that the battery connectors are rmly
plugged into each other when recharging
(see Battery: Recharge interval and Time)
Battery is old and cannot be
fully charged
Replace battery (see Battery: Replacement
and Disposal)
Vehicle is overloaded Reduce weight on vehicle (see user require-
ments and Safety Warnings)
Vehicle is being used in
harsh conditions
Avoid using vehicle in harsh conditions (see
User Requirements and Safety Warnings)
Vehicle makes loud
noise when in use
Chain is dry (on chain drive
models)
Lubricate chain with light oil.
Loud grinding or
clicking noises coming
from motor or gear
box
Motor or gears are damaged Call Customer Service.
Drive Wheel is partially
engaged
Check drive wheel - to motor engagement.
Battery will not
recharge
Battery connector or
adapter connector is loose
Check that the battery connectors are
rmly plugged into each other.
Charger is not working Check that the battery charger is plugged
into a working wall outlet.
Battery is dead Replace battery.
Charger feels warm
when recharging
This is normal and not a
cause for concern
If excessively hot, unplug and replace.
The following are examples of potential problems. Completely read through this manual and
the troubleshooting guide table before calling. If you still need help resolving the problem
please contact Customer Service.
NOTE: Vehicle should be turned off and fully changed before doing troubleshooting.
Troubleshooting
18
Limited Warranty - US
General:
Part or model specications are subject to change
without notice.
This Limited Warranty is the only warranty for the
product. ALL WARRANTIES OTHER THAN STATED
HEREIN ARE DISCLAIMED INCLUDING IMPLIED
WARRANTIES OF MERCHANTABILITY AND
FITNESS FOR A PARTICULAR PURPOSE, TO THE
EXTENT ALLOWABLE BY APPLICABLE LAW. ALL
LIABILITY FOR INCIDENTAL, PUNITIVE, SPECIAL,
OR CONSEQUENTIAL DAMAGES ARE EXPRESSLY
DISCLAIMED, TO THE EXTENT ALLOWABLE BY
APPLICABLE LAW.
The only uses for this product are described in this
manual.
Warranty registration is not required.
The Limited Warranty extends only to the original
consumer and is not transferable to anyone else.
What does this Limited Warranty cover?
This Limited Warranty covers defects in
workmanship and materials for all parts of the
product except those indicated below as not
warranted.
What must you do to keep the Limited
Warranty in eect?
This Limited Warranty is eective only if:
• Product is completely and correctly assembled.
• Product is used under normal conditions for its
intended purpose (see the following section for
excluded activities).
• Product receives all necessary maintenance and
adjustments.
• Product is used for general transportation and
recreational use only.
What is not covered by this Limited
Warranty?
This product is designed for recreational use only.
This Limited Warranty does not cover normal
wear and tear, normal maintenance items, or any
damage, failure, or loss that is caused by improper
assembly, maintenance, adjustment, storage, or
use of the product. This Limited Warranty does not
extend to future performance.
This Limited Warranty will be void if the
product is ever:
• Used in any competitive sport
• Used for stunt riding, jumping, aerobatics or
similar activity
• Modied in any way
• Modied with the addition of a motor
• Ridden by more than one person at a time
• Rented, sold, or given away
• Used in a manner contrary to the instructions
and warnings in this Owner’s Manual
What will The Manufacturer do?
Manufacturer’s sole and exclusive obligation
under this Limited Warranty is to repair and/or
replace, at its sole option, any covered defect in
workmanship or materials.
How do you get service?
Contact the Customer Service Department.
• See included list for Customer Contact informa-
tion.
What rights do you have?
This Limited Warranty gives you specic legal
rights. You may also have other rights which vary
from State to State.
For how long does this Limited Warranty
last?
• When used in this Limited Warranty, the phrase
“for life” means for as long as the original con-
sumer owns the product.
• Drive Battery - 90 days
• Electronics - 90 days
• All other Components - 6 months
BEFORE YOU CALL SUPPORT:
1. What is the model and date code?
2. When was the product purchased?
3. Has the product ever worked for a time or has never worked at all since purchase?
• Yes, When did the product last operate correctly?
• No, were the battery wires connected?
4. How long was the battery charged?
5. Is the charger plugged into the unit when you try to operate the product?
• (The unit will not operate with charger plugged in)
6. Do any lights or sounds come on when you power the product on?
• Yes, Does the lights and sounds go away when you press the drive switch?
7. When you press the drive switch, does an electric motor start?
• Yes, Did you check that the correct drive wheel was installed?
• Yes, Does the insert in the gearbox rotate?
Troubleshooting Guide - continued
Troubleshooting
19
Limited Warranty - US
General:
Part or model specications are subject to change
without notice.
This Limited Warranty is the only warranty for the
product. ALL WARRANTIES OTHER THAN STATED
HEREIN ARE DISCLAIMED INCLUDING IMPLIED
WARRANTIES OF MERCHANTABILITY AND
FITNESS FOR A PARTICULAR PURPOSE, TO THE
EXTENT ALLOWABLE BY APPLICABLE LAW. ALL
LIABILITY FOR INCIDENTAL, PUNITIVE, SPECIAL,
OR CONSEQUENTIAL DAMAGES ARE EXPRESSLY
DISCLAIMED, TO THE EXTENT ALLOWABLE BY
APPLICABLE LAW.
The only uses for this product are described in this
manual.
Warranty registration is not required.
The Limited Warranty extends only to the original
consumer and is not transferable to anyone else.
What does this Limited Warranty cover?
This Limited Warranty covers defects in
workmanship and materials for all parts of the
product except those indicated below as not
warranted.
What must you do to keep the Limited
Warranty in eect?
This Limited Warranty is eective only if:
• Product is completely and correctly assembled.
• Product is used under normal conditions for its
intended purpose (see the following section for
excluded activities).
• Product receives all necessary maintenance and
adjustments.
• Product is used for general transportation and
recreational use only.
What is not covered by this Limited
Warranty?
This product is designed for recreational use only.
This Limited Warranty does not cover normal
wear and tear, normal maintenance items, or any
damage, failure, or loss that is caused by improper
assembly, maintenance, adjustment, storage, or
use of the product. This Limited Warranty does not
extend to future performance.
This Limited Warranty will be void if the
product is ever:
• Used in any competitive sport
• Used for stunt riding, jumping, aerobatics or
similar activity
• Modied in any way
• Modied with the addition of a motor
• Ridden by more than one person at a time
• Rented, sold, or given away
• Used in a manner contrary to the instructions
and warnings in this Owner’s Manual
What will The Manufacturer do?
Manufacturer’s sole and exclusive obligation
under this Limited Warranty is to repair and/or
replace, at its sole option, any covered defect in
workmanship or materials.
How do you get service?
Contact the Customer Service Department.
• See included list for Customer Contact informa-
tion.
What rights do you have?
This Limited Warranty gives you specic legal
rights. You may also have other rights which vary
from State to State.
For how long does this Limited Warranty
last?
• When used in this Limited Warranty, the phrase
“for life” means for as long as the original con-
sumer owns the product.
• Drive Battery - 90 days
• Electronics - 90 days
• All other Components - 6 months
Warranty
www.huybikes.com/home/globalcontact/
for current contact information / pour les informations de contact actuelles / para obtener la
información de contacto actual
 USA 
PLEASE - BEFORE RETURNING TO STORE:
Contact Huy Customer Service.
We are glad to assist you
with any parts or assembly problems you might have!
For Fast Customer Service and email:
www.huybikes.com/contact
To Order Parts:
www.huybikes.com/parts
OR TEL: 1 800 872 2453 (US)
 CANADA 
PLEASE - BEFORE RETURNING TO STORE:
Contact Huy Customer Service.
We are glad to assist you with any parts or assembly problems you might have!
AVANT DE RETOURNER AU MAGASIN :
Communiquez avec le service à la clientèle de Huy. Nous vous aiderons
volontiers avec tout problème concernant les pièces ou le montage!
For fast customer service in Canada / Pour un service à la clientèle rapide au Canada :
Call / Appelez : 1-800-872-2453
Or Email / Ou Courriel : huffycanada@huffy.com
Or visit / Ou visitez : : www.huffybikes.com/global-contacts
[ MÉXICO ]
ANTES DE DEVOLVER EL PRODUCTO A LA TIENDA:
Comuníquese Con Servicio Al Cliente De Huy. Nos Complace Ayudarlo Con
Cualquier Parte O Problema De Ensamblado Que Pudiera Tener.
Para obtener Servicio al cliente rápido, visite:
www.huybikes.com.mx
Contáctanos por WhatsApp al 222 422 4955
Visita nuestra página de Facebook HuffyMexico
O LLAME AL TEL:
800 1 HUFFY 1 (800 1 48339 1)
(Mexico only)
Para comunicarse por correo electrónico:
servicio.mexico@huffy.com
For ASSEMBLY Help:
Aide à l’ASSEMBLAGE :
Ayuda de la ASAMBLEA:
Please REGISTER your Product:
Veuillez ENREGISTRER l’article :
Por favor, REGISTRE su producto:

This manual suits for next models

1

Other Huffy Motorized Toy Car manuals

Huffy m0409 User manual

Huffy

Huffy m0409 User manual

Huffy BMW User manual

Huffy

Huffy BMW User manual

Huffy 360 Battery Ride-on User manual

Huffy

Huffy 360 Battery Ride-on User manual

Huffy Mini Quad User manual

Huffy

Huffy Mini Quad User manual

Huffy CR8-R User manual

Huffy

Huffy CR8-R User manual

Huffy Disney Princess Royal Horse and Carriage User manual

Huffy

Huffy Disney Princess Royal Horse and Carriage User manual

Huffy 6V User manual

Huffy

Huffy 6V User manual

Huffy 6V BMW Ride On User manual

Huffy

Huffy 6V BMW Ride On User manual

Popular Motorized Toy Car manuals by other brands

Carrera 370402009 quick start guide

Carrera

Carrera 370402009 quick start guide

Amewi HYDRAULIC WHEEL LOADER manual

Amewi

Amewi HYDRAULIC WHEEL LOADER manual

ROBBE Tunin chassis 1:10 4WD Elektro operating instructions

ROBBE

ROBBE Tunin chassis 1:10 4WD Elektro operating instructions

Horizon Hobby ARRMA BigRock CREW CAB BLX6S instruction manual

Horizon Hobby

Horizon Hobby ARRMA BigRock CREW CAB BLX6S instruction manual

Associated Electrics RC10T instruction manual

Associated Electrics

Associated Electrics RC10T instruction manual

Yokomo YD-2S PLUS manual

Yokomo

Yokomo YD-2S PLUS manual

Duratrax DXR500 manual

Duratrax

Duratrax DXR500 manual

Carson X16 Mini Warrior instruction manual

Carson

Carson X16 Mini Warrior instruction manual

COX INDY manual

COX

COX INDY manual

ROBBE Subaru Impreza WRC operating manual

ROBBE

ROBBE Subaru Impreza WRC operating manual

Jamara LAMBORGHINI Huracan 40 4592 instructions

Jamara

Jamara LAMBORGHINI Huracan 40 4592 instructions

Amewi DRIFTCAR BREAKER instruction manual

Amewi

Amewi DRIFTCAR BREAKER instruction manual

Agora Models JAGUAR E-TYPE Pack 01 Build instructions

Agora Models

Agora Models JAGUAR E-TYPE Pack 01 Build instructions

Carson Specter instruction manual

Carson

Carson Specter instruction manual

Jamara Ped Race instructions

Jamara

Jamara Ped Race instructions

Alice's Garden TUNDRA manual

Alice's Garden

Alice's Garden TUNDRA manual

REVELL Sd.Kfz. 9 FAMO Assembly manual

REVELL

REVELL Sd.Kfz. 9 FAMO Assembly manual

Team Losi Aftershock Operation guide

Team Losi

Team Losi Aftershock Operation guide

manuals.online logo
manuals.online logoBrands
  • About & Mission
  • Contact us
  • Privacy Policy
  • Terms and Conditions

Copyright 2025 Manuals.Online. All Rights Reserved.